
Introduction
The objective of this tutorial is learn the basic steps of how to operate Cxense Advertising. Before starting this tutorial you should have read the following two wiki pages:
This tutorial assumes that you have been granted access as a 'broker user' to a Cxense Advertising sandbox account at https://sandbox.cxad.cxense.com.
Create Users
We will start by creating a new user. The new user will be yet another super user with the same rights as the 'broker user':
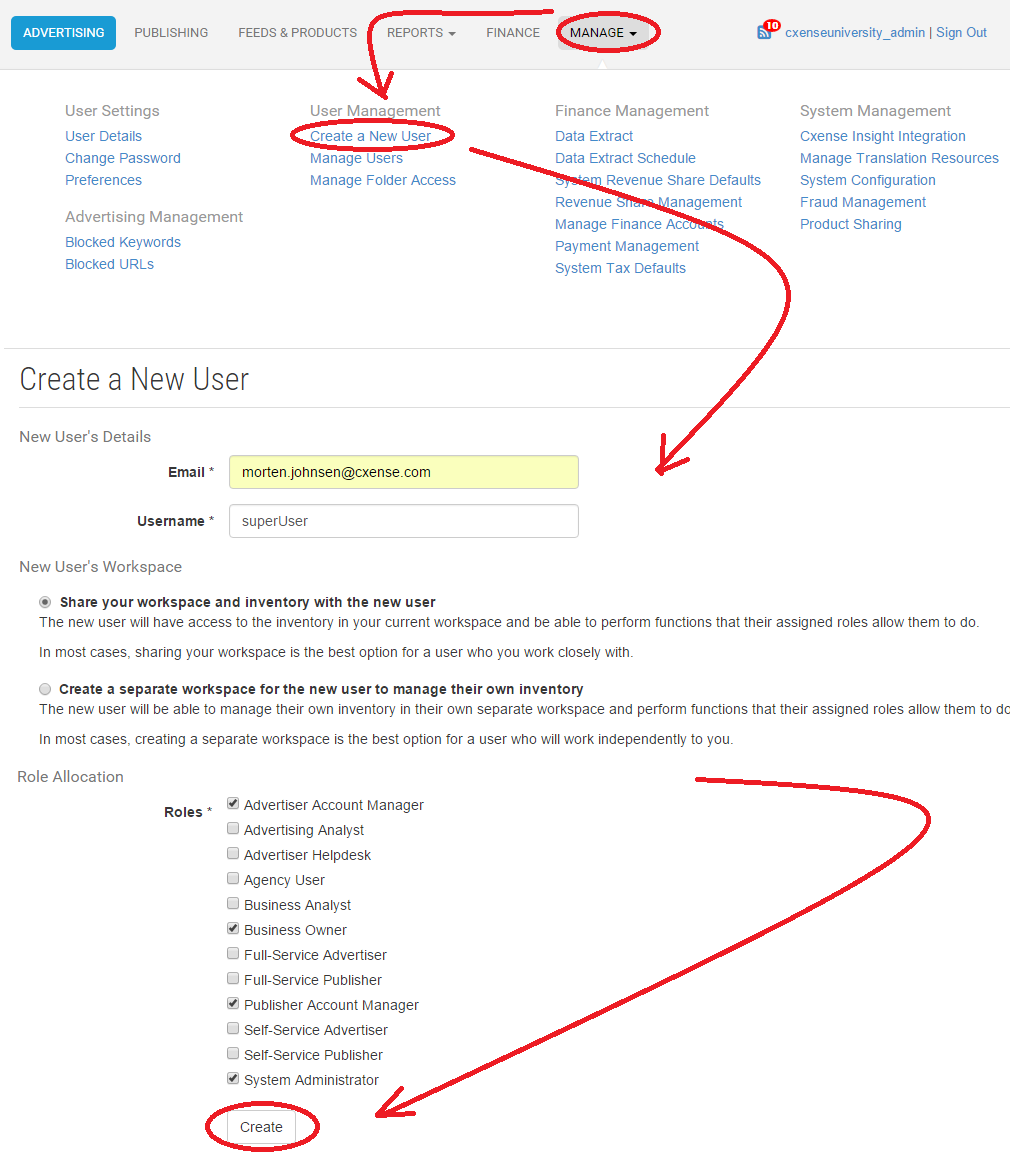
The new user (and that should be you) will now receive an e-mail with the login details. As soon as you receive them, log in as that new user and observe how a lot of the previously seen menu options are now gone.
Create Finance Accounts
At some point of time the users will start trading ads and ad spots, by then we need to have set the parties up with their right accounts. The publishers need a finance earning account and the advertisers need a finance billing account.
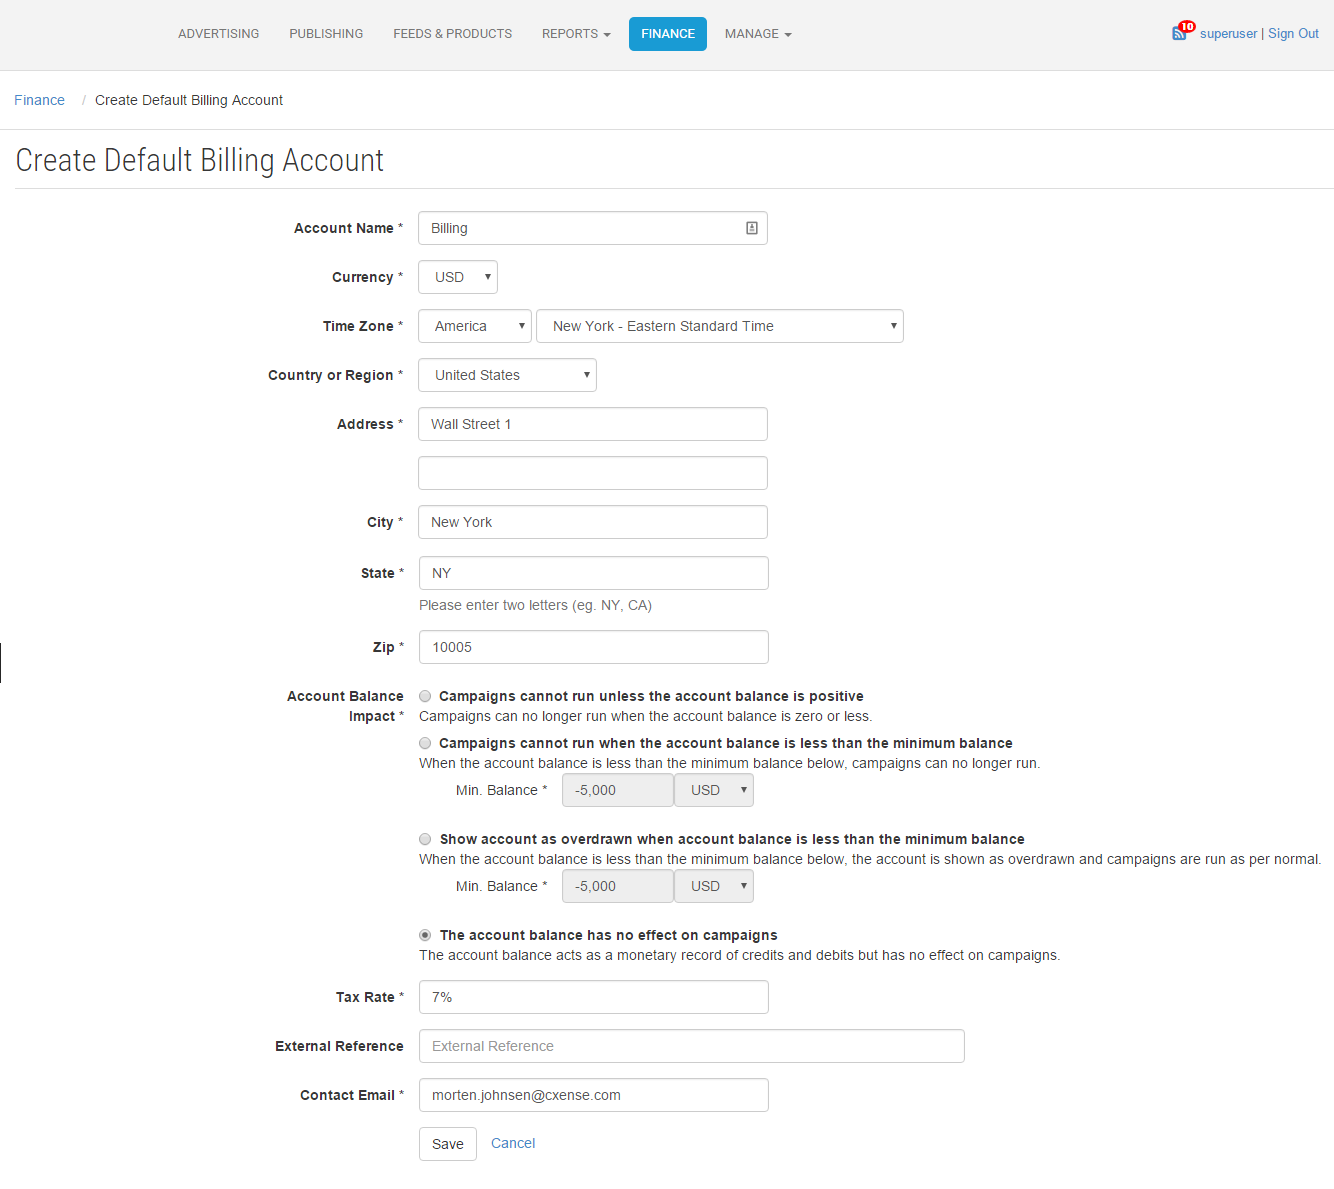
Billing Account
Below we see how to go about creating a billing account.
Earnings Account
And here how to make an earnings account:
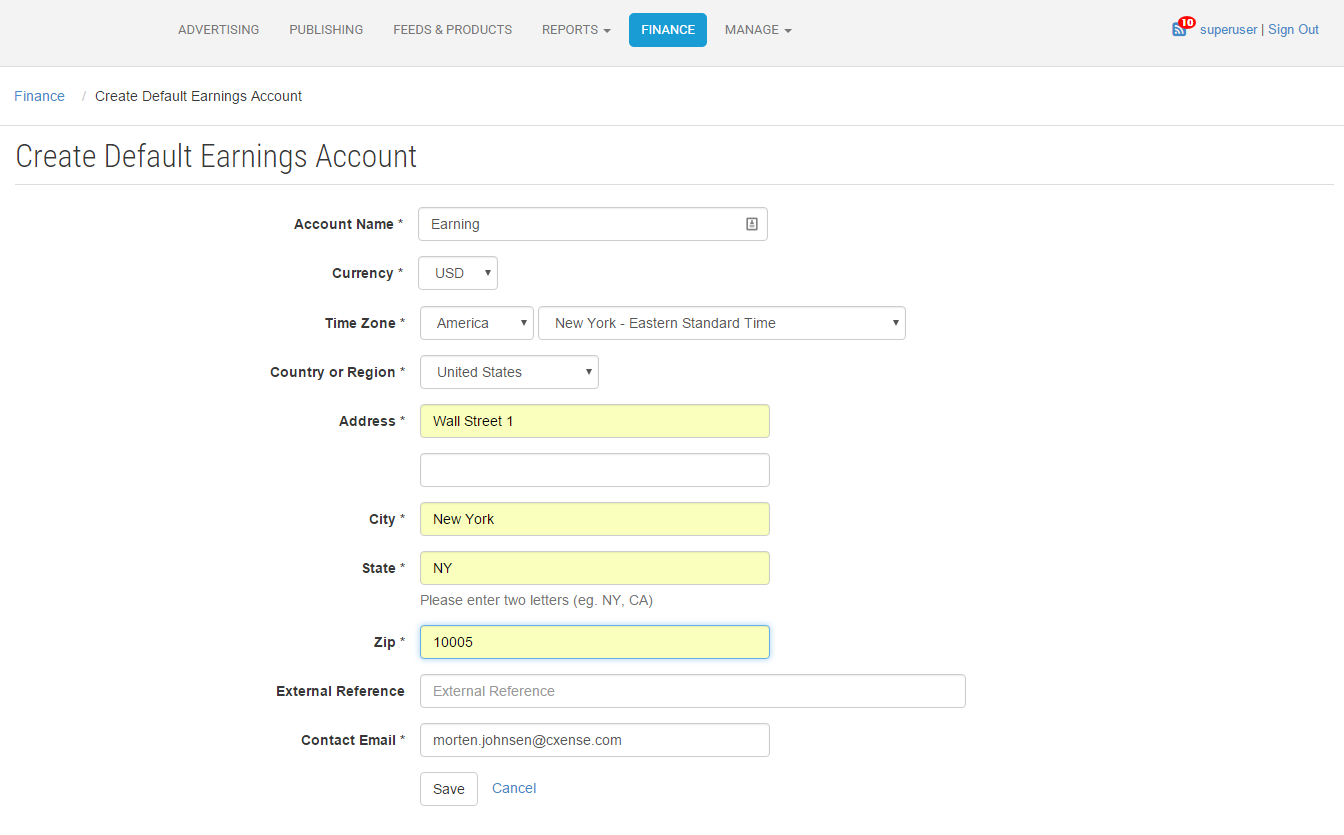
Even if no billing should take place, without at least the two default finance accounts created, it will not be possible to create any campaigns.
Create Products and Feeds
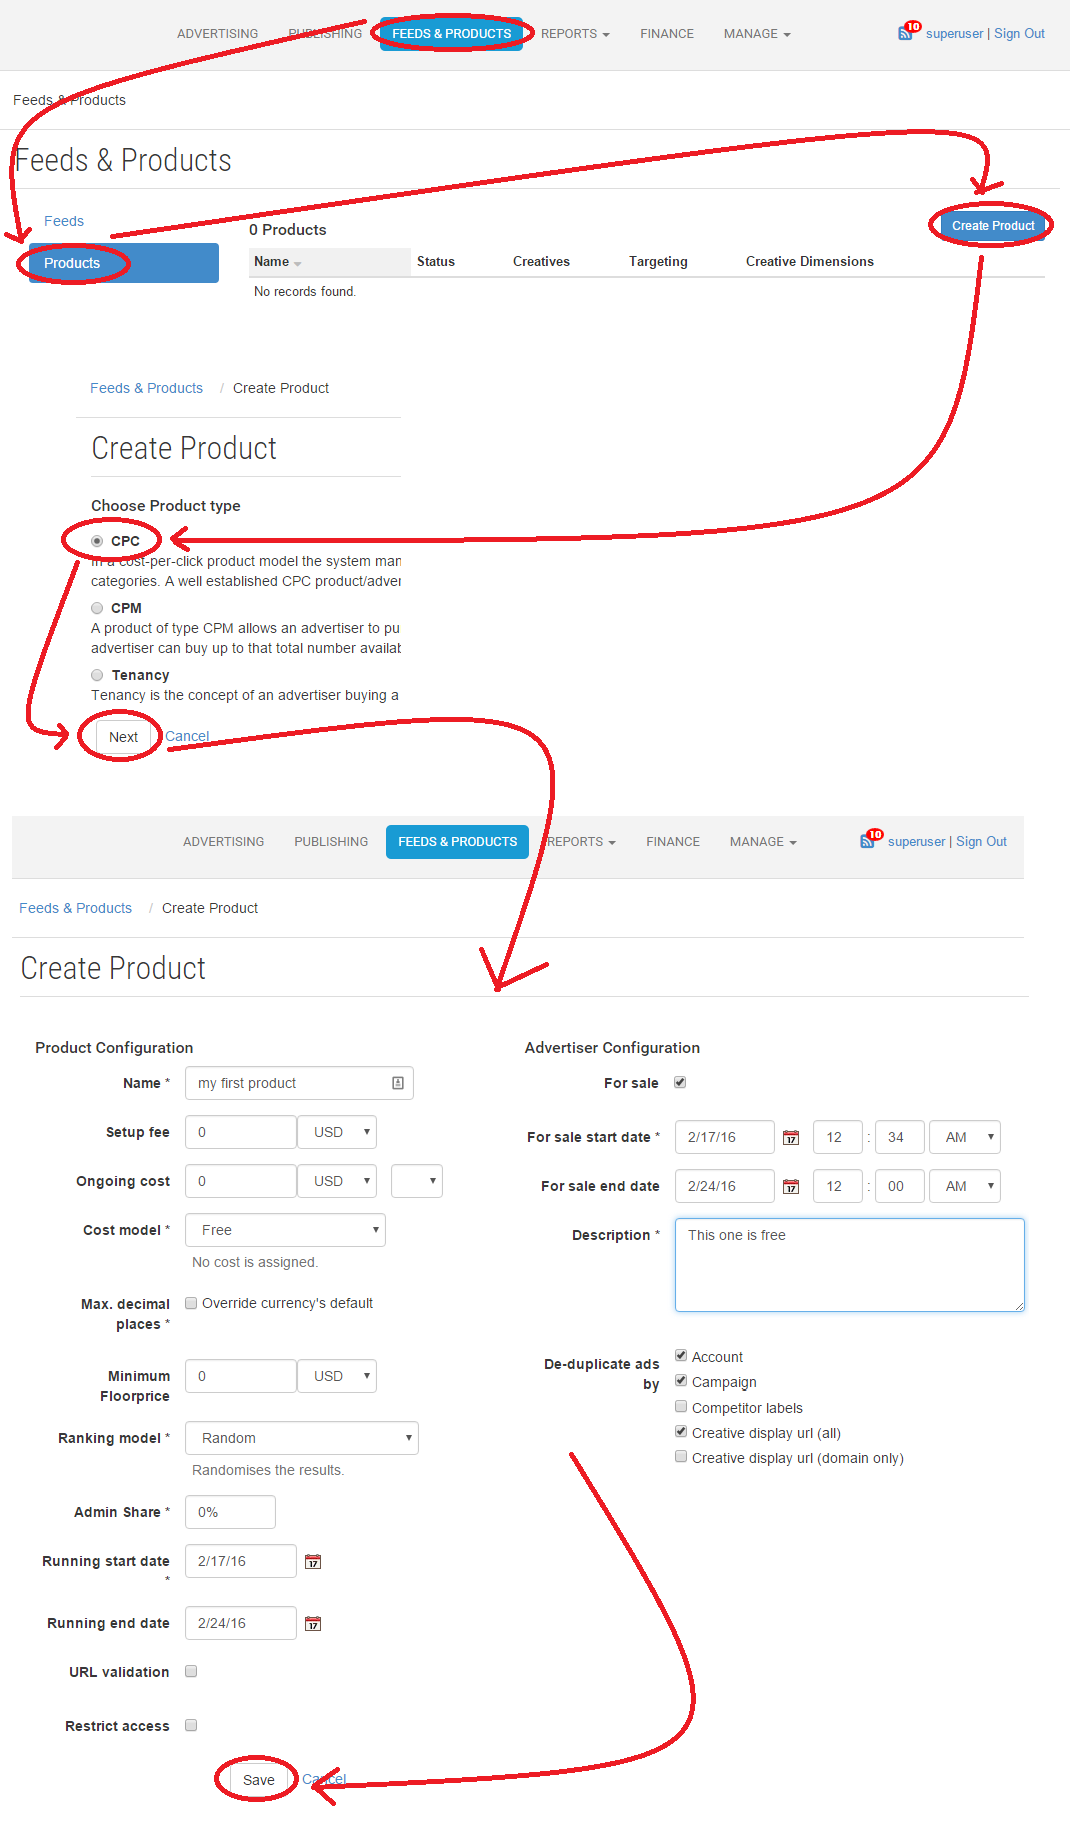
Create a Product
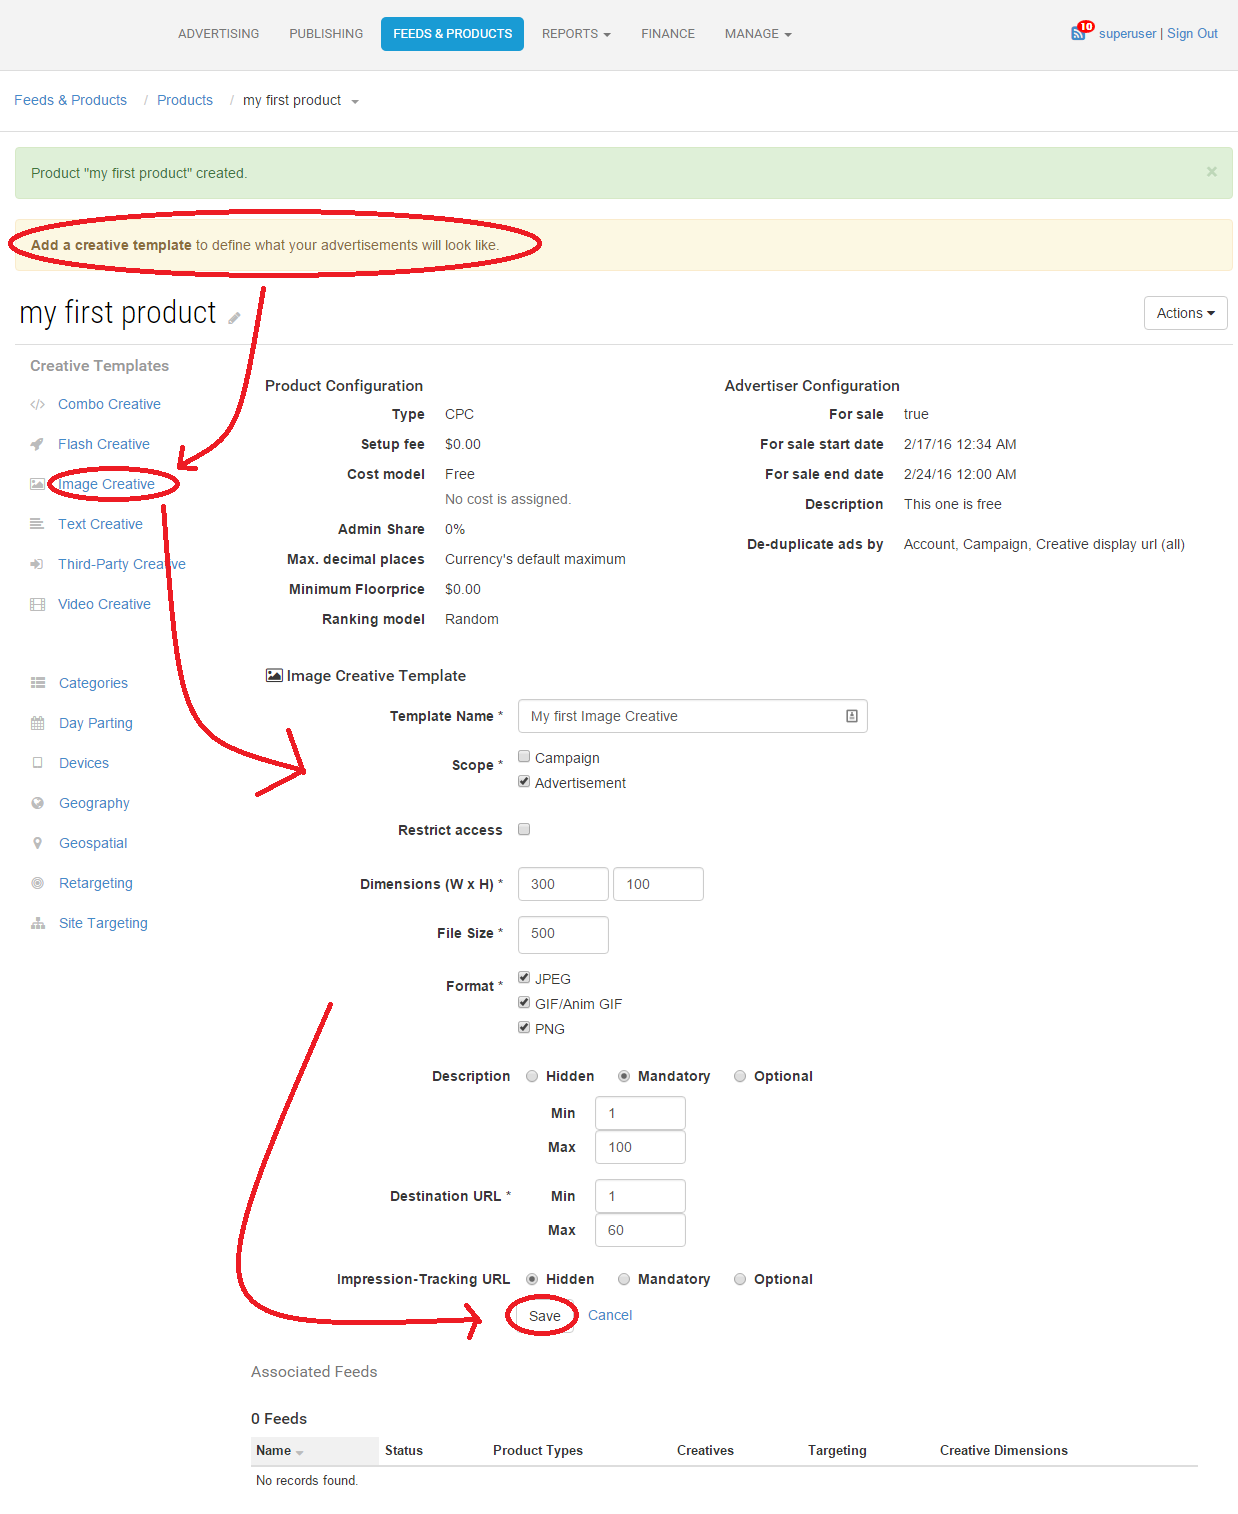
Being logged in as the new user you will now create a product. A product is the object used for trading ads and ads spaces. Our first product we will name 'my first product'. It will be a real simple CPC product that will be for free (no charge per click or impressions) and only image creatives can be used in the ads. Most of the settings will be 0, blank or the default value:
Link the Product to a Feed
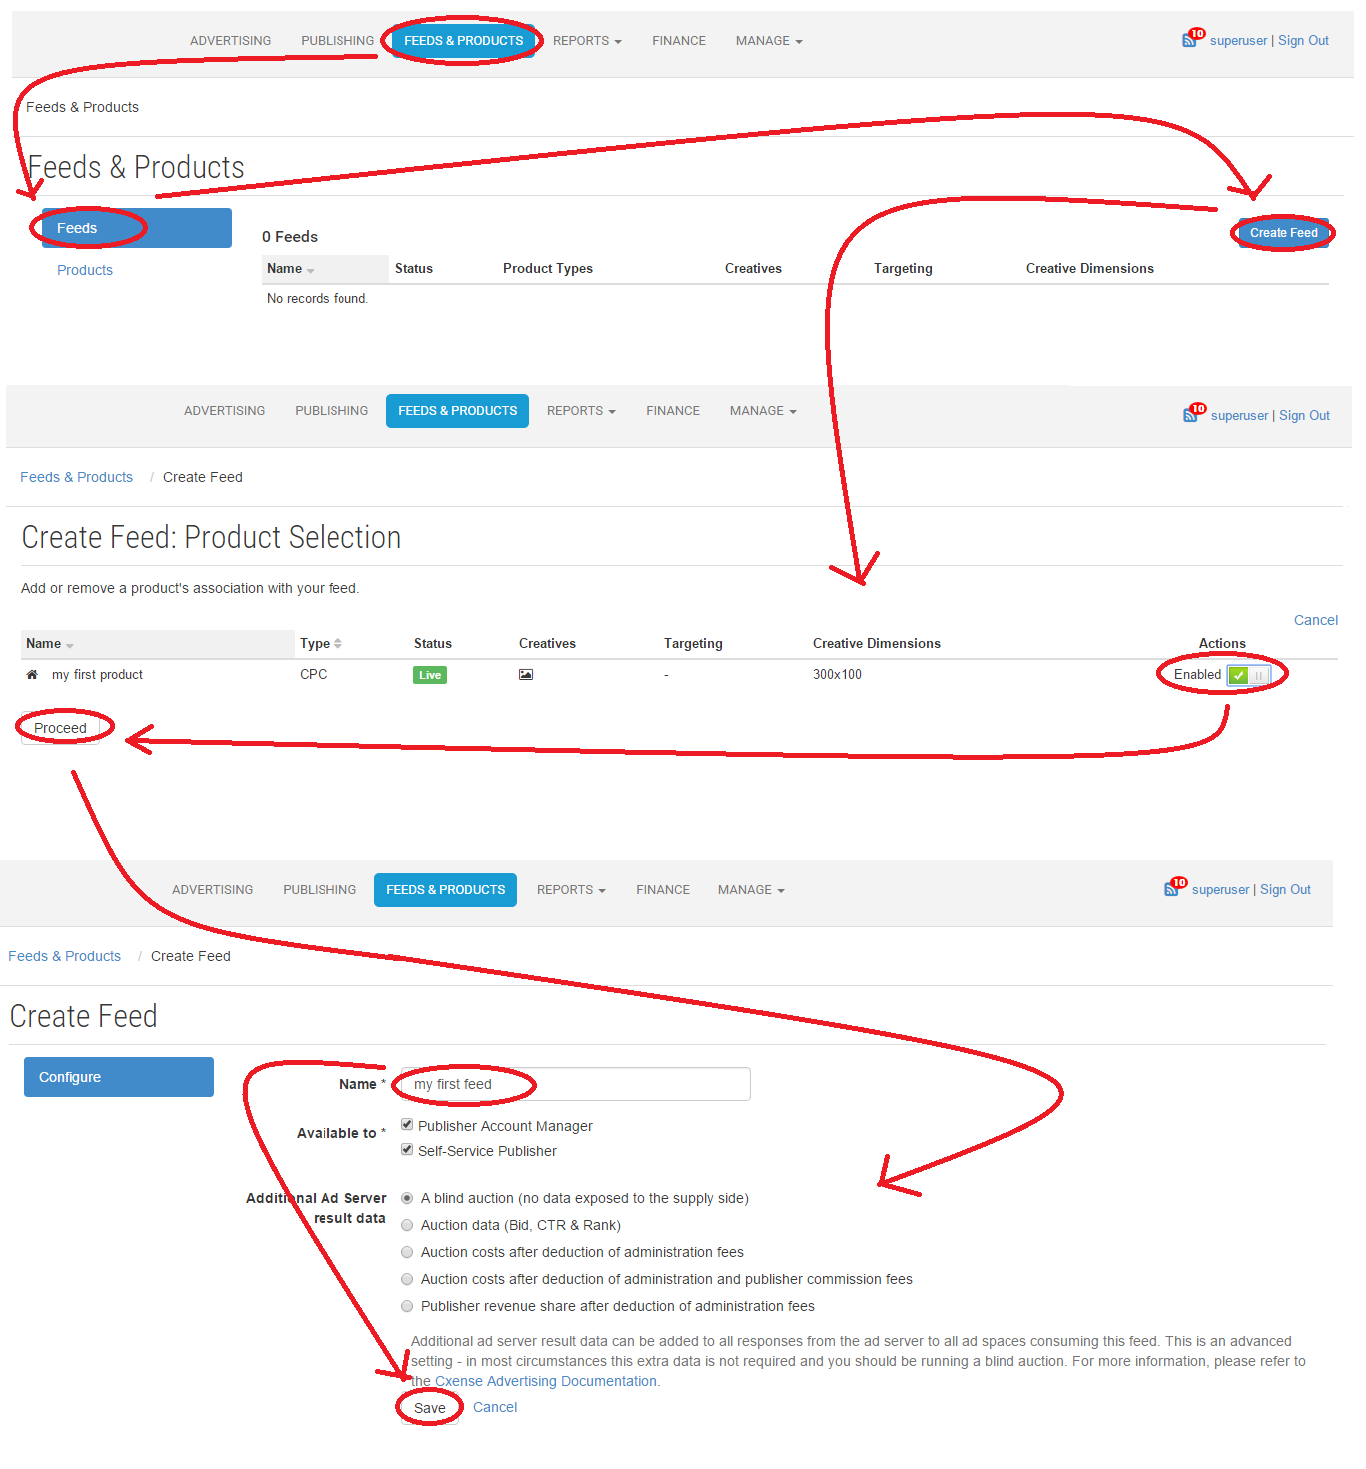
After successfully having created our first product, we will now create our first feed with the product we just created. The use of feeds is not required, but it makes the administration of large number of products much easier. Follow the steps below to make the feed 'my first feed':
Create Campaigns
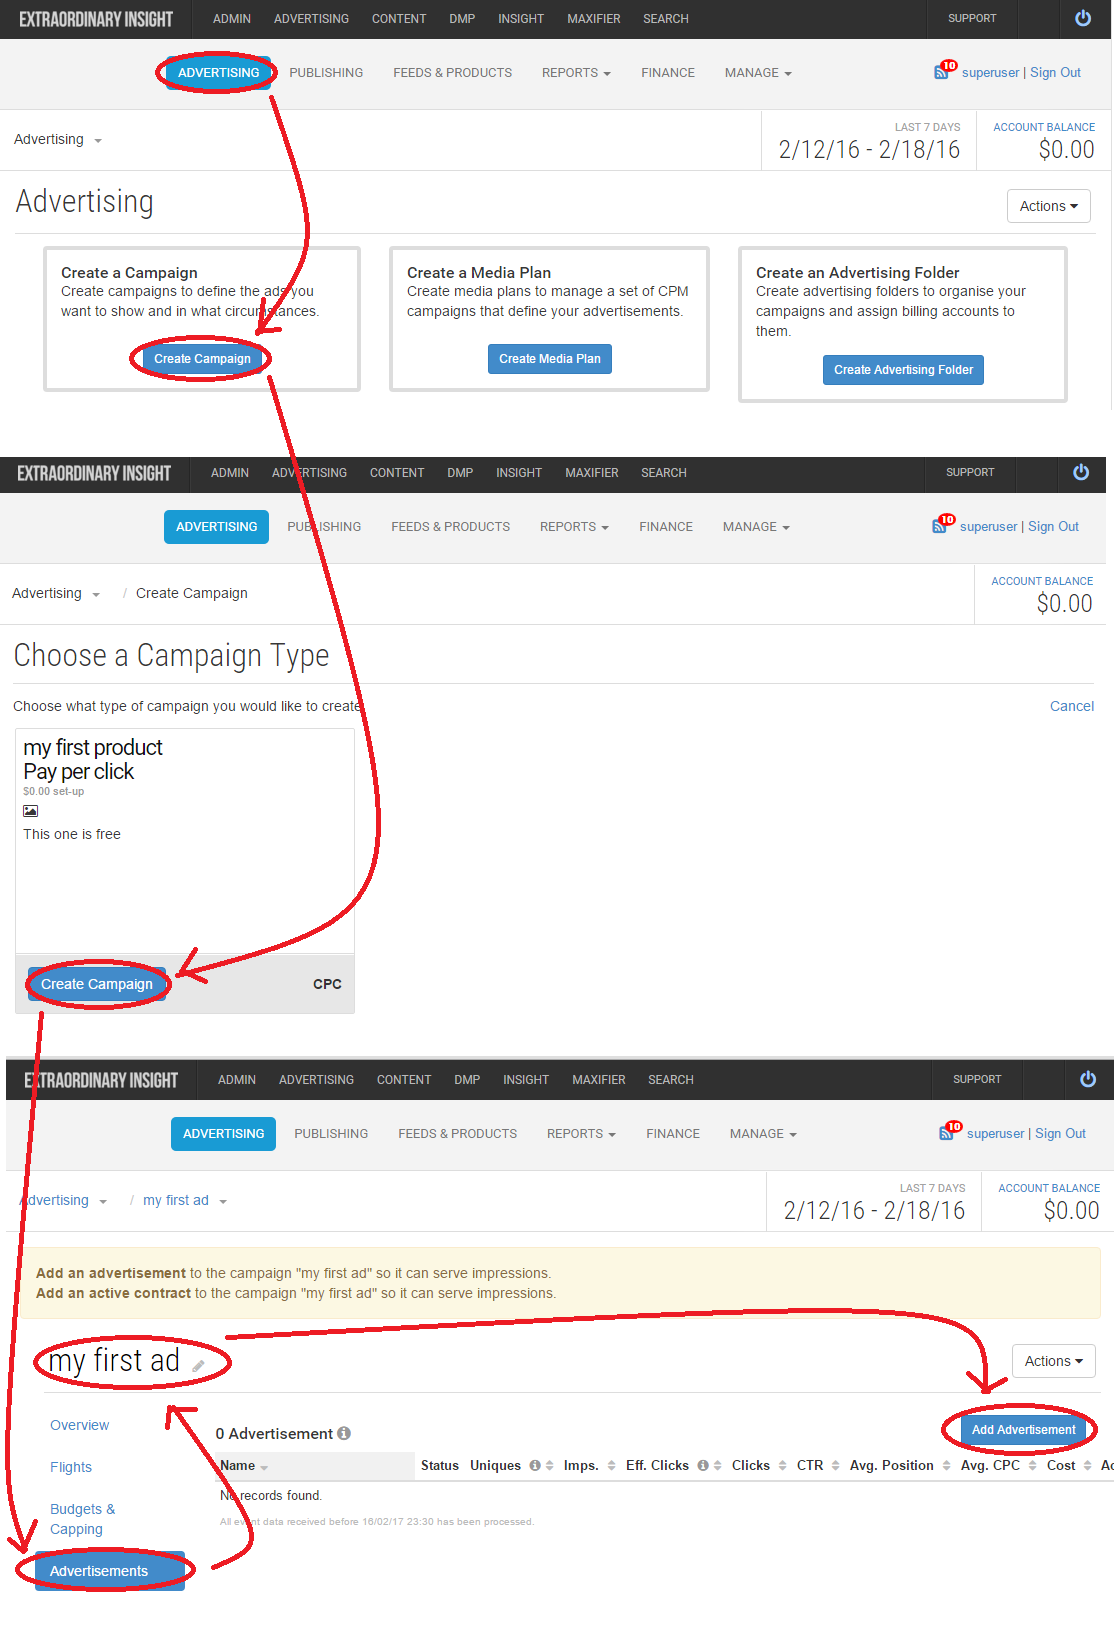
After having defined an ad product, we can now create a campaign that uses that product to place ads.
A Cxense Advertising campaign consists of 3 sub configurations, the setting of the product type, the addition of one or more creatives and the creation of the contract (refereed to as flights and bookings for some types of products).
Selecting the Product
Add an Creative
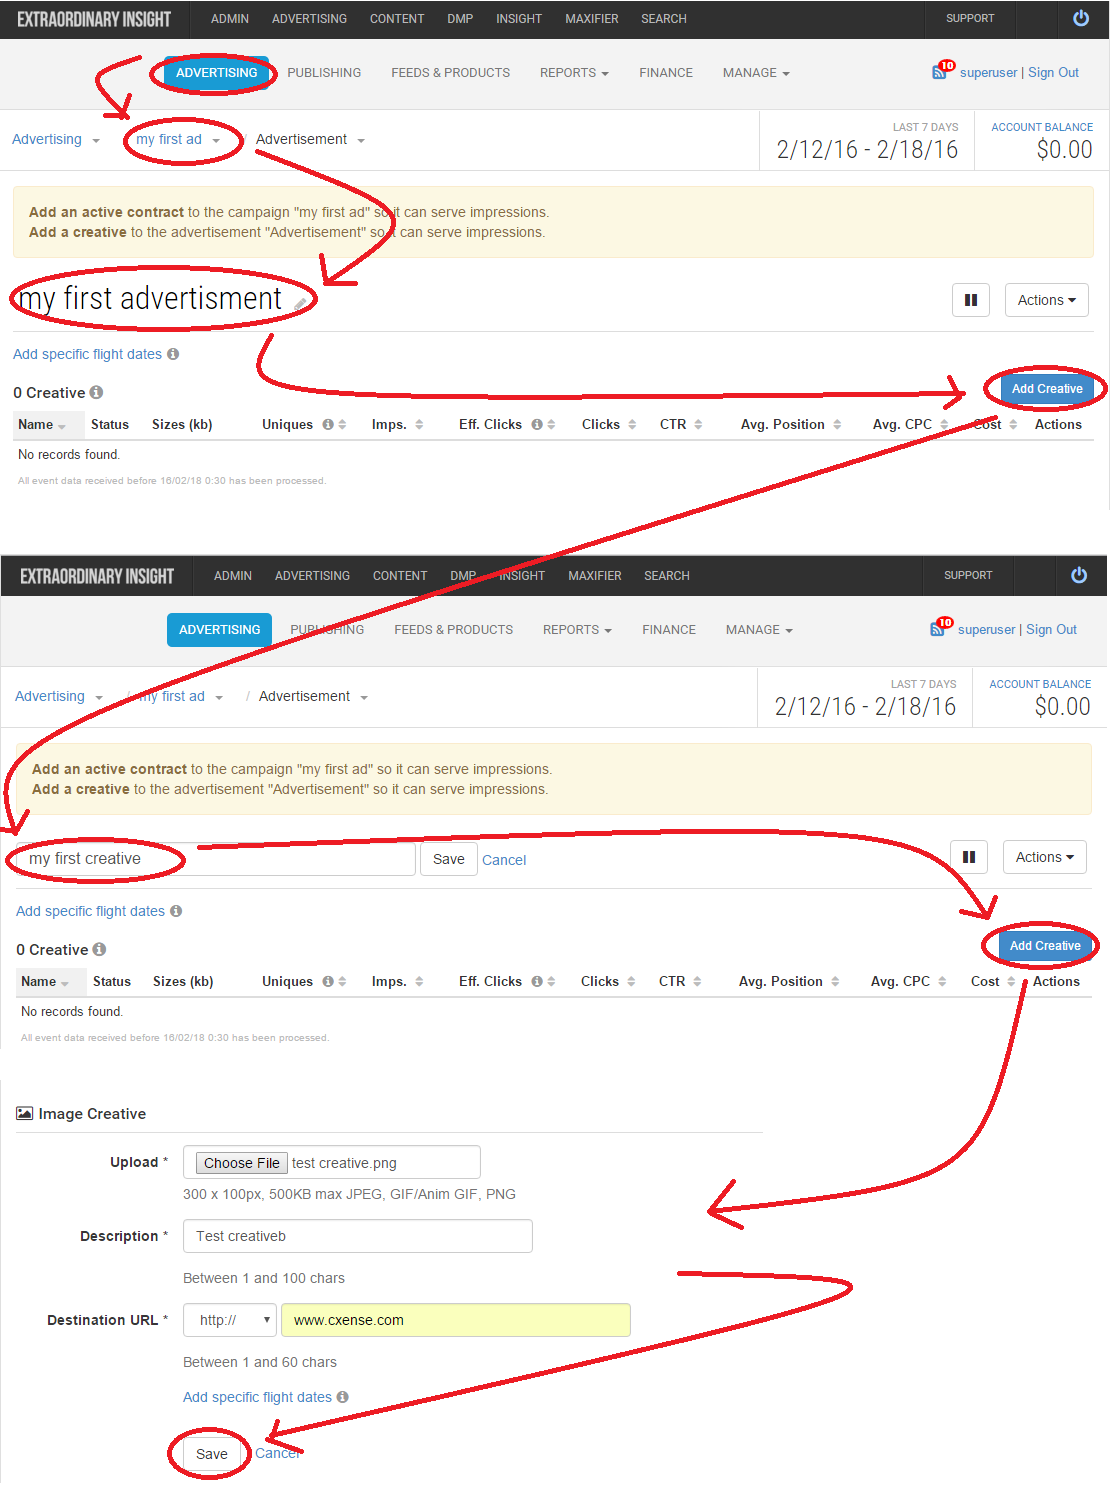
We will use this image file as the ad.

Below we see how to add it to the campaign.
Add a Contract
All campaigns need a contract. For some type of campaigns, the contract is instead called flights (like in this case) or bookings.
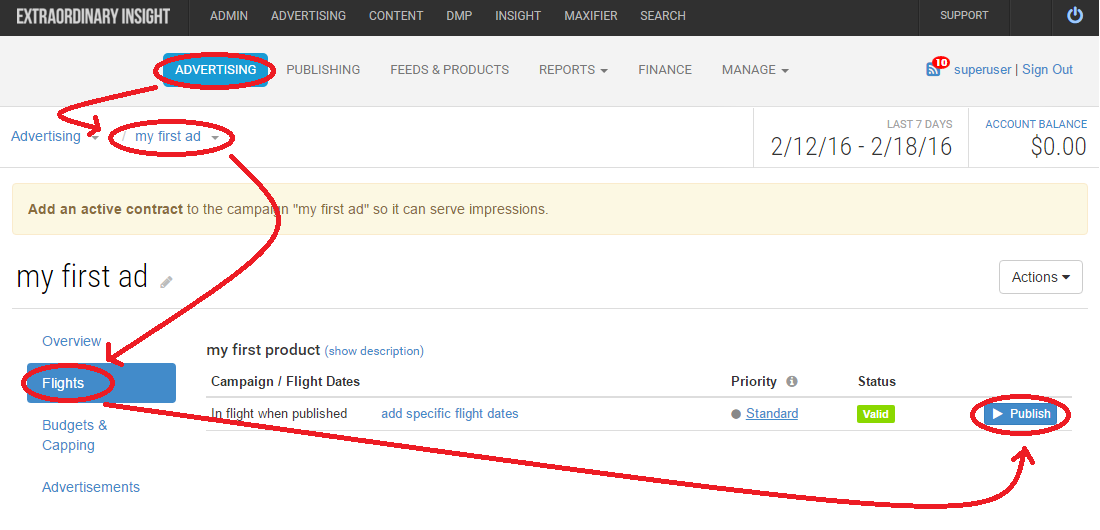
Add a Budget
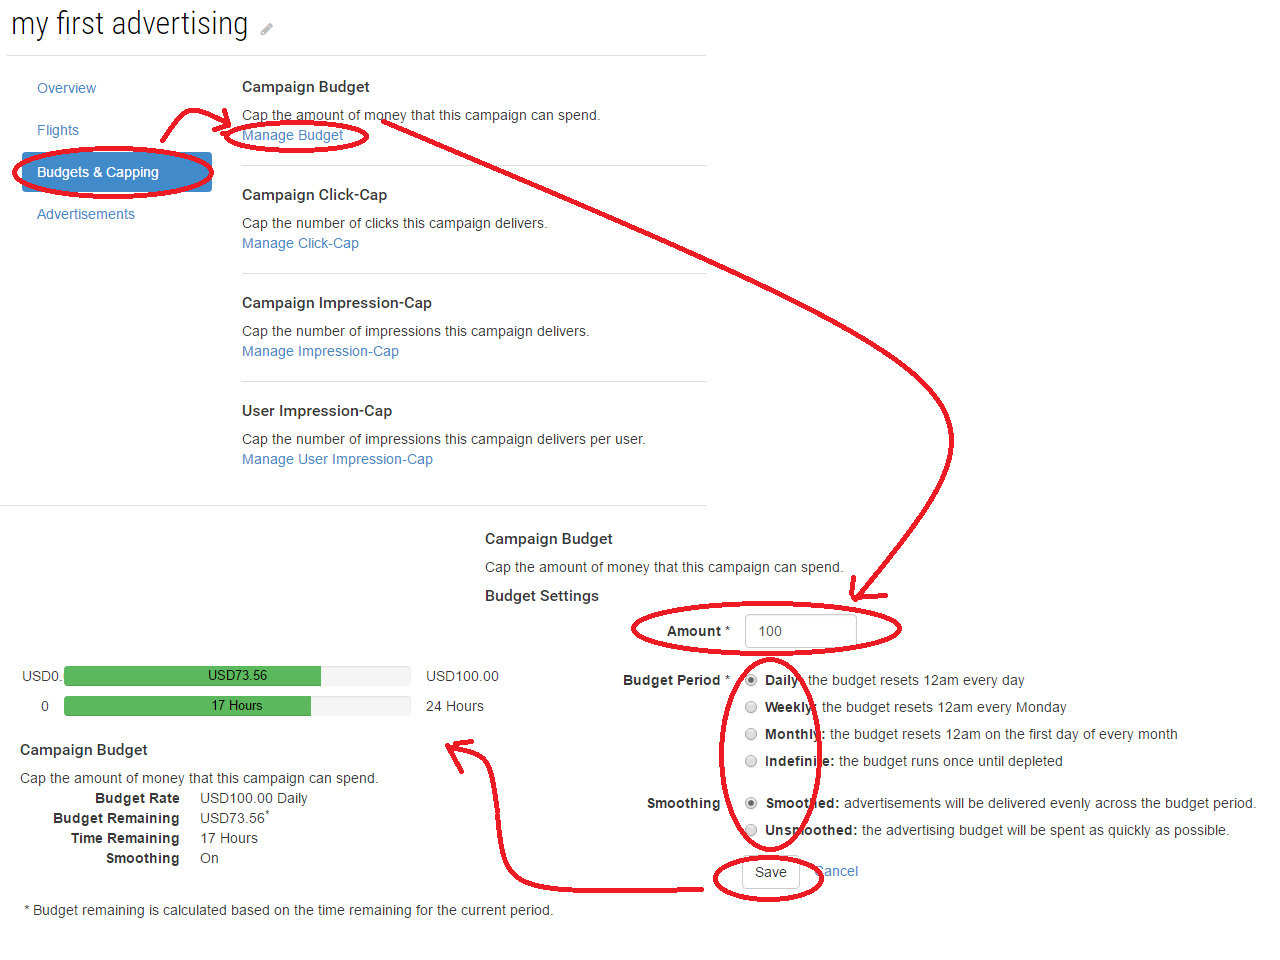
To control the total amount as well as the burn rate, one can add a campaign budget or some type of expense capping. In the figure below show how one set up a daily budget of 100 (of whatever the monetary unit the system is set up with).
Create Ad Spaces
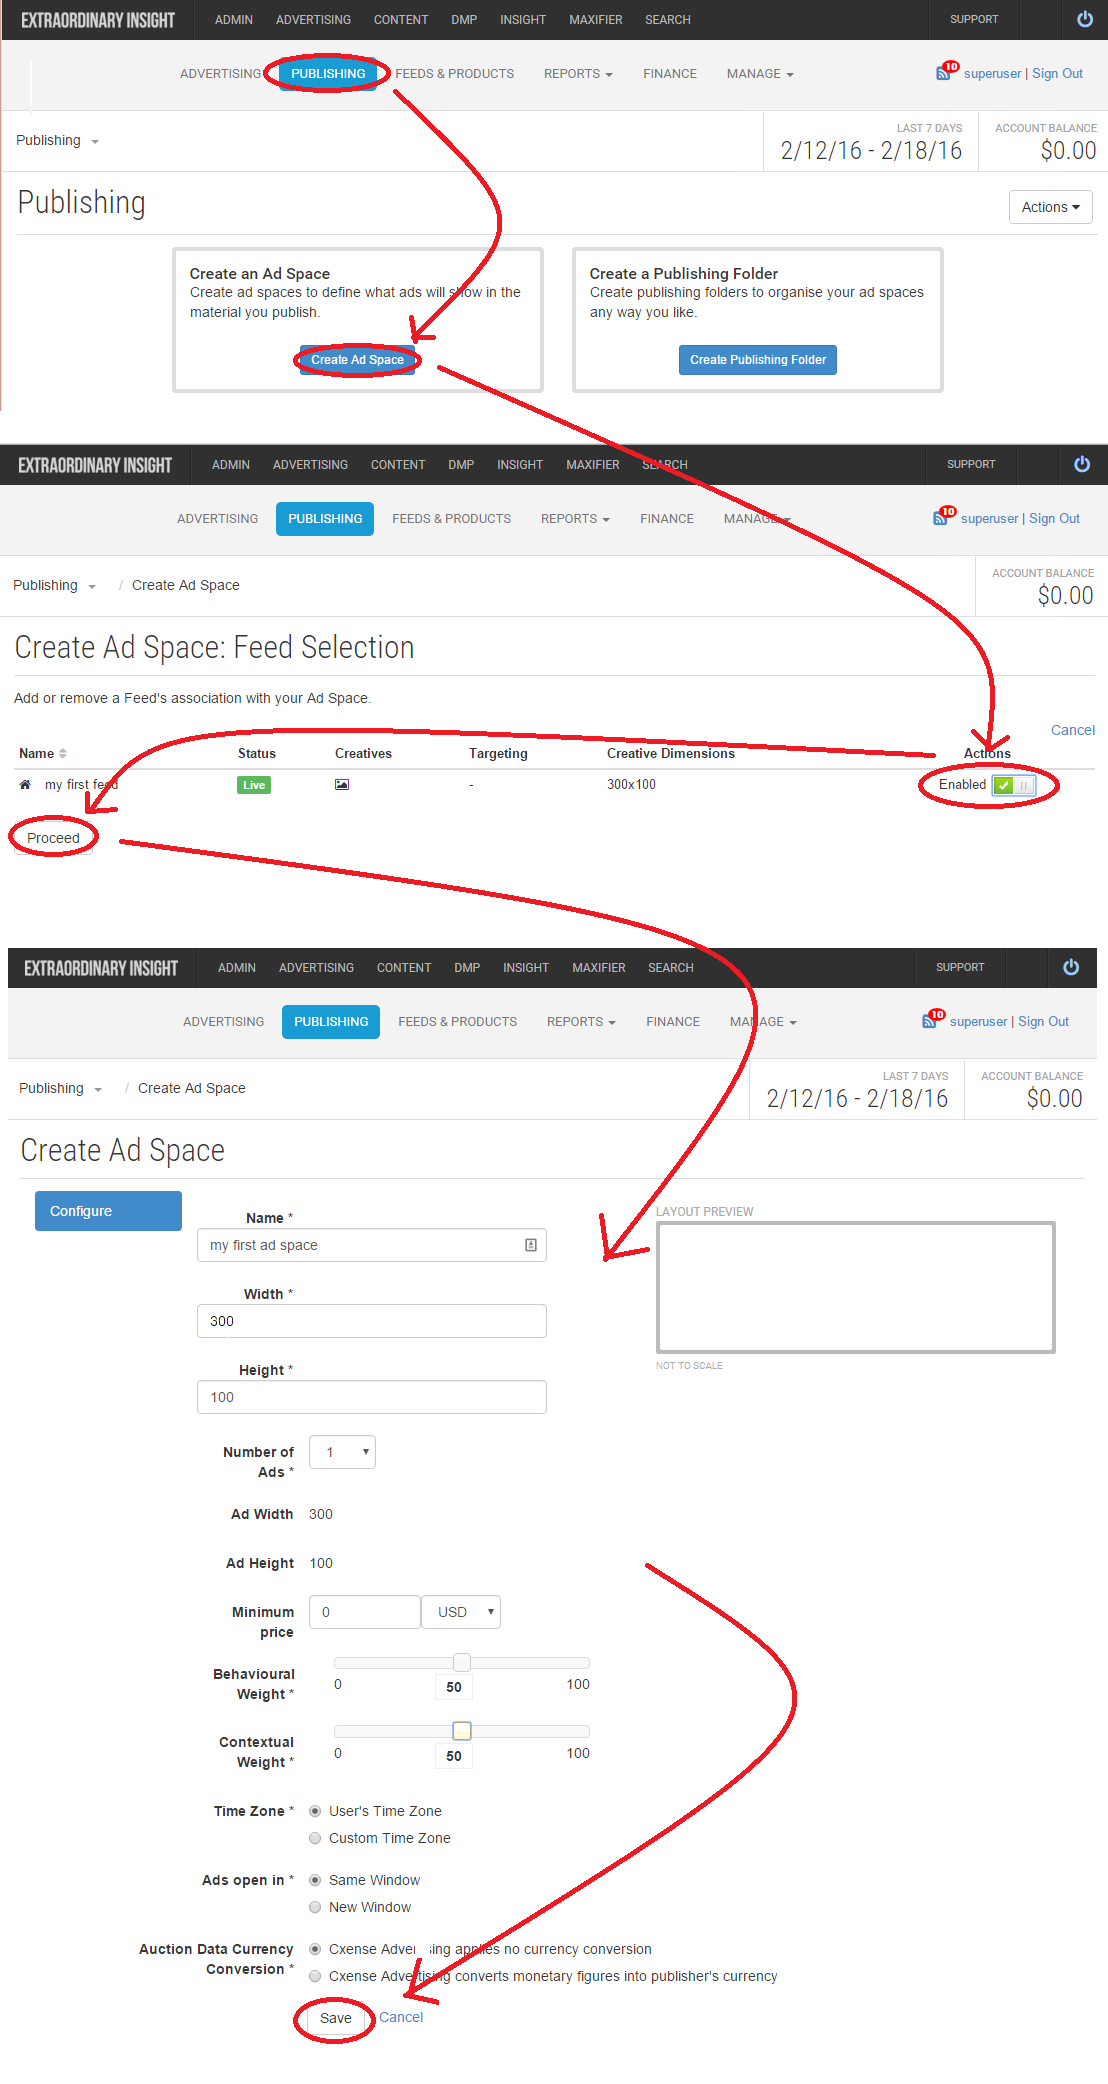
The campaign we made is ready to deliver ads, but so far we have no place for that ad to go. For that we need to create an ad space. The figure below shows how to go about that.
Deploy an Ad Space
With an ad space created we can now get hold of the ad tag and insert it into a web page as shown in the figure below.
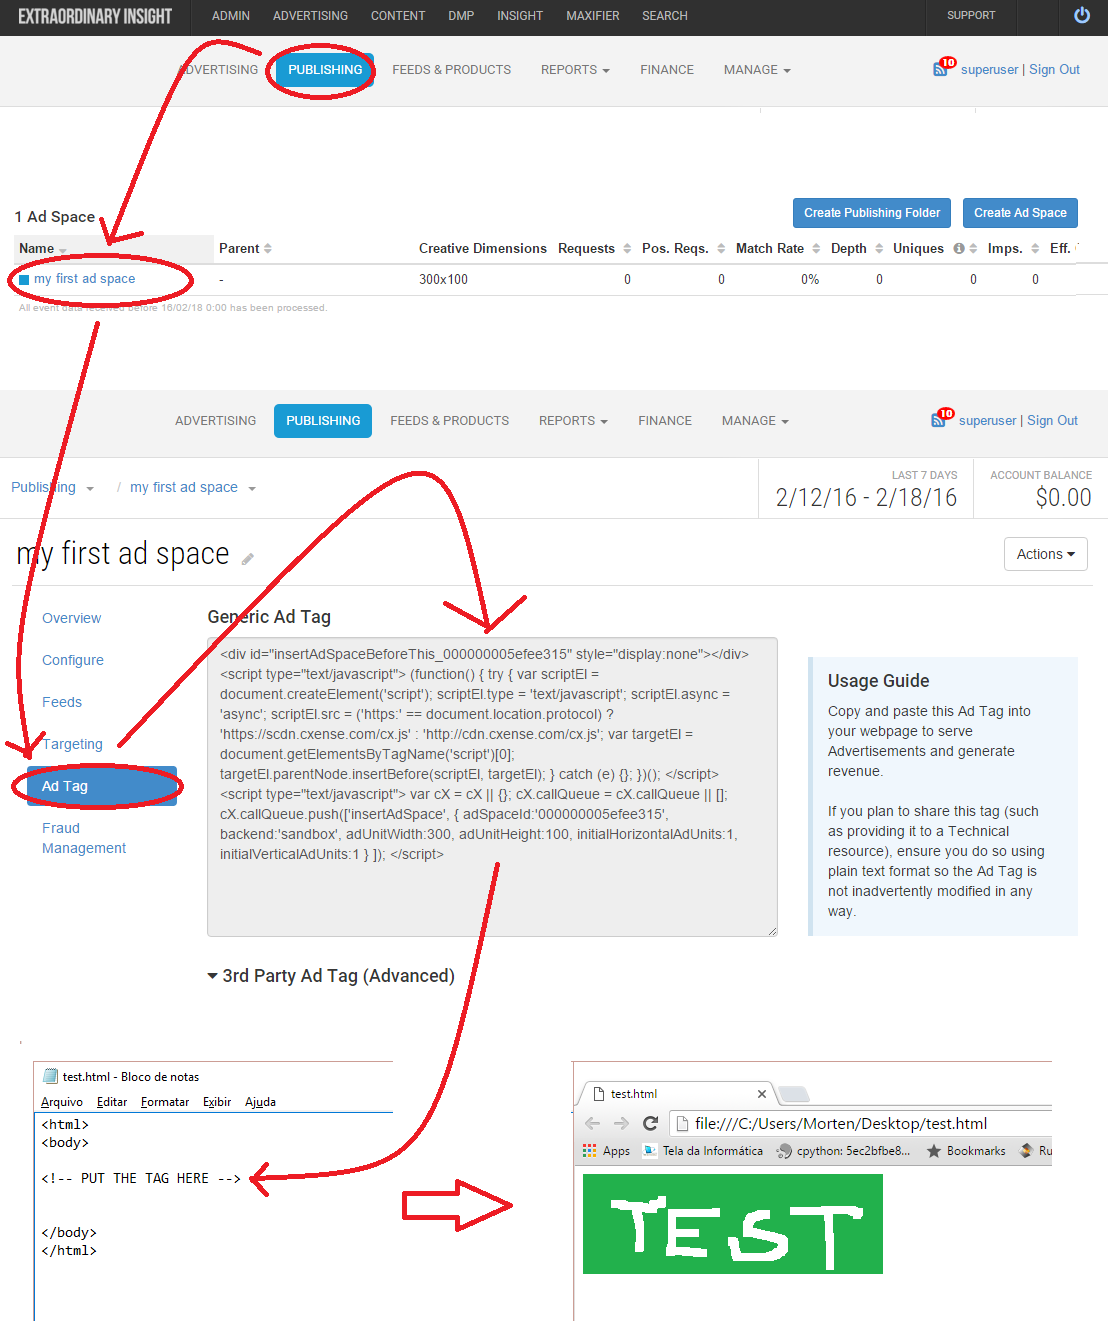
And voila, there we see the creative we uploaded to the campaign now deployed to our web page.
Create a Combo Product
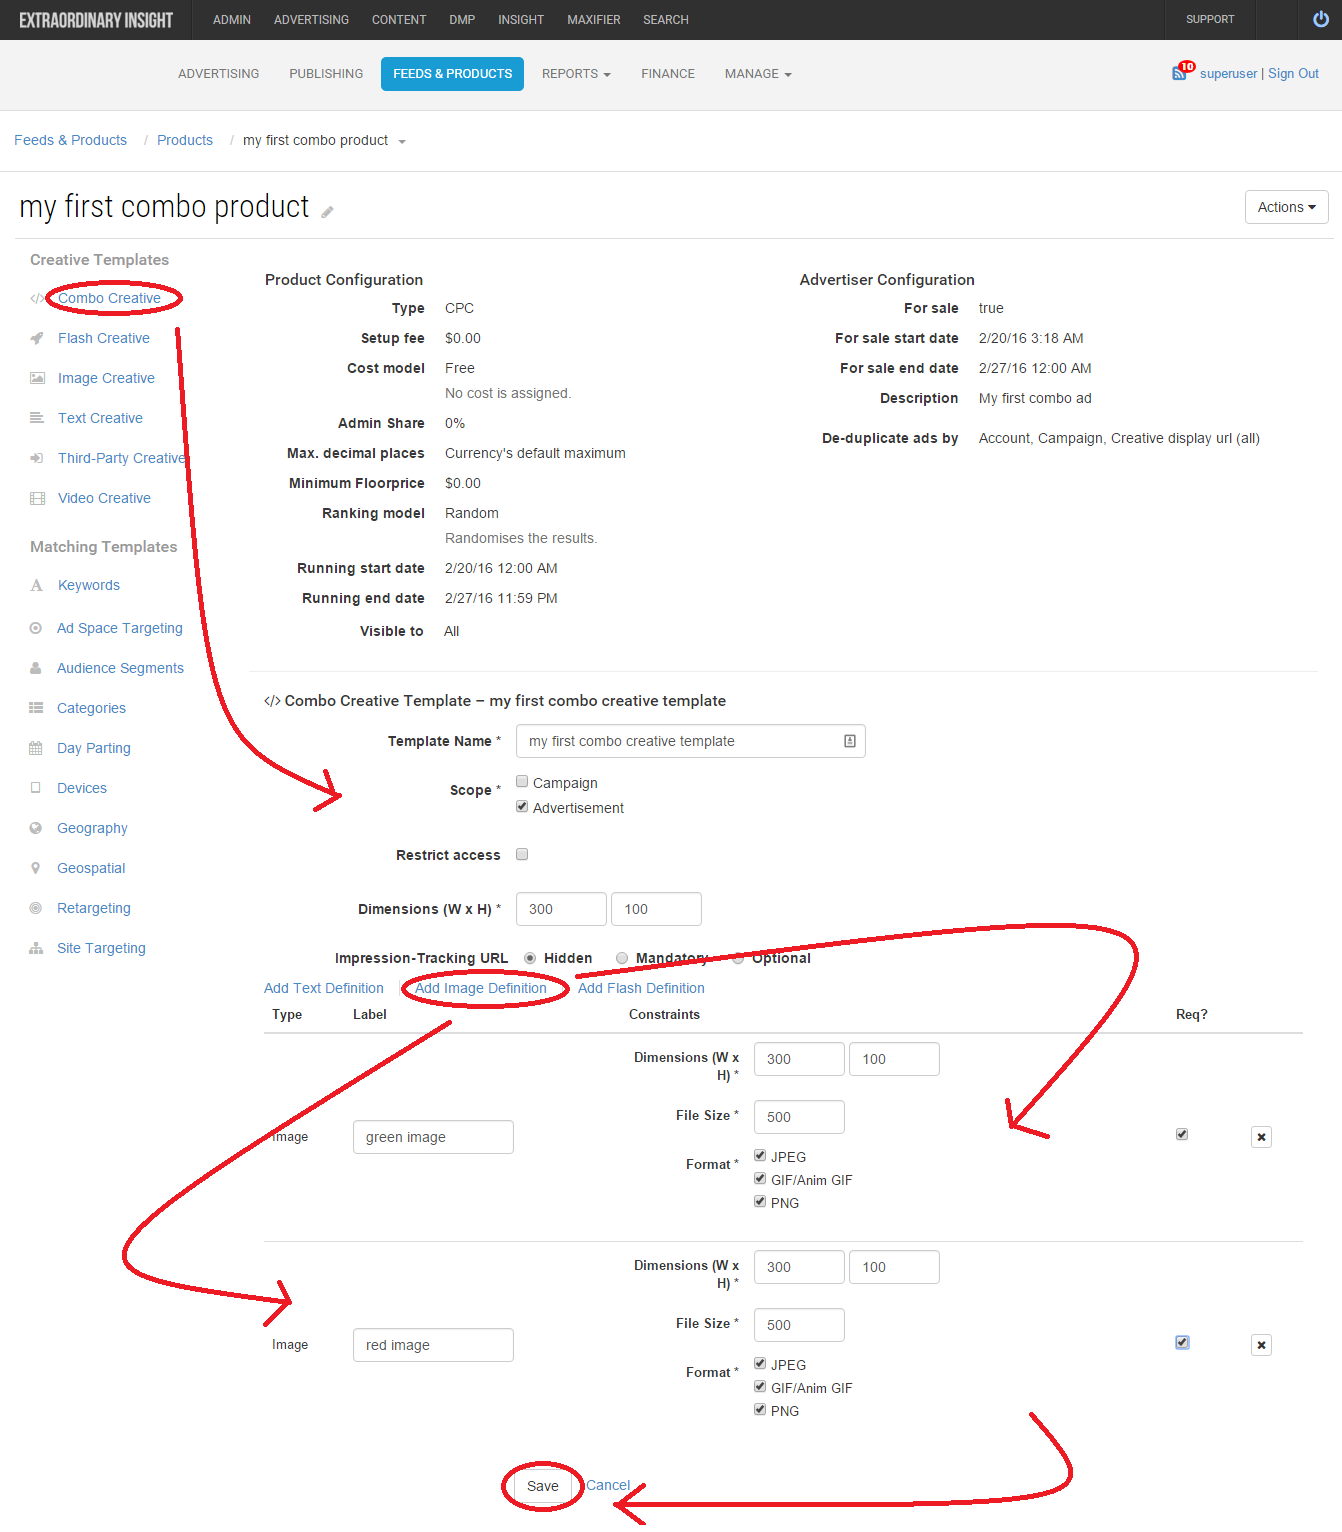
We will now make a more sophisticated product. A so called combo product that can be used as the basis for rich media ads. We will continue to show the green test ad from earlier as before, but we will now add the feature that when the mouse is passed over it, the color will change to red. This we will achieve by adding the extra image file red test creative.png and then toggle between the two depending on where the mouse is located at any time:

Below we make the new product. We start out the exact same way as with the first product we made, just that this one is called my first combo product instead of my first product and this one does not include an image creative, but a combo creative that contains two images (the green image and the red image):
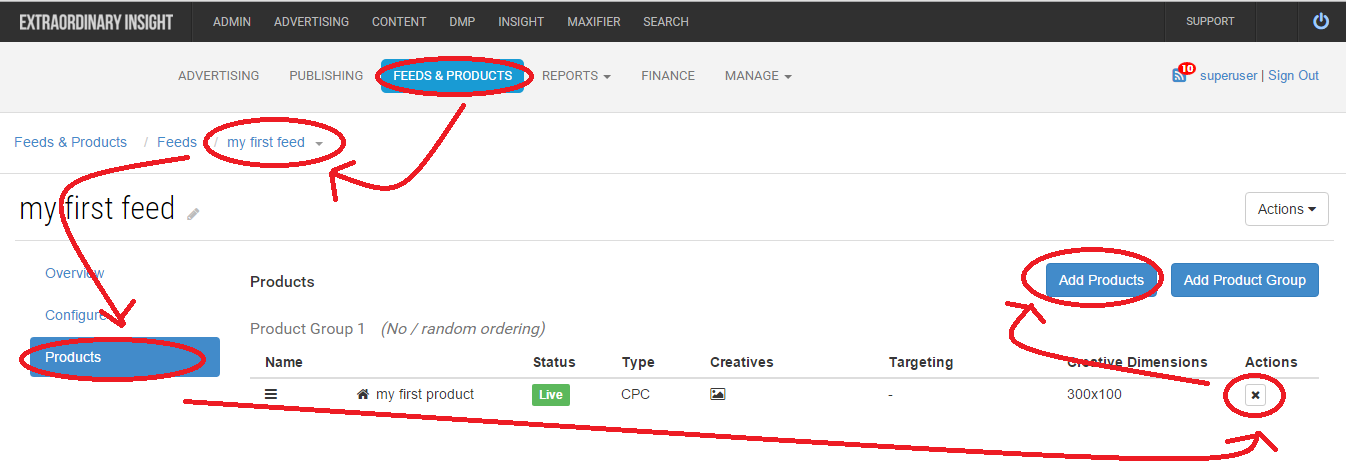
Now create a new campaign called my first combo campaign that uses the combo product that we created above, and then upload the green and the red image files to the creative. Then remove the first product from the feed and add the second one as shown here:
We have now connected the latest product to the ad space and we have made a campaign with that product. If we now were to open the web page with the ad tag, what do we see? Hmmm,... nothing?!??
Well, the ad tag is not prepared for the new type of data coming. We changed from a image creative to a combo creative and now we need to add some code to unpack and display the combo product. And that is what we are about to learn how to do in the next section.
Implement and Deploy a Render Template
Before continuing reading further in this section, please complete the Render Template Tutorial. It will give the overall understanding of render templates and how they are used in Cxense Advertising to determine the layout and behavior of rich media type ads.
Below we have the same web page as before, just this time with these changes:
-
We formatted the code for readability
-
We changed the target template id to something nicer and more readable
-
We added the renderTemplateUrl parameter and in that way point to the text file shown further below
|
Below we see the content of the myFirstRenderTemplate.html file referenced above. Notice how it receives all input data from the file above (forwardHashArgs: true) and that we take care of all rendering ourselves (renderFunction: renderFunction) via the function renderFunction(). The implementation is simple, on mouse over we set the image tag source to the red image, and on mouse out, we set it back to the green image.
|
Below we see the end result. If we move the mouse over, the ad goes red. When we remove the mouse, it goes back to green.
