
This articles explains how one can implement a responsive Content Recommendation widget. The emphasis is on how to configure and write the Cxense related code in order to enable the responsive behavior. The responsive behavior itself is in the provided example implemented using the Bootstrap (BS) style sheet framework.That does not in any way suggest that the use of the framework is the way to go about it. There are other frameworks that may be better to use, for instance CSS Media Queries.
If you are not familiar with how content recommendations are normally set up in the Cxesene portal then first read Piano Content Recommendation Tutorial.
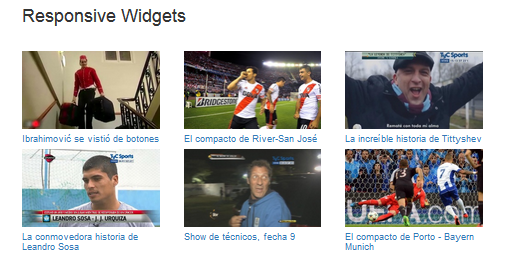
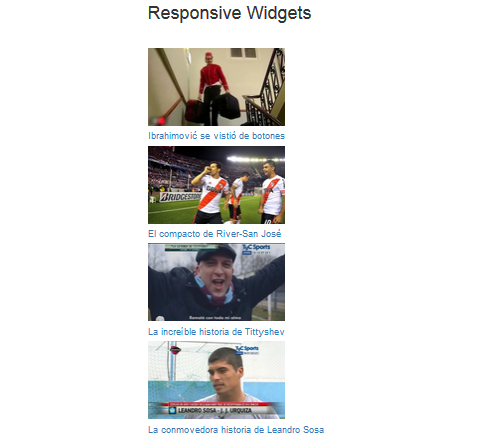
Above we see an example of an response content recommendation widget that display a 3x2 matrix for large devices and to the right another that display a 6x1 matrix for smaller devices (only the top 4 images are shown). The Javascript rendering code is shown below.
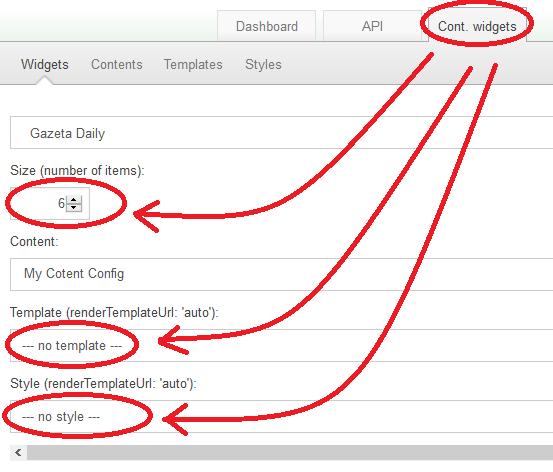
To the right above we see that since we are taking care of rendering and style in the javascript code (shown below), we have disabled those two settings in the portal GUI. Notice also how we make sure to select a number of content recommendations (6 in this case) that makes up complete rows (2x3, 3x2, 6x1).
<!doctype html>
<html>
    <head>
        <meta http-equiv="Content-Type" content="text/html; charset=utf-8" />
        <meta name="viewport" content="width=device-width, initial-scale=1">
        <link rel="stylesheet" href="http://maxcdn.bootstrapcdn.com/bootstrap/3.3.4/css/bootstrap.min.css">
    </head>

    <body>

        <div class="container">
            <h1> Responsive Widgets </h1><br/><br/>
            <div id="myContentRecs" class="row"></div>
        </div>

        <script type="text/javascript">

            var WIDGET_ID ='62fd8e3f65b2391fc4931f458c74a8c3bc23743f';    // Replace with your Widget Id

            function myRenderFunction(data, context) {

                for (i = 0; i < data.response.items.length; i++) {
                    // For each recommendation, obtain the title, the url, the image
                    recPageTitle = data.response.items[i]["title"];
                    recPageUrl = data.response.items[i]["url"];
                    recPageImageUrl = data.response.items[i]["recs-image"];

                    // Compose the html of each individual content recommendation
                    var recContent = "";
                    recContent += "<a href='" + recPageUrl + "'>";
                    recContent += "   <img src='" + recPageImageUrl + "' border='0' width='275'>";
                    recContent += "</a>";
                    recContent += "<h4>";
                    recContent += "   <a href='" + recPageUrl + "'>" + recPageTitle + "</a>";
                    recContent += "</h4>";

                    // Add the individual content recommendation created above to the set of recommendations
                    var div = document.createElement('div');
                    div.id = 'recDiv' + i;
                    div.className = "col-xs-12 col-md-6 col-lg-4"; // This line configures the bootstrap framework's behavior
                    document.getElementById('myContentRecs').appendChild(div);
                    document.getElementById(div.id).innerHTML = recContent;
                }
            }

            var cX = cX || {}; cX.callQueue = cX.callQueue || [];
            cX.callQueue.push(['insertWidget',{widgetId: WIDGET_ID, renderFunction: myRenderFunction}]);
        </script>

        <script type="text/javascript">
            (function(d,s,e,t){e=d.createElement(s);e.type='text/java'+s;e.async='async';
            e.src='http'+('https:'===location.protocol?'s://s':'://')+'cdn.cxense.com/cx.js';
            t=d.getElementsByTagName(s)[0];t.parentNode.insertBefore(e,t);})(document,'script');
        </script>

    </body>
</html>
The function that normally renders the widget is part of the autogenerated widget insertion code and looks like this:
cX.callQueue.push(['insertWidget',{widgetId: WIDGET_ID, insertBeforeElementId:elemId, width:width, height:height, renderUrl:'auto'}]);
This would insert an iframe at the specified location (before element with element id elemId) with a width and height as specified. The layout and rendering will be done according to the content of the template and style box in the widget configuration. What is different this time around is that we will not insert a ready to go iframe, but do all the rendering and the CSS directley within the web page itself. The rendering is done inside the function myRenderFunction that is passed in as a callback function to the insertWidget function as shown here:
cX.callQueue.push(['insertWidget',{widgetId: WIDGET_ID, renderFunction: myRenderFunction}]);
With the exception of this line of code from inside the render function:
div.className = "col-xs-12 col-md-6 col-lg-4";
all other CSS related activities take place deep inside the BS framework that is included in header section.
The function myRenderFunction takes two input parameters of which the first one, data, is the only one of interest to us:
function myRenderFunction(data, context)
By iterating over the items array of data.response we can obtain the url, title, image as well as the click_url of the content recommendation:
item = data.response.items[i][itemName];
The url, title and image can after that be part of the html that one constructs for the purpose of showing the content recommendation.