
Adding a content collection
A content collection is the selection of articles that are candidates to be shown in the module when delivered to end users.
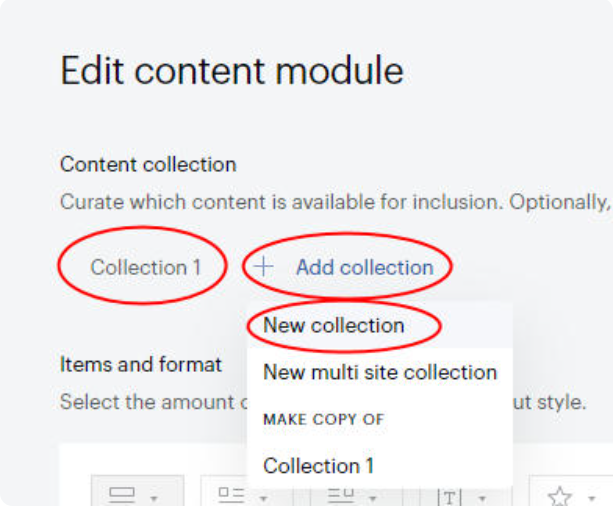
Modules default to a collection entitled "Collection 1", so if you want to deliver all recommendable content, you don't need to do anything. When you want an advanced config with multiple collections and per-position collections (e.g. sports in the first & second slot, general content in the third & fourth), you can create a new collection in the Content collection of the Edit content module menu. To do it, follow Add collection → New collection.
Creating a multi-site collection may be relevant when you want a module to present items from different websites.
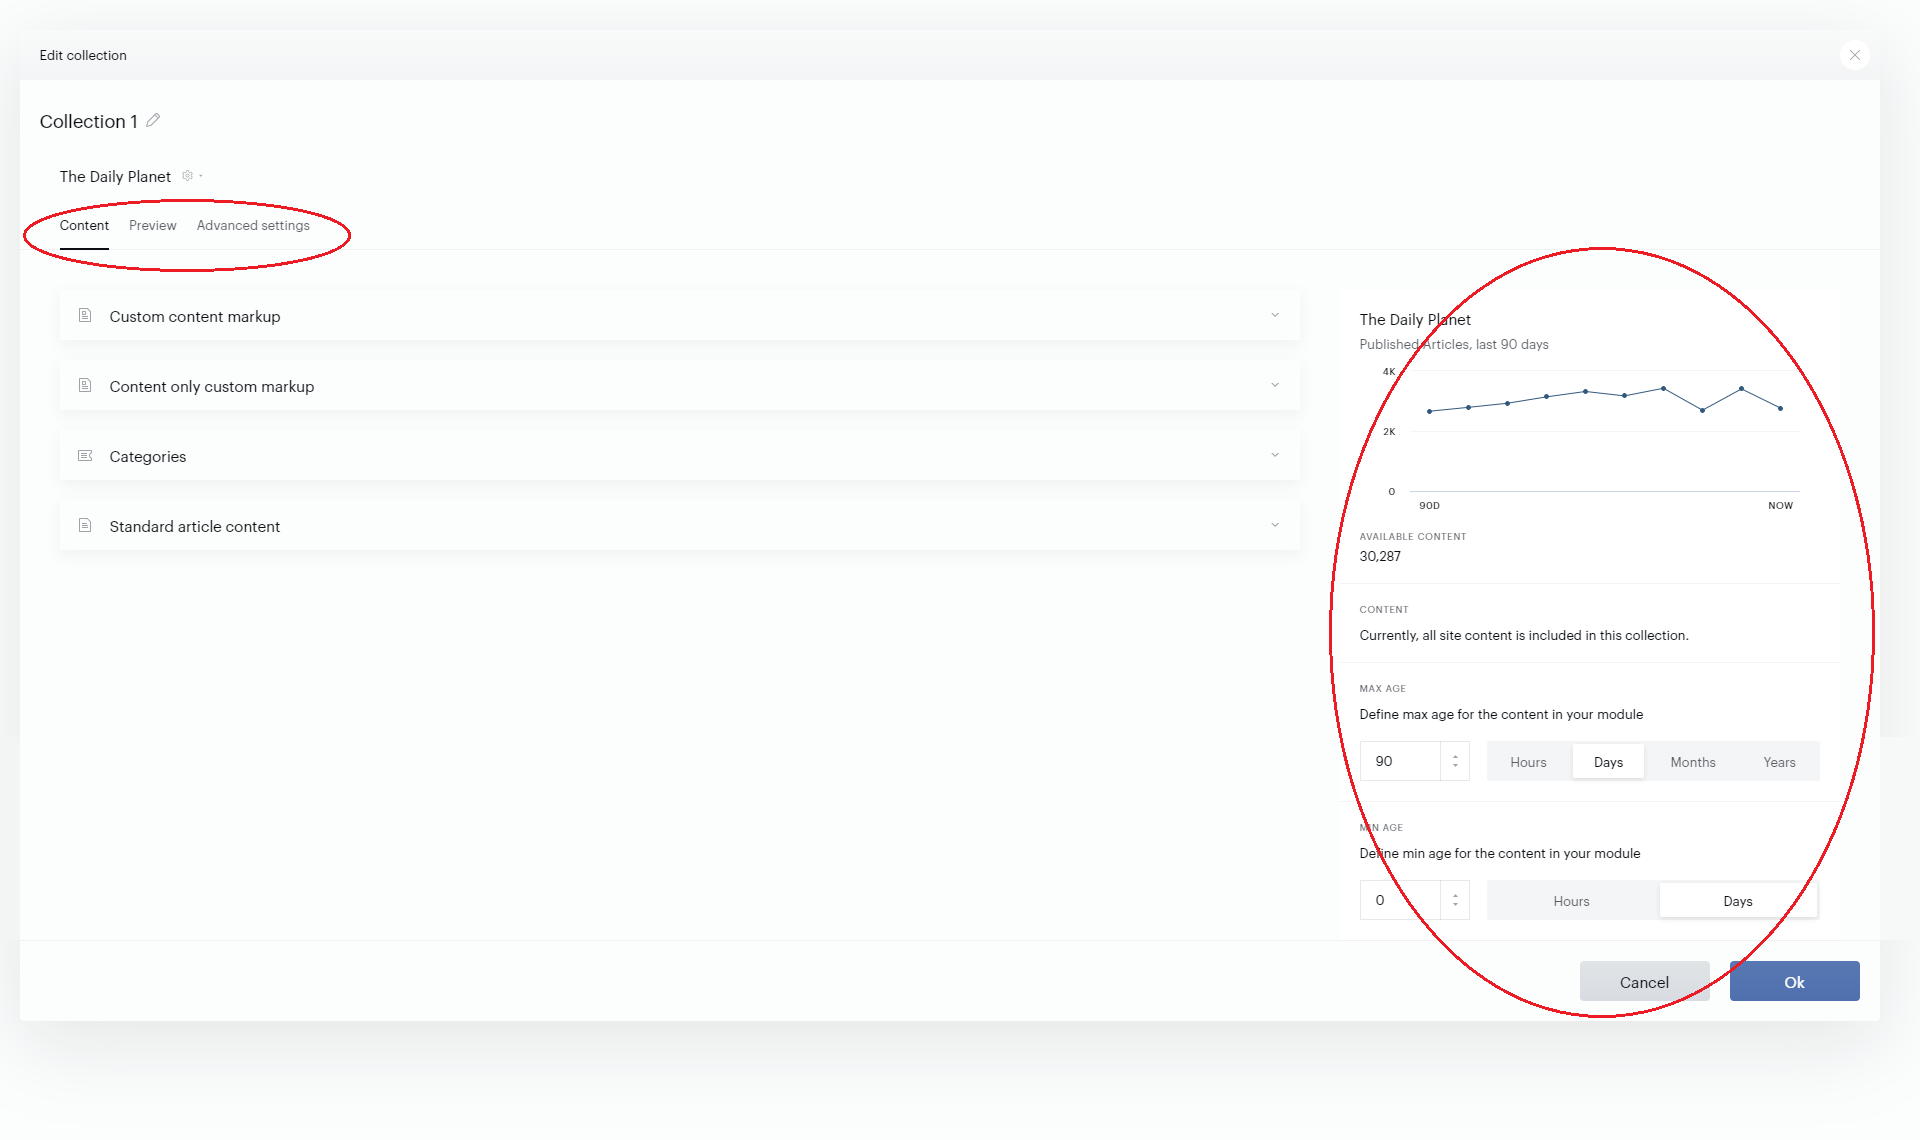
Use the tabs in the Edit Collection menu to:
-
Configure the Content of your collection.
-
Preview a configured collection.
-
Define its Advanced settings (use only under the guidance of our support center).
There is a collection summary panel in the right part of the screen where you can monitor and review your collection and define the minimum and maximum age of the items (articles) it covers.
Content tab
On the Content tab, you see three blocks holding various parameters for filtering your articles for a collection.
-
Custom content markup
-
Categories
-
Standard article categories
Content only custom markup is a legacy feature duplicating the custom content markup.
The available number of parameters in these blocks depends on the data demanded by each parameter, and usually, it is not more than 20. Our best practices suggest creating a collection by including all possible content and configuring just a short list of parameter values to filter out.
When configuring a collection, it is usually convenient to expand or collapse the blocks by clicking their names.
Note: Your module must contain at least one collection, so you don’t see a Delete icon if this is your only collection.
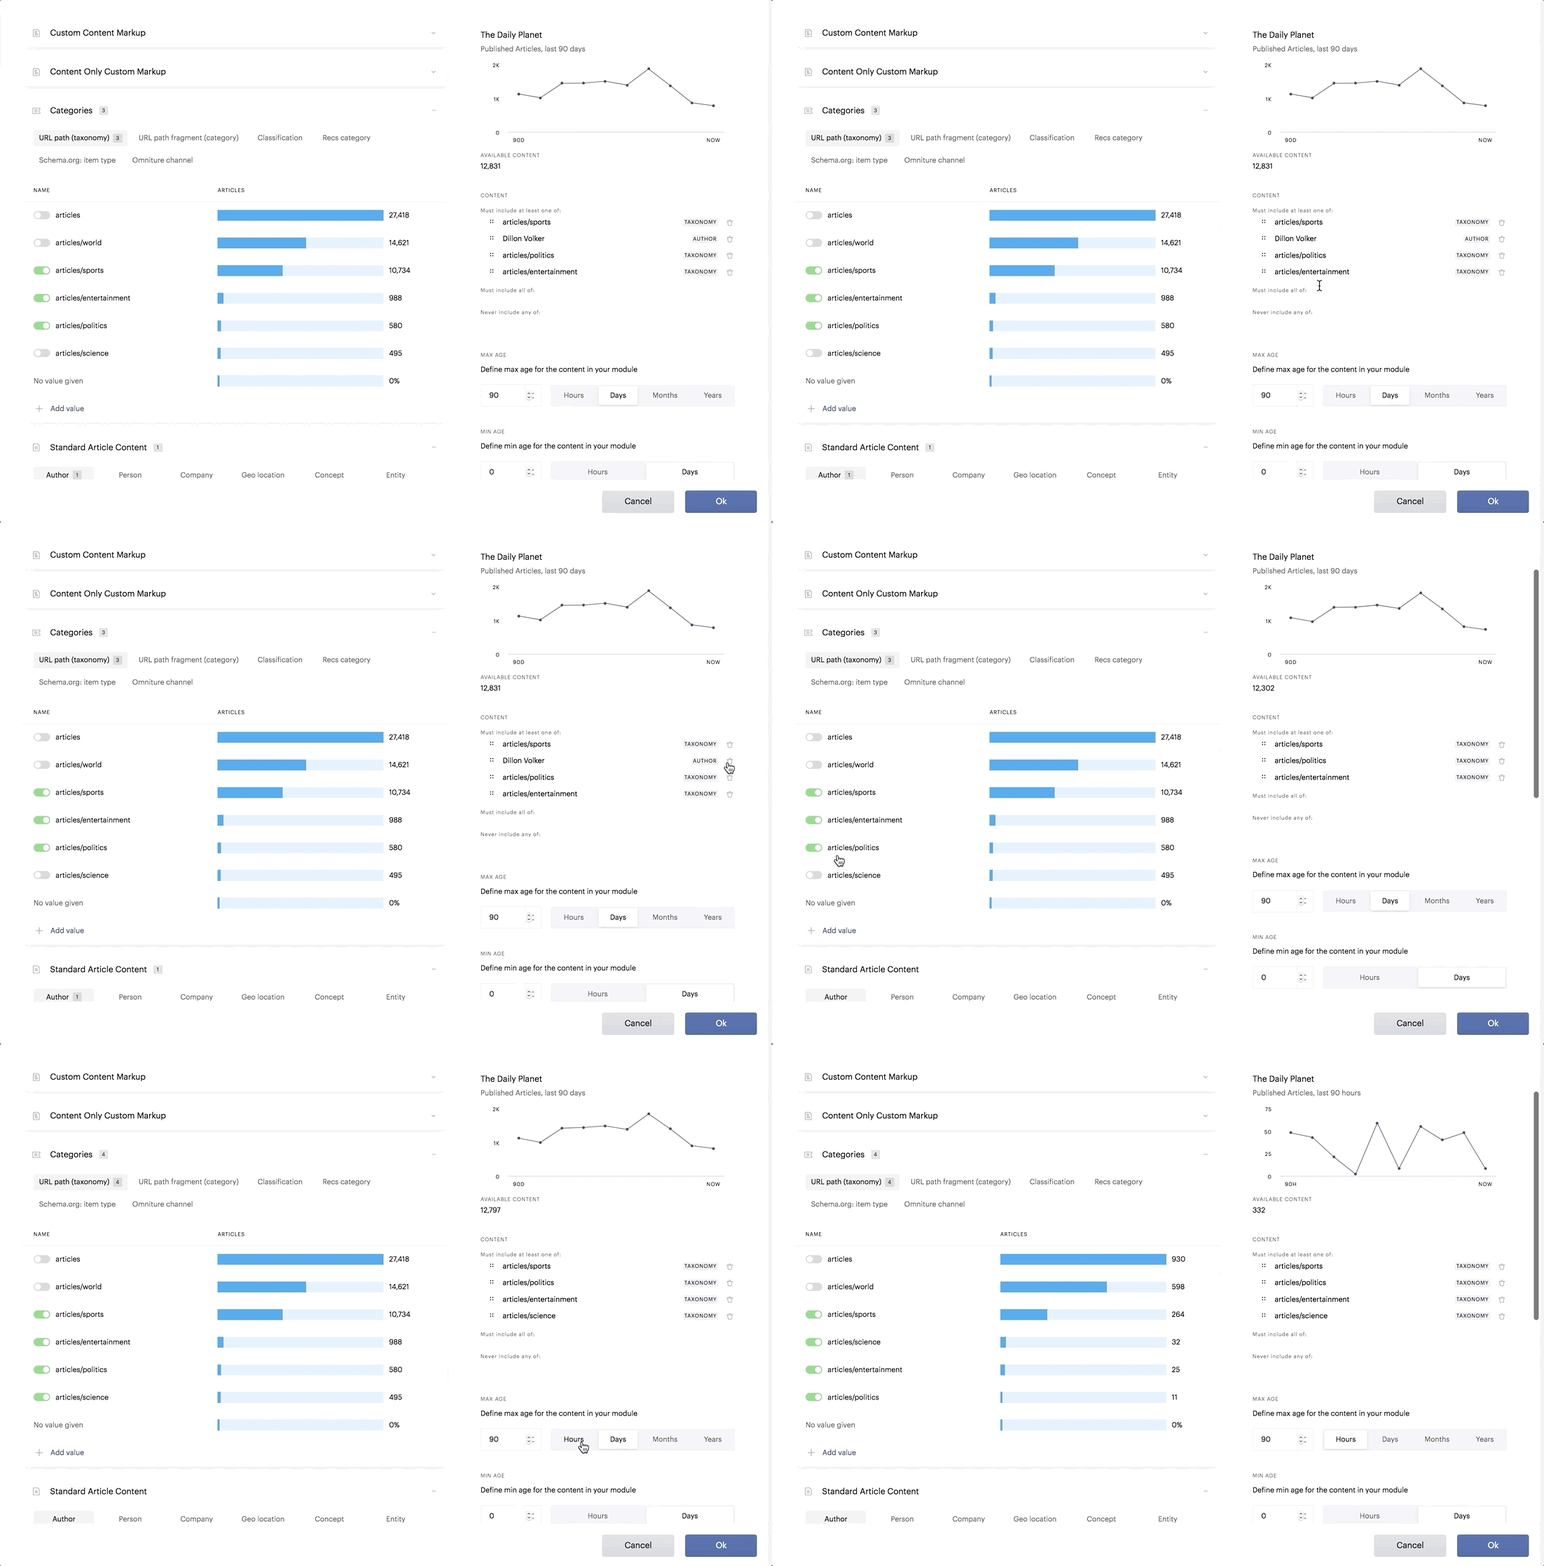
When a block and a parameter are selected, pick up parameter values by clicking the toggles near them. It will change the toggle color, which indicates the role of this value in selection:
-
Grey: Not specifically included/excluded, hence can be included.
-
Green: Content to deliver must include at least one of these key/values.
-
Blue: Every item in this collection must include all blue values.
-
Red: No items with red values will be included in the collection (red takes priority over green/blue/grey).
You can also drag and drop values on the right-hand summary panel to rearrange their roles.
-
Custom content markup
Use this section to filter articles by the custom content markup elements you use on the HTML pages of your articles. Here, we consider examples of “custom-prefix categories”, while in fact, the list of parameters is completely custom.
Every customer using Audience, Insight, or Content gets their individual customer prefix (contact our support if you don’t have one). In our examples, you will see “cxd-”, a demo variant. One of the uses of customer prefixes is to let the Piano crawler recognize prefixed tags (like “cxd-news”) that the customer has set in an article's page metadata.
After crawling, the content profile of such an article in Piano’s datastore gets a key-value pair (“cxd”, “news”). Later, in Piano Content, when you set up the Custom content markup filter of a collection - you can select the value “news” in the list of cxd-categories. All articles with the “cxd-news” tag in the metadata will be counted. One article may have multiple prefixed tags; for example, “cxd-news”, “cxd-politics”, “cxd-usa” etc.
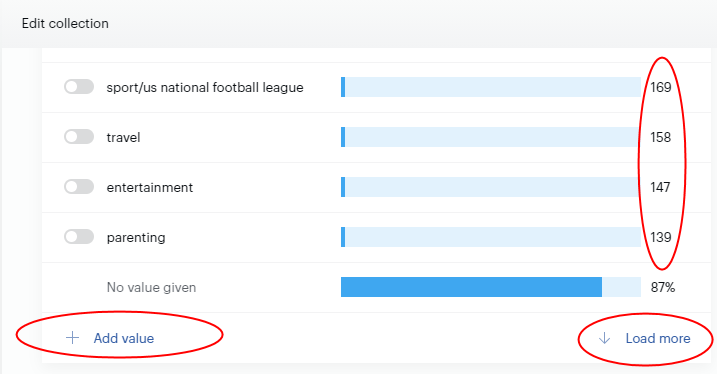
You see the top 100 most used tags. Click Load more to go on opening the list. In the general case, Piano composes it automatically. Still, you can use the Add value button to enter a new line manually. It is useful when you expect many articles with a new tag that has 0 hits yet. It may happen before or right after some event or when you are going to introduce a new content section to your users.
-
Categories
Beyond custom HTML tags, pages can be sorted by dozens of criteria. Here, we describe filtering by URL and by IAB tags.
-
URL
The URL path to any article page consists of one or more slashed elements. It is either a single word or a hyphenated (or underscored) word combination. In this document, we call such single elements “categories”. The chain of more than one slashed “category” is a “taxonomy”.
For example, in <span style="font-weight: 400;">https://examplemedia.com/news/politics/joe-biden</span><span style="font-weight: 400;"> </span>:
-
“news”, “politics”, and “joe-biden” are categories, while
-
“news/politics”, “news/politics/joe-biden”, “politics/joe-biden” are taxonomies.
Piano Content allows you to use URL categories and URL taxonomies as tools to configure a content collection.
-
IAB Classification
“Classification” stands for a filter based on ongoing mapping and remapping according to the IAB taxonomies. It means the Piano crawler and parser process your content and classify articles according to the classes defined by IAB. As new standards are introduced, we add them to our roadmap to launch them as appropriate.
-
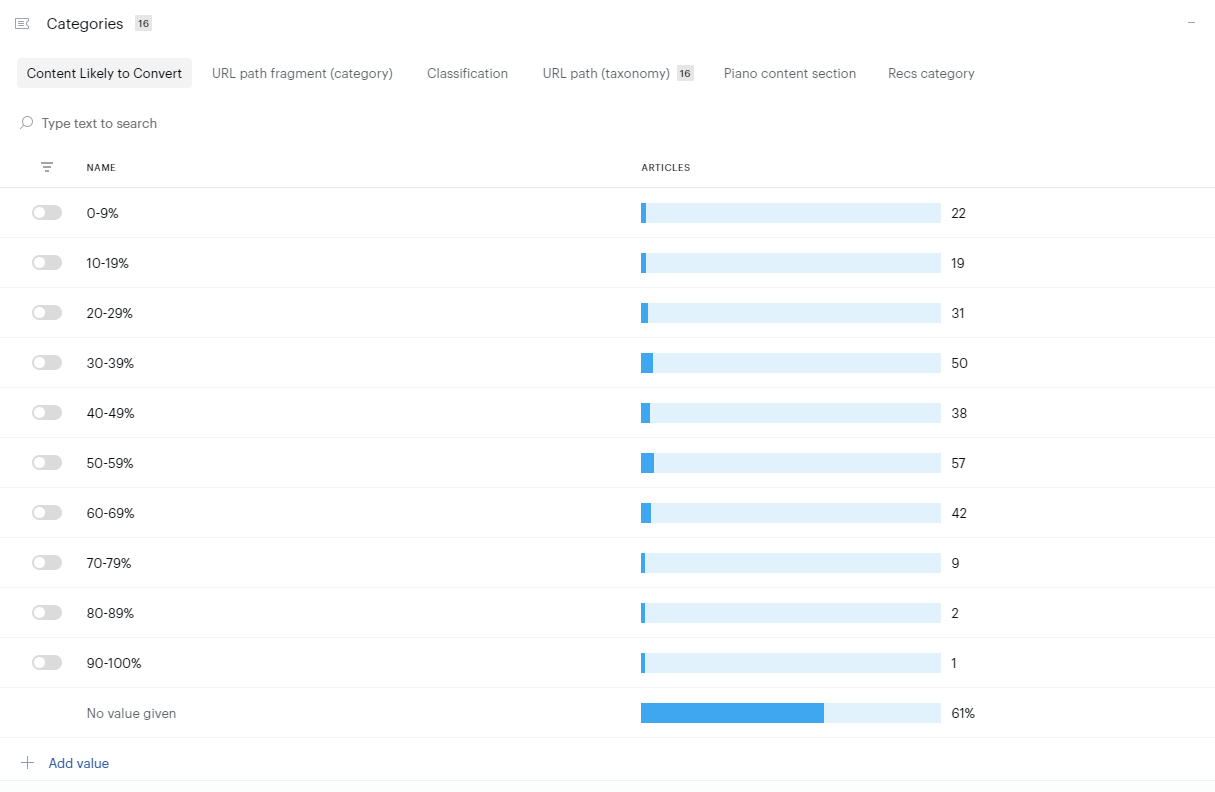
Content Likely to Convert
In addition to URL and IAB tag filtering, Piano offers a ”Content Likely to Convert” category which leverages propensity models to identify articles with a high likelihood of converting readers. This filter, available only to customers with content scoring enabled, enriches content collections by highlighting pieces that are most likely to drive engagement and conversions.
-
Standard article content
Unlike the previous blocks, Standard article content works with article wording too (and file metadata, to a lesser extent).
-
Author: stated in the file metadata or directly in the visible text.
-
Company: any mentions in the visible text.
-
Concept: suggested by Piano, based on linguistic analysis of the visible text.
-
Entity: suggested by Piano, based on linguistic analysis of the visible text. Proper names may get here if the author uses them without capitalization (for example, “biden”).
-
Geo location: any mentions in the visible text.
-
Page classification: “article” or “frontpage”, stated in the file metadata, necessary to prevent recommending landing/home pages.
-
Person: any mentions in the visible text, capitalized.
After configuring the Content tab, click Ok to save changes and return to the Edit module menu or switch to preview.
Preview tab
On the Preview tab, you can see the items of your collection all together.
Advanced settings tab
The majority of these parameters don't have to be configured often, and we recommend consulting our support when you need that. The most popular use case for this tab is the Response fields described below.
Response fields
To display some details of your content recommendations, you can go to the list of Collection response fields and use the Field toggle against a specific response field (e.g., show the author and publish date of an article by toggling on author and recs-publishdate). Take note of the blue isobar for each parameter - it indicates how many of the selected results include that field.
In our example, the author field is only present on a certain portion of curated/collection content.
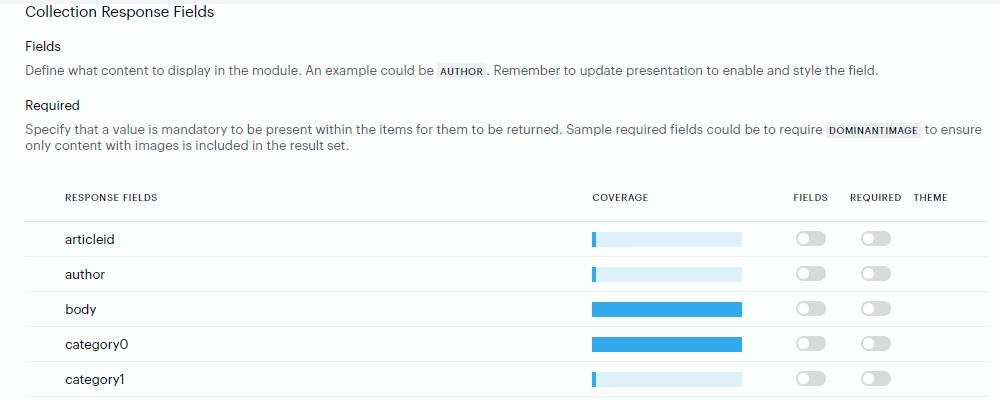
So, in this case, the template should be updated to handle the presence - or not - of the author field. We need to use defensive templating to ensure that the layout looks ok both with the author's name and without it.
Defensive templating
Defensive templating includes support for handling the page when fields (author in our case) are not present. When customers do not include images in their content, all ootb templates present a description instead.
Line 9 declares "if there is an image (a dominant thumbnail as per line 6), add the Image & Title", then on line 14, "Else, if there is no image, add the Title, and a description - if there is one.".
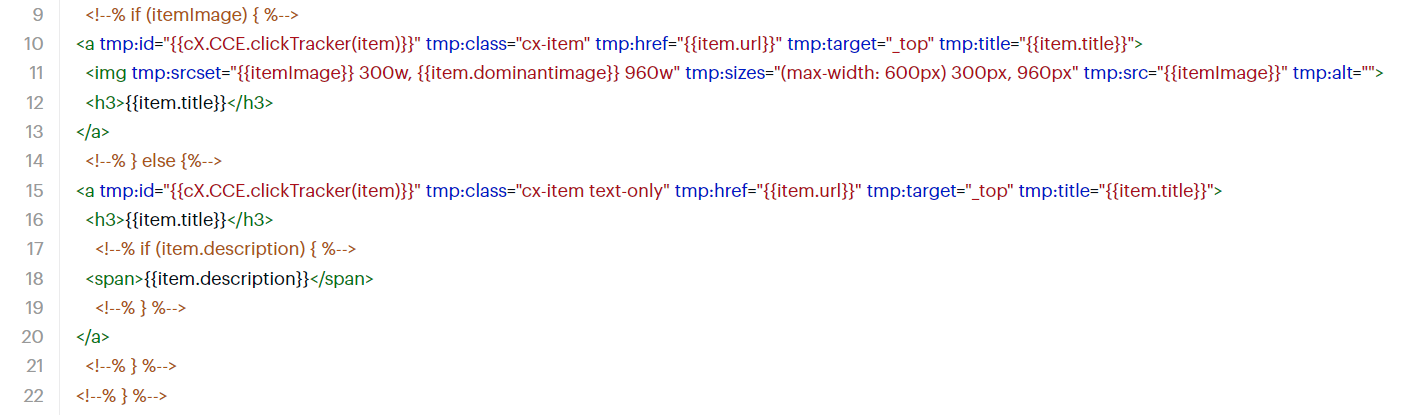
Customers should follow this same process for including various fields.
if (item['author']){
  //add the author value
  <span>{{item['author']}}</span
}
More advanced versions might add the author if present, else, add a site section or something.
if(author){
  //add author
} else if (section){
  //add the section
}
Apart from the presence of fields, you can also handle their specific values, e.g.:
if (author && author === 'AuthorName'){

  // Add a special visual style for AuthorName who is part of the elite author team...
  <img tmp:src="awesome.com/elite-author-icon.png" /> <span>{{item.author}}</span>

} else if (author){

  //just add the normal author reference
  <span>{{item.author}}</span>

}