
Bucketing lets you group the values of a property into your own custom categories, directly in Data Query. Instead of analyzing dozens or hundreds of raw values, you define a handful of meaningful groups (like "Young / Adult / Senior" or "Active / Inactive"), and Data Query does the sorting for you.
A bucket is a new, derived property built from a single existing property. You decide the rules: if a value meets a condition, then it belongs in this group. The result is a cleaner, more readable report that reflects the categories your team actually cares about.
Because a bucket is applied when your report runs, it works on the fly and is fully retroactive. It applies across any period you analyze, including data collected long before you created the bucket, so you can reorganize your historical values instantly. Unlike a data management rule, there's nothing to configure ahead of time and no need to wait for new data to come in.
When to use bucketing
Reach for bucketing whenever a property has more detail than you need for a given analysis. A few common cases:
-
Turning a numeric property into bands (age into age groups, order value into price tiers).
-
Grouping many text values into fewer categories (dozens of page paths into a few site sections).
-
Flagging records against a threshold (last visit before a cut-off date into "Active" vs. "Inactive").
How bucketing works
A bucketing property is built from a few simple pieces:
-
A property. You bucket the values of one existing property at a time.
-
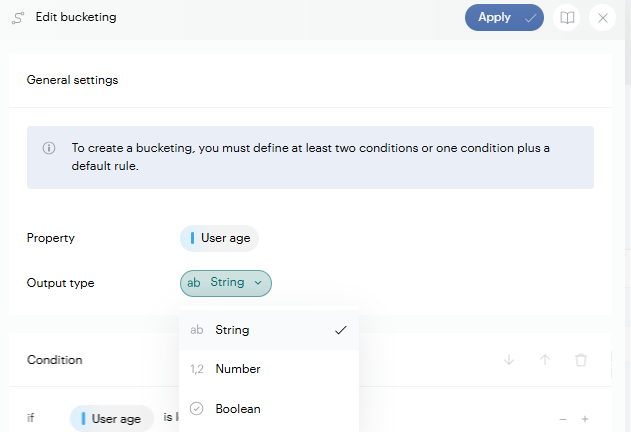
An output type. You choose what kind of value your new property produces: String, Number, or Boolean.
-
One or more buckets. Each bucket has one or more conditions and an output value. When a record matches a bucket's conditions, it receives that bucket's output value.
-
An optional default bucket. This is the "everything else" case. It has no conditions and applies to any record that did not match another bucket.
Creating a bucket
In your report table, click the property you want to group to reveal its actions, then select Create a bucketing. (If the property is already a bucket, this option reads Edit bucketing and reopens the existing setup.)
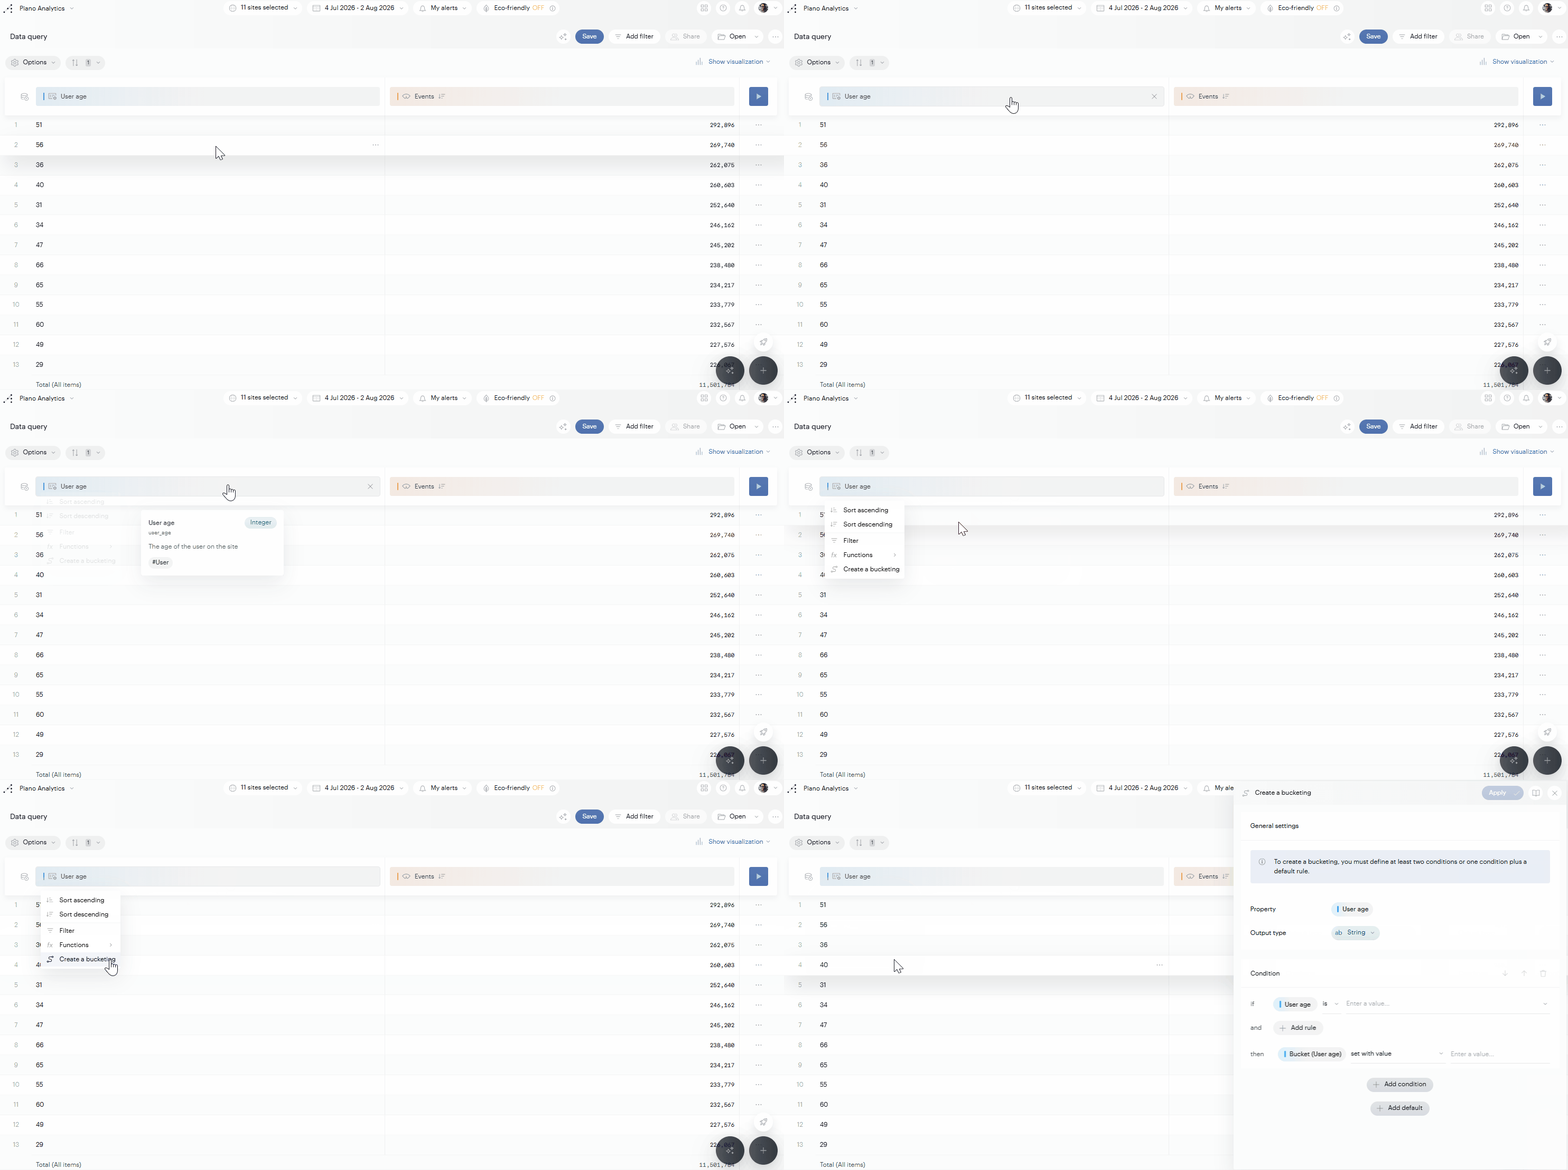
General settings
-
Property: The property you're grouping, shown here for reference. Each bucket is based on a single source property.
-
Output type: The type of value your bucket produces, either String, Number, or Boolean (true/false). Set this before defining conditions, since every output value must match it. Mismatches are highlighted so you can fix them before applying.
Conditions
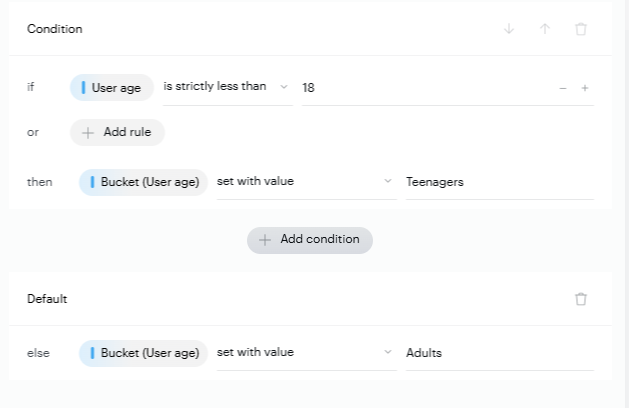
Each condition has two parts: an if that decides which records match, and a then that sets the value those records receive.
-
if: Choose an operator and select one or more values to match on the source property (up to 2,000 values per condition). The operators available depend on the property's type (listed under Supported operators below). To require more than one rule in the same condition, click Add rule. Rules are combined with AND, so a record must satisfy all of them to match.
-
then: Set the value matching records receive, in one of two ways:
-
set with value: Assigns a fixed constant to the bucket, such as
YoungorHigh value. This is the most common choice. -
set with property value: Uses the value of another property instead of a constant. Only properties whose type matches your output type are available.
-
Click Add condition to create another group, or Add default to add a catch-all that applies when no other condition matches. Use the up/down controls on a condition to change the order in which conditions are evaluated.
-
A bucket needs at least two conditions, or one condition + a default, and can include up to 15 conditions + one optional default.
-
Each condition other than the default must contain at least one rule.
-
The default is always last and has no if rules; it simply catches everything not matched above.
Click Apply. The button activates once your setup is valid, and your new bucket replaces the original property column.
Supported operators
The operators available depend on the type of the source property you're grouping:
|
Source property type |
Available operators |
|---|---|
|
Numeric (integer or decimal) |
|
|
String |
|
|
Boolean (true/false) |
|
|
Date |
|
|
String array |
|
-
=and!=accept multiple values, so they work like "is any of" and "is none of." -
is empty matches records where the property has no value.
Using a bucketing property
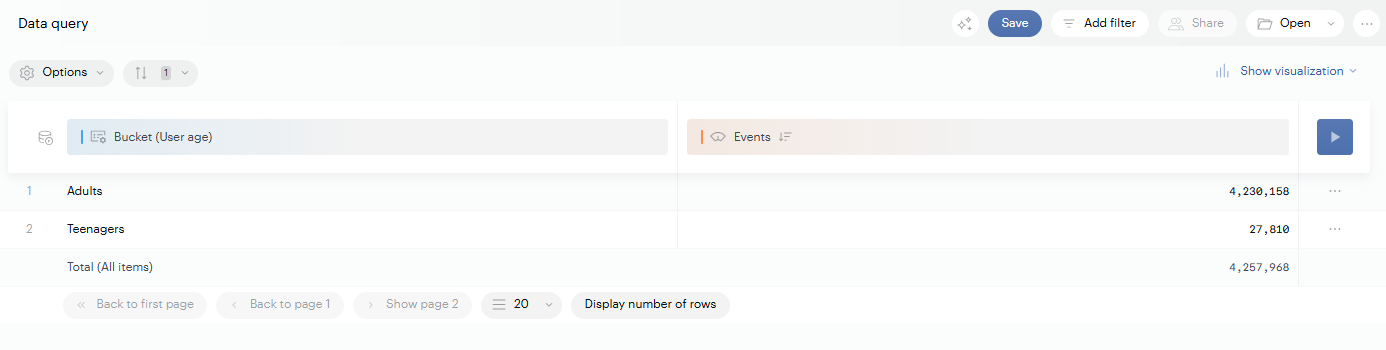
Once applied, a bucket appears as a column in your report and behaves like any other property: you can filter on it just as you would any other property. However, functions such as counts, sums, or averages can't be applied to a bucket. If several conditions produce the same output value, those results are grouped into a single row in your report.
To adjust a bucket later, click its column to reveal its actions and select Edit Bucketing. From there you can change its conditions, output values, or output type.
A bucket is saved as part of the report it belongs to. Once you save the report, your bucket is reused every time you open it, and any report that contains a bucket can be added to a board just like any other report.
Examples
Age banding (Numeric to String)
Imagine you have a numeric user age property, with a different value for almost every visitor. On its own, that level of detail is hard to read in a report: a breakdown by age would produce dozens of rows. Bucketing lets you collapse those raw ages into three familiar life stages, so you can compare behavior across meaningful groups instead of individual ages.
You'd set the source property to user age and the output type to String, then define one condition per band:
-
If age
<25, thenYoung -
If age
>=25 and age<65, thenAdult -
If age
>=65, thenSenior
Once applied, the age column is replaced by a Young / Adult / Senior column. Every visitor is sorted into exactly one band, and you can filter or break down your report by these groups just as you would any other property.
Active vs. inactive users (Date to String)
Here the goal is a simple engagement flag rather than a full set of bands. Starting from a last login date property, you want to separate users who haven't logged in since the start of the year from everyone else. A single condition handles the "inactive" case, and a default catches the rest, so you don't have to describe every possible recent date.
Set the source property to last login date and the output type to String, then:
-
If last login date
<=2026-01-01, thenInactive -
Default, then
Active
This produces a clean two-value column you can use to segment or compare active and inactive audiences. If some users have never logged in at all, their last login date is empty and won't match the "inactive" condition. To capture them explicitly, add a condition using the is empty operator on last login date and assign it to whichever group fits your analysis, for example Inactive.