
See also:
Creating your Campaign
This section covers the overall process of creating a single campaign within a Campaign Set.
Step 1: Audience
In the first step you define who is going to receive the Campaign you are creating. You can select from a broad range of data signals to define your target Audience. To add targeting criteria, click one time on the selector next to the data value so that it becomes green. Clicking again will make it red, which means that the campaign will not target users that match this data point. A third click resets the filter.
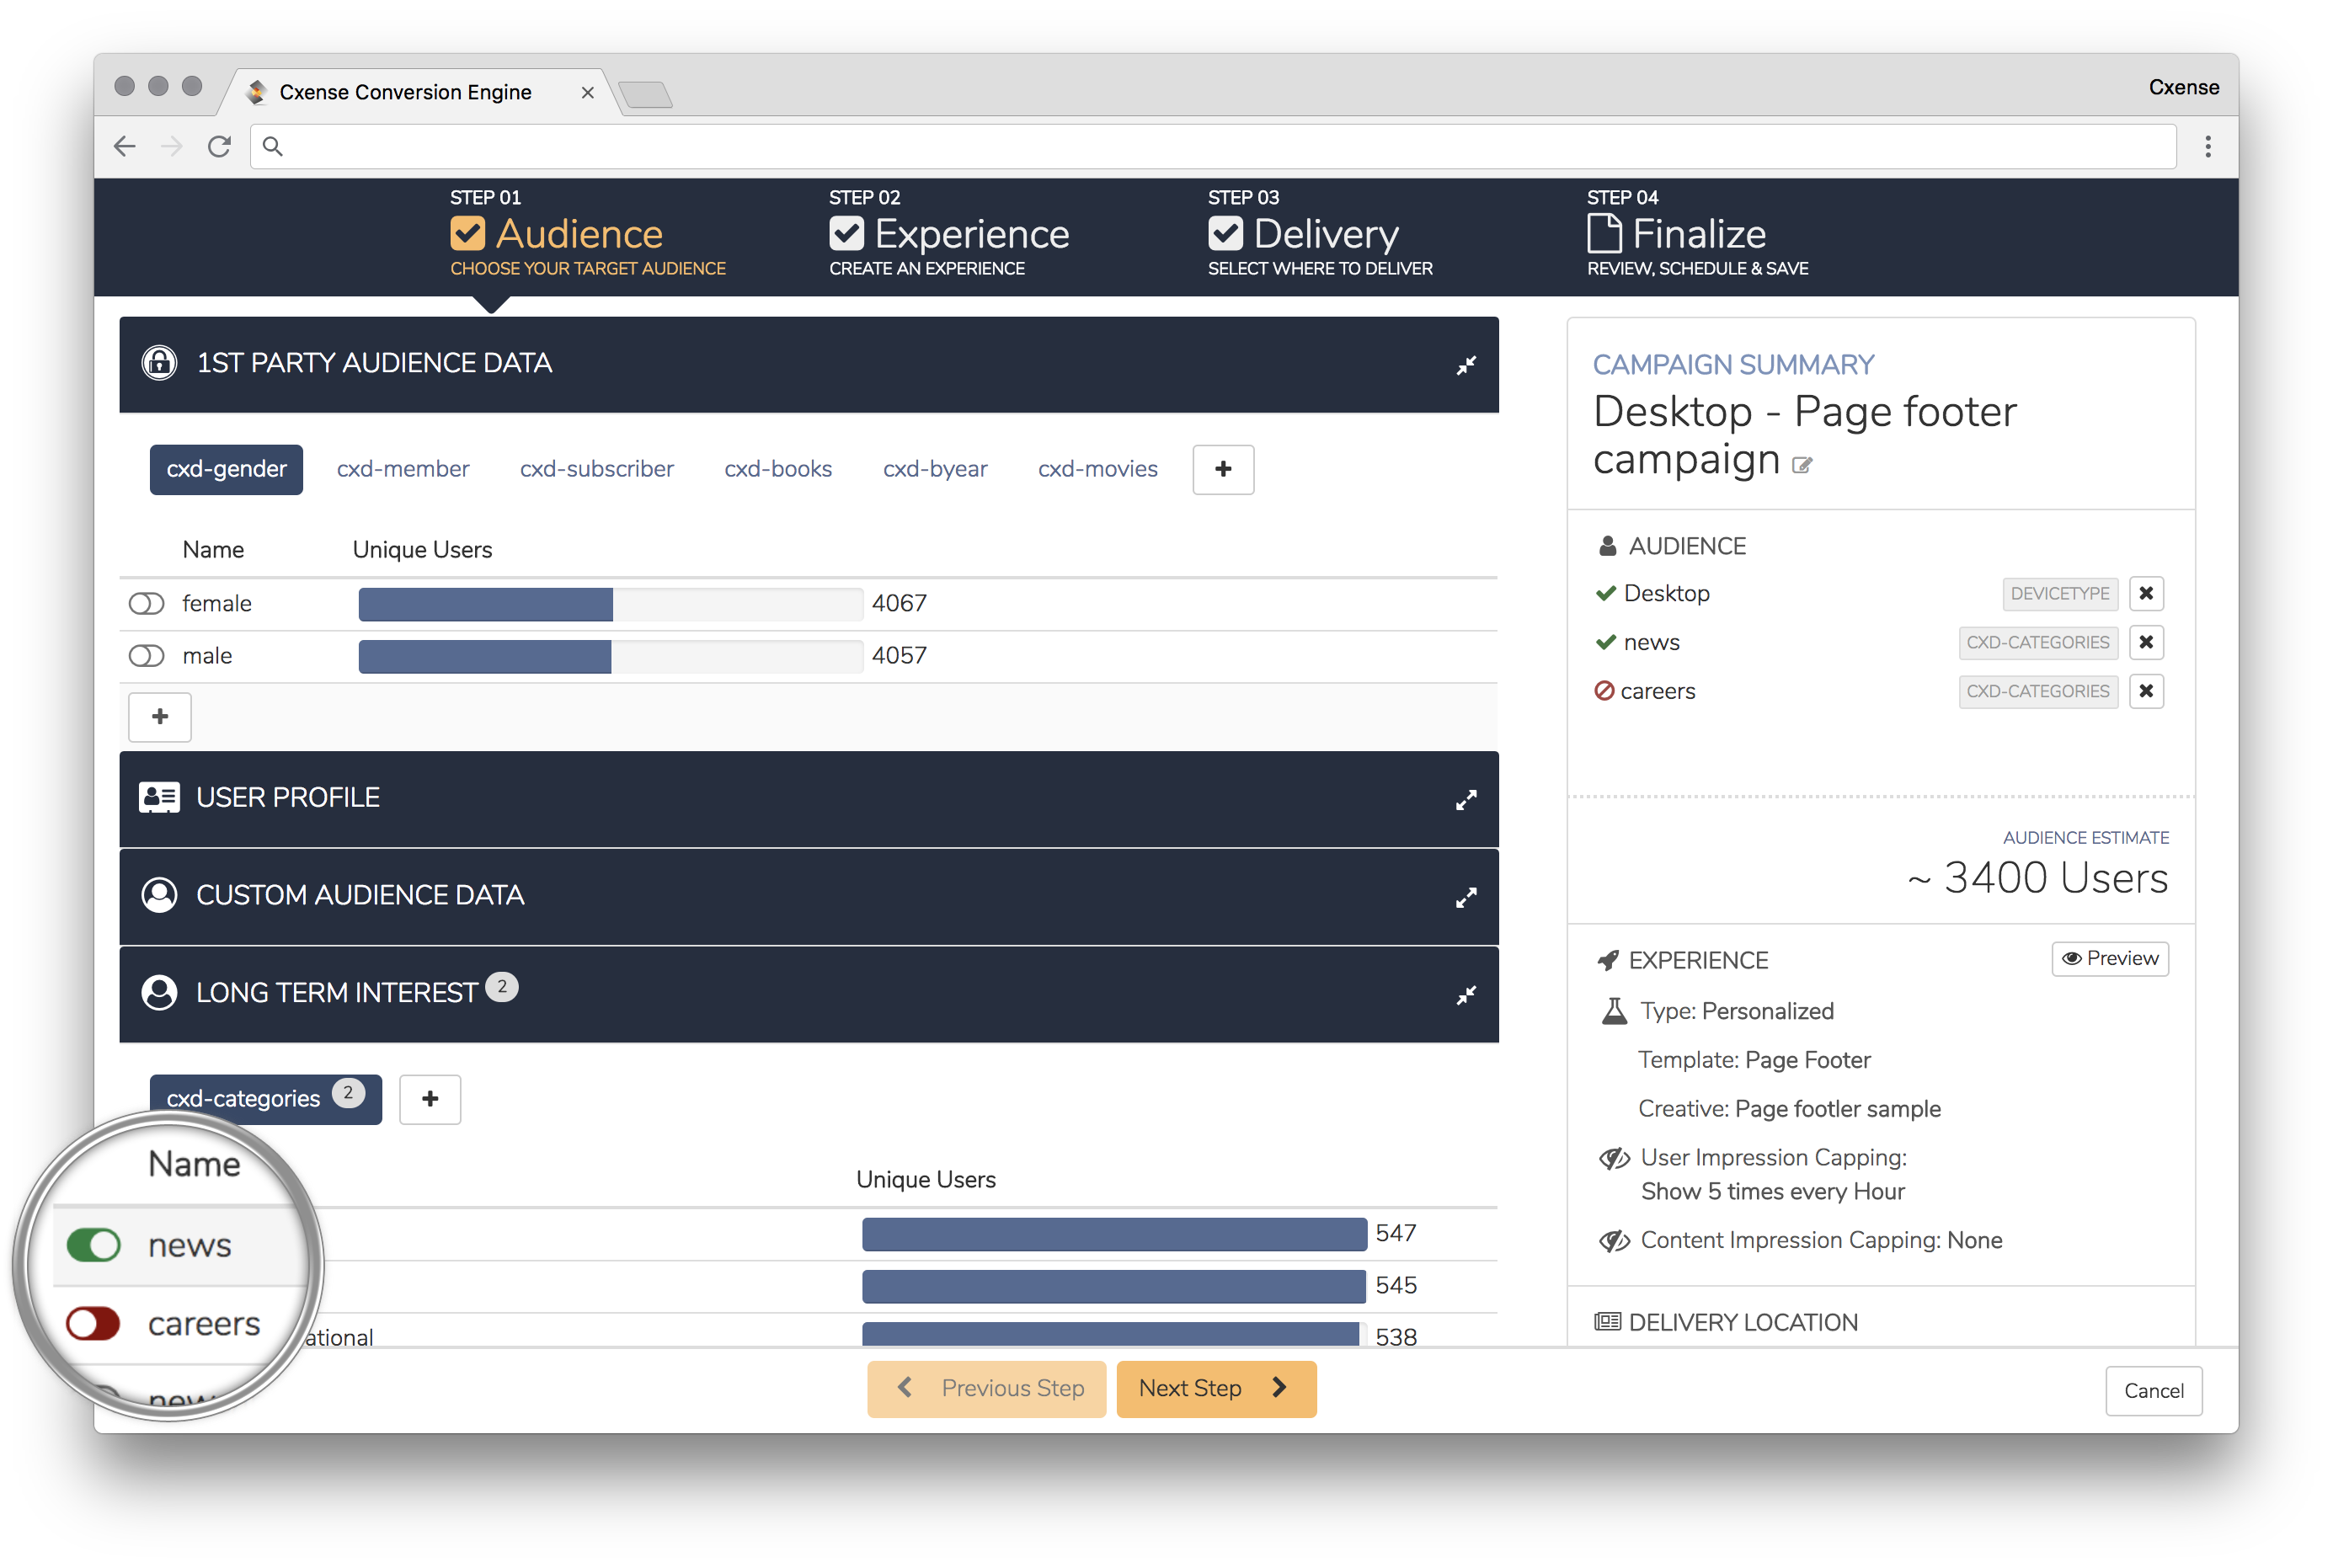
You may choose from various targeting criteria: from geographical location, device types and 1st-party data you are passing from other systems to the Cxense Data Platform (e.g. CRM data) to data values on a users likelihood to subscribe. For the propensity score, you can choose values in buckets between 1-10, where range 1 = low propensity to subscribe to 10 = high propensity to subscribe, assigned by our machine-learning propensity model.
All selected criteria are displayed in the Campaign Summary on your right-hand side. The "Audience Estimate" on the right-hand side in the Campaign summary will indicate the number of users that matched the selected criteria the past 24 hours to provide an indication on Audience volume. At the top of the Campaign Summary, your can assign a name to your campaign.
Step 2: Experience
In the second step, you define what your defined Audience is going to receive in the Campaign you are creating. Four options are available: Free Access / No Visual Experience, Personalized Content, Personalized Offer and Advanced Experience Definition.
Free Access / No Visual Experience
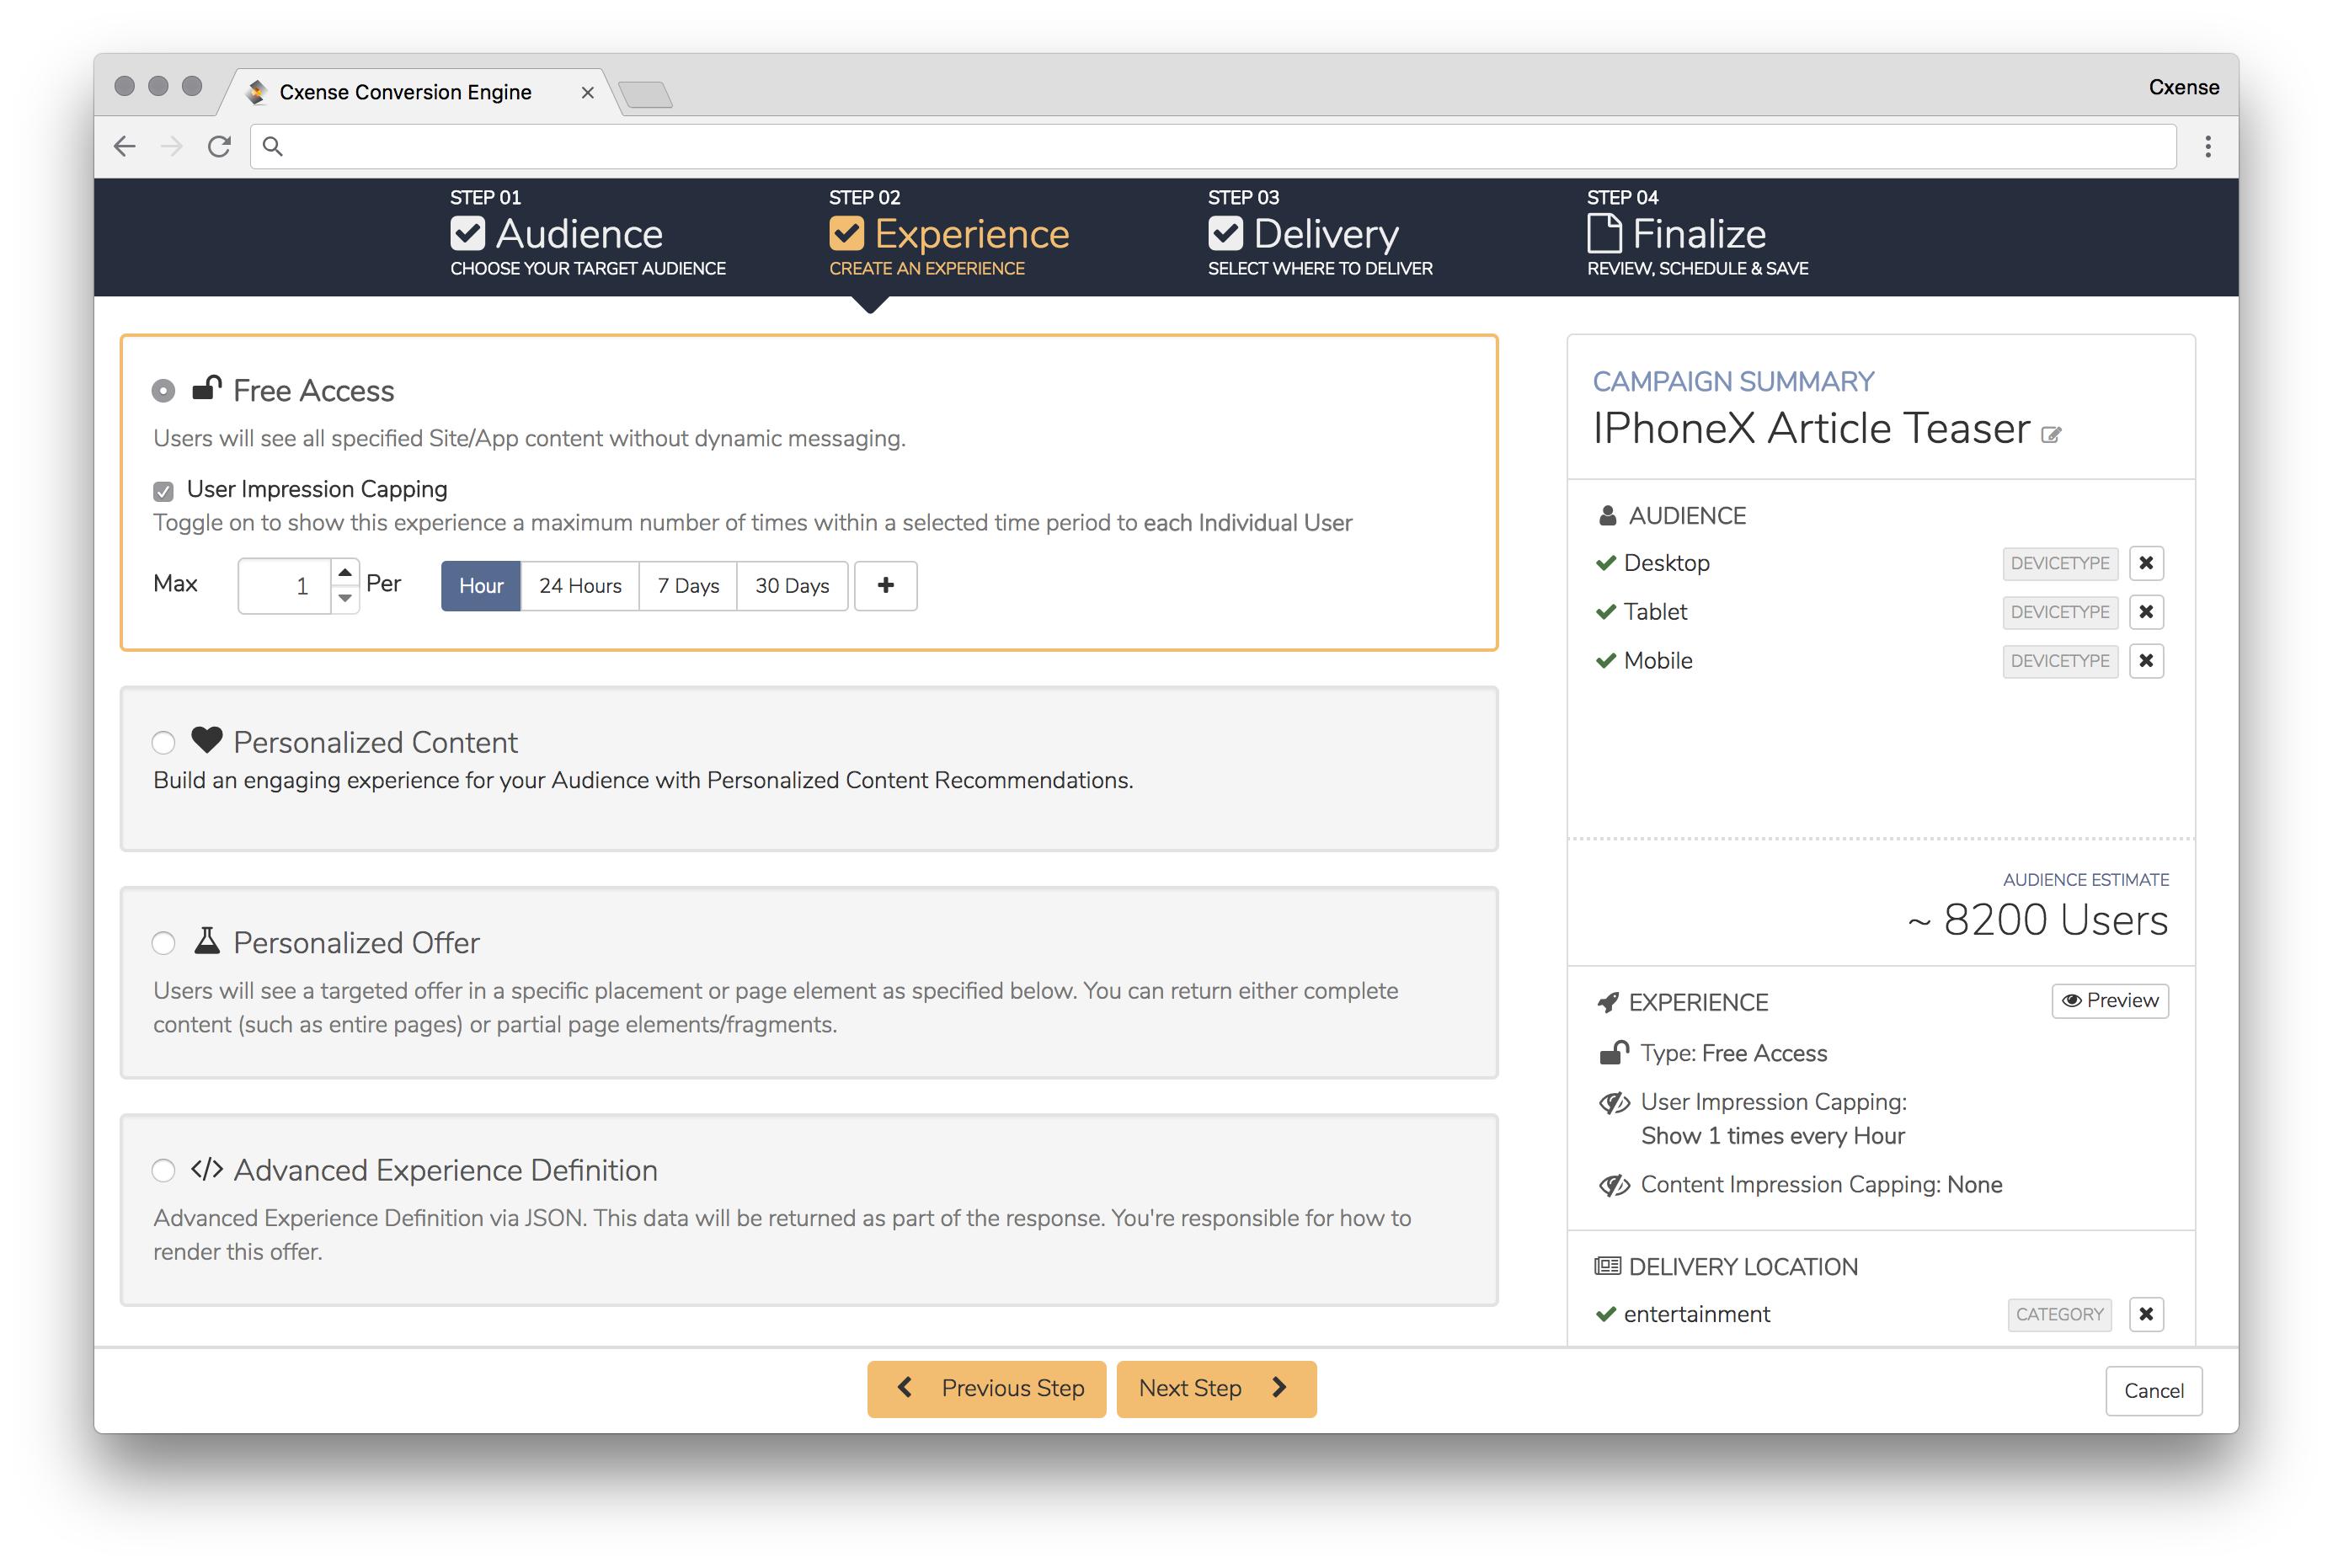
Free Access is available for Convert campaign sets only. This option enables access to articles if the user matches the targeting criteria defined in step 1. If you want to restrict the access of articles to a limit the number for the Audience group define, select "User Impression Capping" and define how many articles within a given time period you want the user to have access to.
No Visual Experience is available for the Engage campaign sets only. These options allow you to create campaigns where nothing happens. Use this option if you e.g. do not want a user to have an experience on the first-page view on the site but on the second you want the personalized message to be shown.
Personalized Content
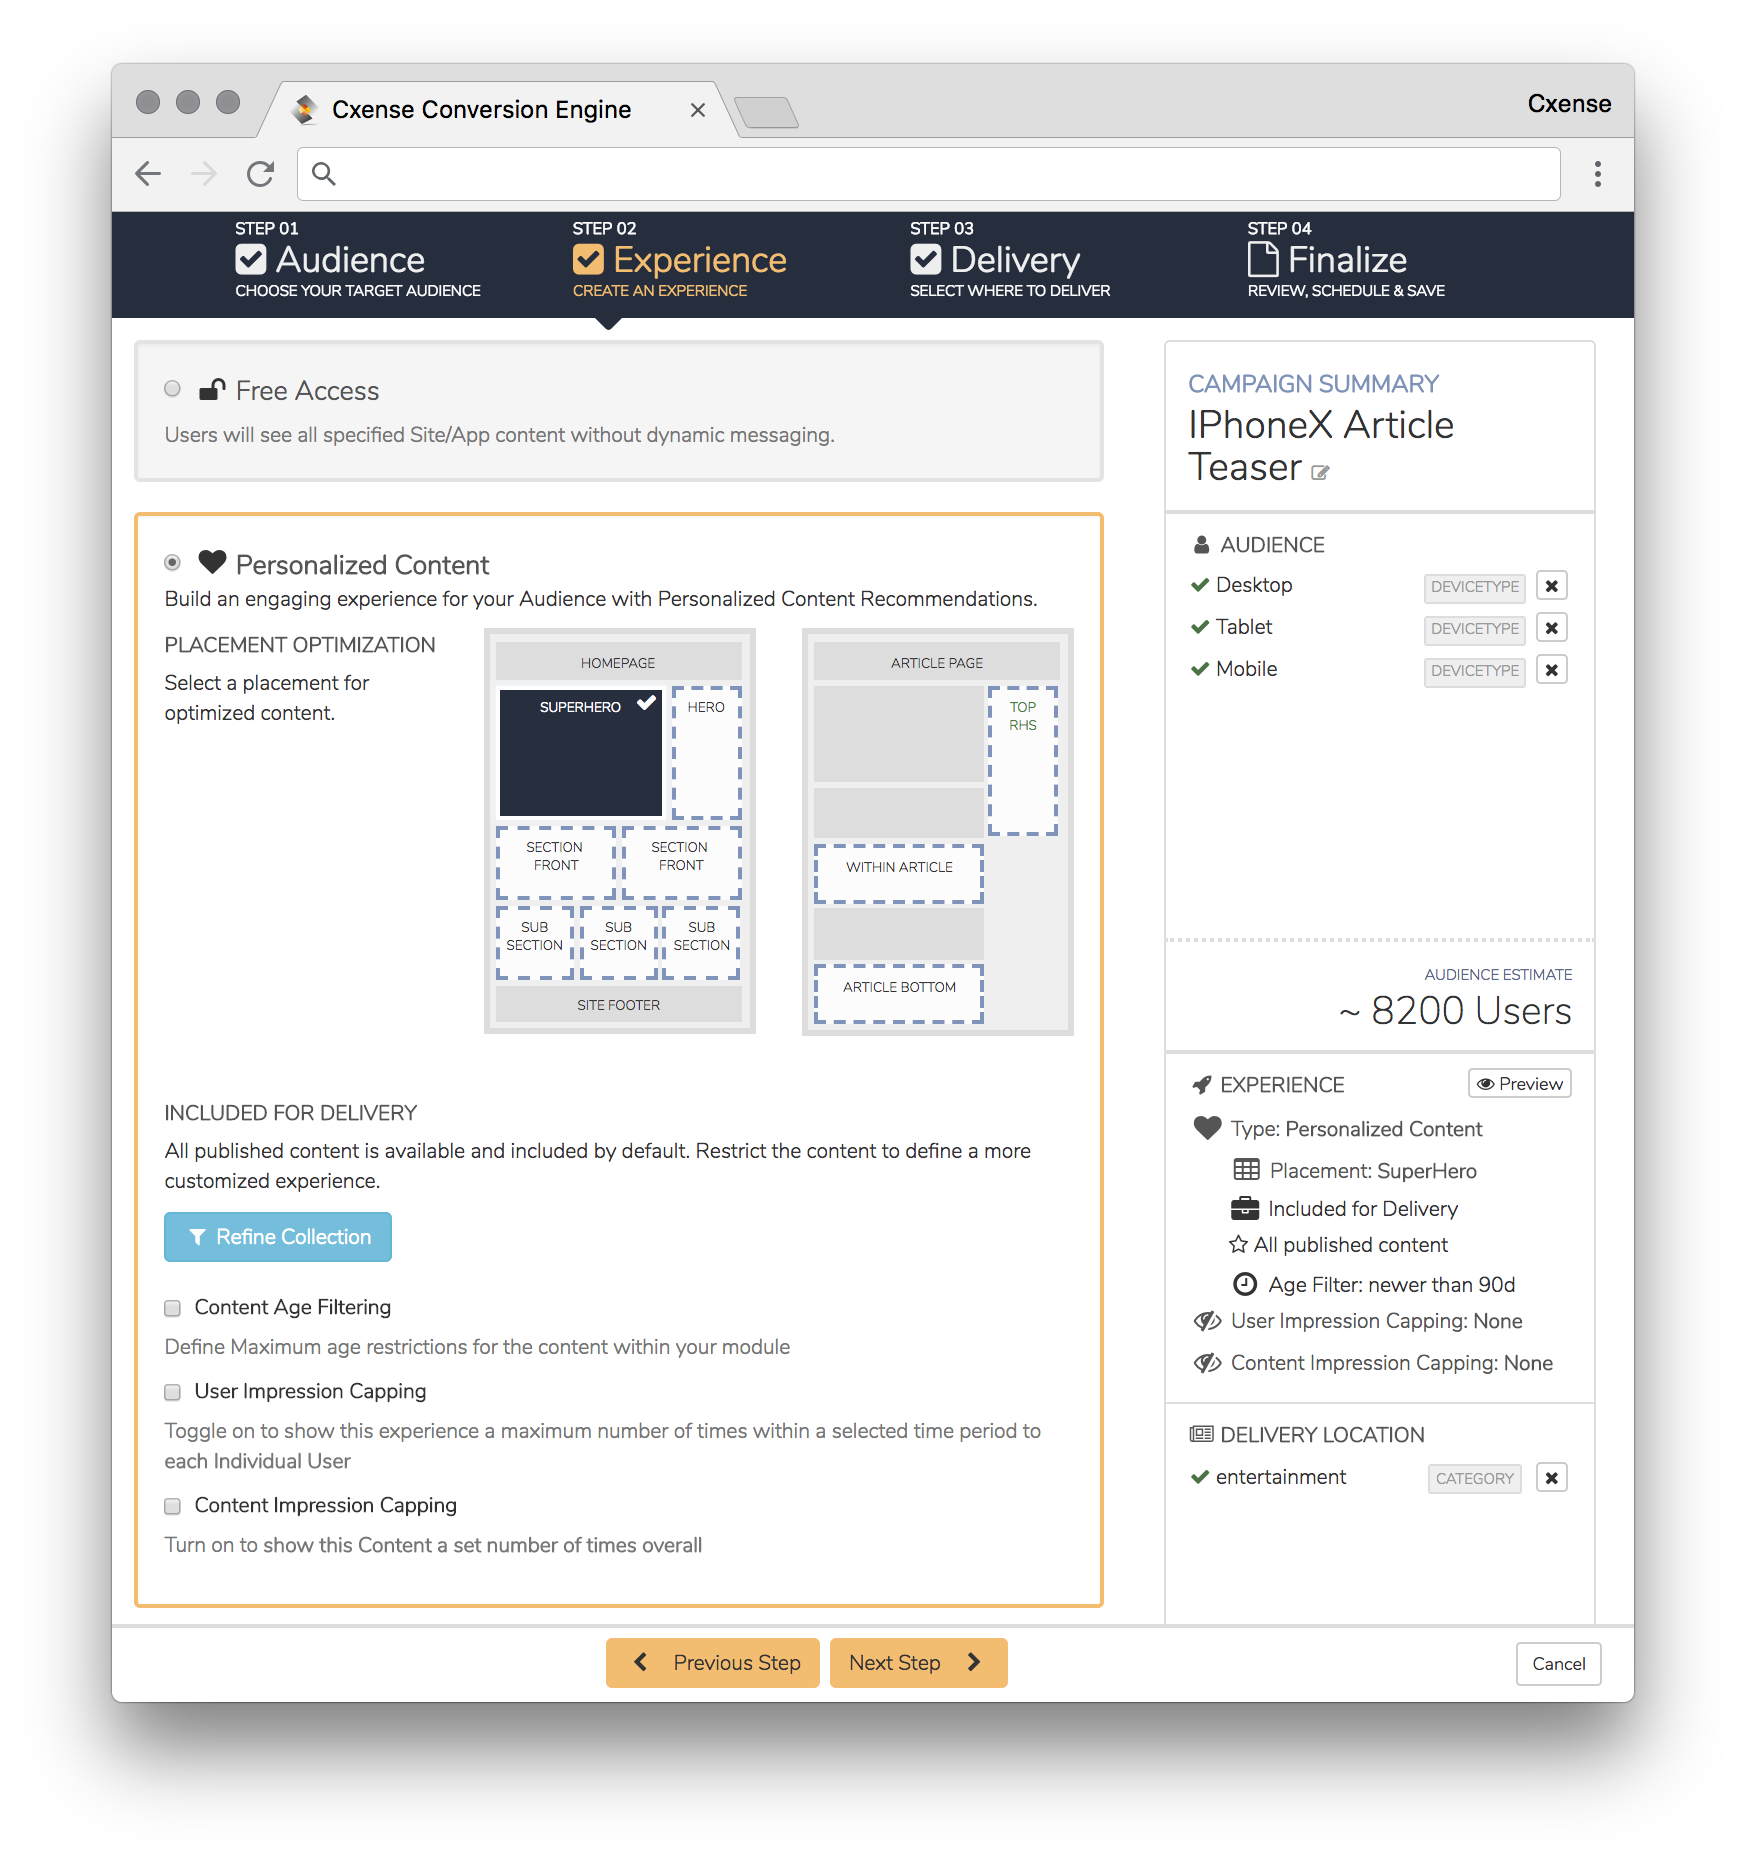
Personalized Content enables you to define an experience of personalized content recommendations. When choosing this option, you will be first asked to indicate the site placement of the Campaign Set on your page. This setting will enable Cxense to optimize the Personalization algorithms utilized to ensure best performance delivery.
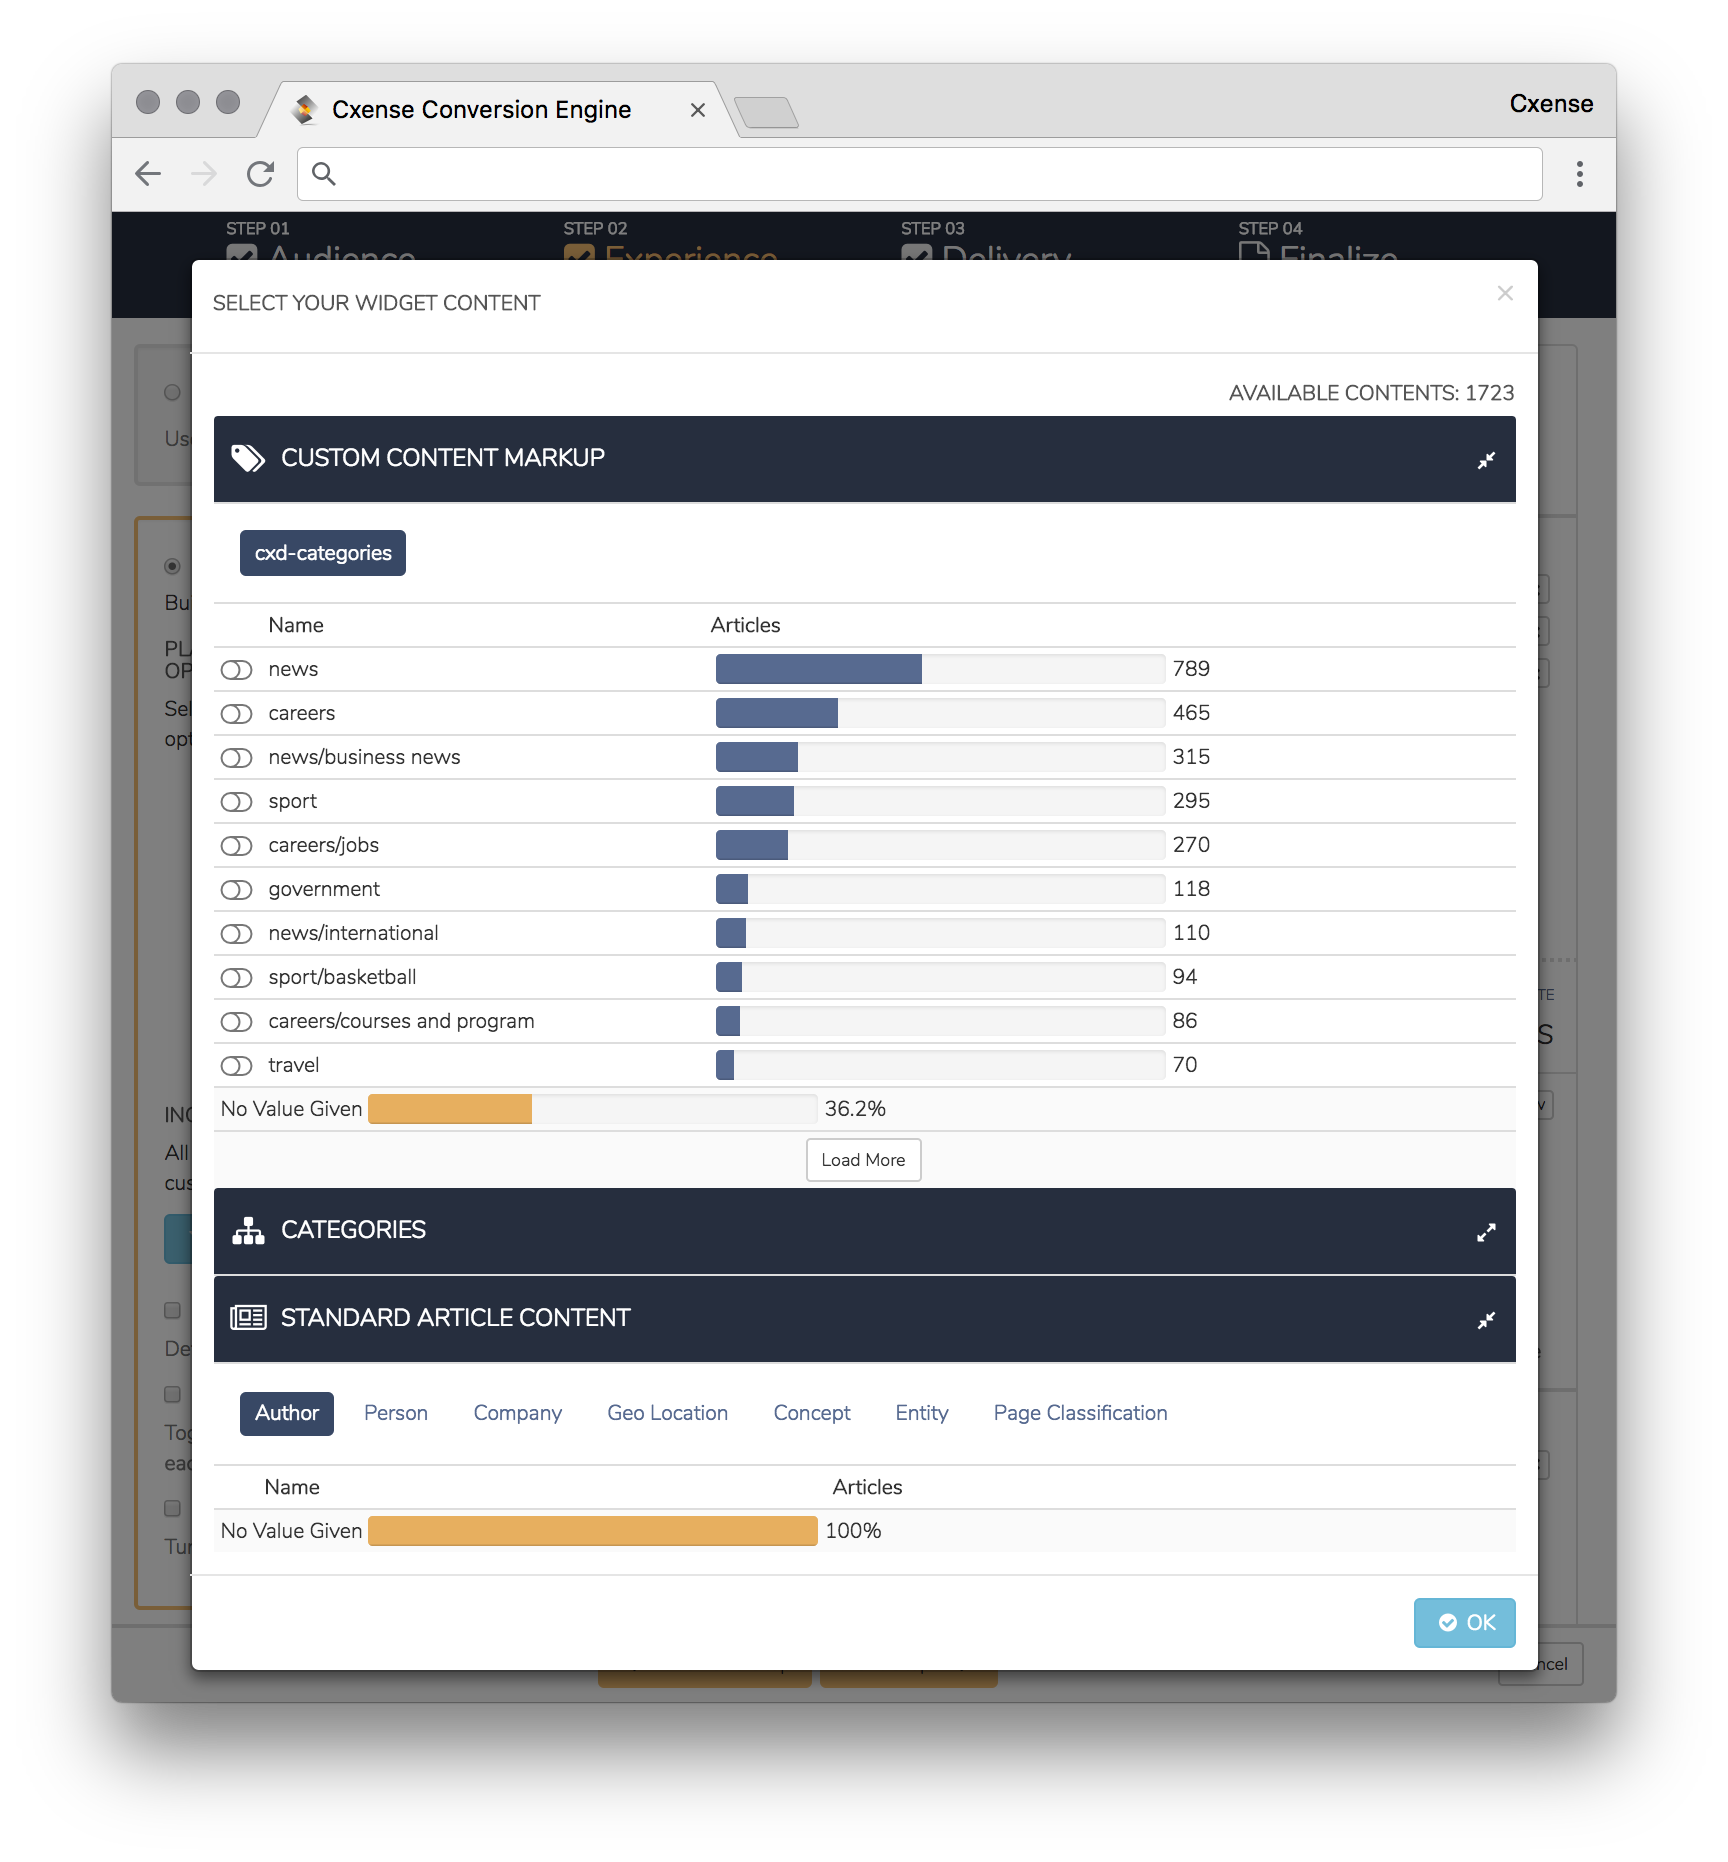
Second, choose Refine Collection. Here you will define what content that will be curated in the Experience. In the modal view you can define the content by a number of article data points:
-
Custom Content Markup: Define content by your content meta-tags passed to Cxense;
-
Categories: Define content by page structure e.g. content that belongs to specific site sections;
-
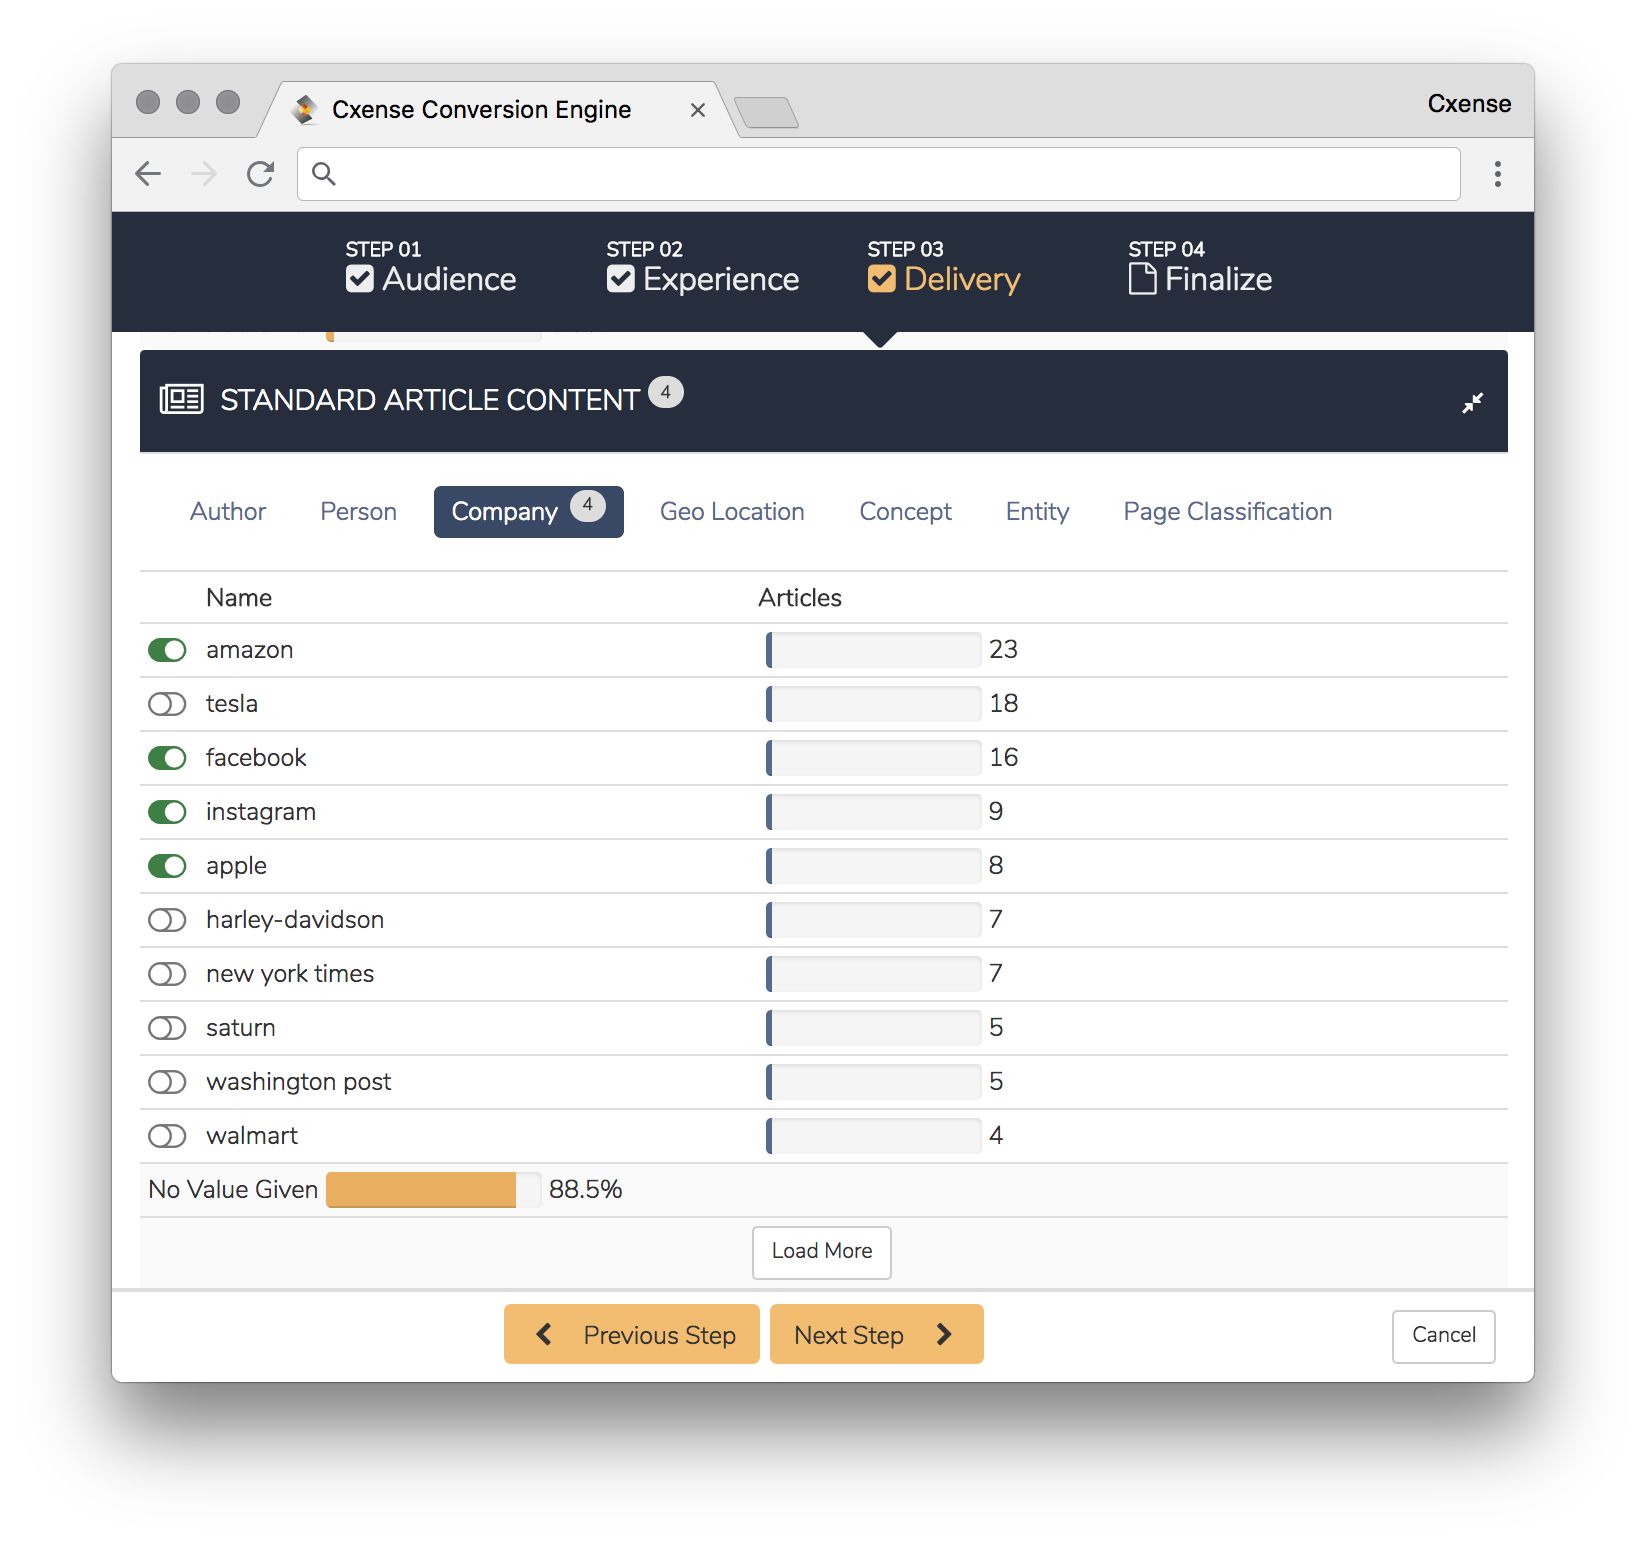
Standard Article Content. Define content by article content e.g. include articles that mention a specific person, company or are written by a specific author.
Clicking two times on any category (making the button red) enables you to exclude specific content e.g. if you want to curate content from anything except these two sections.
By selecting Content Age Filtering, User Impression Capping or Content Impression Capping you can further specify criteria for what content that will be curated in your Personalization module. This can be useful if you have a content piece you only want to show a number of times, like e.g. native content. Please see CCE Terminology for the definitions for each option.
Personalized Offer
Personalized Offer enables you to deliver a personalized message or offer to the Audience defined. Select Add Creative to generate a modal view where you can upload the creative you want to utilize for your campaign. A prerequisite for this step is that the creative template you will utilize has been defined. Definition of creative templates is done in Manage Creative Templates in the application.
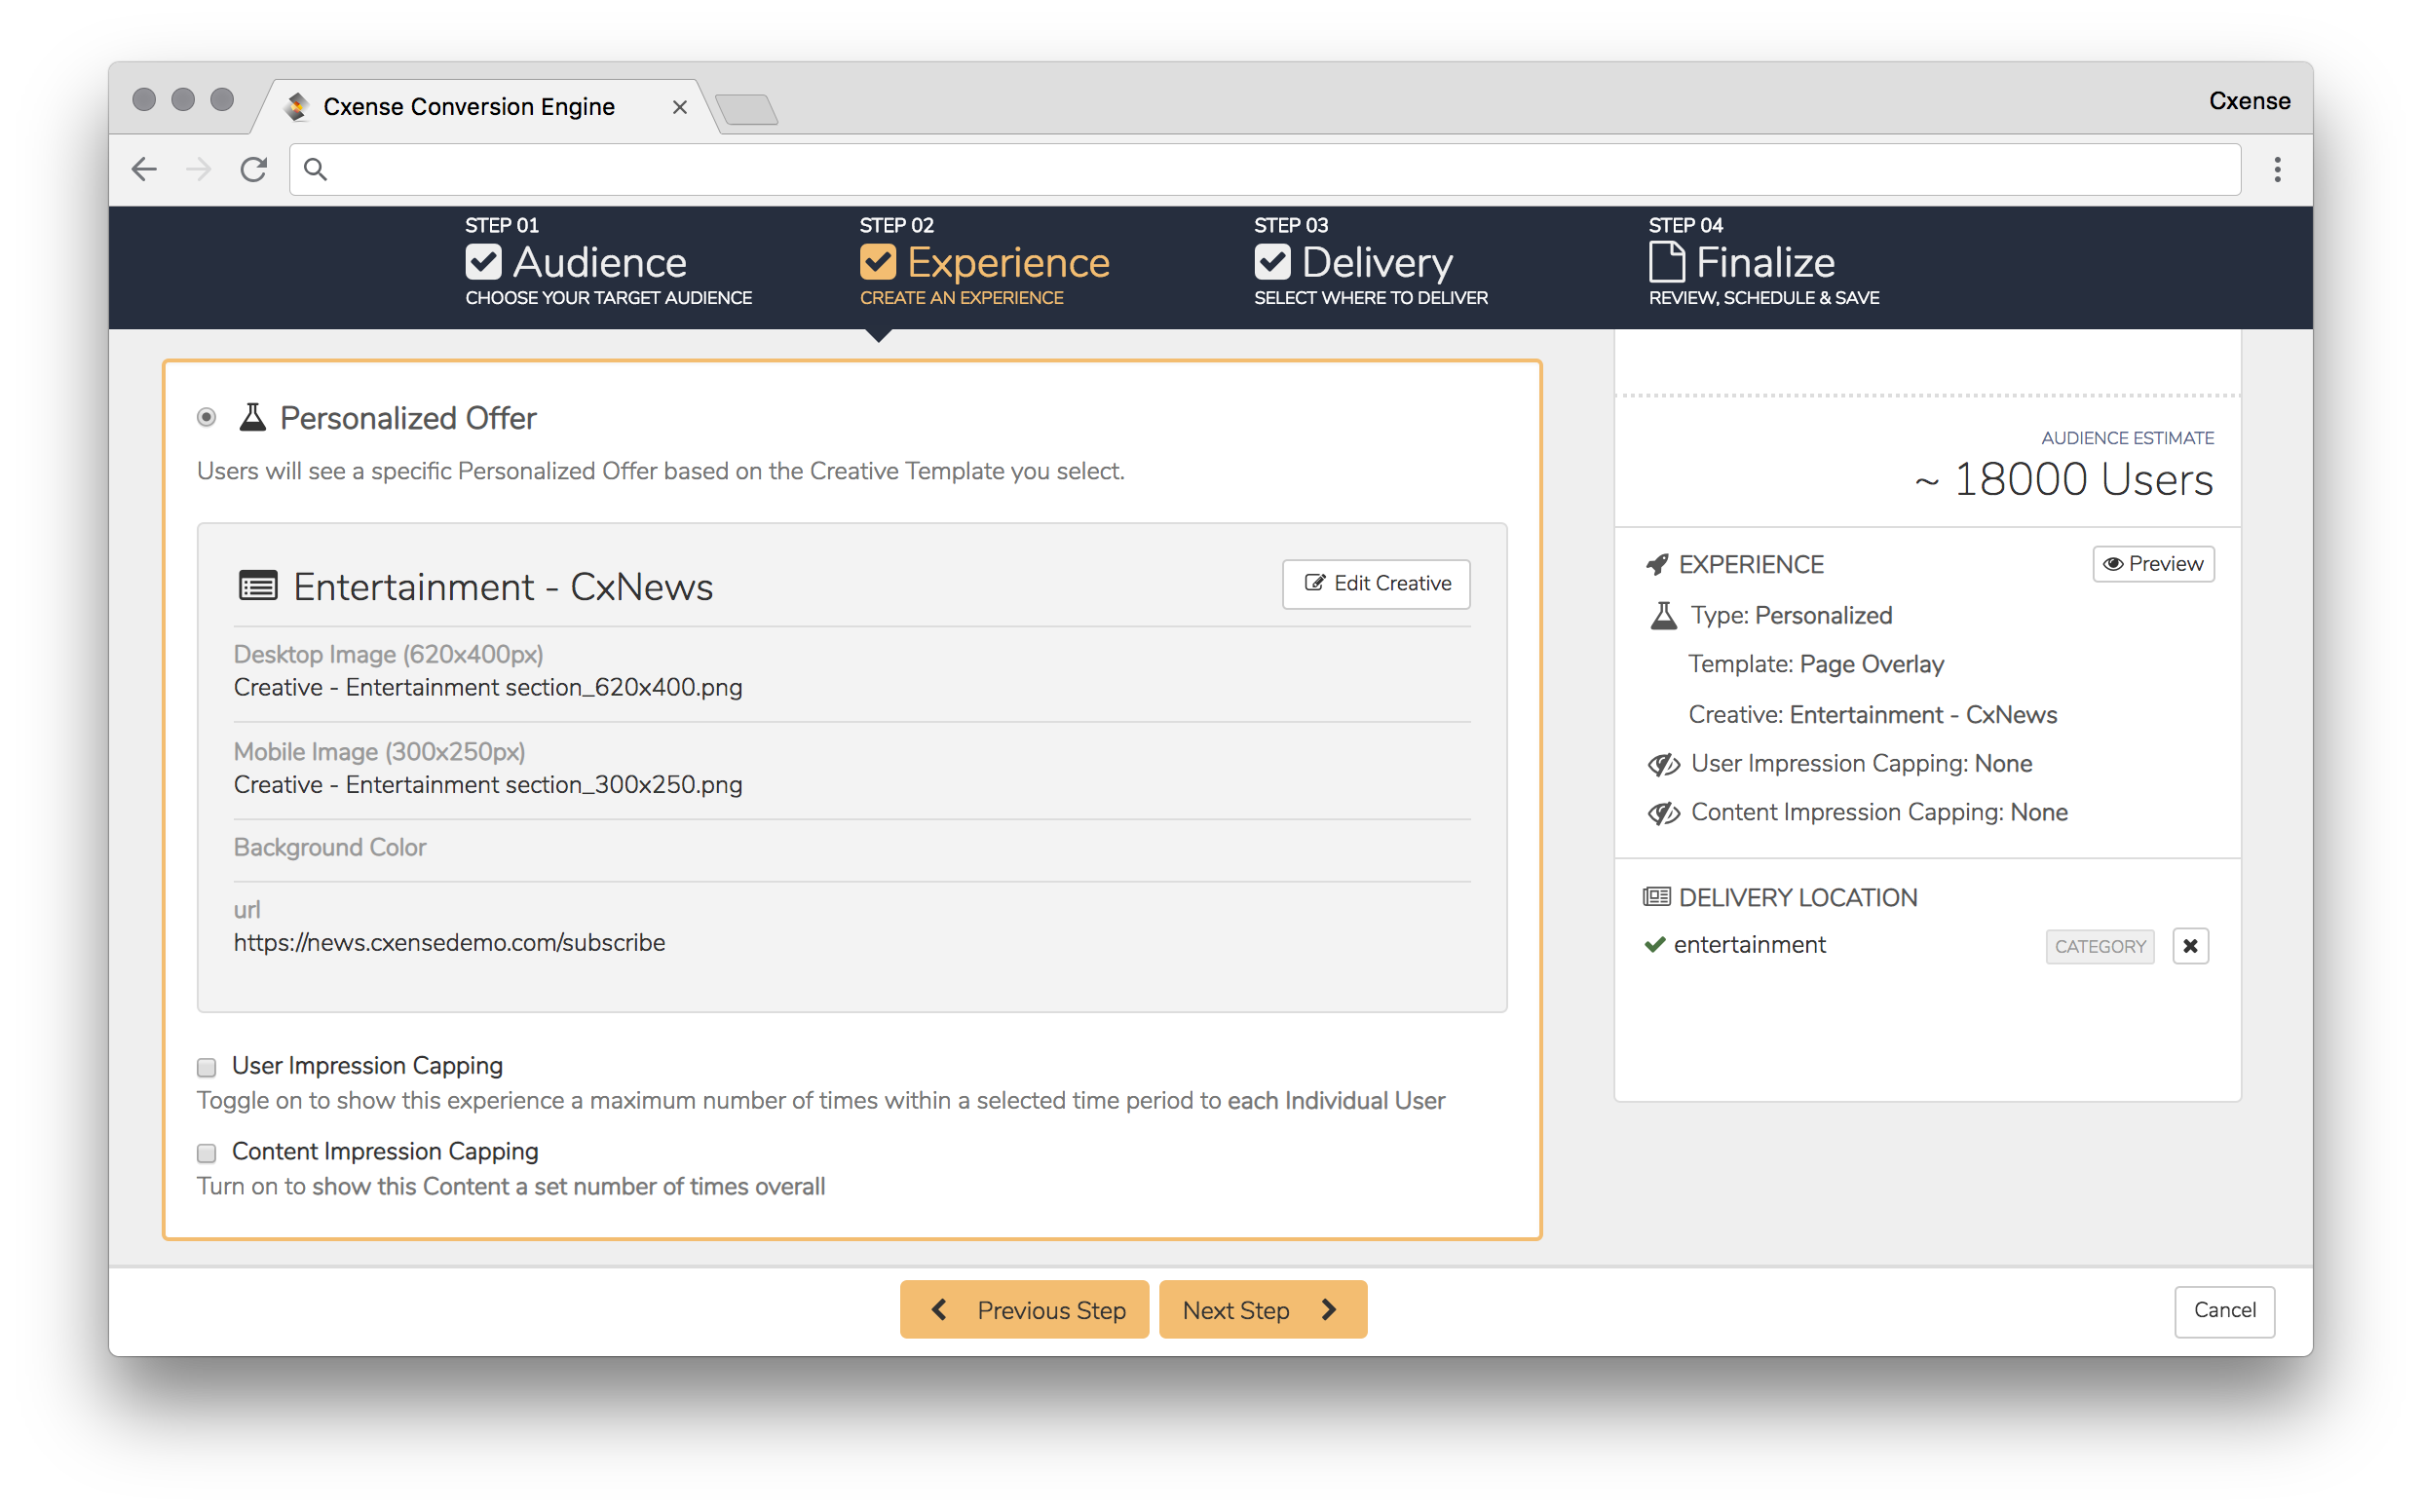
You can also edit the selected creative anytime later in the pop-up widget that opens upon clicking the "Edit Creative" button to the right:
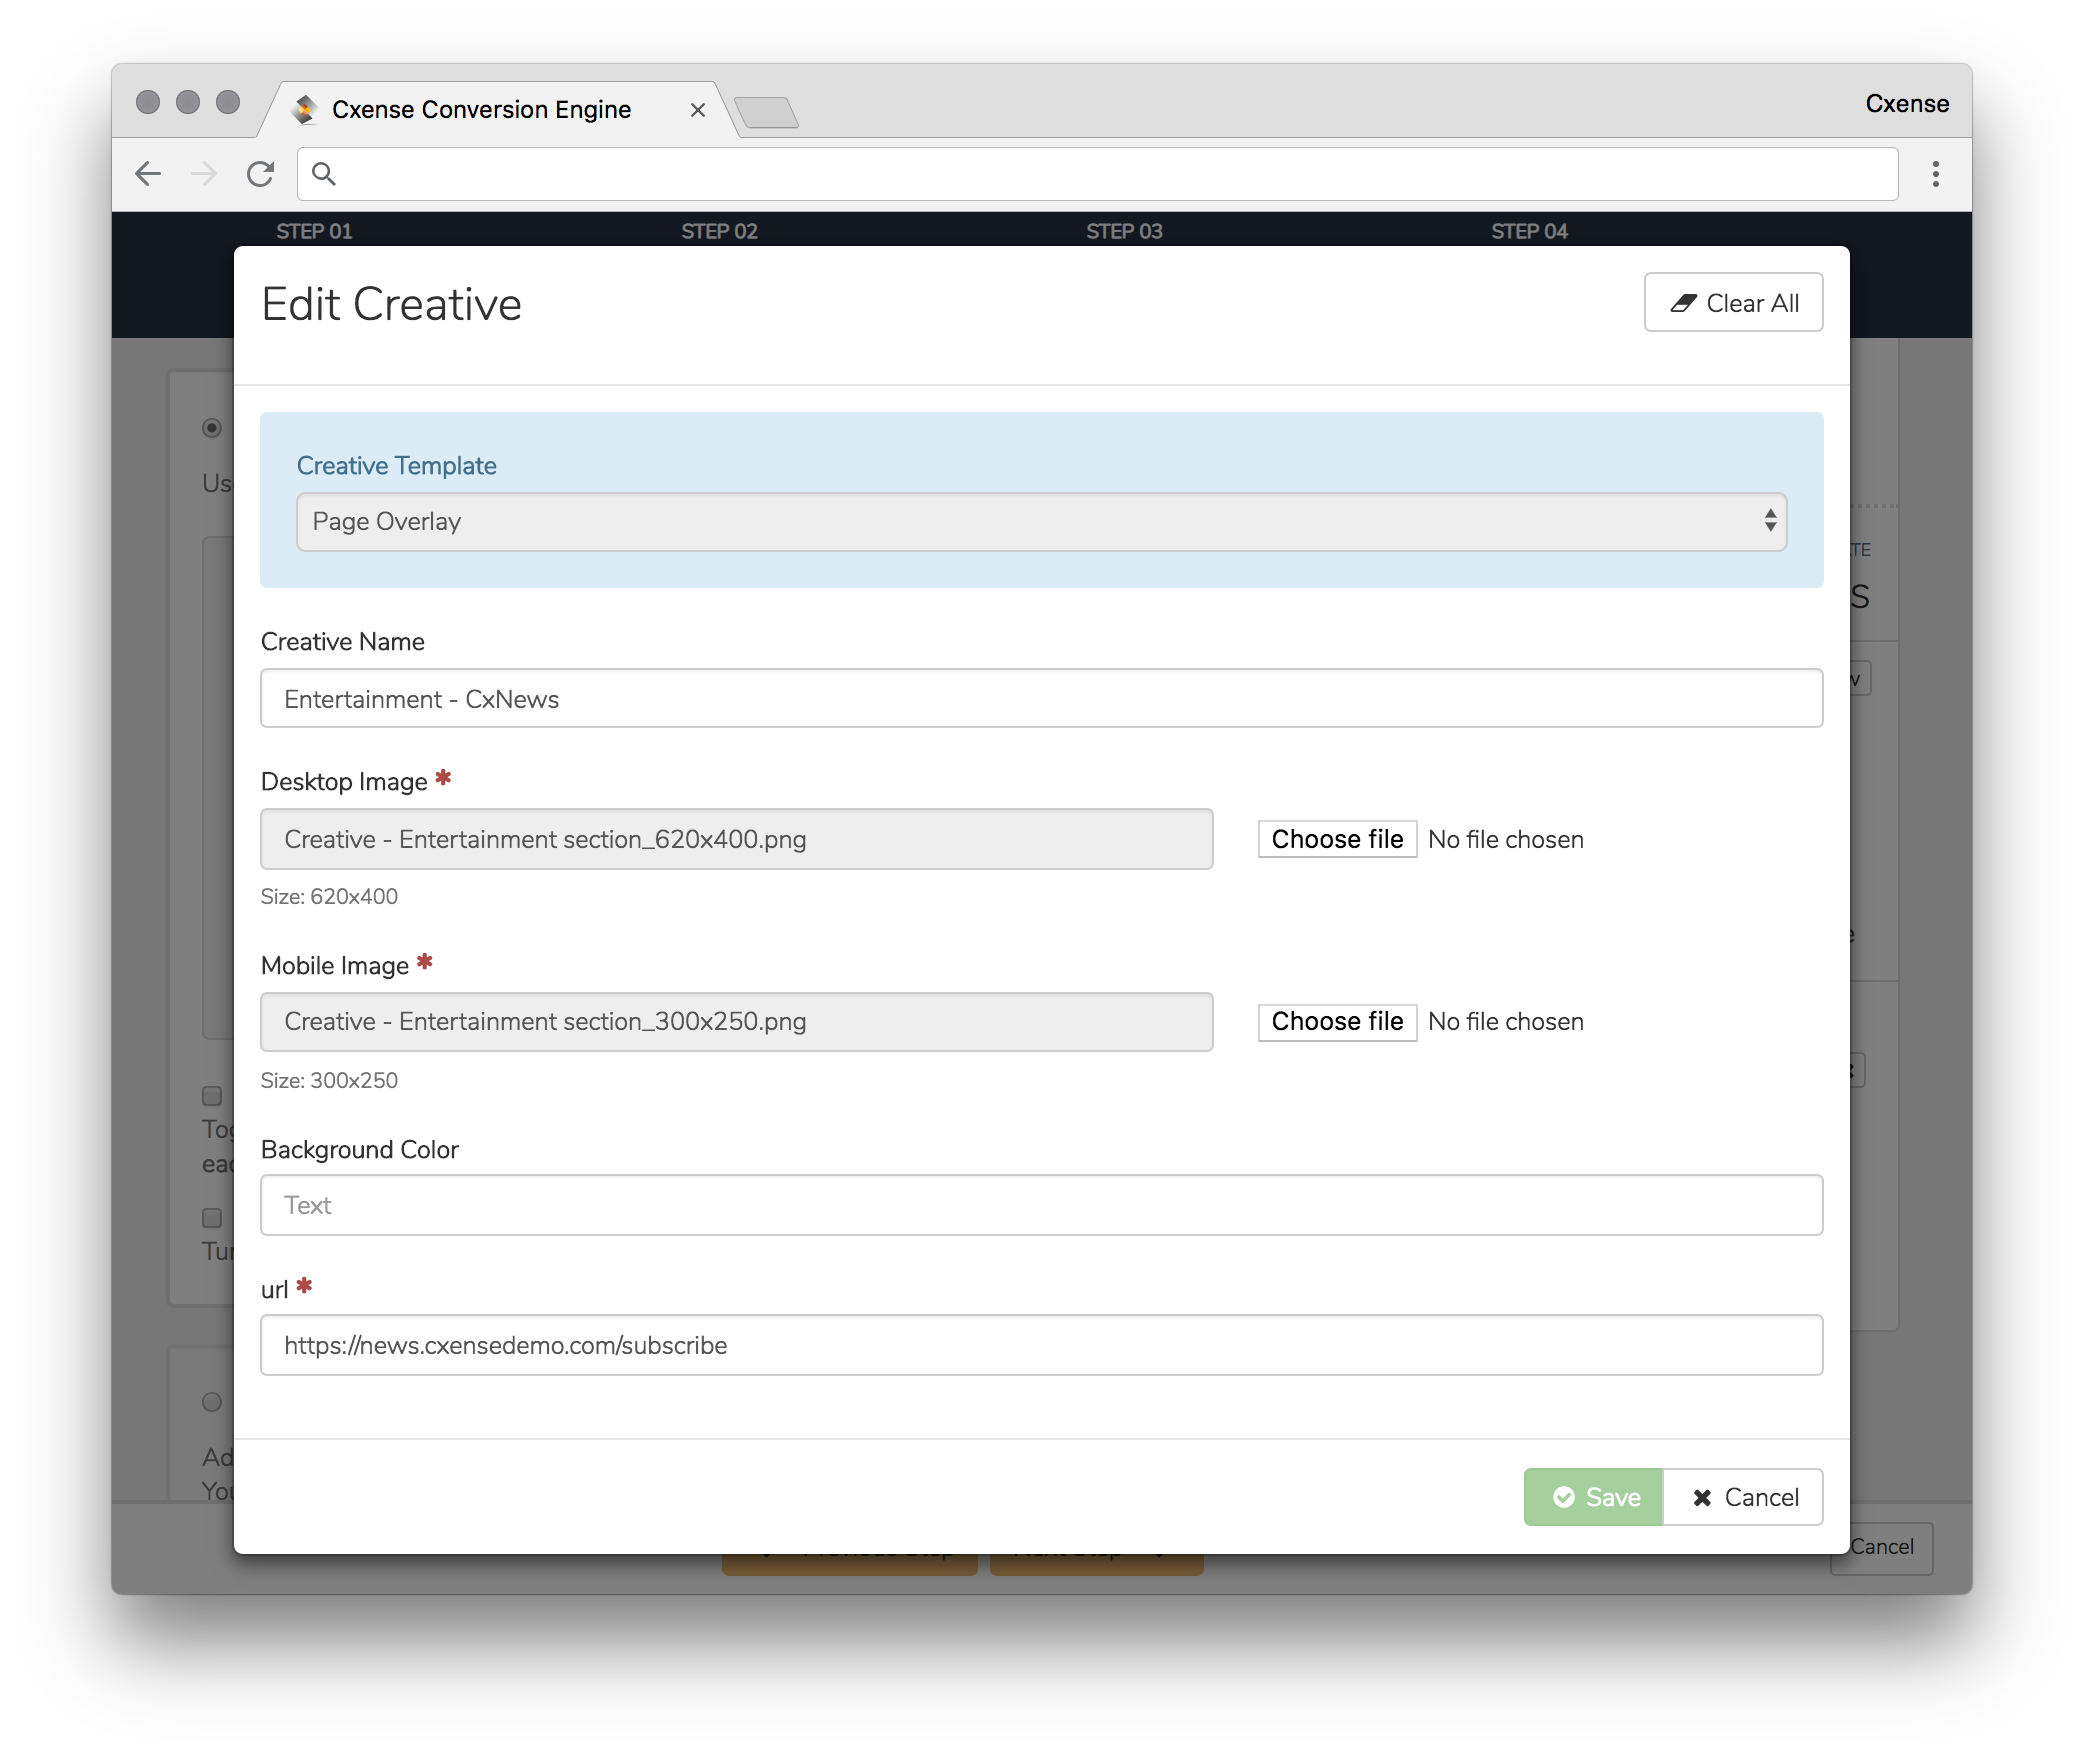
Start by selecting your creative template and fill in the required elements (text / image) that have been specified in your template. Once you have filled in your template, hit save to upload the creative. A preview and further visual specifications can be done under Campaign Presentation in CCE in the Campaign overview after you have completed the process of creating the campaign.
By selecting User Impression Capping or Content Impression Capping you can further specify delivery criteria for the Personalization Offer. This can be useful if you want the Personalized Offer to only be show a specified number of times. Please see CCE Terminology for the definitions for each option.
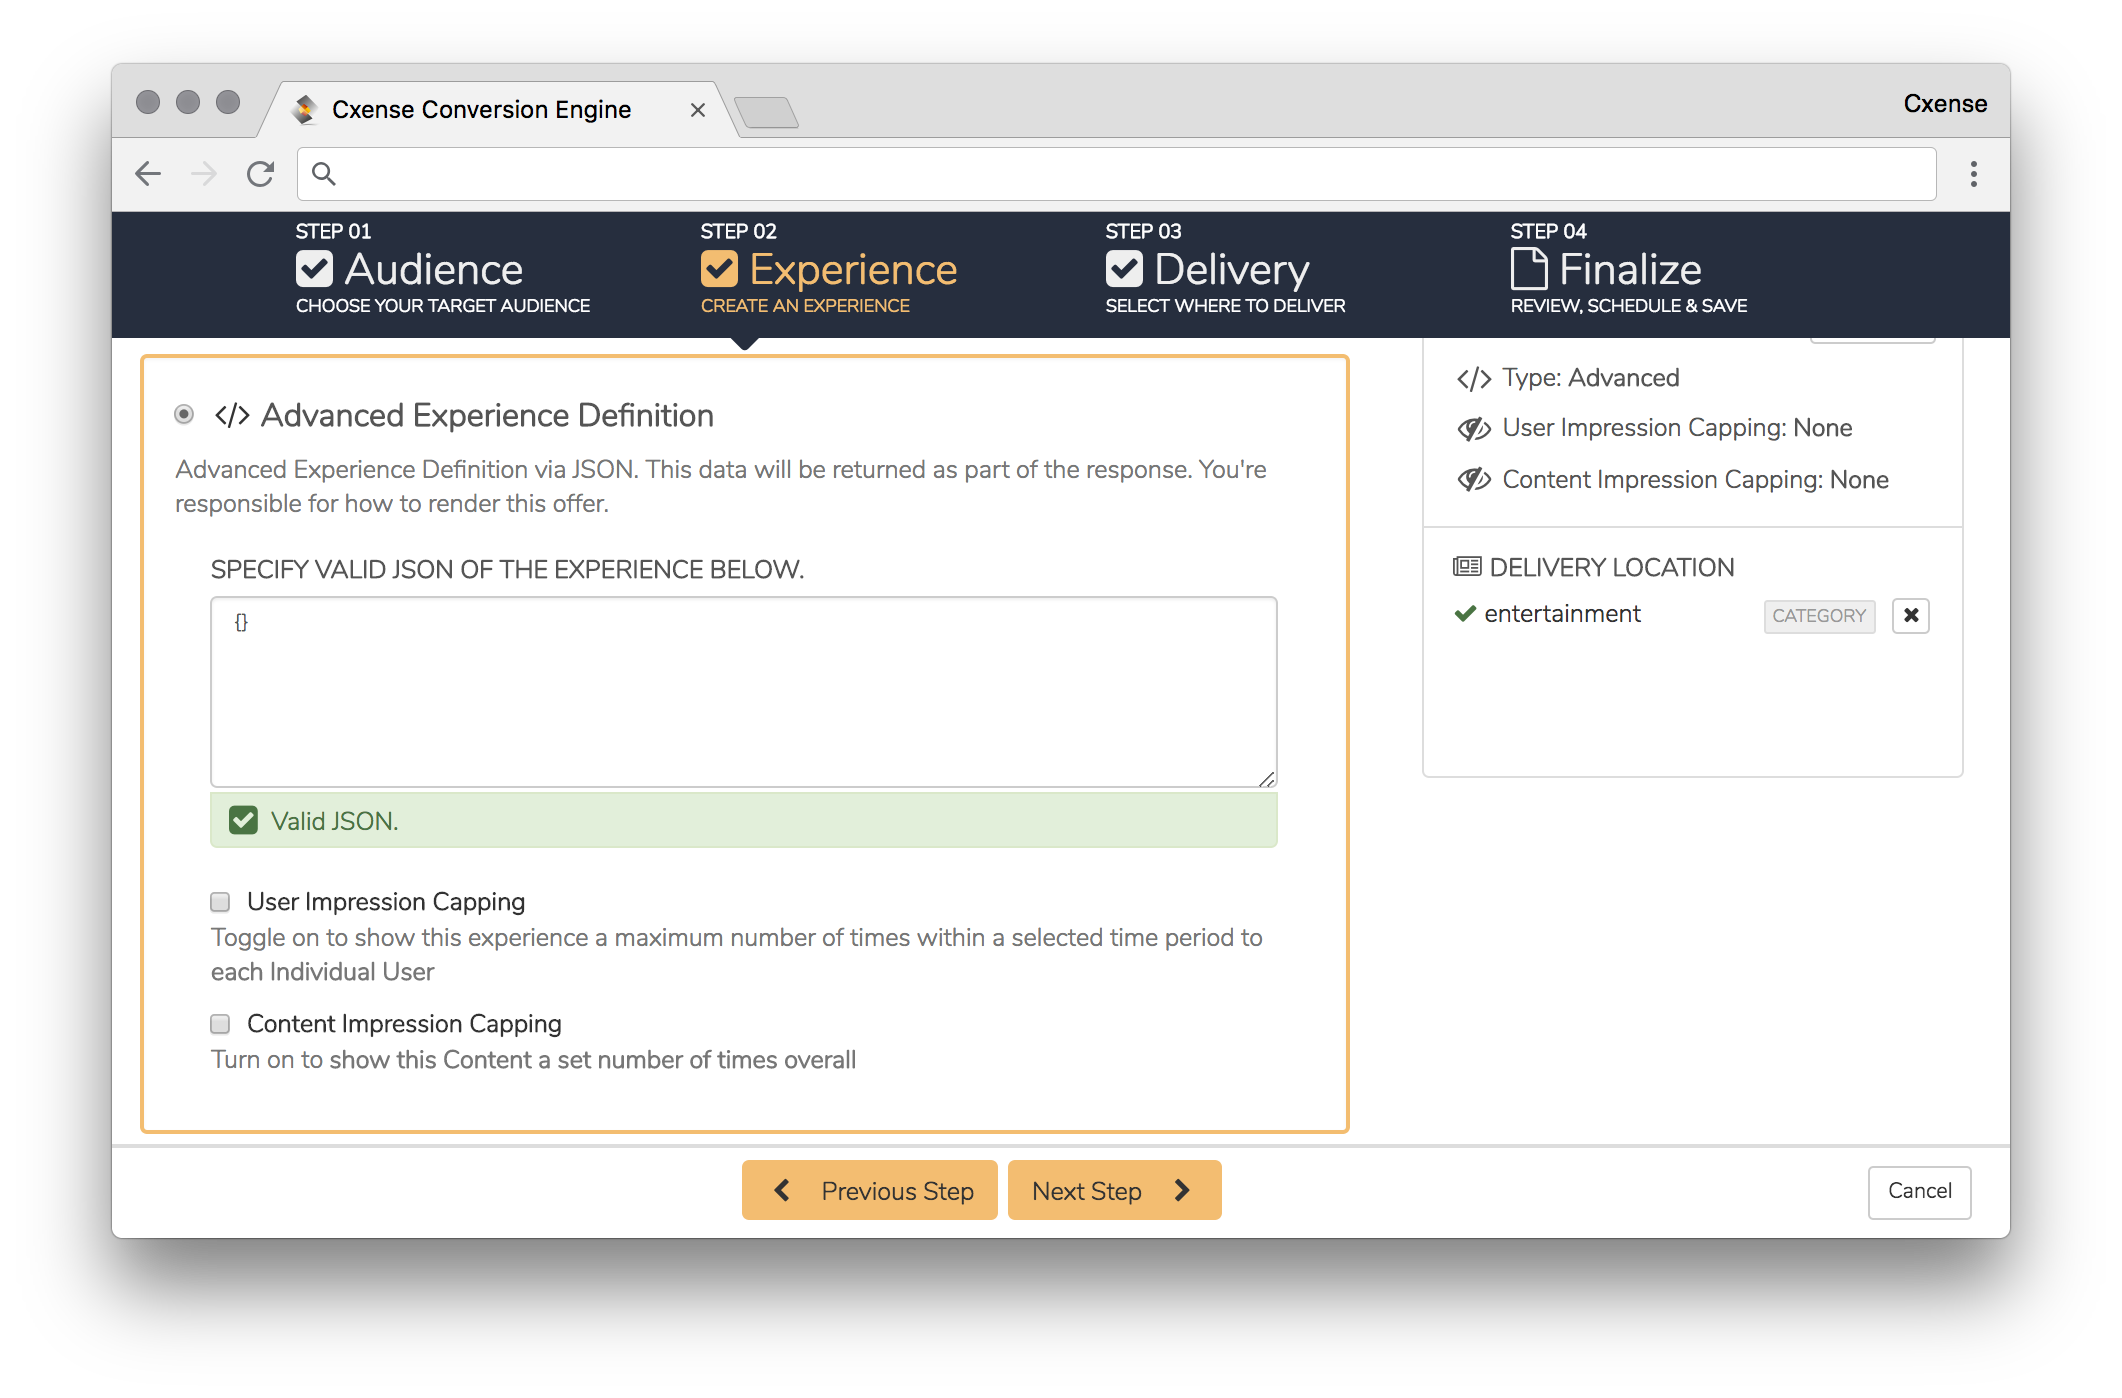
Advanced Experience Definition
To cater for custom experiences, Advanced Experience Definitions gives you the possibility to configure the more advanced experience using JSON. This allows you to specify custom data attributes to return, and then run your own JavaScript on the page that will action these data.
Step 3: Delivery
In the third step you define where on your site the defined Audience is going to receive the Campaign you are creating. E.g. you can give free access only to a "Sports section". This step is optional and you do not need to restrict the campaign to a given area.
For the Delivery selection you can select to deliver or restrict the experience to articles with a given custom content markup passed to Cxense, specific parts of your site structure;
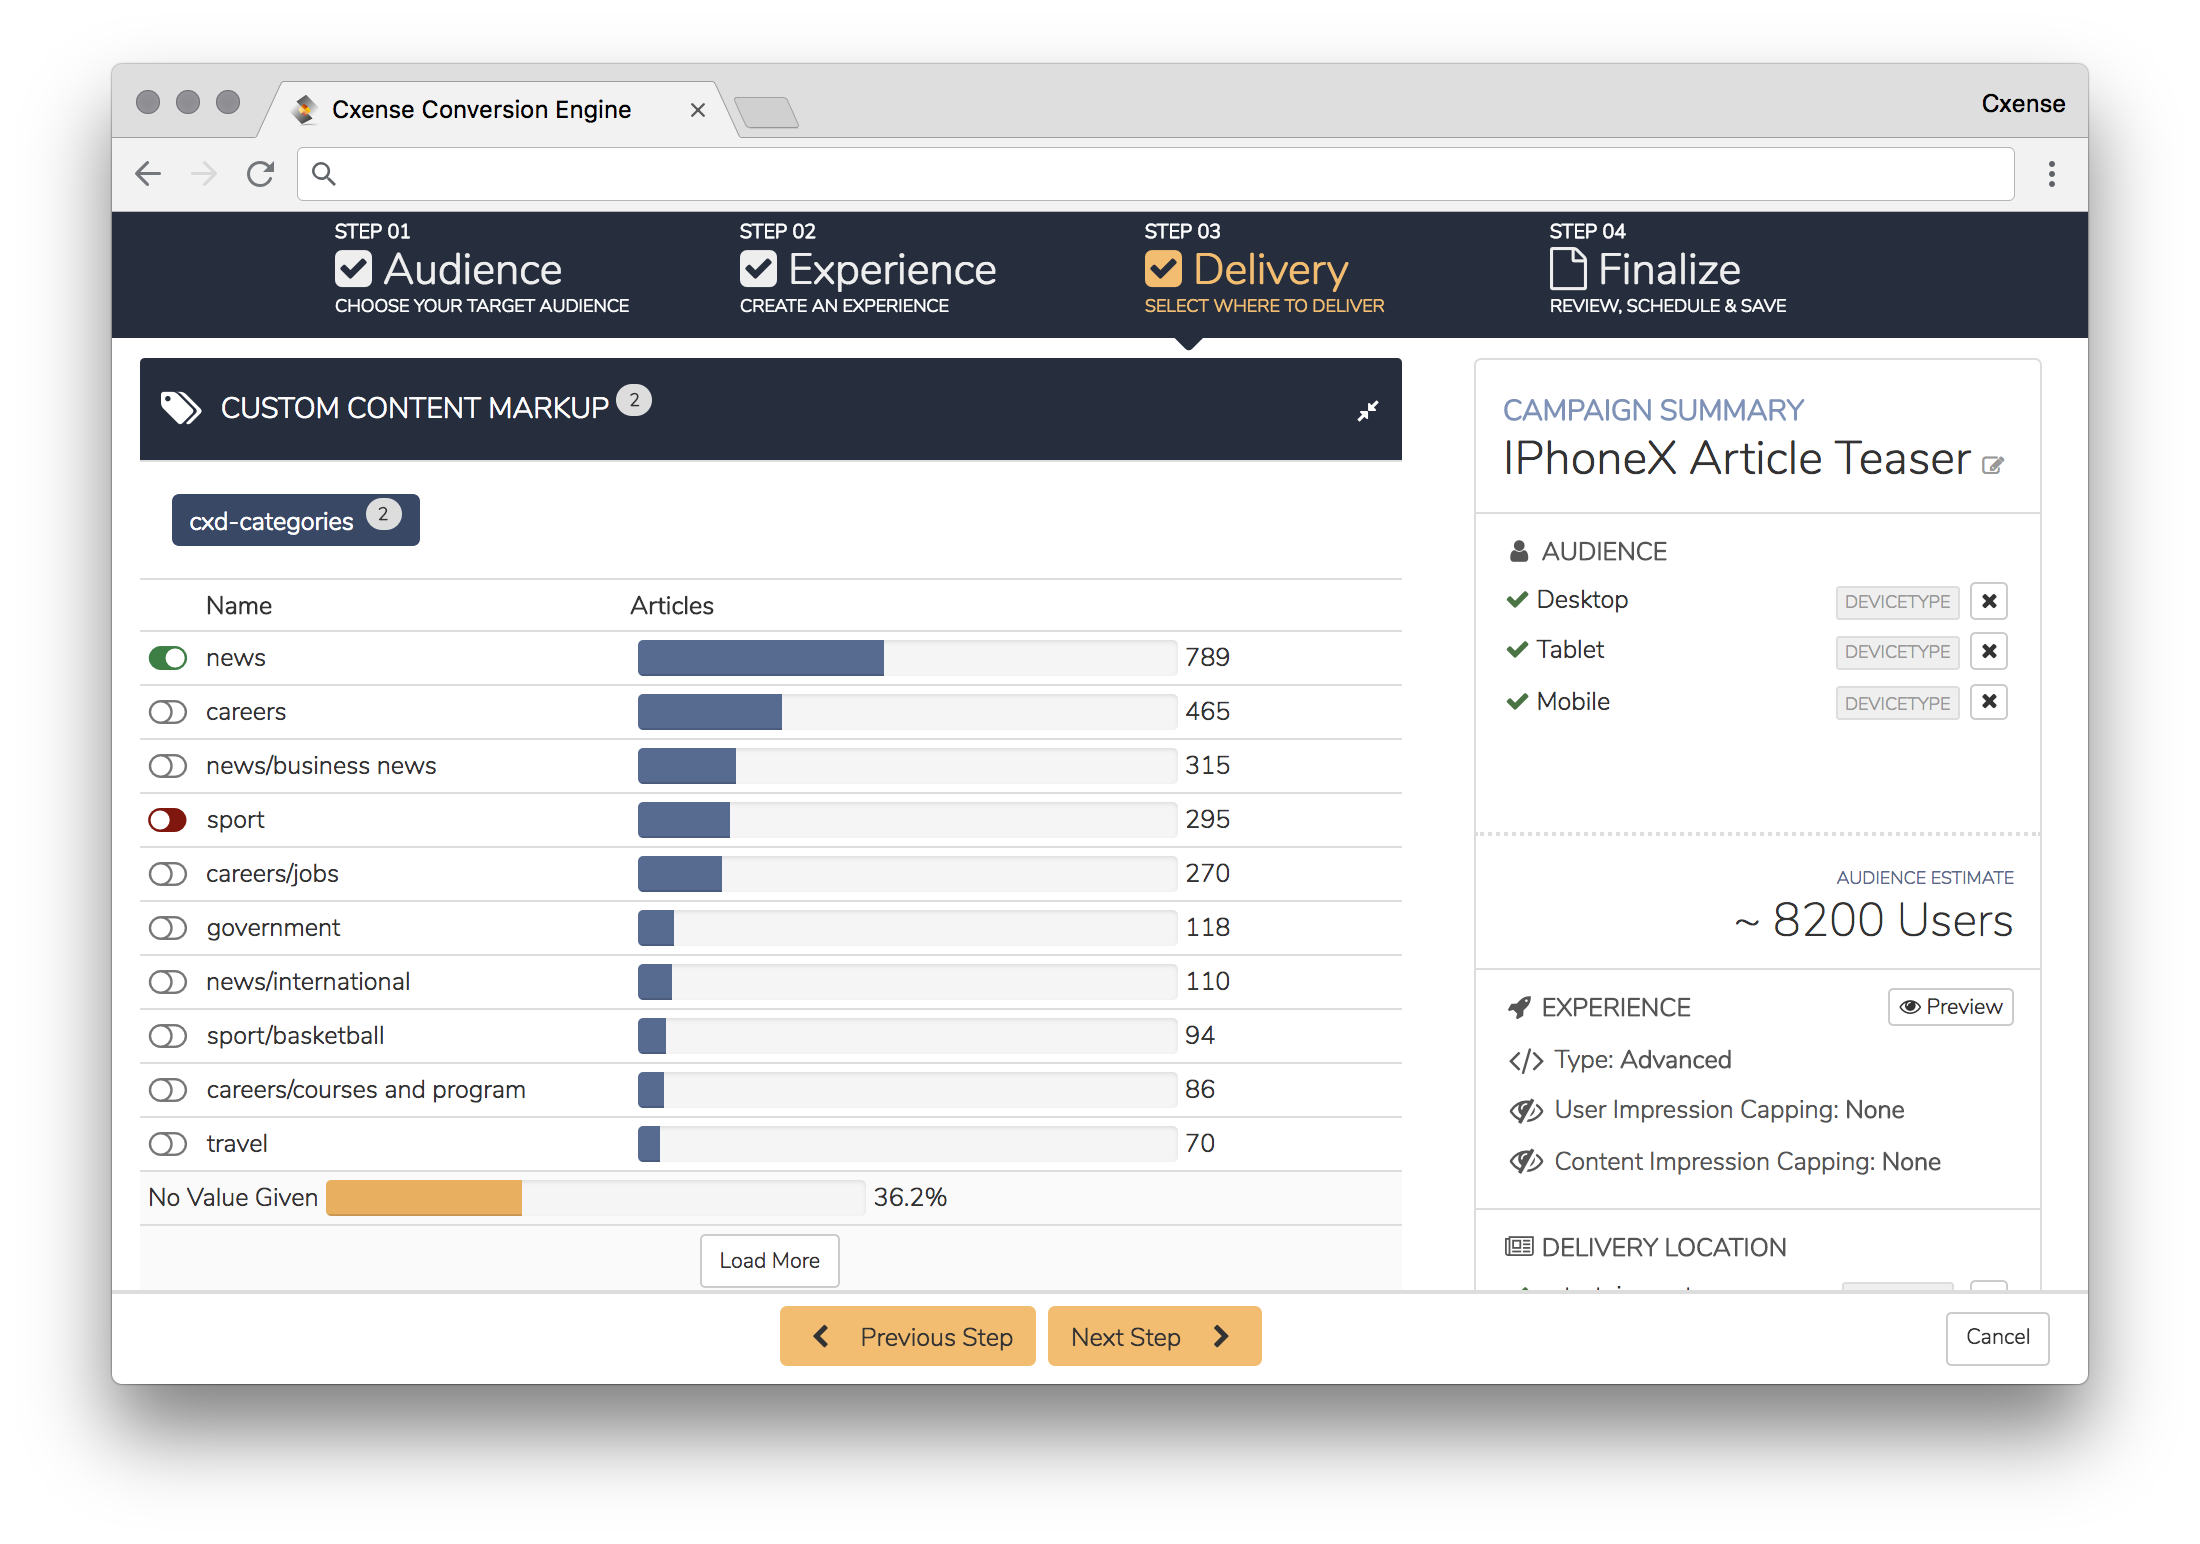
you can tailor the delivery to articles with specific content elements under standard article content like e.g. articles that mention a specific company.
Step 4: Finalize
In the fourth step, you will finalize the campaign you are creating. The step provides an overview of the Audience, Experience and Delivery placement you have defined. Before you save and activate your campaign you have the option to set restrictions on when your campaign should be active by selecting Campaign Schedule. On the Campaign Schedule, you can define both start and end date for the campaign you are creating, or you can select to leave either the start date or end date open-ended.
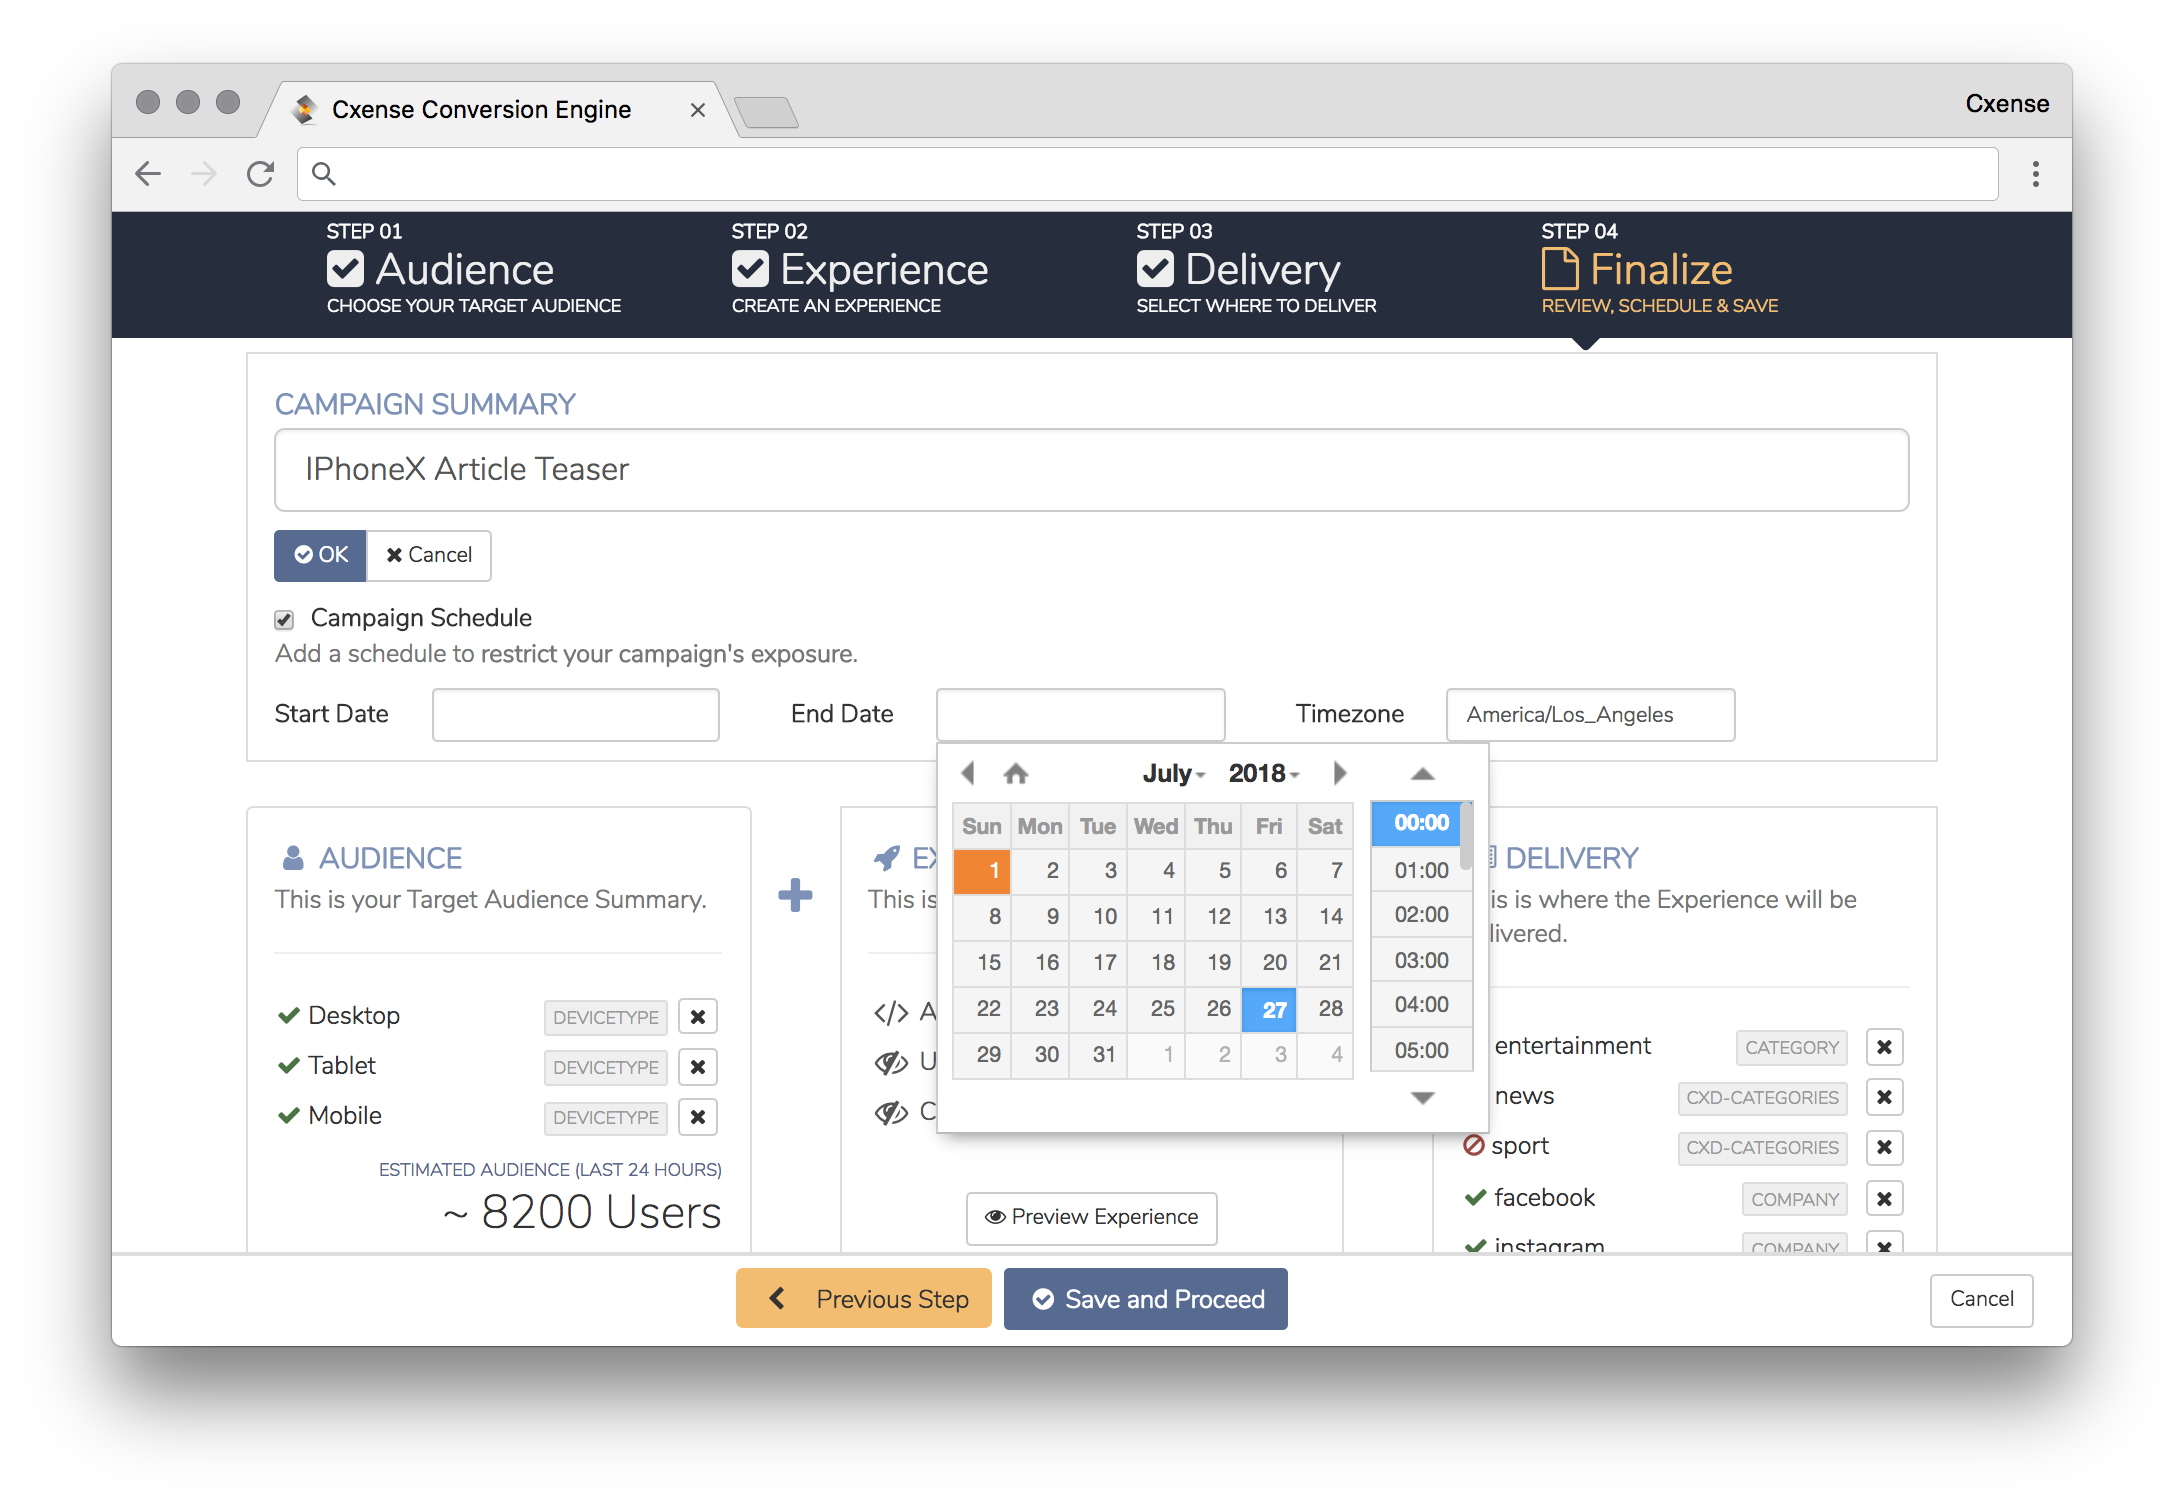
Hit Save and Proceed to activate your campaign. Your new campaign will now be found on your Campaign Set overview as the last campaign before the Default / Fallback campaign.