
Push Notifications overview
Push notification is a message that pops up on the user's device. It is an additional ability to deliver relevant, personalized content to end users' devices from a website even though the user has not opened the website. Push Notifications will let the end-users know about the new content on your website and will notify the subscribers about upcoming/completed events. Furthermore, this feature provides an option to increase the visibility of your content among others.
Notification delivery is available for browsers that have Web Push Protocol (Chrome, Opera, Firefox, Edge) based on a service worker script that the browser runs in the background. ESP’s SDK registers the service worker script and receives permissions from the user's browser. The browser subscription object is stored on the ESP server, and ESP uses this data for sending notifications.
Safari browser has its own API for receiving permission to send notifications. For this reason, we use the .p12 certificate to generate the push package (zip). Then this file is used during requesting permissions in the Safari browser. Instructions on how to create a .p12 certificate are in our FAQ.
Web push campaigns
To create a web push campaign, go to the web push section. Click on the Create campaign button.
Enter an internal campaign name and select the type: recurring, one-time, or breaking news, then click Submit. This will bring you to the push campaign creation wizard.
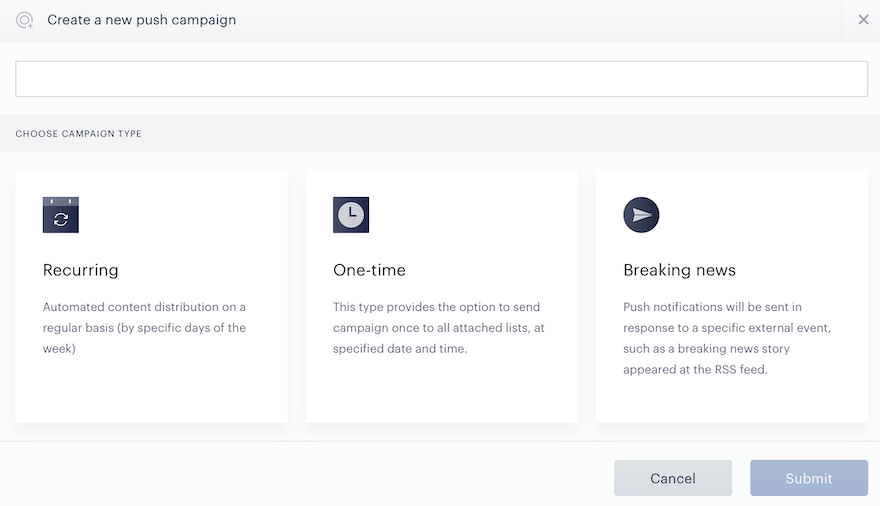
There are five key steps to complete before your push campaign is ready to launch: General, Content, Push List, Schedule, and Integrations. The following sections will walk you through each step in more detail.
For frequently asked questions about setting up Push campaigns, please visit the following link.
General settings
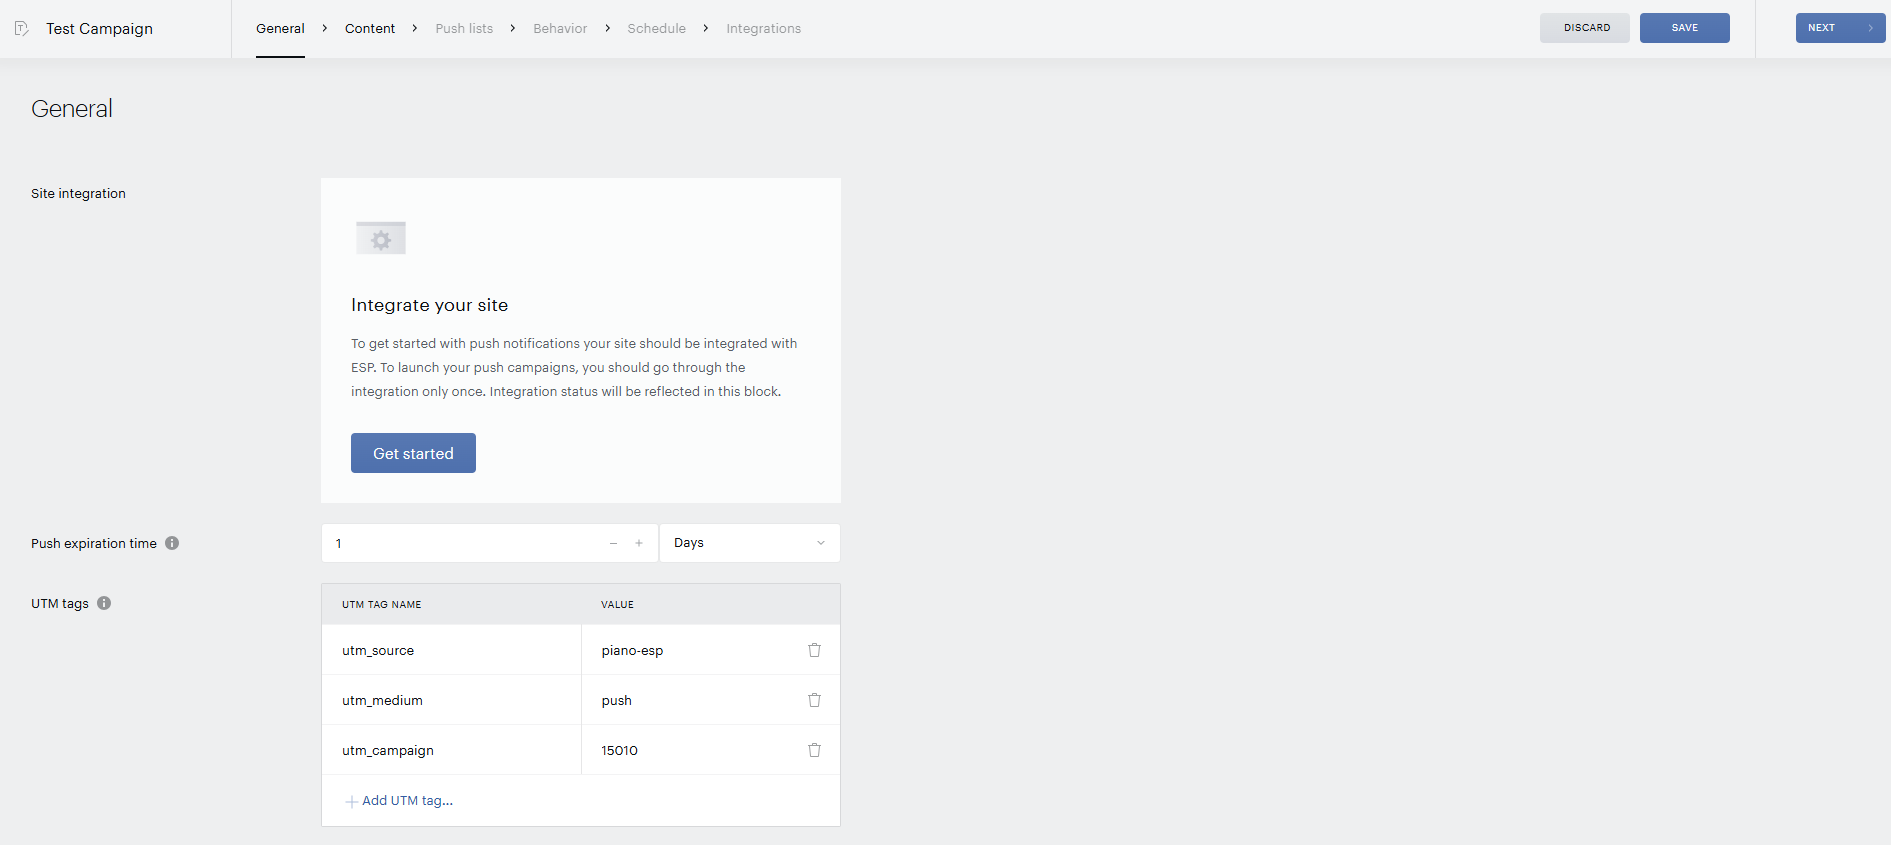
Site integration
At the General step of the wizard, click on the Get started button. You will be forwarded to the Web push integration section, where you can specify the main settings to start push notification sending from your domain.
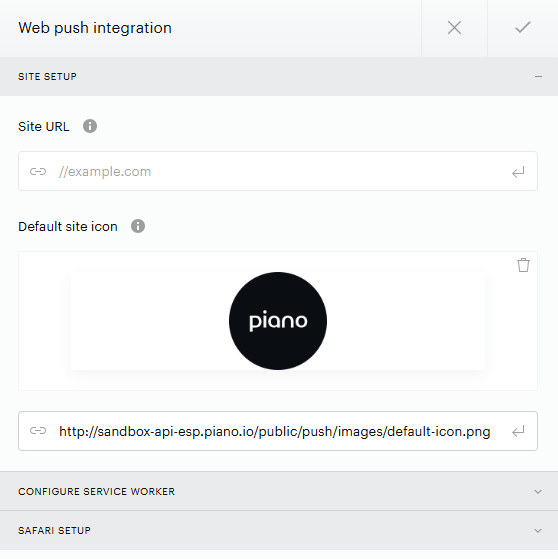
Site setup
-
Site URL: domain of the publisher’s website, which needs to be integrated with our platform using ESP setup files. Please note, this field is used as an allowed domain for getting push subscriptions in the Safari browser. Note: This setting lives on the Site level and can’t be modified for a specific campaign
-
Default site icon: a universal image that will be loaded as a fallback in case no image is set at the Content tab or no image is found from the RSS feed. Here, we recommend attaching your brand logo image. This setting is used for Safari push subscription prompt and for all push notifications, lives on the Site level, and can’t be modified for a specific campaign. Note: In case you leave this field empty, a fallback image for push notifications will contain the Piano logo
Configure service worker
-
Integration status of the publisher’s website with ESP
-
Download ESP service worker: Here, you can download the setup file for the Chrome browser. Upload the JS file into the top-level directory ( root, or ‘/’) of your website. And please note that the JS file’s name should not be changed.
-
'Customize service worker path: in case you need to use a custom service worker file, you could choose this option. To use a custom service worker, copy and paste the string with ESP importScripts into your .js file → and indicate the path to your .js file at the 'Service worker path' input so that we can find the file and your website could be integrated with ESP to send out push notifications.
Safari setup
Push Notifications work on Safari differently from all other browsers. To launch notifications on Safari, you should upload a Web Push Certificate (.p12 certificate) to the ESP dashboard. Please note, to create a unique Push ID for your website, you need to have an active paid Apple Developer subscription. If you don’t have one, you can contact your account manager, and we will help you to generate a .p12 certificate.
In addition to the above integration settings, you can configure the Push expiration time, when the notification will expire and will be dropped from the queue if the user’s device remains offline for a specified period of time.
And UTM tags, through which you can track how traffic from the specific campaign behaves on your website.
Content
Depending on the campaign type that you selected when creating the push campaign (recurring, one-time, or breaking news), you can configure the appearance and content of push notifications.
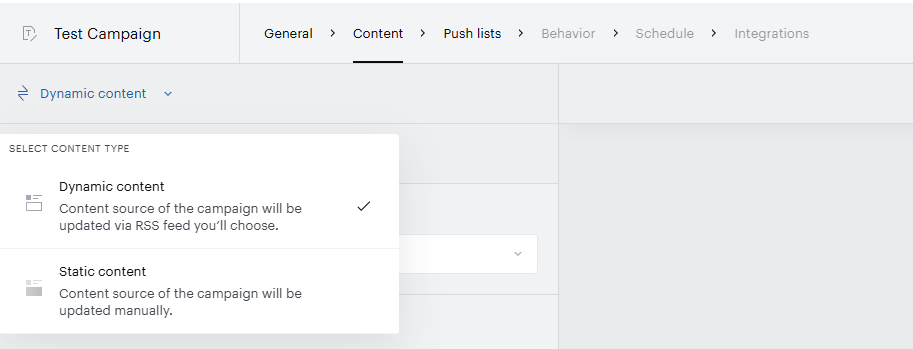
For recurring and one-time push campaigns, you can select either Dynamic content or Static content. For breaking news push campaigns, only the Dynamic content type is available.
Static content type and main settings
For the Static content type push campaign, the content of the campaign needs to be updated manually. You can configure the following fields:
-
Title: The title of the push notification.
-
Description: A message that will display for users.
-
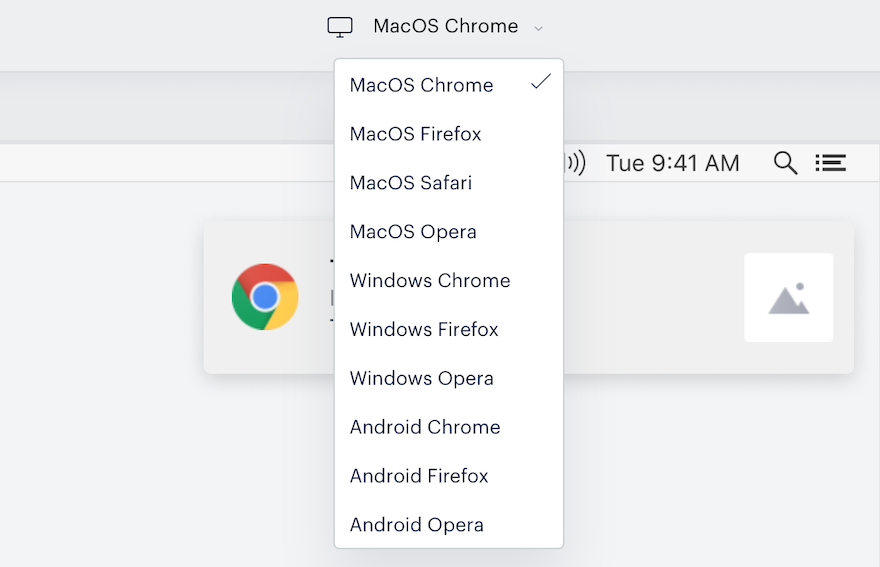
Image: Push notifications will appear with this image below the notification content if the browser supports the large image property (on Windows or Android only). On Mac, the image is displayed as a small icon on the right side of the notification.
-
Link: The link to the article on your website.
-
First button, Second button: You can add additional buttons with custom website links and button texts. If you enable this option, the extended push notification will be shown on devices running Windows and Android OS, as well as on all browsers except Firefox. On macOS, this option is only available for the Chrome browser.
Please note, you can preview push notifications on different browsers and operating systems from the Preview window.
Dynamic content type and main settings
For Dynamic content type push campaigns, the campaign content will be automatically updated based on the RSS feed you select.
The Sources tab manages how Piano connects to your content management system, typically in the form of an RSS feed. Click Add new source, enter a valid link to the RSS/Atom feed, and click the checkmark to add this RSS feed as a source. Once the RSS feed was successfully added, you can attach it to the push campaign.
We recommend that the language of the RSS feed be the same as the site language that was selected during the setup process. It's important to note that the content of the push notification: title, description, image, and the link will be picked up from the attached RSS feed.
The Settings tab allows you to define how content will be selected for push notifications. You can find more details about Content selection types here.
Key functional points for the Push notification Breaking News block include that when multiple new stories are detected during a single feed check across the attached sources, only one notification is sent. Content selection always chooses just one story - the latest news item added to any of the attached feeds, regardless of how many new stories are found at once. The push template preview reflects this by displaying only the most recent story based on publication date across all sources. As a best practice, stories should be added to the Breaking News source one at a time to ensure accurate triggering and delivery.
Push lists
Push lists are comprised of subscription IDs, and each subscription ID is mapped to a specific web browser instance and OS that allows push notifications.
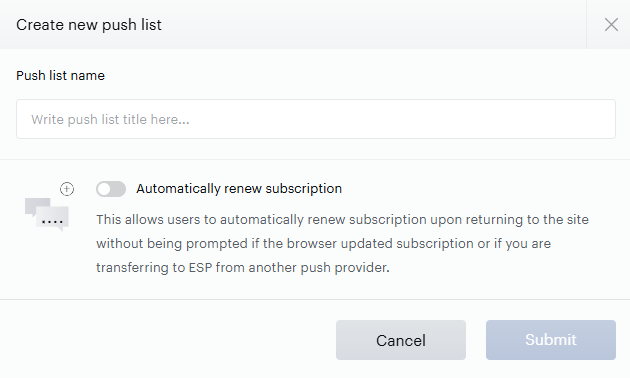
The Push lists tab allows you to manage the list of subscribers who receive your push notifications. You can only attach one push list to a particular push campaign. You can also create a push list by going to the Web push → Push Lists section. To add a new push list, click Add push list and enter the name for your list.
Behavior
At this wizard step, you can customize how push notifications will behave on the user’s device:
Renotify: specifies whether the user should be notified again in case the article was updated (upon condition that the user hasn't yet clicked on the initial notification)
Silent: specifies whether the notification should be silent, i.e., no sounds or vibrations should be issued, regardless of the device settings
Vibrate: run vibration when a notification is displayed, assuming the user’s current settings allow for vibrations (i.e., the device isn’t in silent mode).
Require interaction: notification will remain visible and active until the user clicks or dismisses it, rather than closing automatically.
Schedule
You can specify the time zone and time frame for your push campaign. Piano recommends a wider time frame, as our system can detect the best delivery times for users, so more options help us set better, more specified delivery times. For example, if you enter from 9 to 23, our system will use historical data to determine the best time to send the push notification for a particular user within the specified time frame.
Recurring campaign type implies an automated content distribution on a regular basis. For this campaign type, push notifications will be sent according to a specified schedule (days of week and time frame).
One-time campaign type provides the option to send the campaign once to the attached list, at a specified date and time, or to send it out immediately (right after campaign activation).
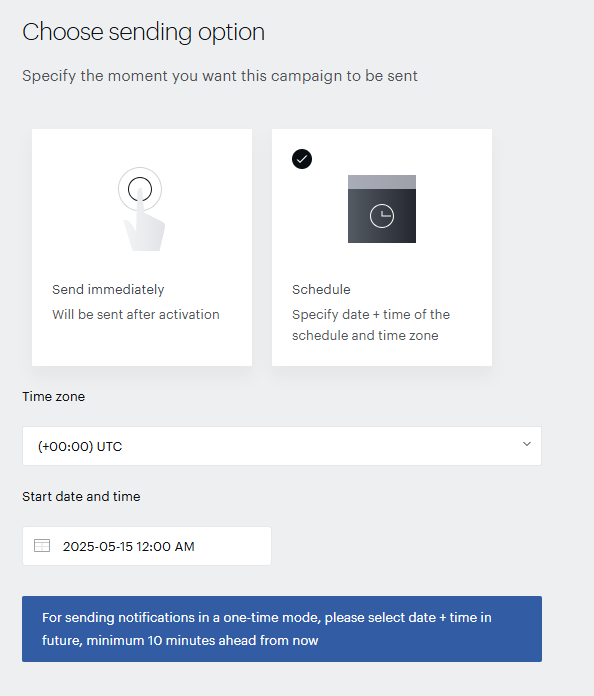
But please, keep in mind that once a One-time campaign has been sent, it will be automatically deactivated. If you want to send it out again, you can use the Resend option.
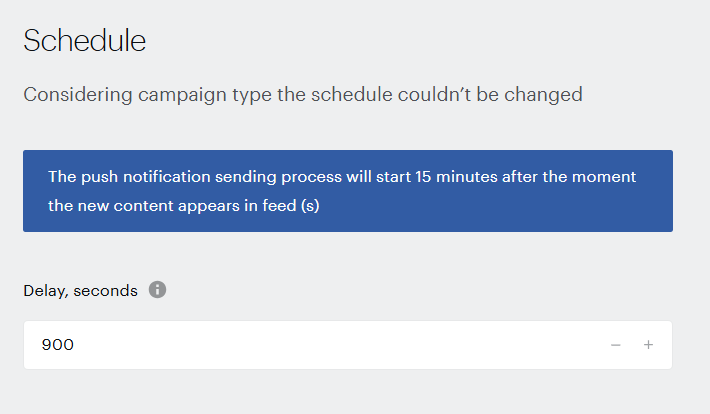
The Breaking news campaign type push notifications will be sent in response to a specific external event, such as a new story addition to the attached RSS feed.
You can also indicate Delay, which allows you to set a waiting time, in seconds, from the moment new content appears in the RSS feed. You can use this time to make the necessary changes in the Push campaign settings before the breaking news push notification is sent.
Integrations
This section is the same as the email campaign functionality. You can find more details here.
Composer integration
In case you are a Composer client, you can enhance push notifications capabilities using Composer Experiences to drive push campaign enrollment. Also, you have an option to use a push sign-up template that is a fully configurable message that can be shown before the system browser prompts. The main purpose here is to enroll a user in a push campaign with a remarkable call to action.
Targetting
With a Composer Experience, you can target all pages for push enrollment or define the specific pages on which the enrollment experience will run using the existing Pages Card.
User segment
You have the ability to target a user segment to show push enrollment according to specific browsers and rules. A user visiting a page where this experience is running may already be enrolled in the push campaign. We will not offer someone who has already enrolled in a campaign the option to enroll again.
Show Push signup card
Once you have added the Push sign-up card to a Composer Experience, you can select the push list from the list of already created lists, and attach a push sign up to a specific push list. It means that all users' opt-ins will be passed to push lists within ESP. You can create a push sign up template or use one from the VX template library. If you do not select any push sign up template, but have created the experience, users will see only the browser prompt to receive notifications from our domain. If you select a push sign up template, the user will see it, if users confirm the push sign up, they will see a browser prompt to receive notifications from our domain. You can use the setting "Don't show to users who already enrolled the push notifications from your domain" to avoid sending notifications to users who are already enrolled.