
How to get started?
Please have a look at the following points in order to successfully start configuring Push notifications.
ESP clients without Composer
-
Please make sure that the main integration code of our SDK is installed on all pages
-
The service worker file is located in the top-level directory of your website (as described in the instructions here in Point 4.)
-
You start collecting users' permissions to receive push notifications
-
If your website contains the SDK of another push provider, you need to remove the old one and install the Piano ESP SDK, since sending push campaigns can only work from one service
-
If you previously used the services of another push provider and want to re-subscribe users who have already allowed notifications on your site, you need to migrate the list of these users to the ESP. Moreover, if they have already been signed up, then the browser prompt to receive notifications will not be displayed to them
ESP clients with Composer
-
Please make sure that the Composer SDK contains a part of the ESP integration code
-
The service worker file is located in the top-level directory of your website (as described in the instructions here in Point 4.)
-
You start collecting users' permissions to receive push notifications
-
If your website contains the SDK of another push provider, you need to remove the old one and install Piano Composer SDK (containing the ESP integration part), since sending push campaigns can only work from one service
-
If you previously used the services of another push provider and want to re-subscribe users who have already allowed notifications on your site, you need to migrate the list of these users to the ESP. Moreover, if they have already been signed up, then the browser prompt to receive notifications will not be displayed to them
How to start collecting users' permissions to receive Push notifications (without Composer)
This applies only to the native browser prompt, without the use of the Composer Show push sign-up card.
You do not need to follow the steps below if you are using ESP through Composer, you can skip to the section here.
Adding a Push User to a Push List via SDK
-
Add the ESP integration code via Composer or directly to your website.
-
Add the relevant functions to the window scope:
async function subscribToPushSquads(squads) { const keyInStorage = 'esp-already-subscribed-to' + squads.join(); const currentPushState = await window.PianoESP.getCurrentPushState(); if (localStorage.getItem(keyInStorage) && currentPushState !== 'prompt') { console.warn("PianoESP: Push user has already subscribed"); return; } window.PianoESP.subscribeToPushSquads(squads) .then(() => { localStorage.setItem(keyInStorage, new Date()); console.log("PianoESP: You have successfully signed up, congratulations!"); }) .catch((error) => { console.error('error: ', error); }); } function tryToSubscribeUserToPushListOnLoad(squads) { var isSafari = /^((?!chrome|android).)*safari/i.test(navigator.userAgent); // safari does not allow to show prompt without user activity if (isSafari) { return; } subscribToPushSquads(squads); }; -
Add the callback
onloadtoPianoESPConfig, for example:onload: function (data) { tryToSubscribeUserToPushListOnLoad([<PUSH_SQ_ID>]); //<PUSH_SQ_ID> need to change to correct push list ID }
Note: Replace <PUSH_SQ_ID> with the correct push list ID
How to start collecting users' permissions to receive Push notifications (via Composer)
In case you are a Composer client you can collect users' permissions by displaying a push sign-up template and attaching it to a specific push list.
There is no need to change your scripts or do further implementation work other than the points described below:
-
First of all, you need to make sure that the Composer SDK contains part of the ESP integration code
-
Then you need to create a Composer experience and add the Show push signup action card as described in this article
How to launch your first Push notification campaign
To successfully launch your first push notification campaign you should:
-
-
Go to the Web push section and click on the Create campaign button.
Enter the campaign name (internal use only) and select type: Recurring, One-time, or Breaking news then click Submit. This will bring you to the push campaign creation wizard.
-
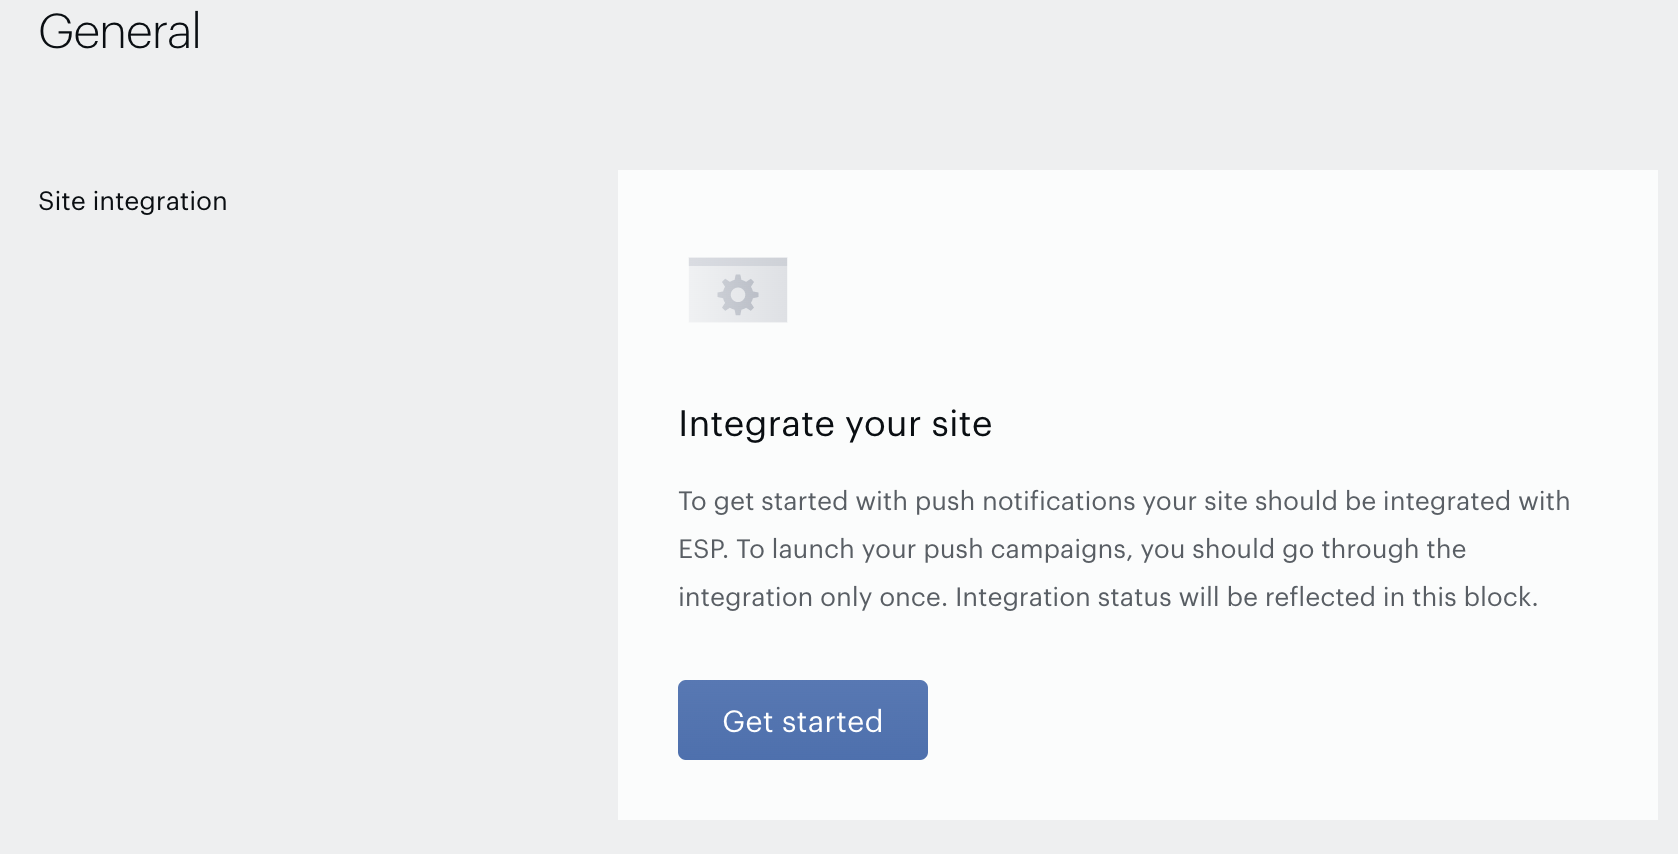
At the General step of the wizard click on the Get started button. You will be forwarded to the Web push integration section where you could specify the main settings to start the push notification sending from your domain.
-
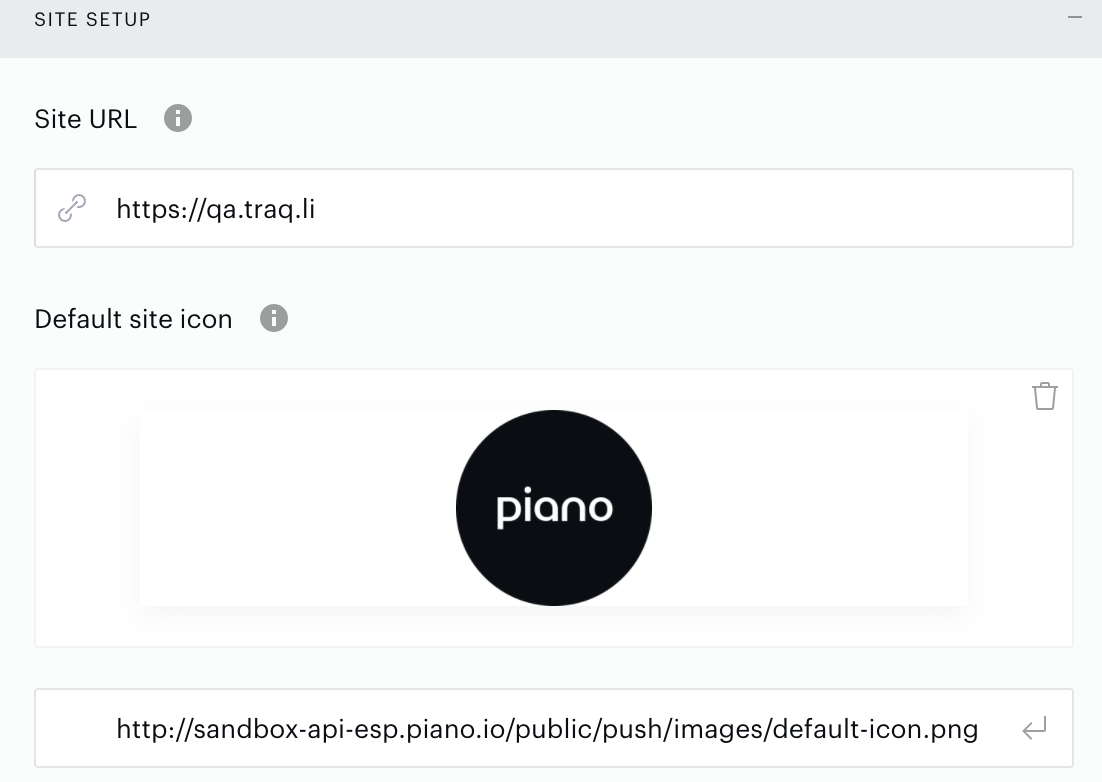
Indicate the correct link on your website in the Site URL input and attach the Default site icon.
-
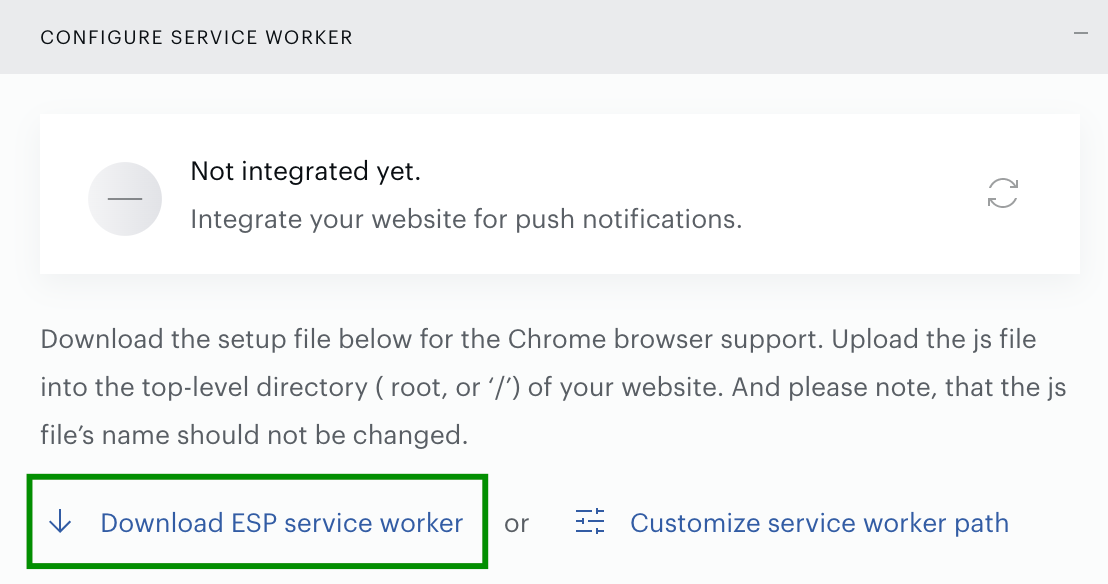
At the Configure service worker part of the setup click on Download ESP service worker and upload this .js file into the top-level directory of your website.
-
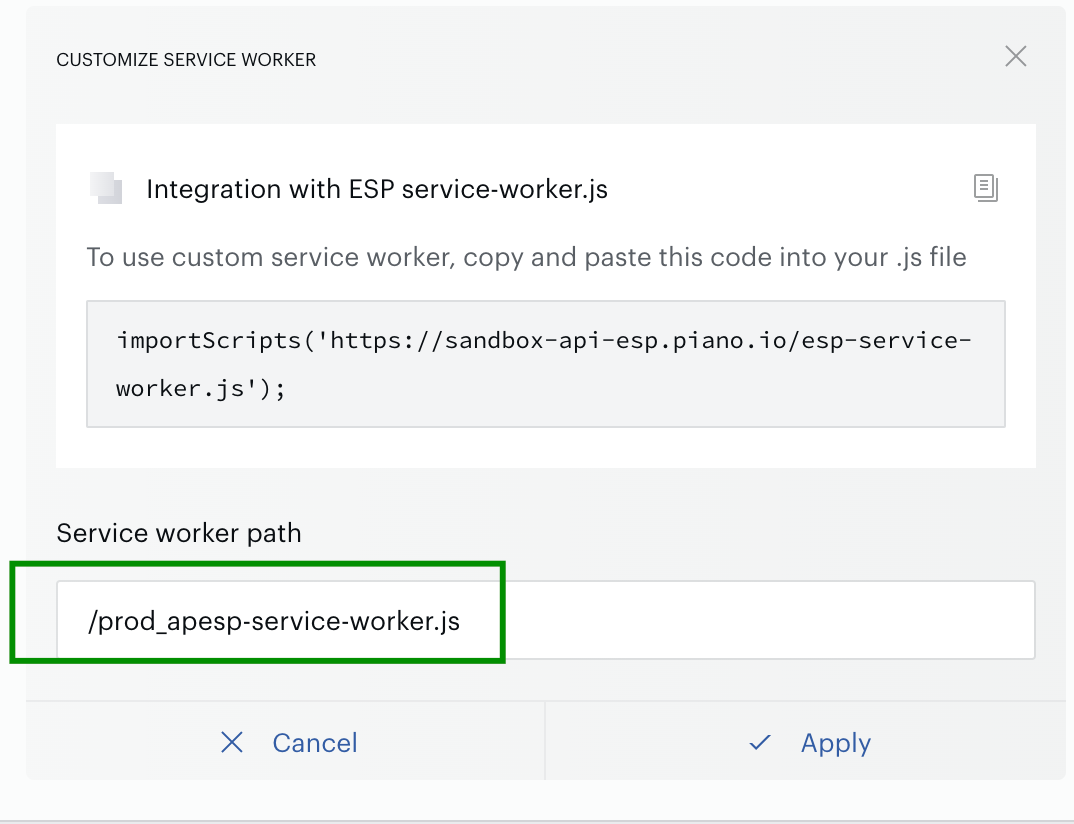
Optional: You can also use a custom service worker. For this, click on the Customize service worker path button.
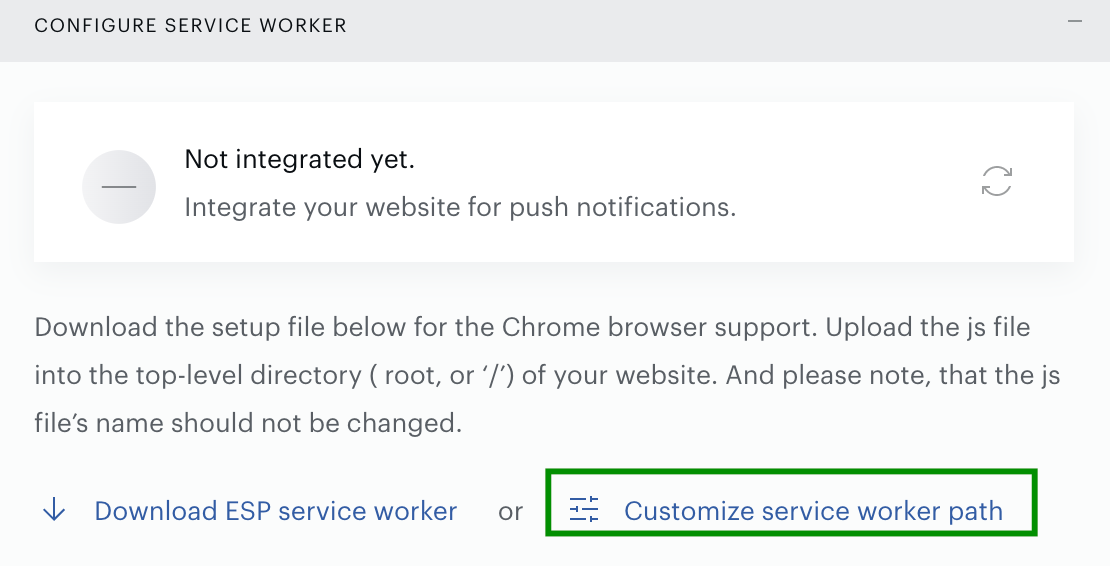
And copy and paste this code into your custom .js file:
importScripts('https://esp.piano.io/esp-service-worker.js');All available ESP Base URLs are listed here.
And indicate a custom service worker path here:
-
-
After we match the indicated site URL with the service worker file located on your website - the push notification campaign launch can be performed and the status of your integration would be successful:

-
As launching Push notifications on Safari is different from all other browsers we put separate instructions for it here.
-
After all steps of the Web push integration are successfully completed please indicate a Push expiration time and UTM tags.
-
How can users receive Push notifications on Safari?
Push Notifications work differently on Safari than they do on other browsers.
The below steps are optional and Push notifications will work on other browsers without this configuration.
To launch notifications on Safari you should upload a Web Push Certificate (.p12 certificate) to the ESP dashboard. Please note, to create a unique Push ID for your website, you need to have an active paid Apple Developer subscription. If you don’t have one, you can contact your account manager and we will help you to generate a .p12 certificate.
The steps to create a .p12 certificate are :
-
Create a Certificate Request:
-
Open the Keychain Access app
-
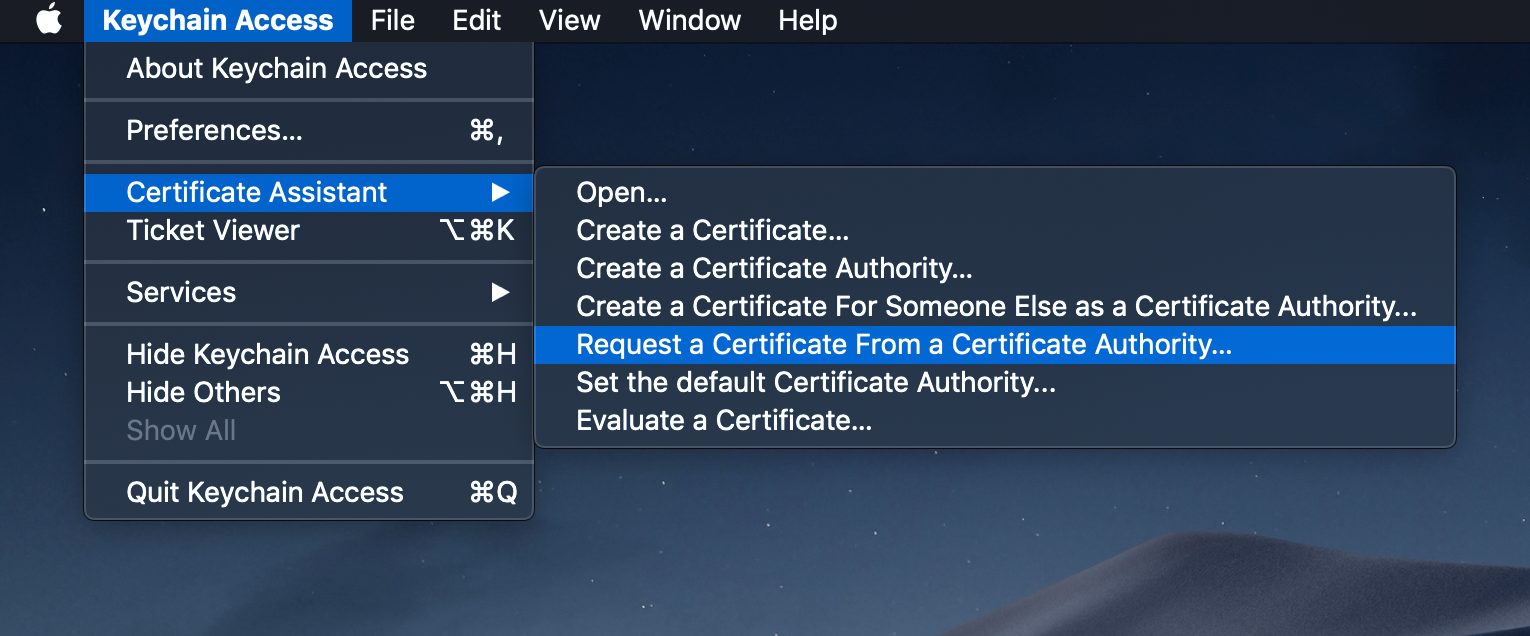
Click on Keychain Access → Certificate Assistant → Request a Certificate From a Certificate Authority:
-
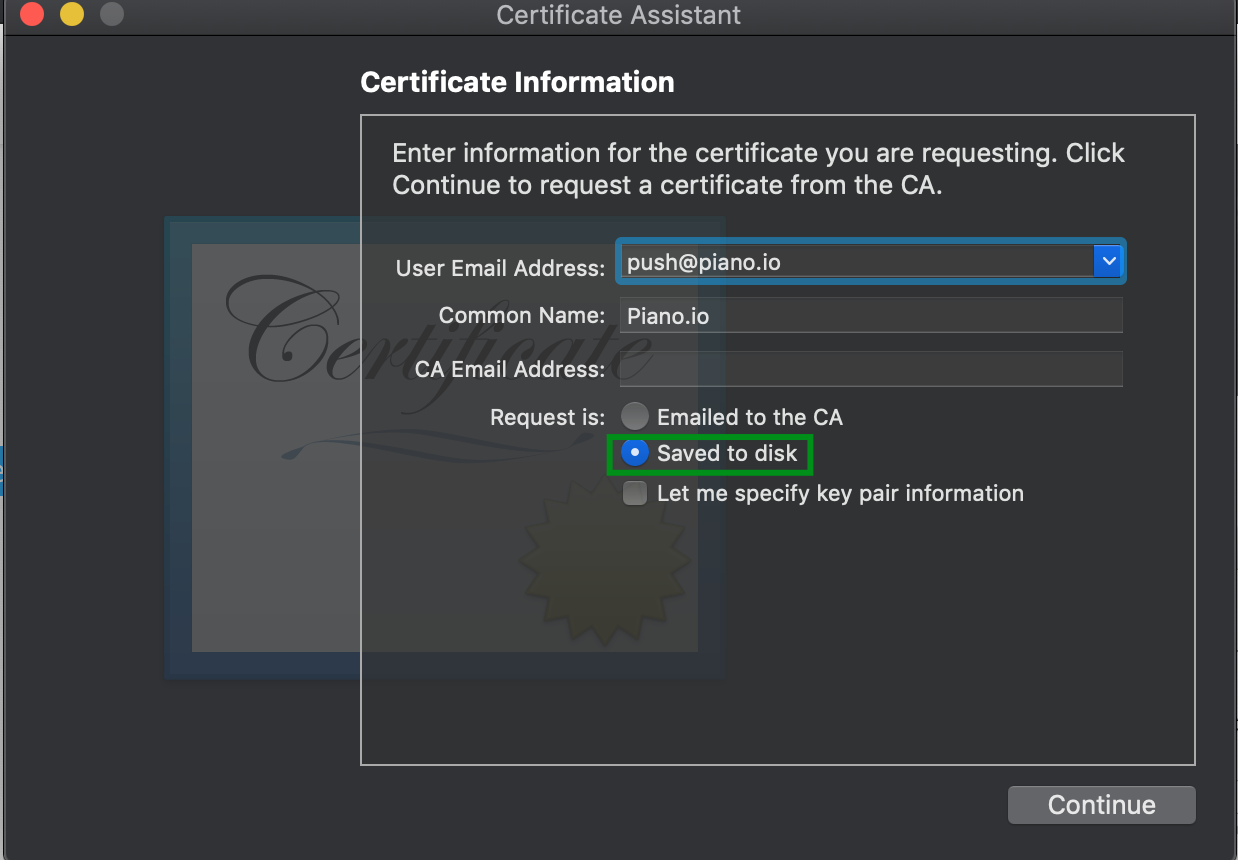
Enter User email address, Common names and select ‘Saved to disk’ radio-button → Click on the ‘Continue’ button:
-
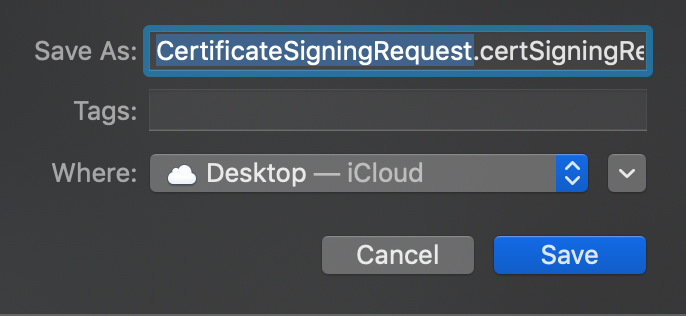
Name the Certificate Signing Request, we will use this later to create the certificate itself:
-
-
Establish the Website Push ID for the Apple Push Notification Service:
-
Sign in to the Apple Developer account
-
In the Developer Console, click on ‘Identifiers’ → click on ‘Register an App ID’ → select ‘Website Push IDs’ from the ‘Register a New Identifier’ list → click the ‘Continue’ button
-
Enter a Description and Identifier → Click on the ‘Continue’ button → If everything is Ok, click Register
-
-
Generate a Web Push Certificate:
-
Go to the Certificates section → Click '+' → Click on Website Push ID Certificate → Click on the ‘Continue’ button.
-
You will get to the page, where you should select the Website Push ID (that one you previously created) → Click the ‘Continue’ button.
-
On the following screen you should indicate the path to the Certificate Signing Request file (that one you saved to disk) → Click the ‘Continue’ button.
-
Download your Web Push Certificate (it will be used to send notifications to your subscribers on Safari) → Then find the certificate on your disk → Click on the certificate and install it via the Keychain Access app.
-
After the certificate is installed, you should export it. For this, select the Certificates section in the Keychain Access app → Click on the Website Push ID → At the drop-down list select an Export option → Save the certificate with Personal Information Exchange in (.p12) format
-
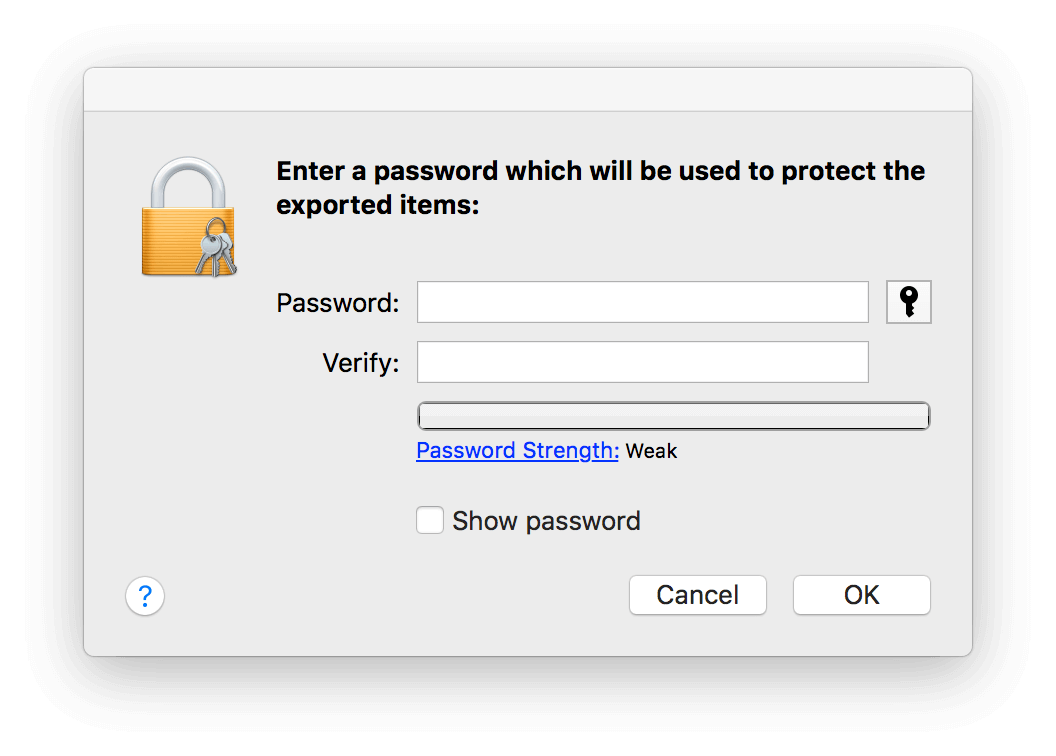
The following modal window will ask you to enter a password. Enter a password, confirm it, and click the OK button:
-
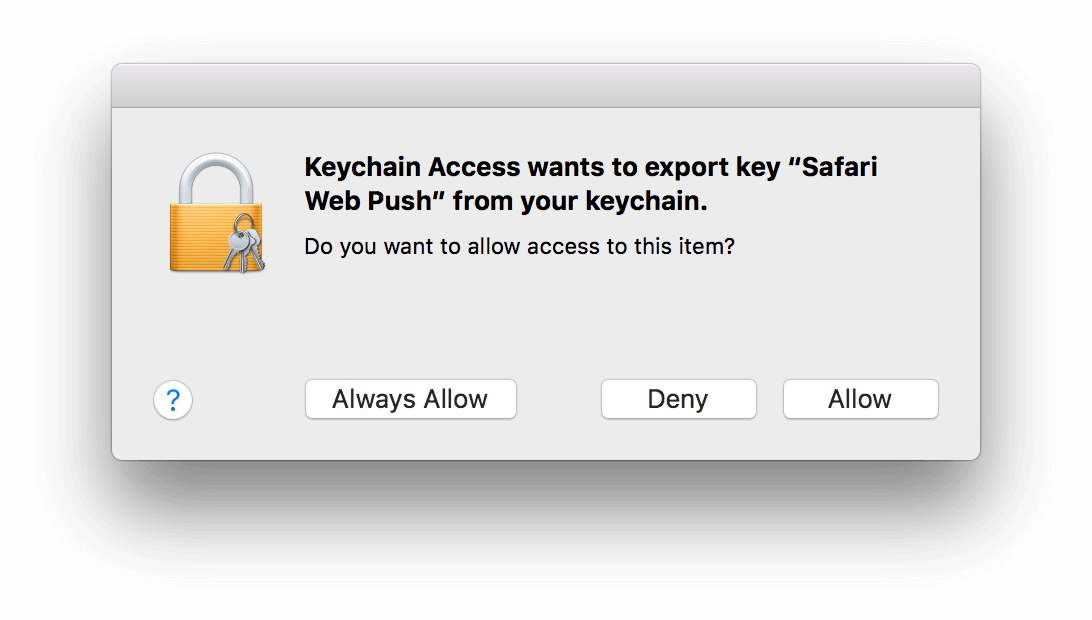
Click the ‘Allow’ button → enter your password -->Export the certificate to your Mac:
-
-
Upload the Certificate to the Piano ESP dashboard
-
On the General page at the web push campaign wizard attach the .p12 certificate:

-
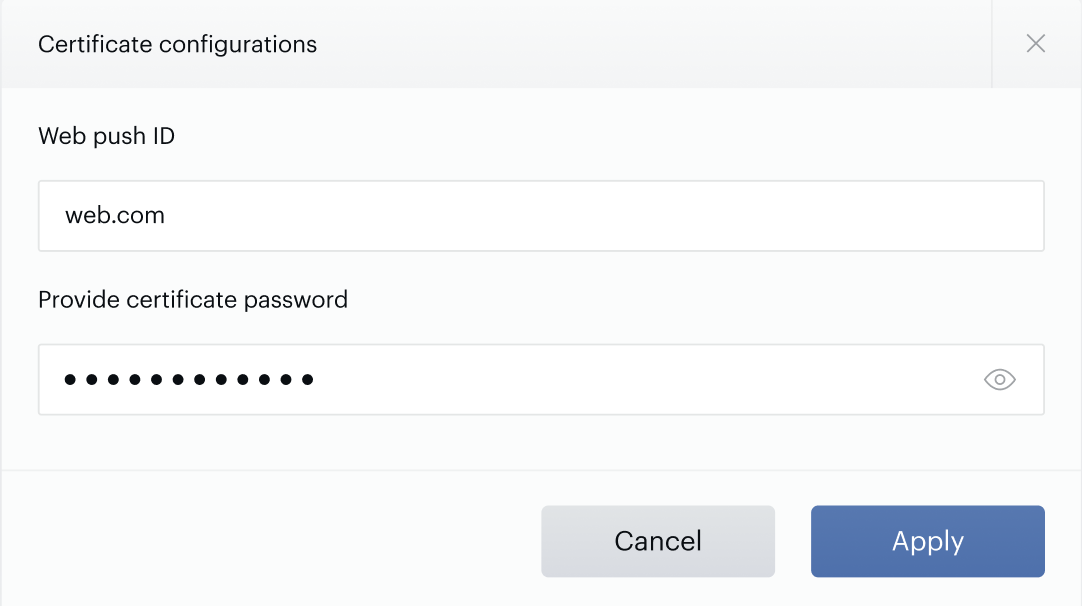
Indicate the Website Push ID and certificate password (if needed) → Click Apply:
-
Why are my subscribers not receiving Push notifications?
This could be happening for a few reasons:
-
Notifications can be turned on by users at the device/OS/browser level.
-
Users are browsing in incognito mode
-
Your Web Push Certificate (.p12 certificate) could be expired or not uploaded. Please attach the Web Push Certificate or check the expiration date (this info is displayed near the attached certificate) and if needed upload a new one.
On the other hand, some users may receive multiple push notifications at once. This is most likely related to the Push notification expiration time - if a user has his computer turned off for more days, after turning it on, the user receives all missed notifications at once.
Scheduled Push notification campaigns send push notifications a maximum of once per day. It is not possible to set up a more granular frequency, you can set up only the days on which the notification should be sent.
Another solution may be to set up a one-time campaign which you will manually trigger.
How can I customize the browser prompt for Push notifications?
Unfortunately, the browser prompt can't be customized. But to attract a user’s attention you can add a 'Push signup' template using Composer. The main idea of a Push signup template is to enrol a user in a push campaign with a remarkable call to action. If you add a Push signup template with the Composer card, the browser prompt will appear right after the Push signup template is displayed.
Below you can find instructions on how to add the Push signup template card to the Composer:
-
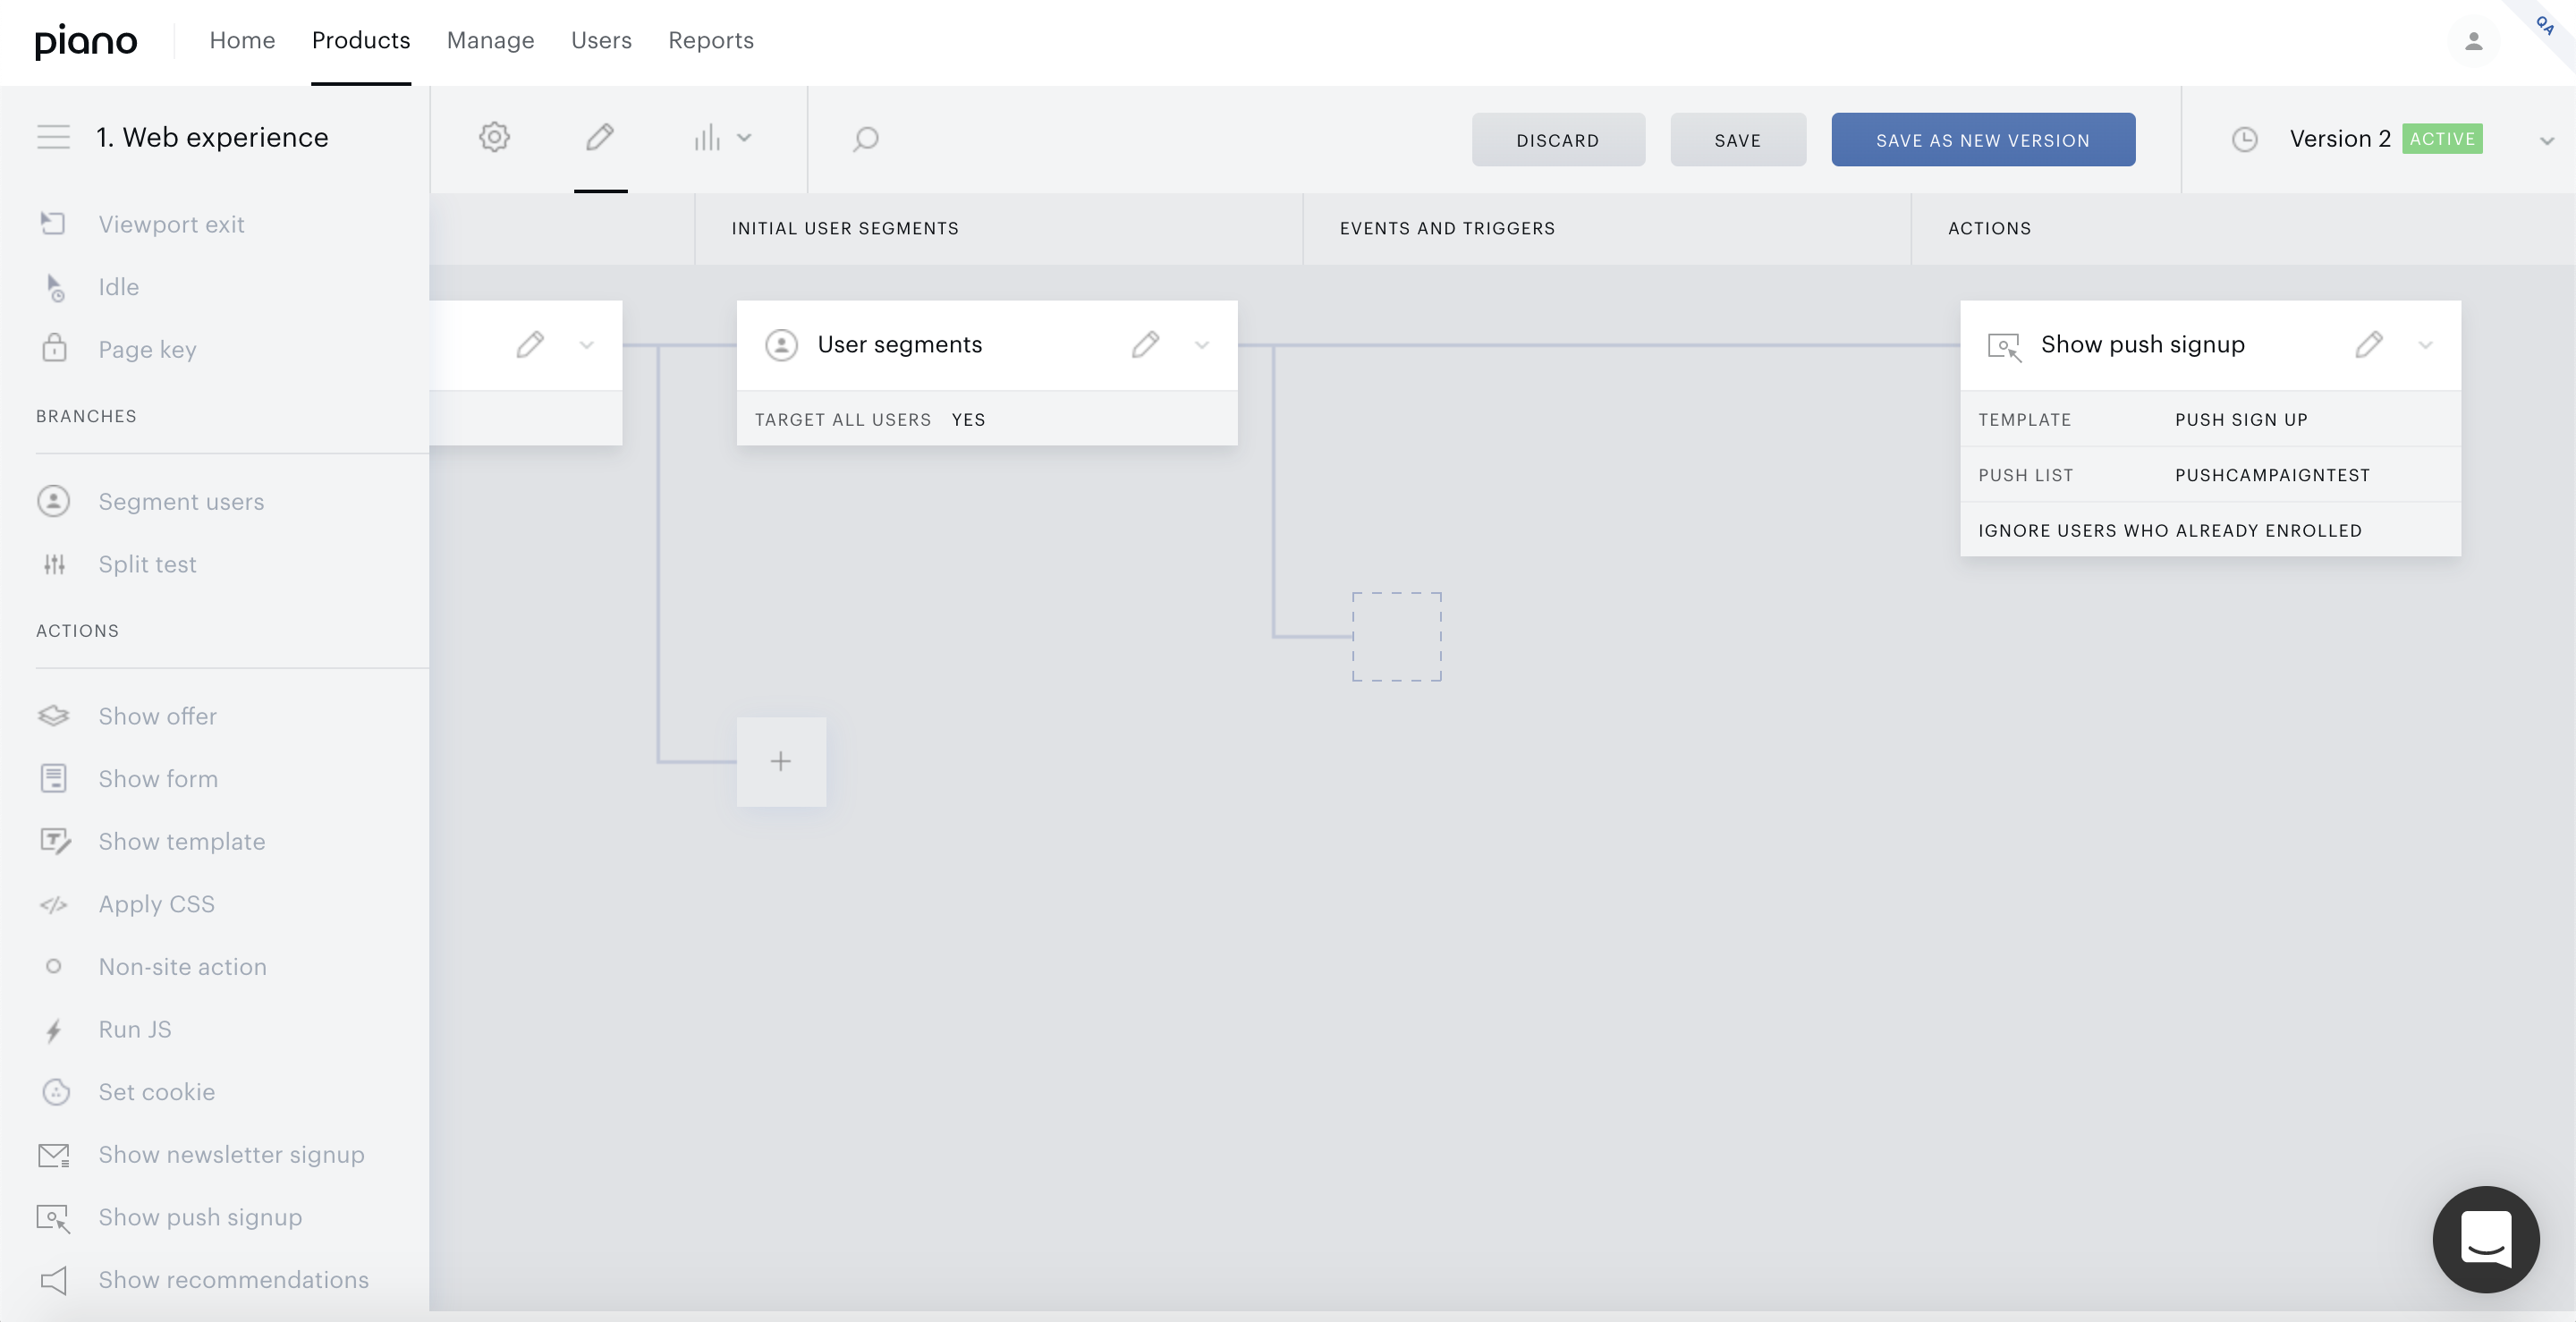
Create a Composer experience and add the Show push signup action card:
-
Attach your push list to the Show push signup action card. Notifications will be shown to users from this push list:
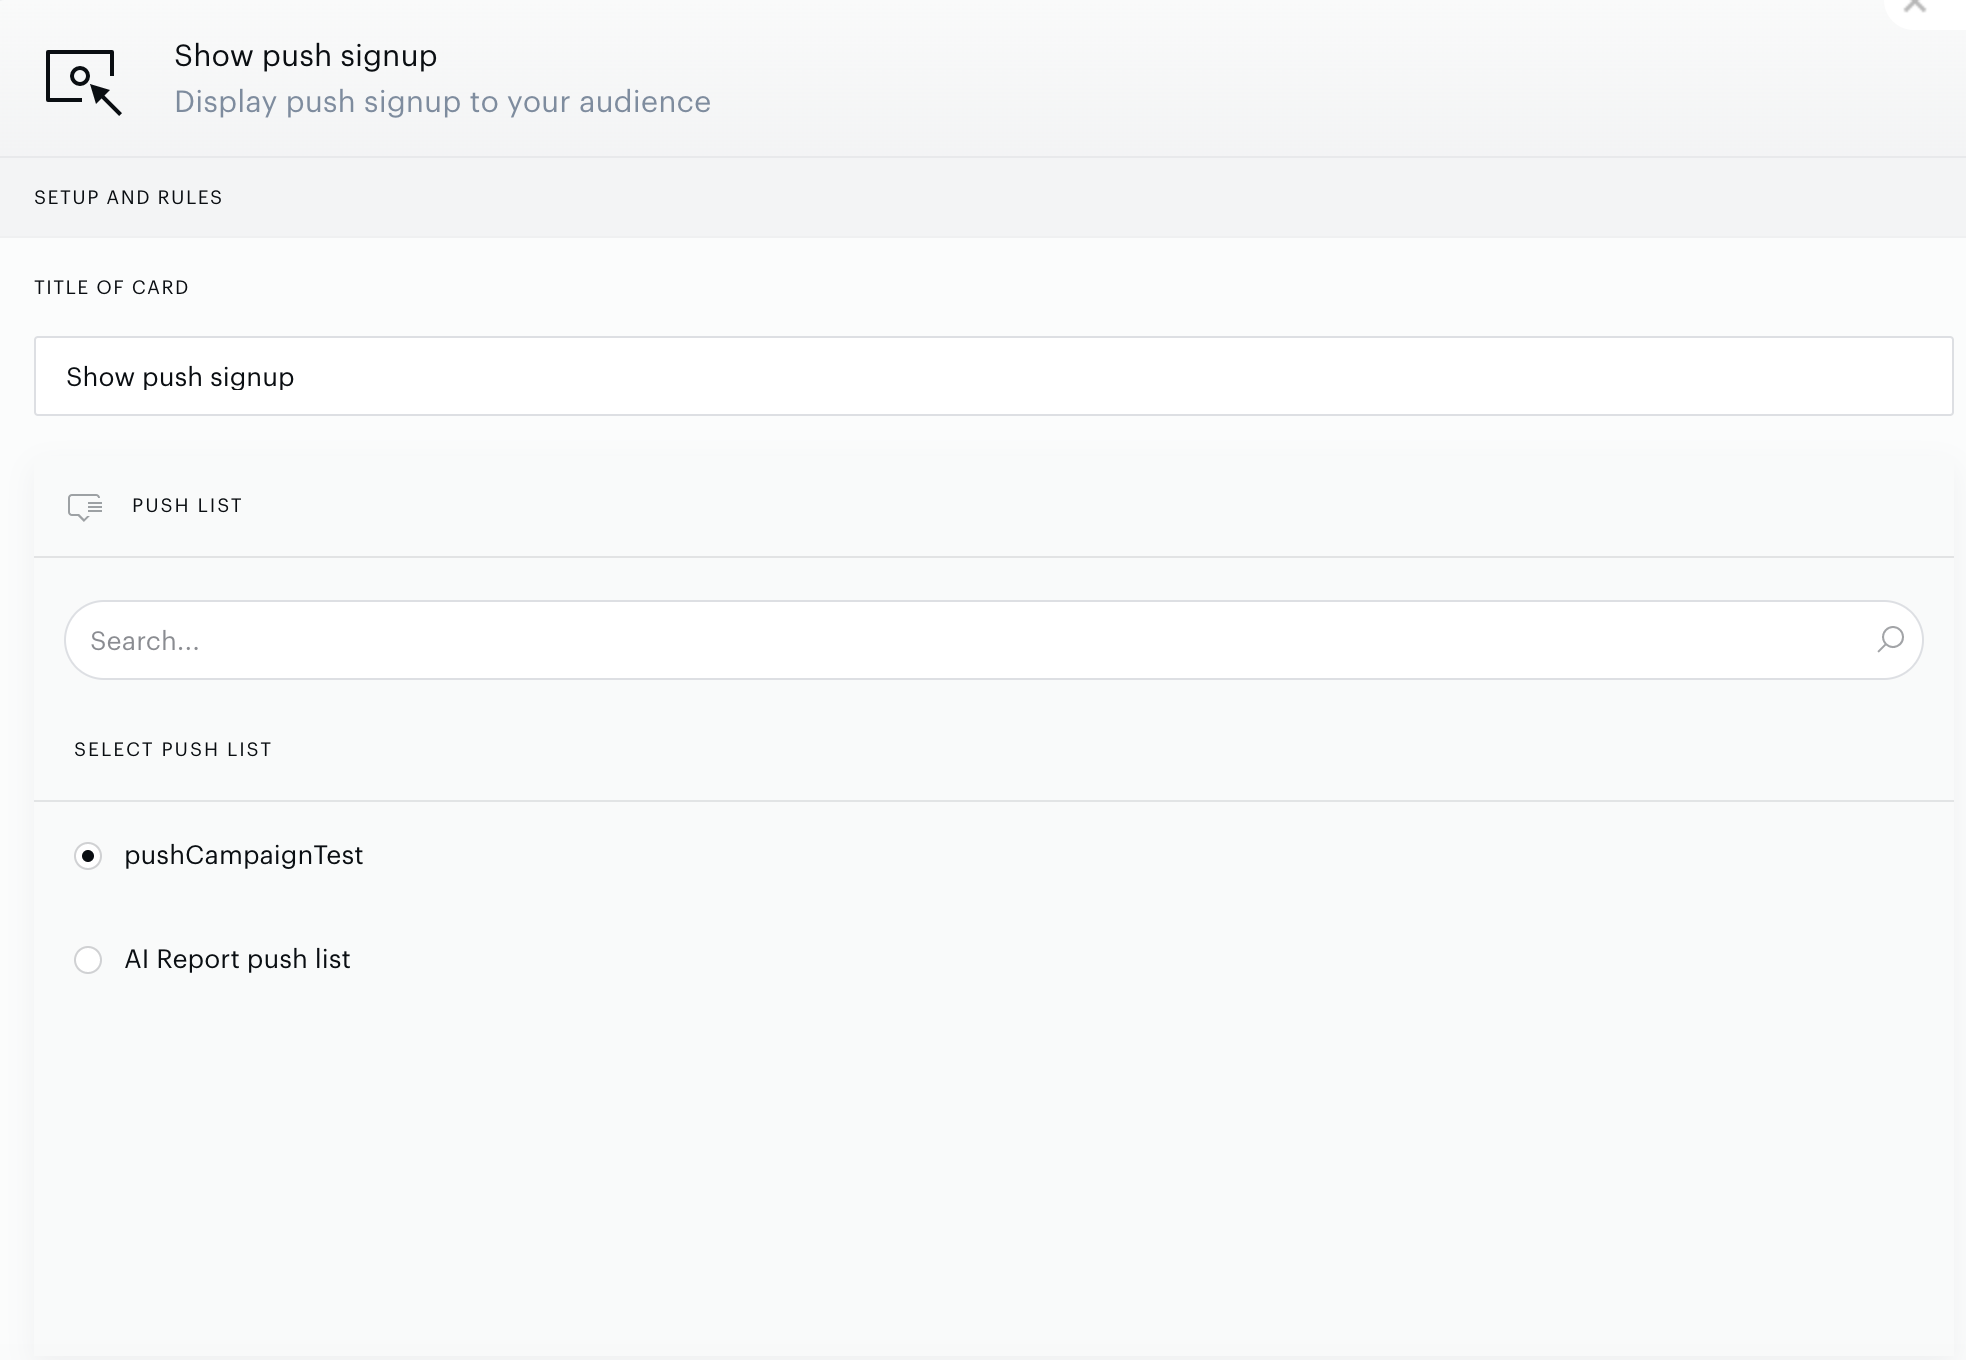
-
Create or attach an existing ‘Push signup’ template from the VX template library:
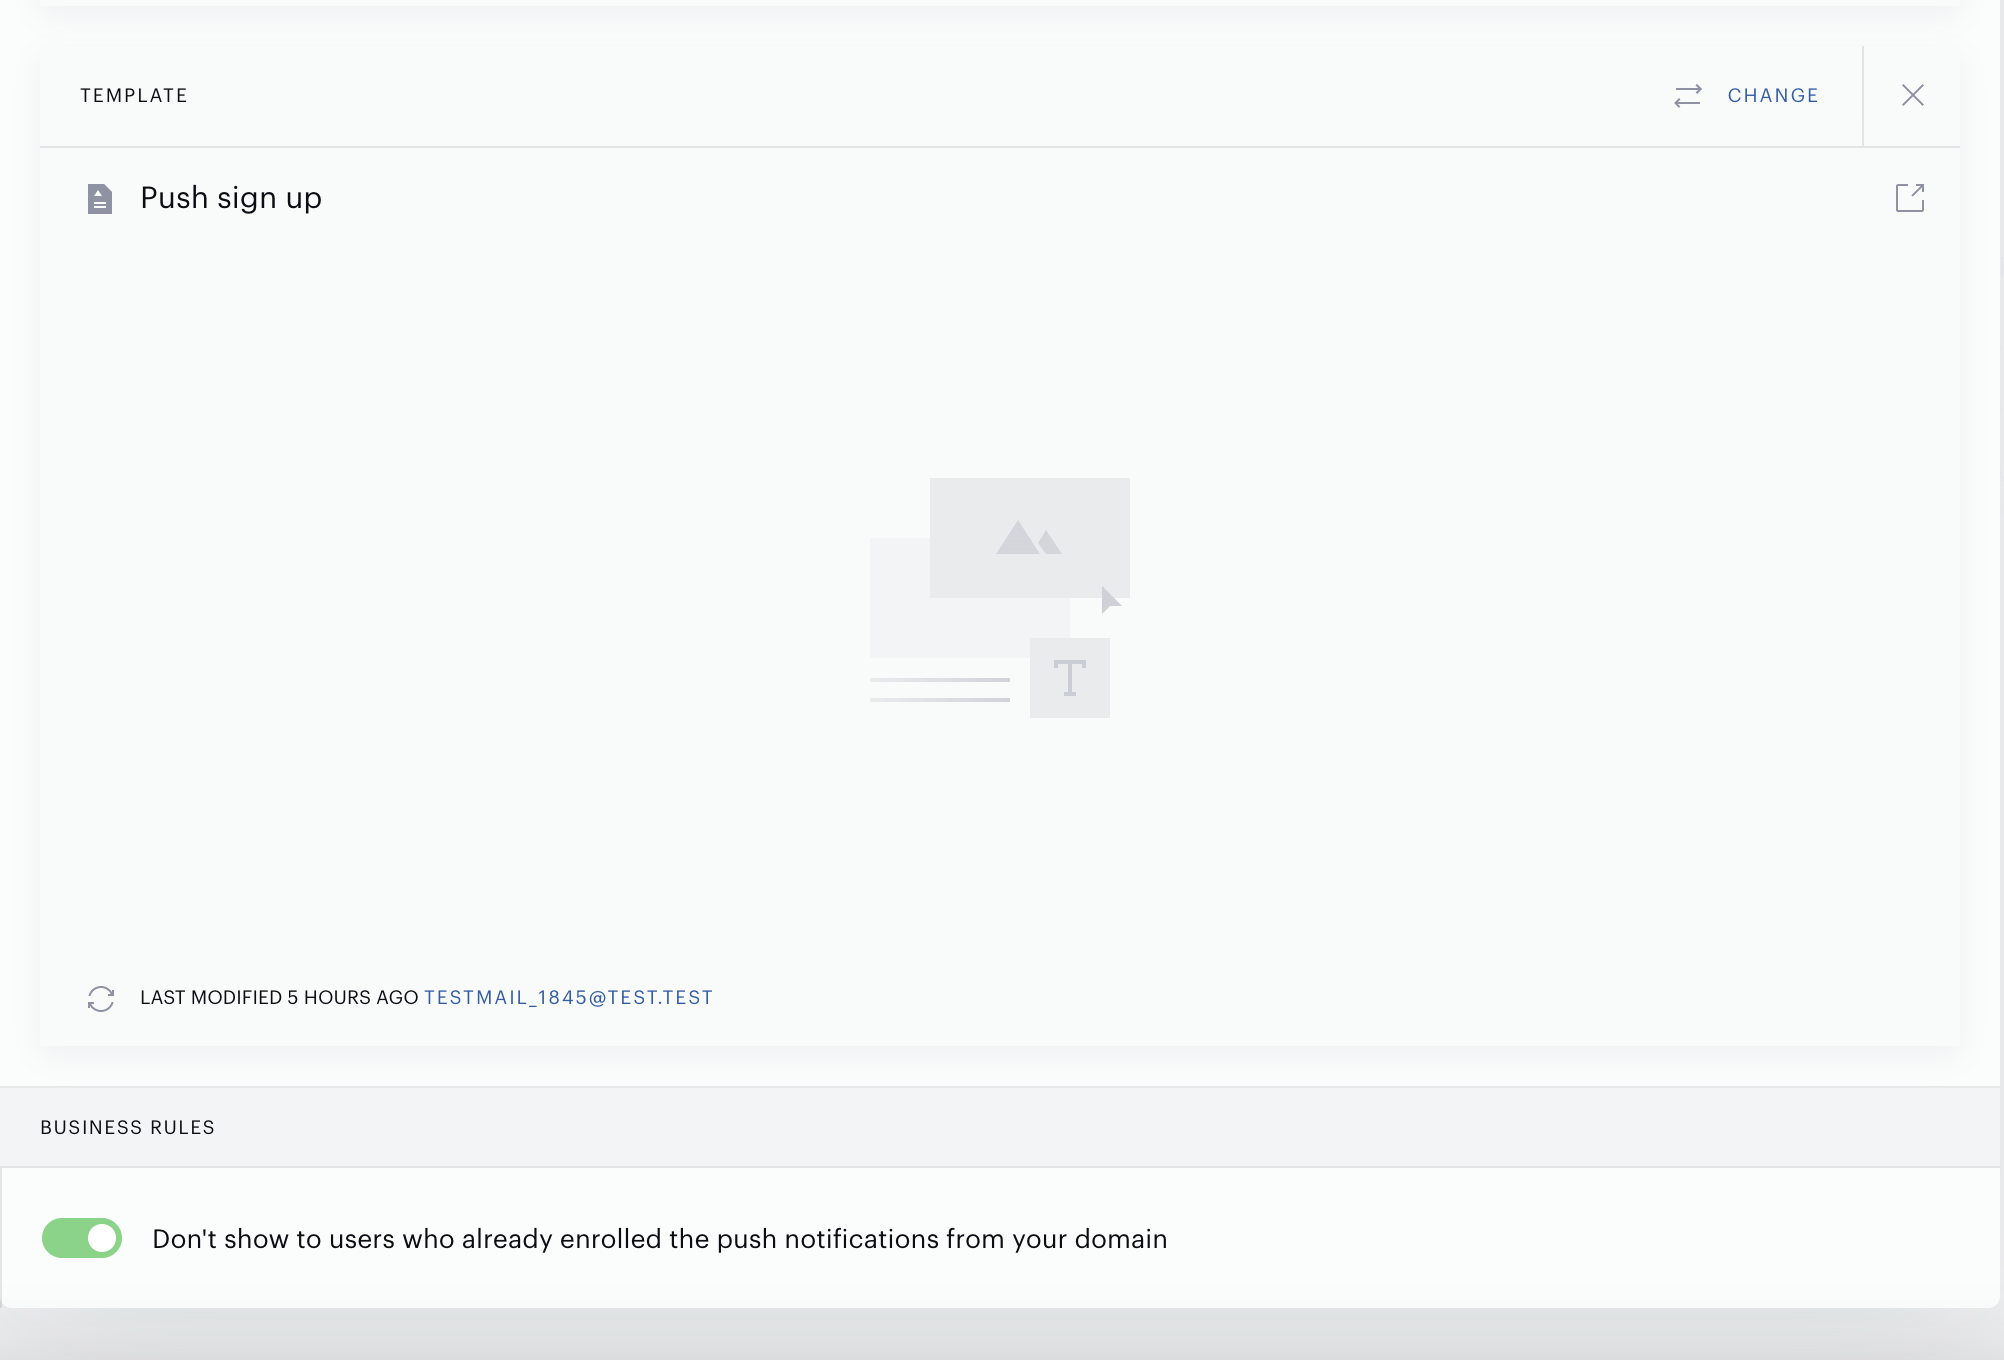
-
Customize the Push signup template at your discretion:
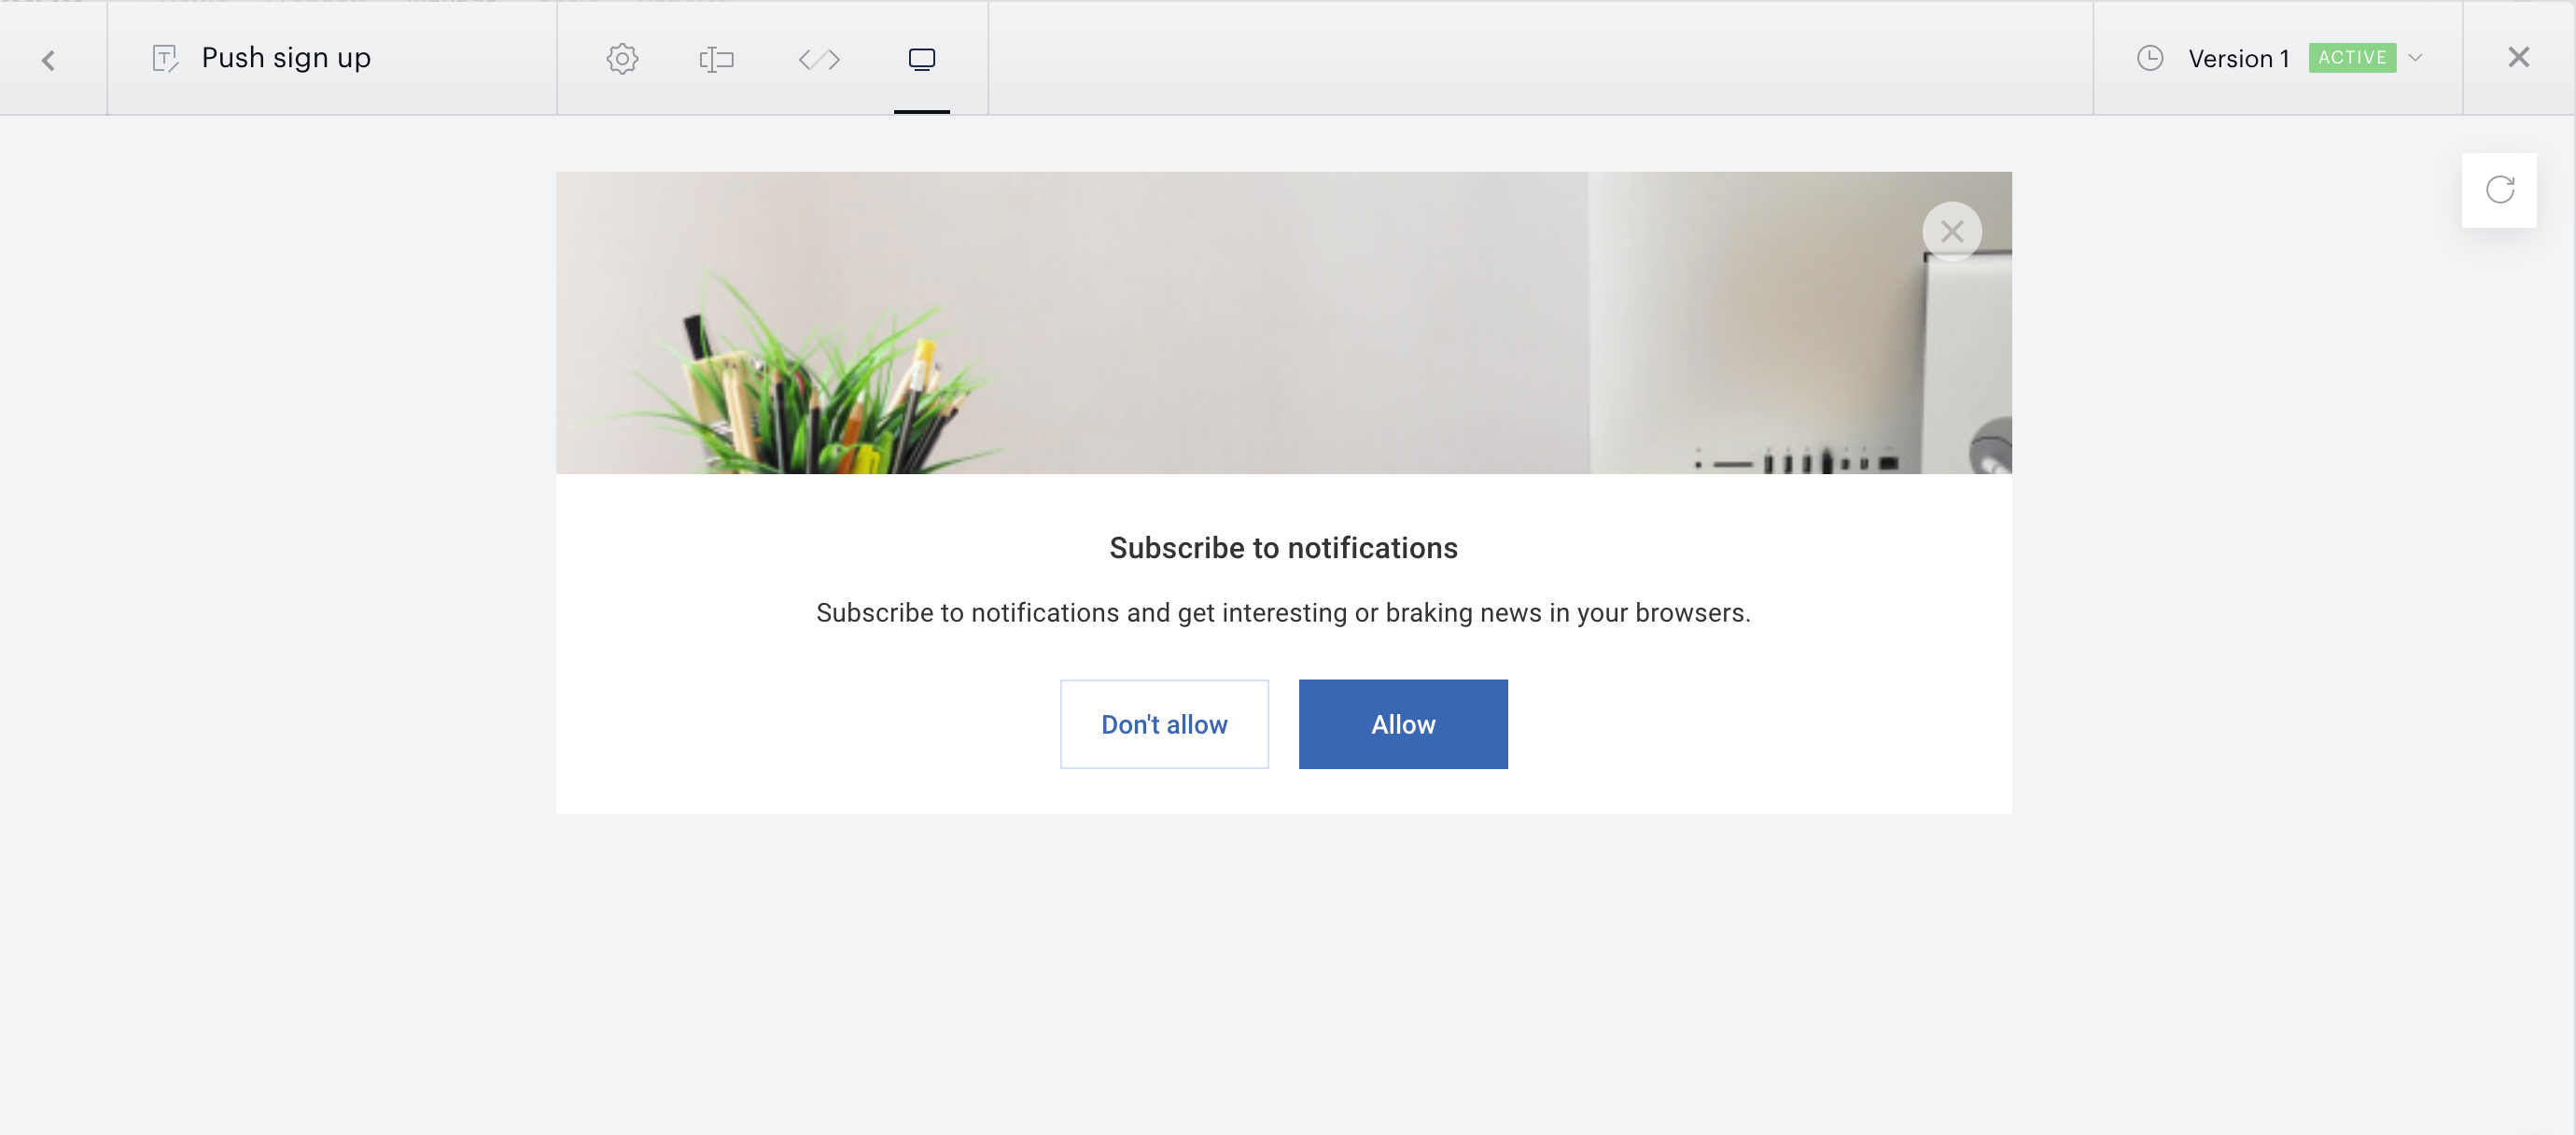
How to use emojis in Push notifications?
Emojis could make your push messages more eye-catching and thus increase user interaction with your content. In order to include emojis in push notifications, you need to call an emoji keyboard shortcut on your computer and choose the appropriate emoji (e.g. ‘Command + Control + Space’ on the Mac). Emojis can be added to the title, description, and additional buttons. If you want to add emojis to the push notifications with dynamic content type, you just need to find the universal Unicode value for the necessary emoji, e.g. \u2764\uFE0F and add it to the appropriate tag in the RSS feed
On which browsers or OS can Push notifications be displayed?
Push notifications are compatible with the most common browsers: Chrome, Opera, Firefox, and Safari. Below you can find a table, which fully describes how push notifications will look on different browsers/OS:
|
Feature |
Windows |
macOS |
Linux |
Android |
iOS |
|---|---|---|---|---|---|
|
Basic push message |
✔ |
✔ |
✔ |
✔ |
✘ |
|
Site icon |
✔ |
✔ |
✔ |
✔ |
✘ |
|
Image |
✔ (On Chrome can be displayed as a large image) |
✔ |
✔ |
✔ (On Chrome can be displayed as a large image) |
✘ |
|
Additional buttons |
✔ (only for Chrome) |
✘ |
✘ |
✔ (Chrome only) |
✘ |
|
Emoji |
✔ |
✔ |
✔ |
✔ |
✘ |