This guide explains how to display custom fields in the registration form for different Identity Management template variants by using multiple Show Form actions in Composer Experiences. The process has three main parts: adding all required custom fields to one custom form, setting conditions based on content fields, and using the relevant template variant in a Composer Experience.
1. Add custom fields to the custom form
-
Navigate to the custom form: Go to Manage > Custom fields and locate the custom form that will be used.
-
Add all custom fields: Add every custom field that may need to appear across the different variants. Include fields that are only relevant to specific variants. In this example, the Registration form uses three fields.
2. Set conditions based on content fields
-
Open the template content fields section: Go to the relevant Identity Management template, add the required variants, and select Edit all fields to manage the content fields. In this example, two variants are added to the Piano ID register page template.
-
Add conditions to the template HTML: Create conditions based on a content field to define which custom fields should display for each variant.
-
Hide the standard custom fields section: Hide the default custom fields section so that all custom fields do not display universally.
3. Create the Composer Experience
-
Create a Composer Experience that includes the desired segments.
-
Add a Show Form action card.
-
Select the appropriate template variant for that action card.
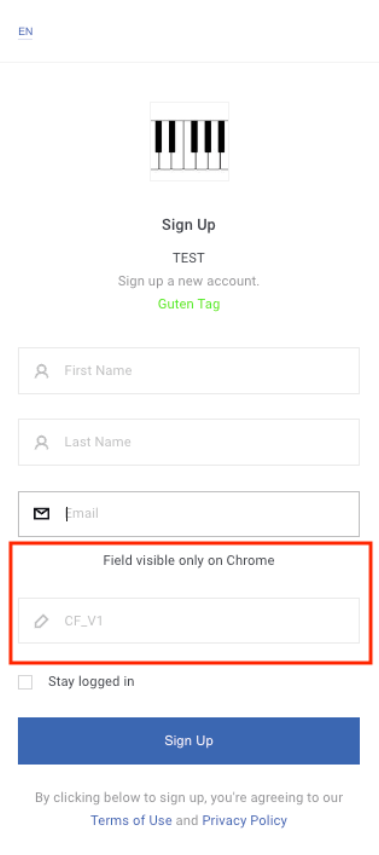
For example, if users in Chrome are targeted with variant V1 of the template, they will see the corresponding registration form: