
With this integration, the client's segments and audience data can be saved to a flat file and uploaded to SFTP/S3/Google Cloud Storage.
Configuring Piano Audience
Create a configuration
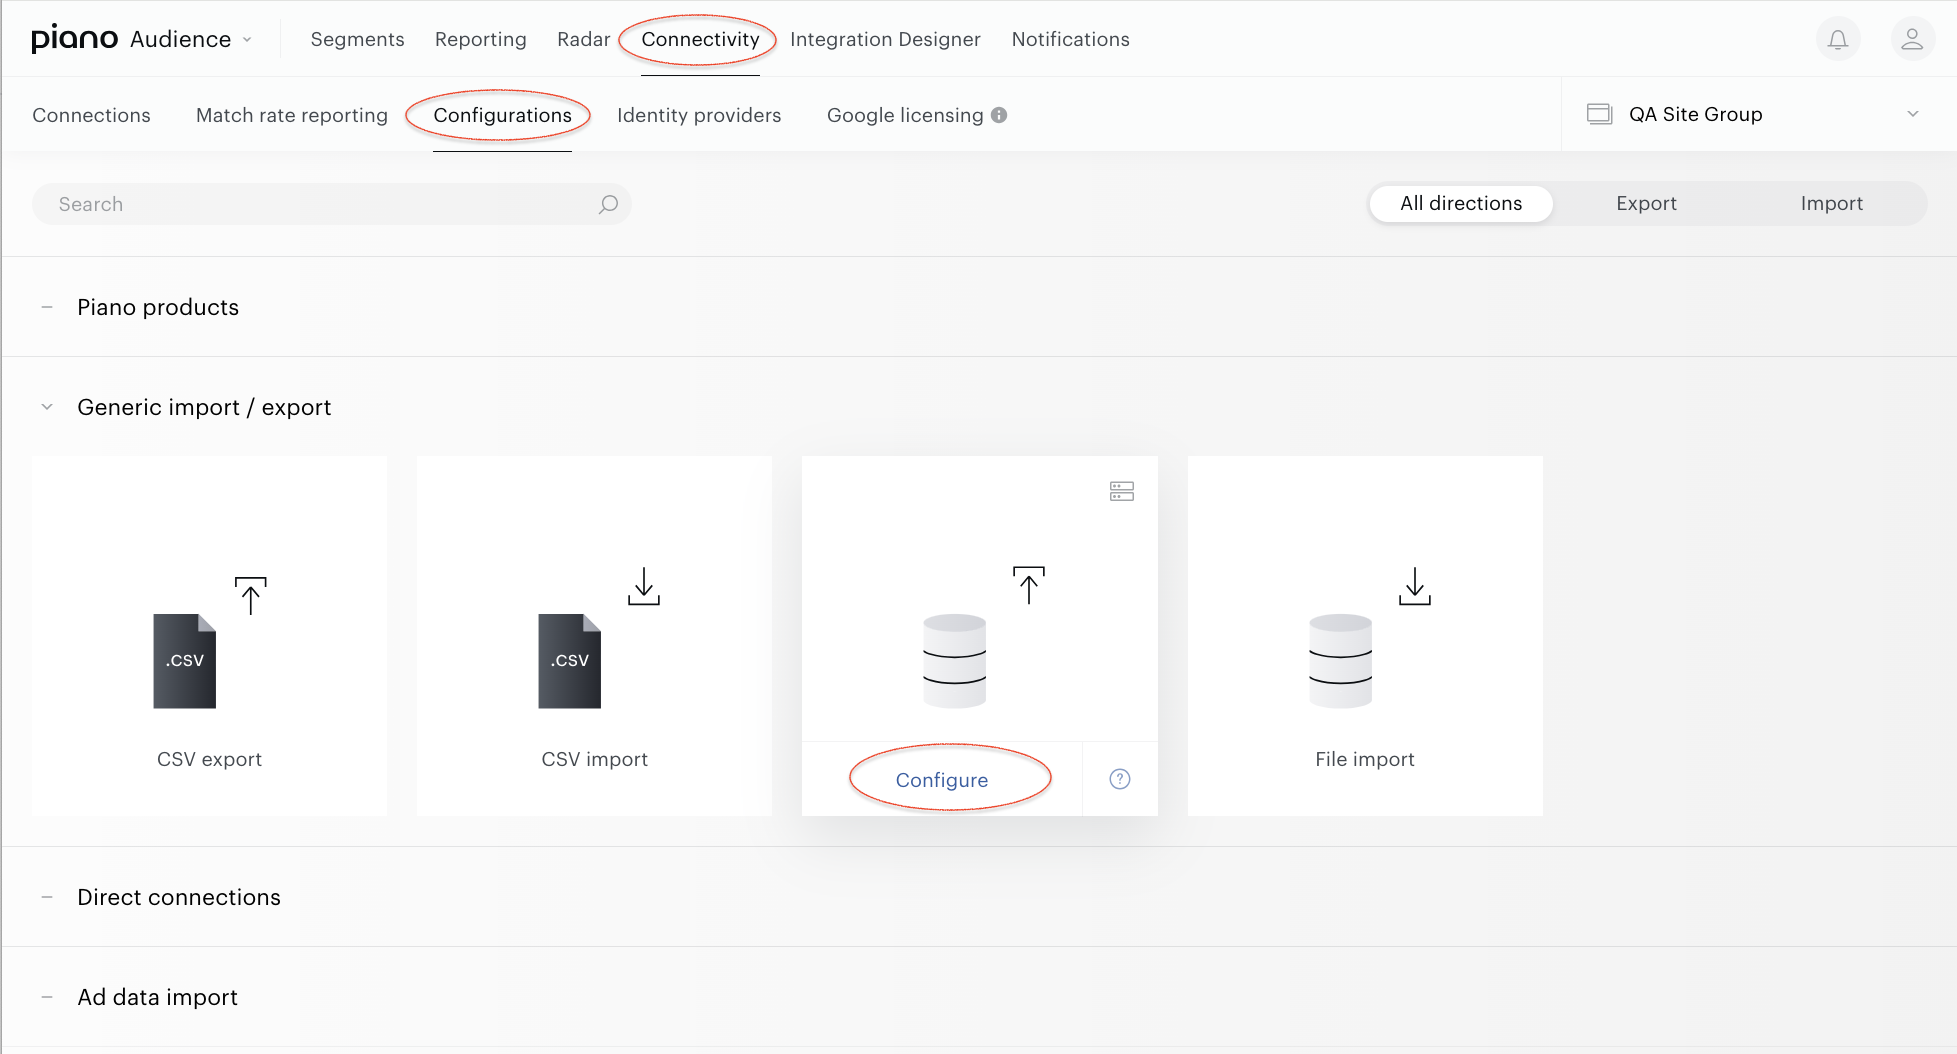
With your site group selected, from the Piano Audience home page, go to the Connectivity tab → the Configurations tab →the File export icon and click the Configure button.
Configure the connection
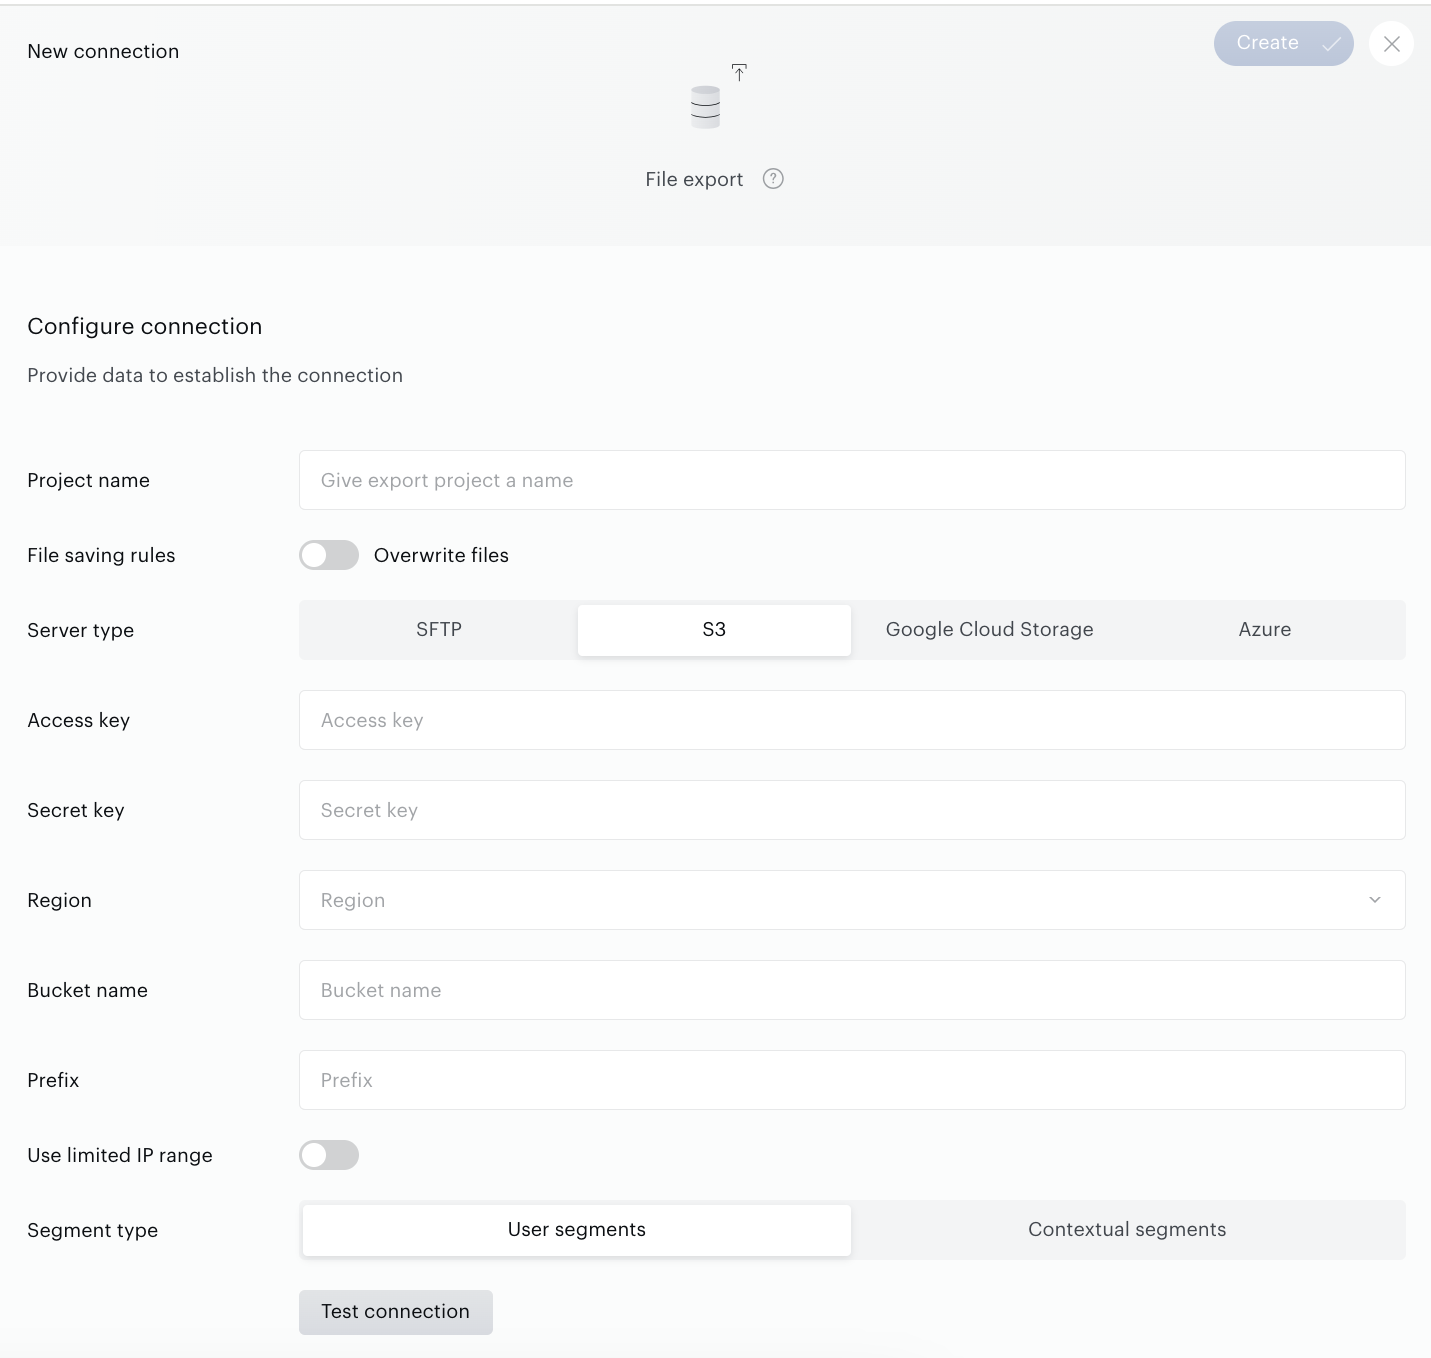
In the New Connection menu, you want to set
-
Project name: It will be shown in Piano Audience only to simplify managing numerous integrations.
-
Server type: SFTP or S3 (if using Amazon Simple Storage Service), or Google Cloud Storage.
-
SFTP requires: Public SFTP key, Server name (or server IP address), Folder name, Port of server, Username, Password (if exists).
-
S3 requires: Access key, Secret key, Region, Bucket name, Prefix
-
Google Cloud Storage requires: Service account, Project ID, Private key, Bucket name, Folder name
-
Azure requires: Storage account name, SAS token, Endpoint suffix, Container, Prefix
-
-
Use limited IP range Use specific IP addresses, listed in the Composer 1x Crawler documentation, for routing files through a Piano Managed proxy server to storage vendors Amazon S3 and GCS. If not enabled, any IPs will be used.
Important The connection can be configured to use only one server type at a time. For example, if you select Server Type = S3, all fields for Server Type = SFTP and Server Type = Google Cloud Storage must be left empty.
-
Overwrite files: if selected, uploads a new file and then removes the old one (to save storage space).
-
Export type: uploads either global or mobile user IDs.
-
Segment type: User segments or Contextual segments. Depends on the selected option segment selectors in the Configure segments section includes User or Contextual segments.
When everything is set, click the Test connection button. A request to the specified account on the partner’s side will be sent, and, if everything works correctly, you'll get a corresponding notification. The Create button in the upper right corner will be activated. Click it. Create will turn to the Save button you can use any time during further configuration.
Configure segments
Successful test connection enables the Configure segments form where:
-
All full usage segments means that all “Full” usage segments will be selected for export; any newly created “Full” usage segment will be added automatically.
-
All segments means that all “Full” usage and “Reporting only” usage segments will be selected for export; any newly created segment will be added automatically.
-
Specific segments option allows you to send manually selected segments.
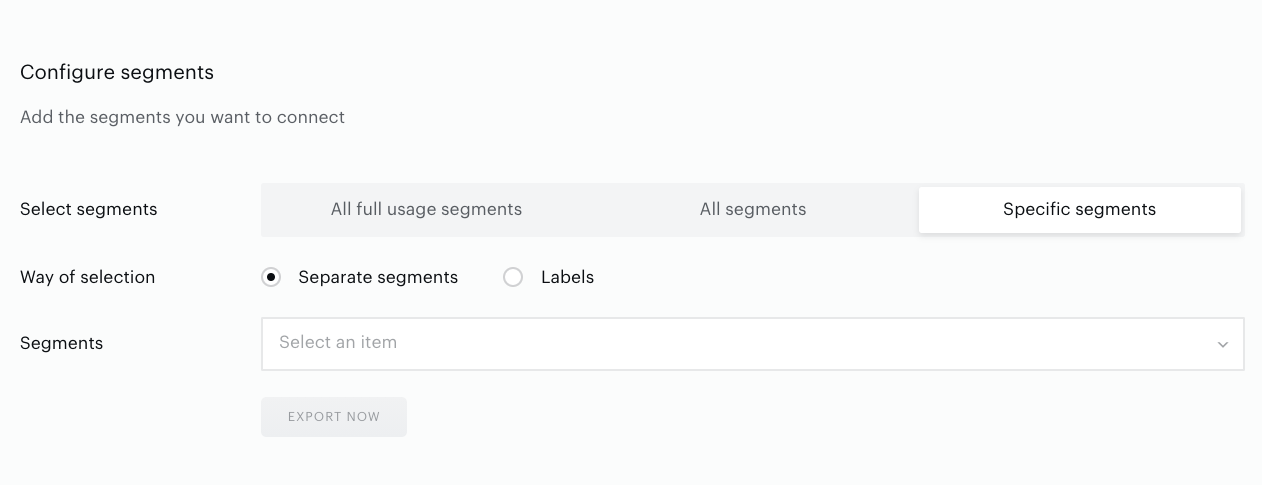
This option includes the following opportunities:
-
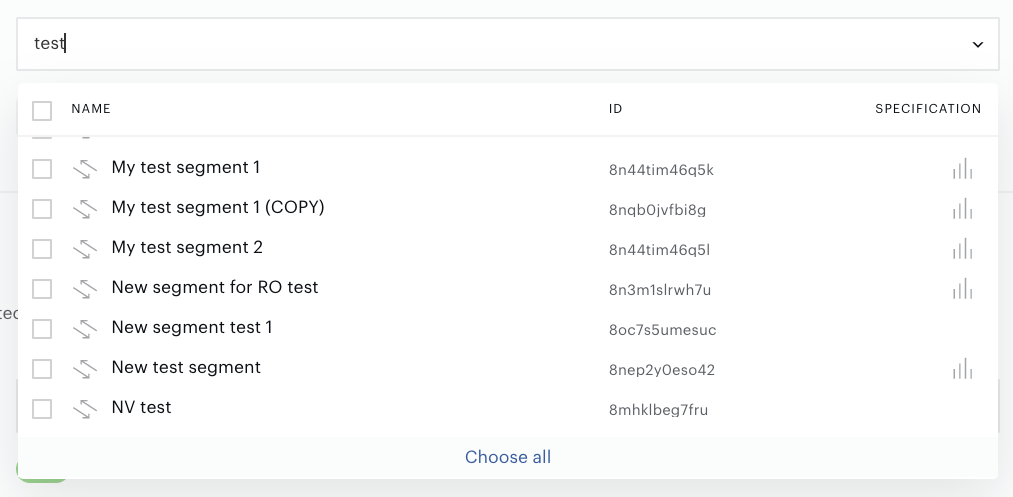
To select segments by name or segment IDs (select “Separate segments”), using the segment selector. Multiple selection is supported.
-
To select segments by label (select “Labels”). By labels allows export segments with specific labels (annotations). More than one label can be selected.
Set the parameter, using the labels selector.
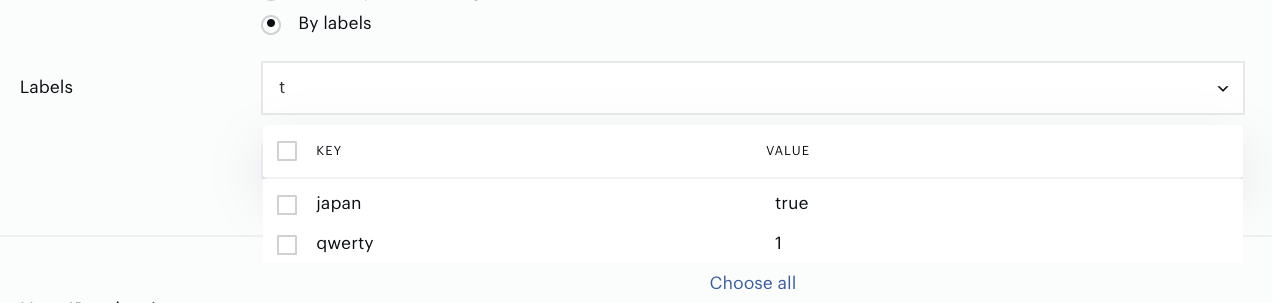
Select user IDs
Under User ID selection, there is a list of the partners you can choose. By default, files will contain Piano’s user IDs, but you can choose which user IDs you want to receive, e.g. for matching IDs from different sources.
Which IDs to choose depends on your cases. For example, if you have uploaded into Piano Audience 1st party IDs from system “A” for segmentation and then you want to receive these segments back into system “A”, you have to select system “A” from the “Available IDs” list using special a selector:
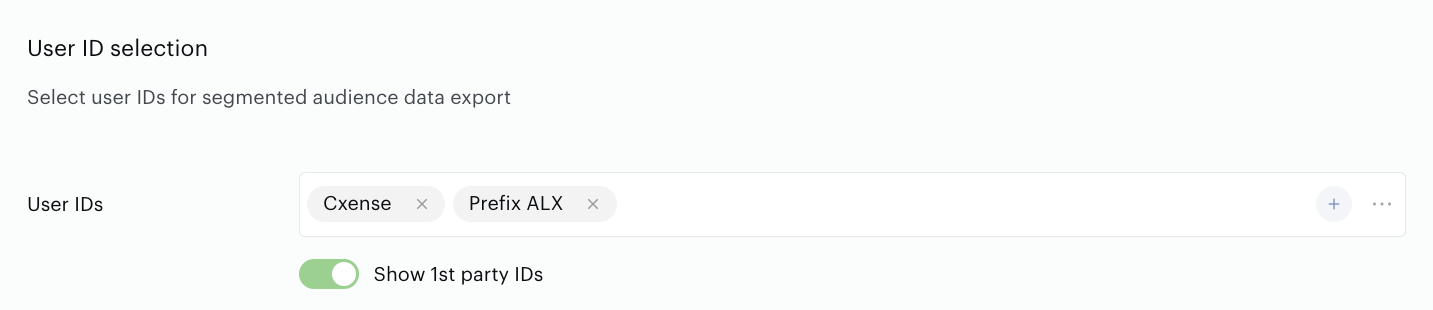
This selector allows you to search by Partner name, to delete selected items (click CLEAR) or choose all found items:
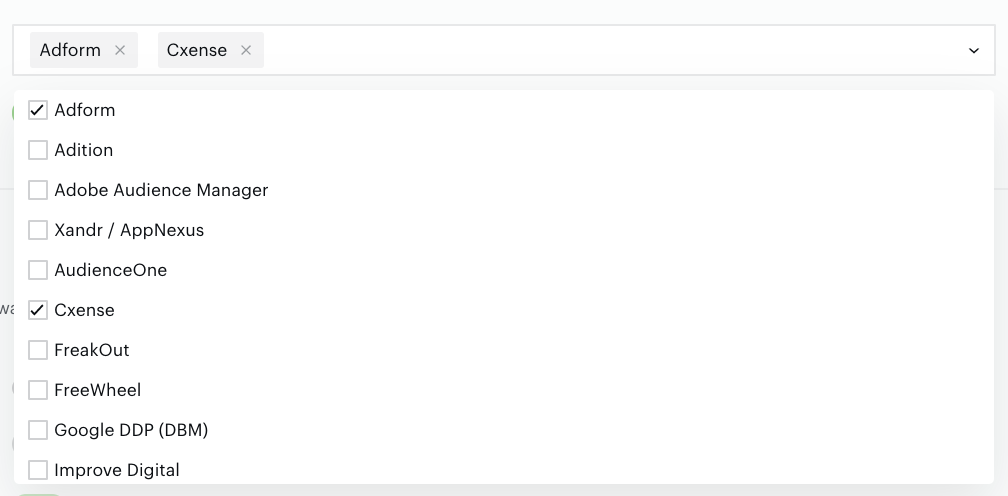
Don't forget to save all changes.
Export file structure
Choose between the user-centric and segment centric export format:
-
If you need only members, select the Users slider (set it to On) and make additional settings.
-
If you need both members and segments, select the Segments slider too (set it On) and make additional settings.
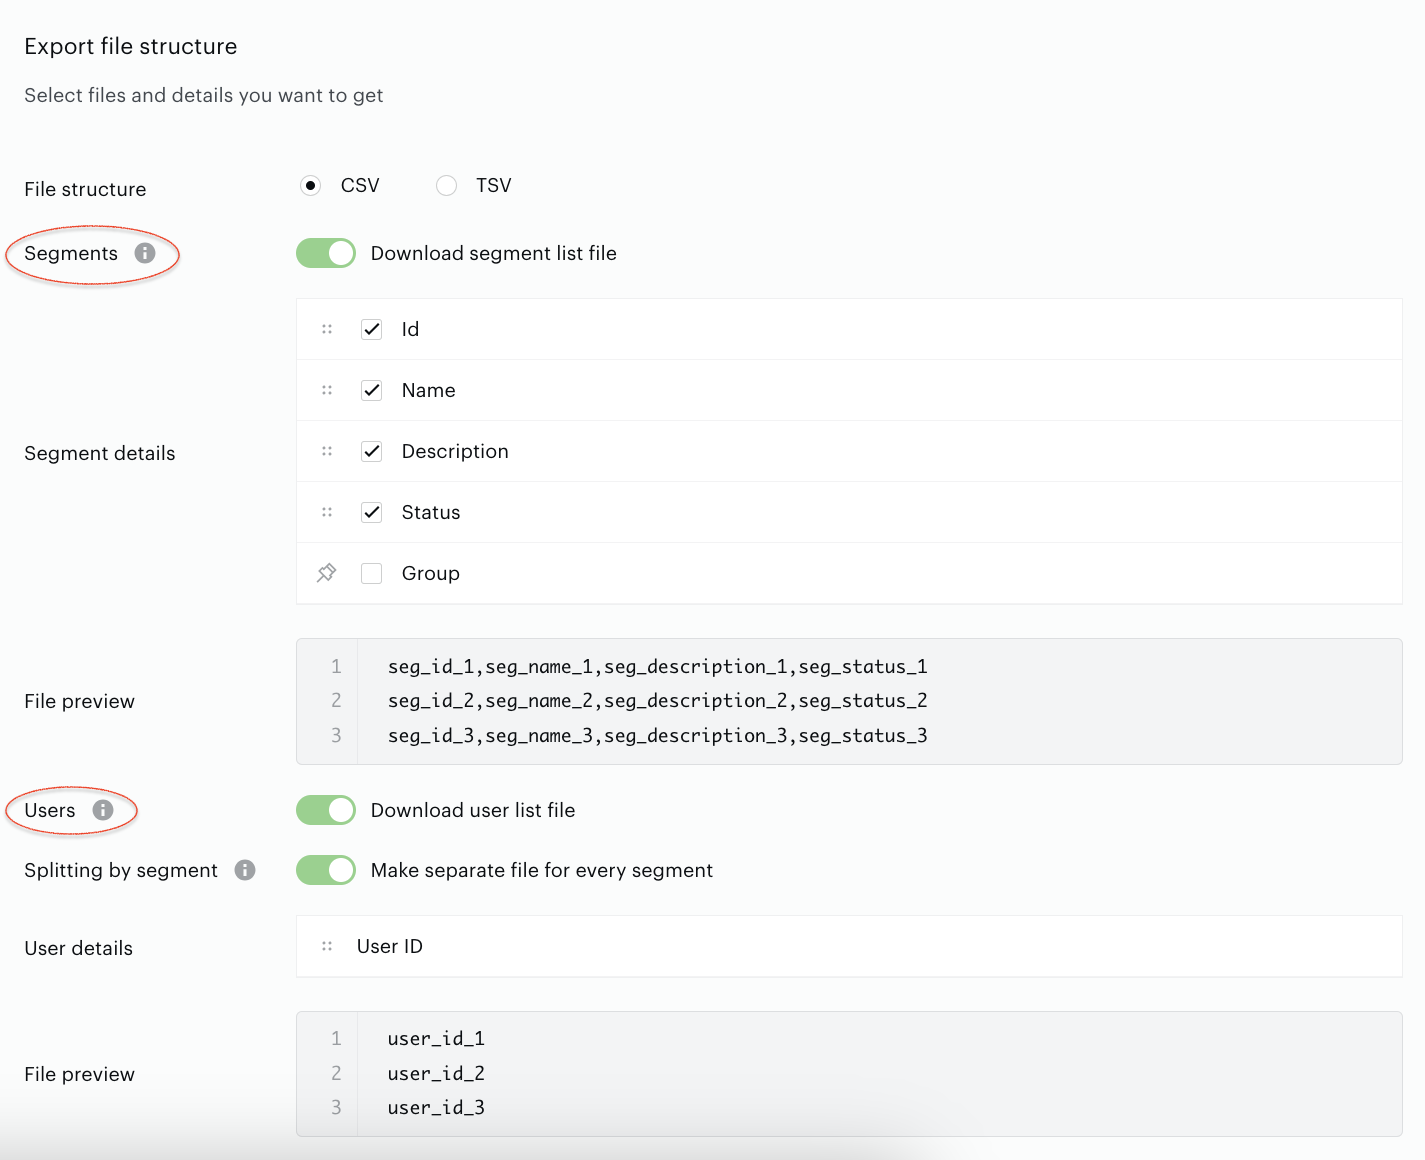
It is now possible to change the order of columns in the generated data files. To adjust the column order, drag and drop the parameters within the User details or Segment details sections.
When ready, click Save in the top right of the form.
You can add a piece of extra information to the file: segment group names will be exported if the selected segment is in the segment group.
If customers want to have segment group names in the file, they have to select the Group checkbox. If segments are in the segment groups, segment group names will be exported alongside the other selected parameters.
Set the export scope and frequency
Select a single export or choose export frequency.
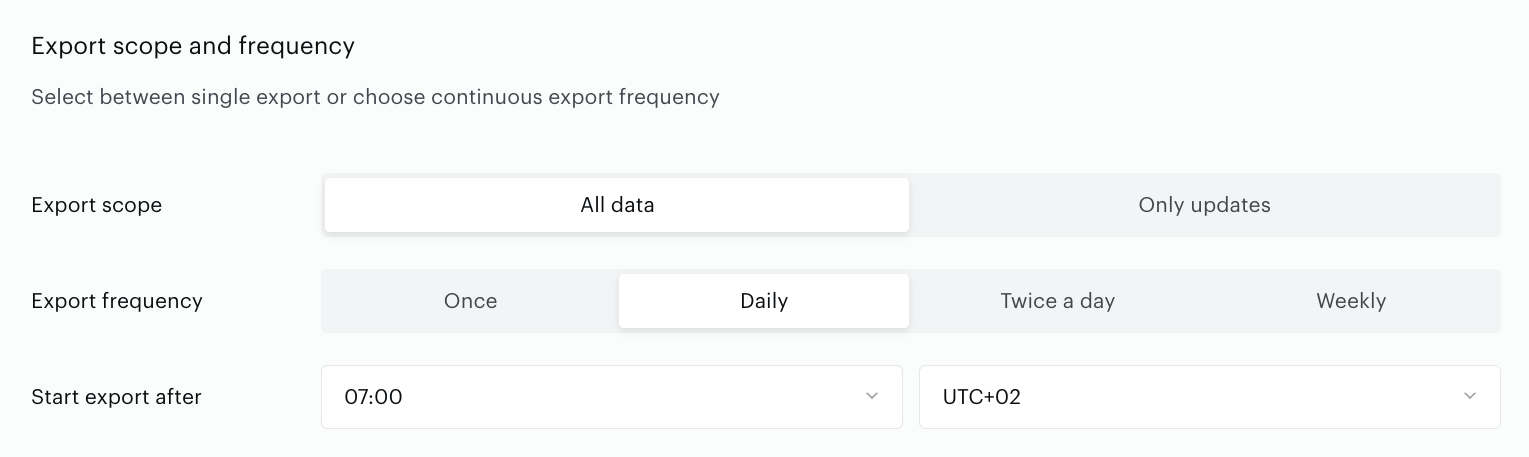
Export into a file starts according to the settings here: either once or periodically.
-
Once. This option allows you to export data once. For example, you can create and activate the File export connection today, selecting the Once option. The export data will be executed on the next day.
-
Weekly. This option allows you to export data once a day every seventh day.
-
Daily. This option allows you to export data once a day every day. There is an extra parameter Start export after. It allows you to select when the export should be started.
-
Twice a day. This option allows you to export data twice a day every day. There is an extra parameter Start export after. It allows you to select when the export should be started. It is possible to set up 2 different hours by selecting them from the selectors. The time for the first export should differ from the second one. The difference between these two times should be more than 3 hours.
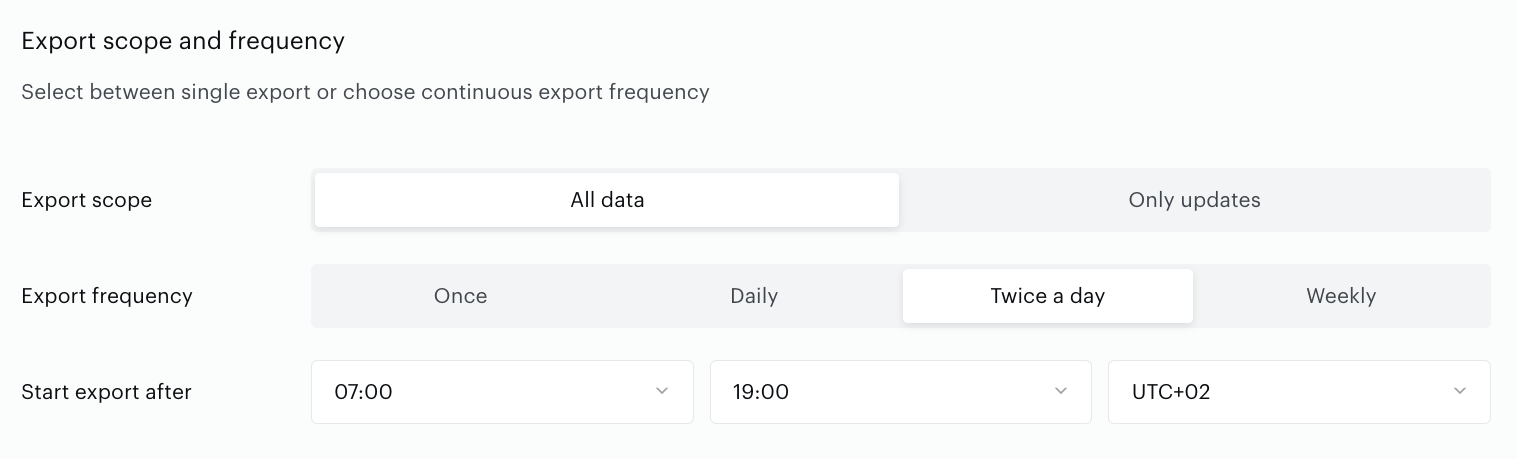
Please consider that the export process takes time, which depends on the amount of data that you want to export. When you select the time as 7 a.m. it does not mean that the export will be done immediately at 7 a.m. It means that after 7 a.m. the system will start preparing data for the export and put it into the common queue for export. Due to the facts mentioned above it is not recommended to set the time too early or too late.
Export now
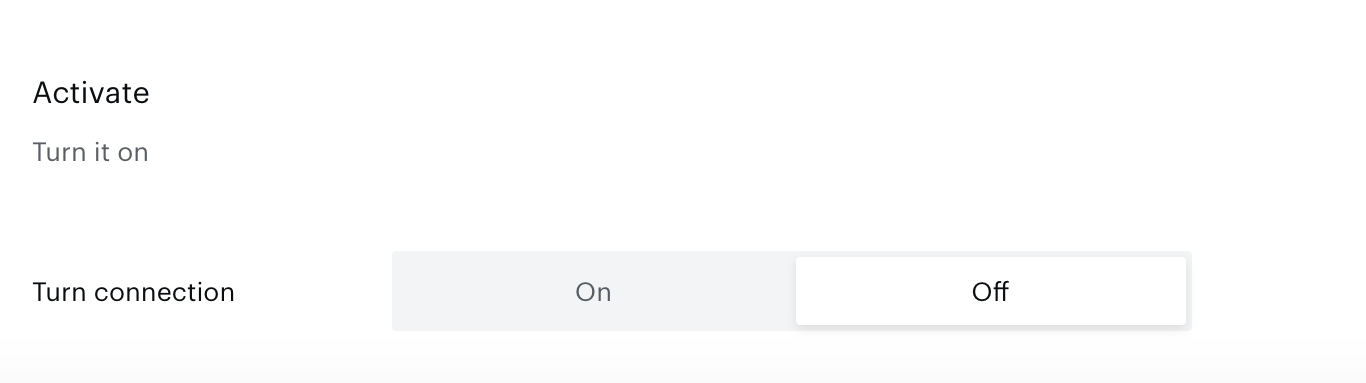
You can click Export now in the Configure segments section for almost immediate export of selected segments and extra data without waiting for the next scheduled data transfer. The other option is configuring scheduled data transfer in the Activate section below. There, you can either set up a daily data transfer by turning connection on, or hold the created configuration without activation yet and set the connection to "off".
When ready, click Create or Save (if editing) in the top right corner of the page.
Export user profile data
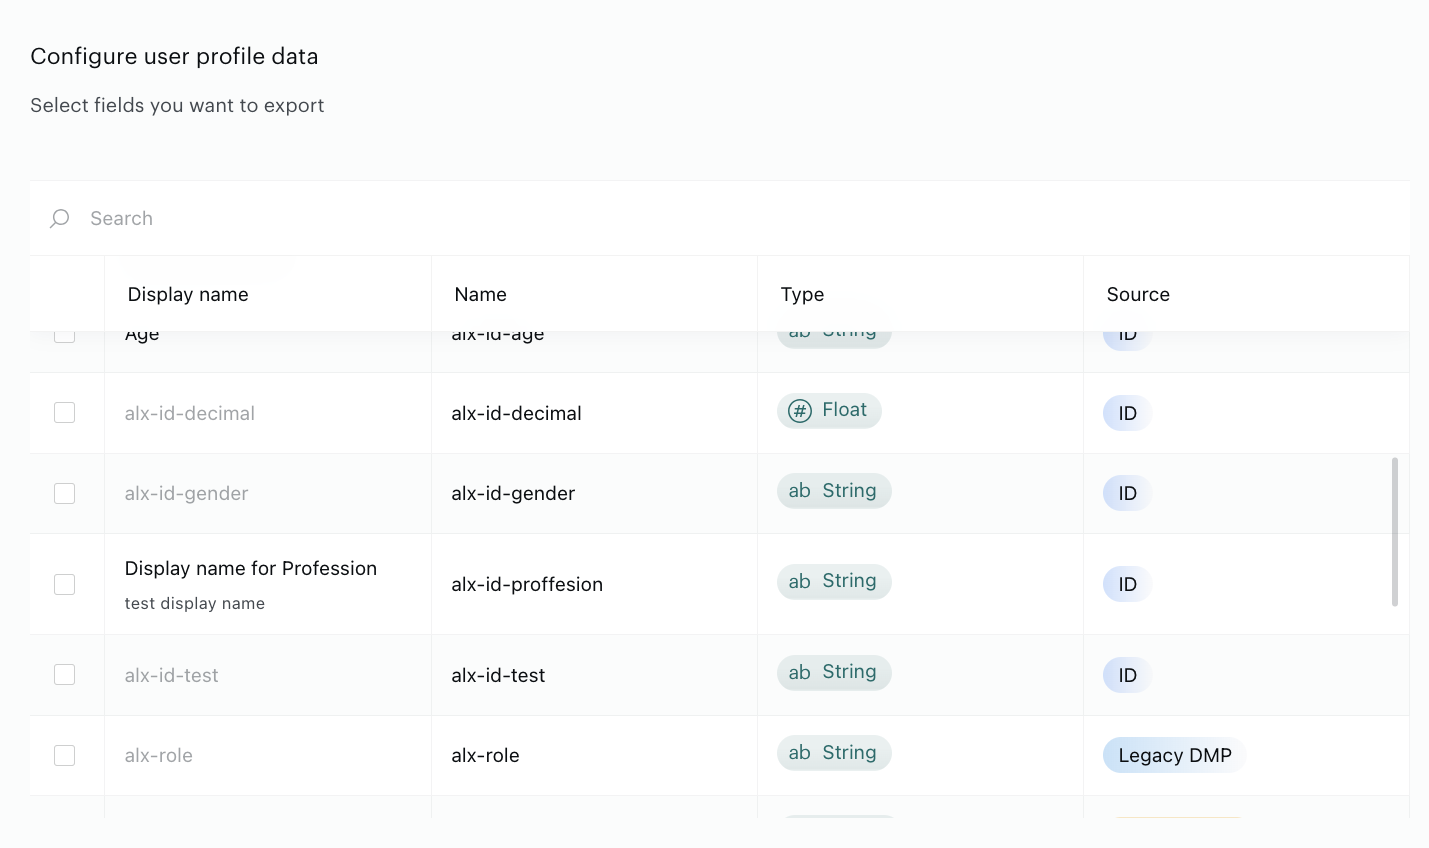
Piano Audience enables you to export user profile data, such as email, name, or custom fields, alongside segment IDs to destinations like sFTP, Google Cloud Storage (GCS), or Amazon S3. By selecting a user identity (stored as a "prefix" in Piano Audience), you can include relevant attributes in the export. This section explains how to configure the export, select an identity, and customize the file structure.
Overview
User profile data exports allow you to retrieve specific attributes linked to a user identity and combine them with segment IDs for use in external systems. To ensure the export contains meaningful data, you must select a valid identity prefix that corresponds to the desired attributes. For example, choosing an hashed-email prefix will include attributes tied to email-based user profiles. Piano Audience also provides a drag-and-drop interface to reorder columns in the exported file, giving you flexibility to structure the output as needed.
Configuring the Export
Set up your user profile data export with these steps:
-
-
Choose sFTP, GCS, or S3 in the export panel.
-
Enter connection details (e.g., credentials, bucket).
-
-
-
Choose the segments to export in the configuration panel.
-
Ensure segments align with your target audience data.
-
-
-
Select a prefix (e.g., hashed-email, CRM ID) linked to profile data.
-
Ensure prefix matches desired attributes to avoid exclusions.
-
-
Select Attributes:
-
Pick profile fields (e.g., name, custom fields).
-
Confirm attributes align with the chosen prefix.
-
-
Customize Export File Structure:
-
Reorder columns via drag-and-drop.
-
Toggle the Segment IDs slider in Export file structure → Users to include or exclude segment IDs.
-
Preview structure to match your needs.
-
-
Validate Export Scope and Save:
-
Review prefix, attributes, and column order.
-
Test export and save or schedule.
-
Best Practices
-
Use a prefix tied to your target data (e.g., email for email-based profiles).
-
Verify attributes are populated for the prefix.
-
Order columns to align with downstream systems.
-
Test exports before scheduling.
Monitoring and update
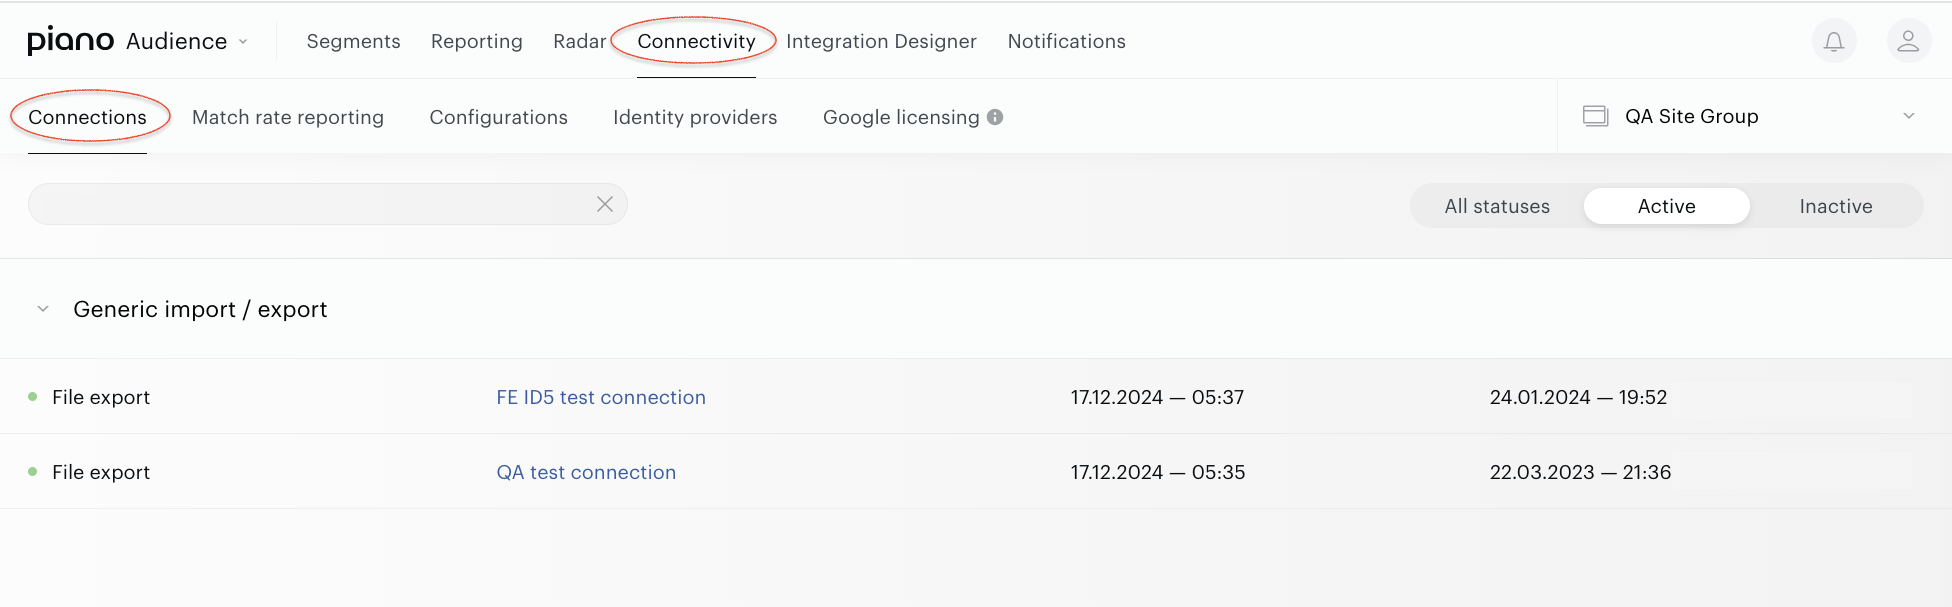
If you want to update a file export connection, navigate to Audience → Connectivity → Connections.
Naming convention and formatting
After a successful export, files will appear on the SFTP server in a specific directory.
The name of the membership file is yyyyMMddHHmmss-<siteGroupId>-users.tsv.gz and the name of the segments file is yyyyMMddHHmmss-<siteGroupId>-taxonomy.csv, where the siteGroupId is the ID of a site group, yyyyMMddHHmmss is the time (UTC) of creation: yyyy means year (4 digits), mm means month (2 digits), dd stands for day (2 digits), hhmmss is time of export (2 digits for hour, 2 digits for minutes, and 2 digits for seconds).
The header of segments file depends on the settings in Export File Structure → All segments name, e.g. segmentId, segmentName, segmentDescription, and segmentStatus.
The header of membership file depends on the settings in Export File Structure → All members, e.g. userID1, segmentID1.
The delimiter between output parameters in the CSV file is comma; in the TSV file, ‘TAB’.
UTF-8 is used.