
The User Profile Data Import feature simplifies data ingestion by allowing clients to upload user profile attributes directly from their storage solutions, such as sFTP, Amazon S3 Bucket, or Google Cloud Storage into the Piano Audience platform. This enables the creation of segments and exporting them to respective channels.
Prerequisites
Before setting up a User Profile Data Import, ensure the following:
-
You have access to the Audience → Connectivity → Configurations section in the Piano Audience platform. No extra permissions are required beyond access to the Generic import/export section.
-
At least one Data Source has been created with the Usage parameter set to "User profile data import". This Data Source must include a configured mapping between file columns and Properties linked to User Profile fields.
-
Files in your external storage (sFTP, S3, or GCS) match the structure defined in the Data Source.
-
For the User ID type, the prefixes in the User Profile fields must match the prefix selected during connection configuration.
-
Ensure your storage solution grants the necessary access permissions, especially if using post-processing options like moving files.
The files used for data import must be encoded in UTF-8 to ensure proper processing. Using a different encoding may result in errors or incorrect data interpretation.
Create an import connection
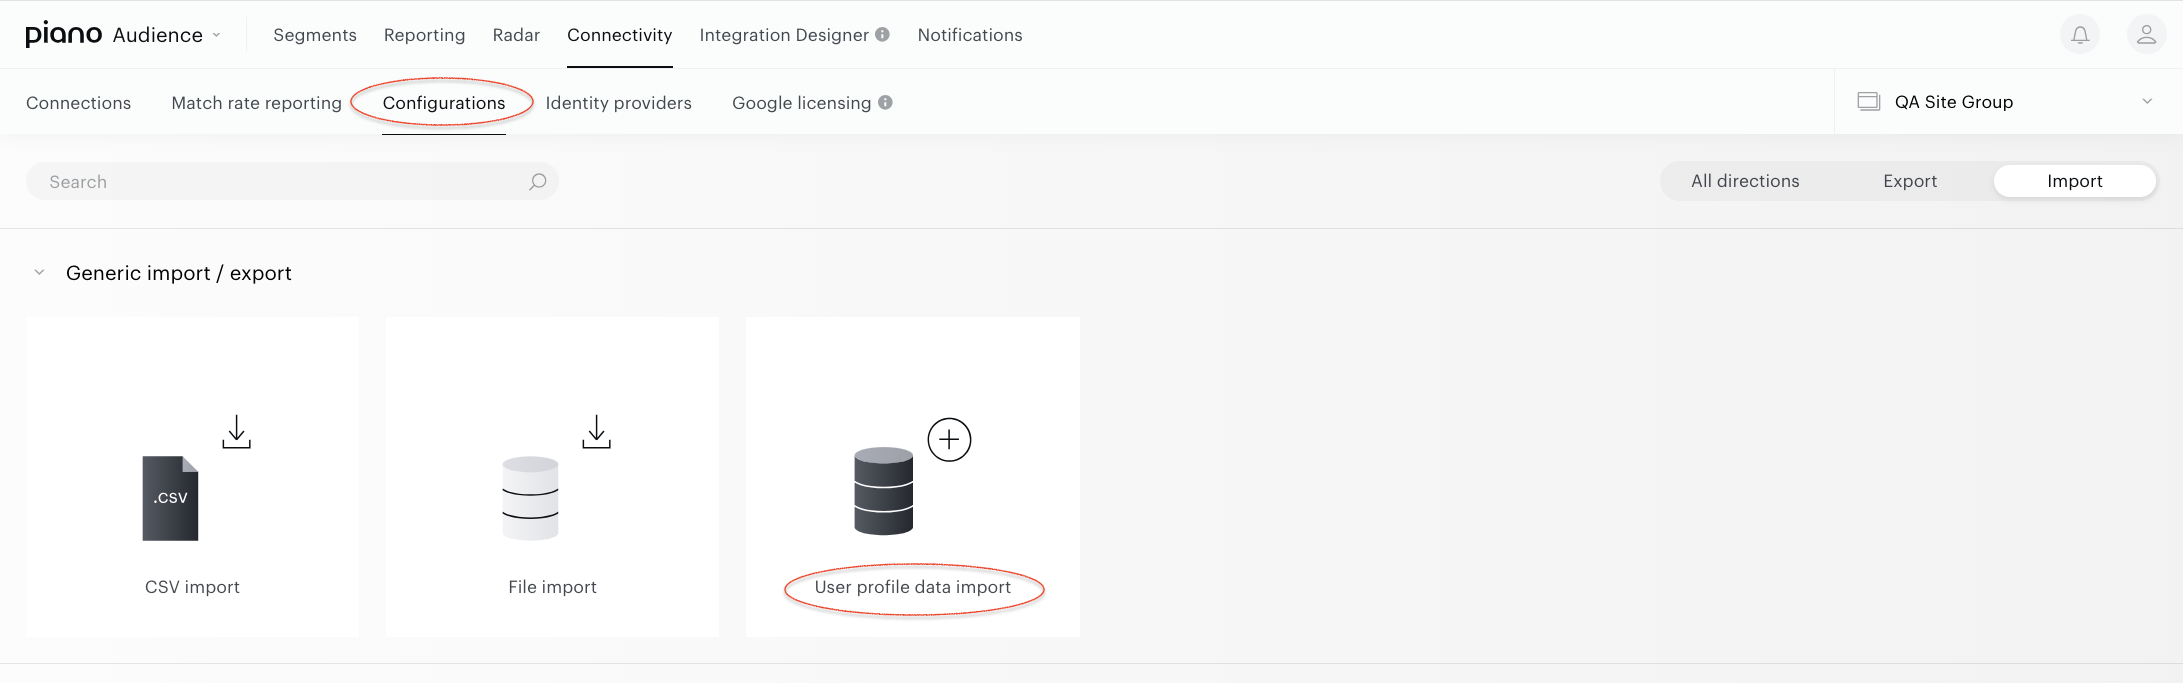
When all the prerequisites are done, you can create a User Profile Data Import connection in Audience:
-
From Piano Audience's home page, go to the Connectivity → Configurations → User profile data import icon and click the Configure button.
-
In the Connection form, fill all obligatory parameters to be able to connect to the storage. Click the Test connection button. A request to the specified account will be sent. Wait for the positive result of the Test connection. If everything works correctly, you'll get a corresponding notification.
Pro Tip: The Create button in the upper right corner will be activated. Click it. Create will turn to the Save button. You can use it any time during further configuration.
Configure the connection
In the New Connection menu, configure the following settings:
-
Project name: This identifier will be displayed within Piano Audience to facilitate the management of multiple integrations.
-
Server type: Select from SFTP, S3 (if utilizing Amazon Simple Storage Service), or Google Cloud Storage.
-
SFTP requires: Public SFTP key, Server name (or server IP address), Folder name, Port of server, Username, and Password (if applicable).
-
S3 requires: Access key, Secret key, Region, Bucket name, and Prefix.
-
Google Cloud Storage requires: Service account, Project ID, Private key, Bucket name, and Folder name.
-
Azure requires: Storage account name, SAS token, Endpoint suffix, Container, Prefix.
-
-
Use limited IP range: Enable this option to restrict routing to specific IP addresses, as outlined in the Composer 1x Crawler documentation, for processing files via a Piano Managed proxy server to storage vendors Amazon S3 and Google Cloud Storage. If disabled, all available IPs will be utilized.
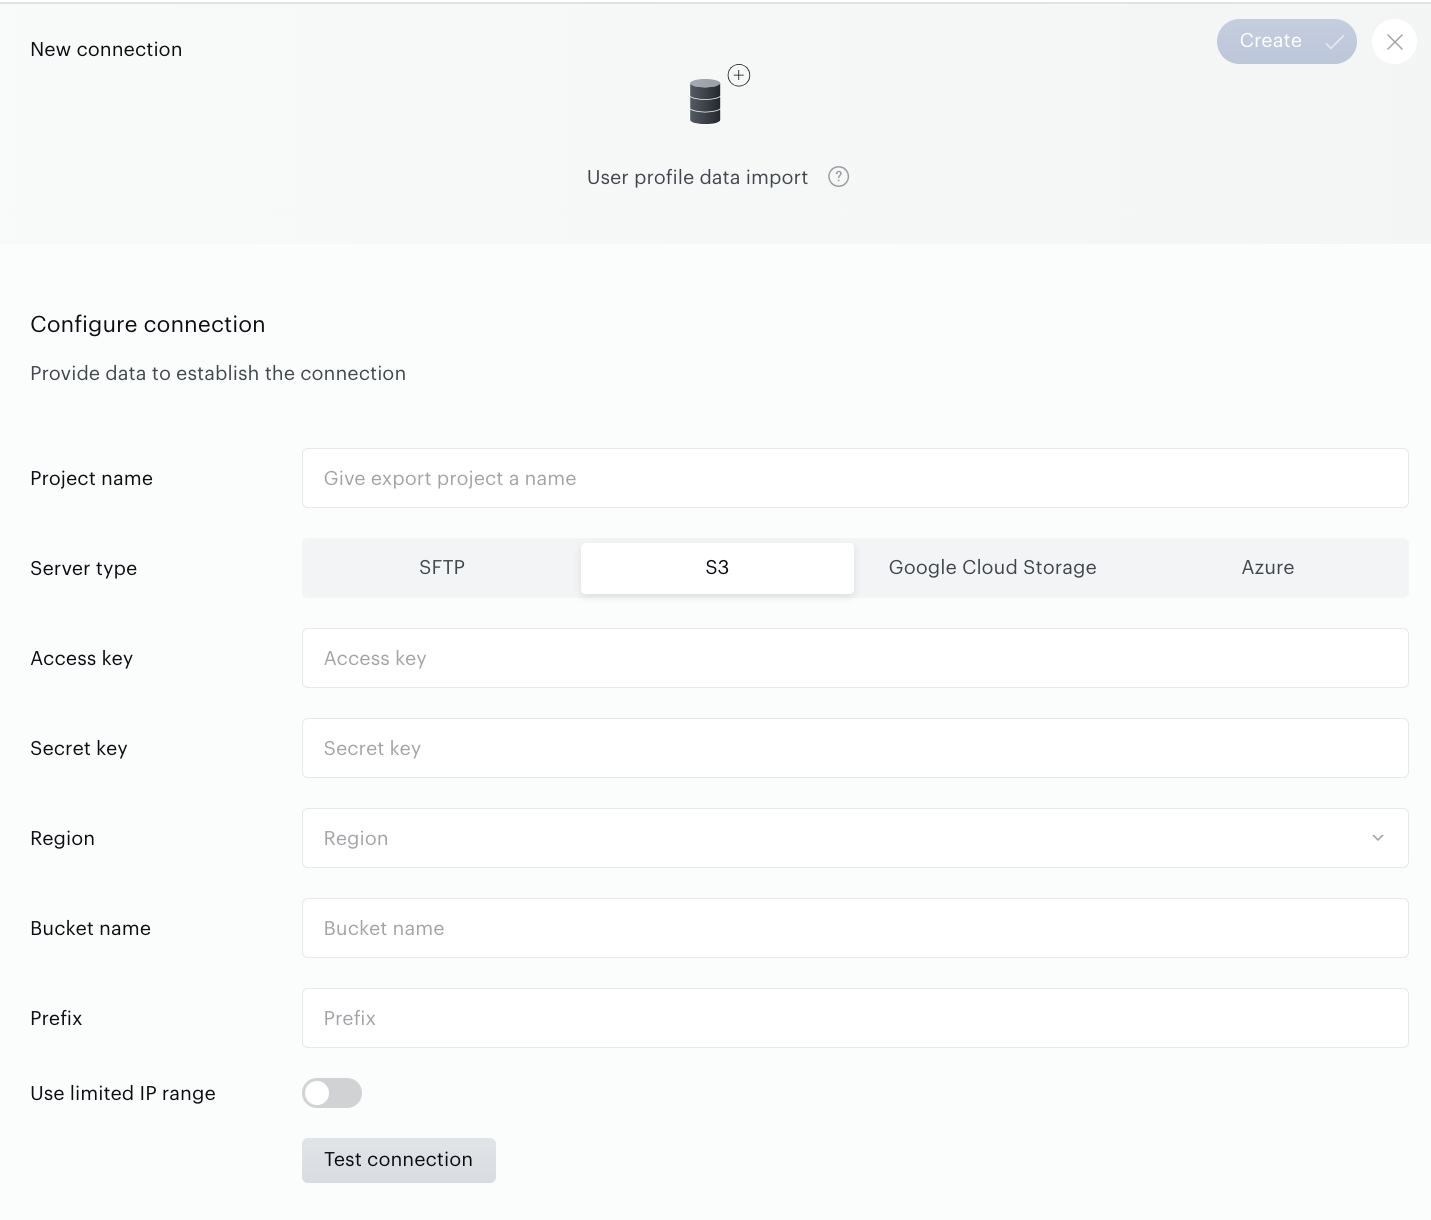
To utilize S3 storage, ensure all fields related to SFTP and Google Cloud Storage (GCS) remain empty, and vice versa. If you require the use of multiple storage types concurrently, it is necessary to establish a distinct connection for each server type, as a single connection cannot accommodate multiple storage types simultaneously.
Import folder configuration
Initially, confirm whether the files are stored within a folder. If applicable, designate the Folder name type:
-
Select the Name option for folders with a fixed name. Upon selection, please provide the folder name in the designated Folder name
-
Opt for the Name structure option if the folder name is dynamically generated based on parameters such as date, customer name, or other specific criteria, typically automated by the source platform. Upon choosing this option, configure the folder name structure by incorporating static components, customizable elements, and various delimiters.
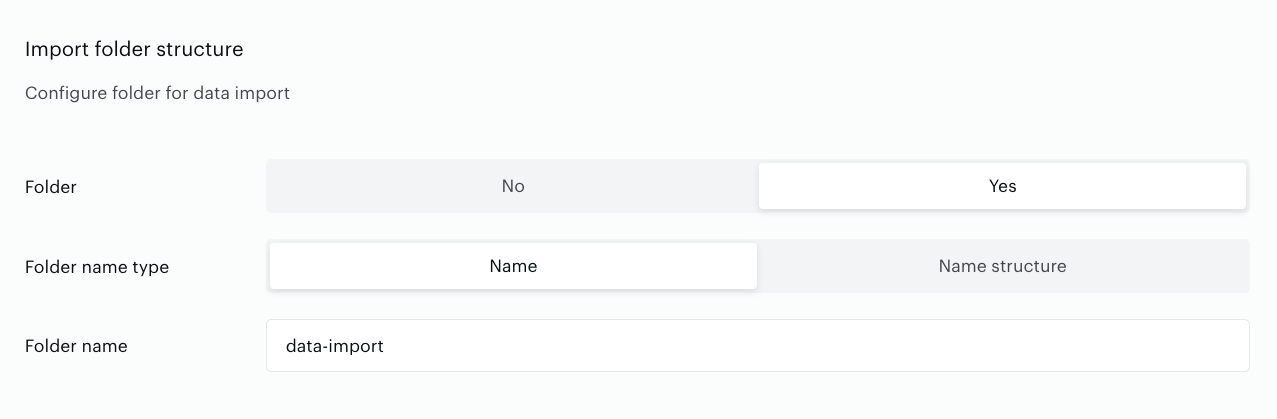
The folder name structure configuration applies uniformly across all import types. For further details, refer to the Name configuration section of this document. Please note that we enforce basic naming restrictions concerning symbols, letters, and name length. Additional information is available in the Name restrictions section of this document.
Import name configuration
Initially, configure the following settings:
-
File type: Piano Audience supports only CSV and TSV file formats.
-
File compression: Indicate whether the files are archived to enable Piano Audience to process them accordingly.
Additionally, specify the File name type:
-
Select the Name option if the file has a static name. Upon selection, enter the file name in the File name field.
-
Choose the Name structure option if the file name is dynamically generated based on parameters such as date, customer name, or other specific criteria, typically automated by the source platform. Upon selecting this option, configure the file name structure by incorporating static components, customizable elements, and various delimiters.
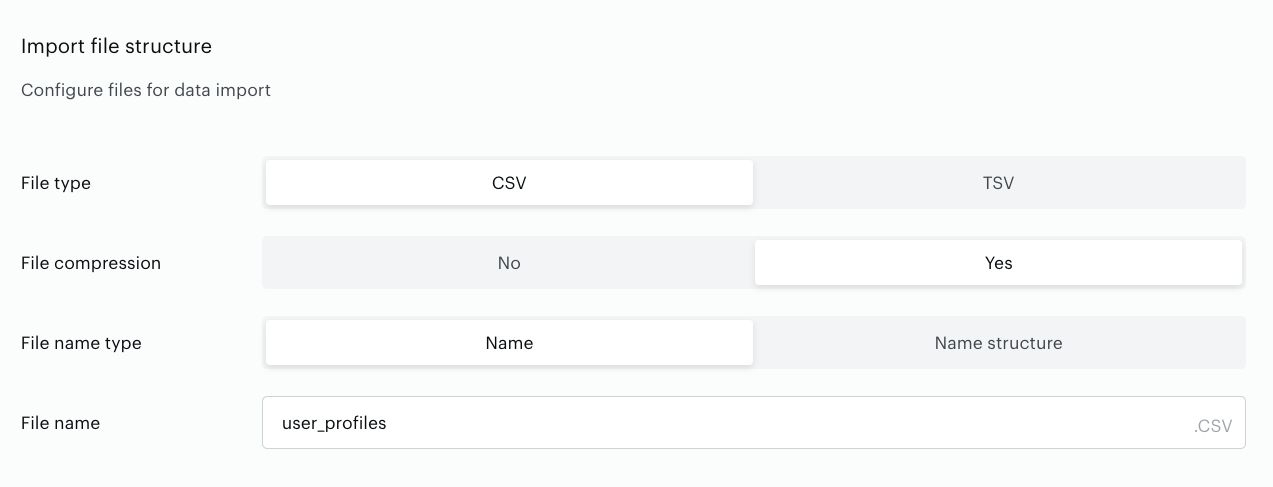
The file name structure configuration applies consistently across all import types. For further details, refer to the Name configuration section of this document. Please note that we enforce basic naming restrictions regarding symbols, letters, and name length. Additional information is available in the Name restrictions section of this document.
Name configuration
Generally, files can be exported to designated folders with names that are either static or dynamically generated, depending on factors such as the export date, customer names, or other relevant criteria.
File names can be established in a similar manner—either as static names, such as “My external segments.csv”, or configured on a daily basis, reflecting parameters like date, customer names, customer IDs, or other variables.
For the latter scenario, where the name is automatically generated based on a specific template, the User Profile Data Import connection enables the configuration of name structures. This is achieved by assembling various components as follows:
-
Static parts: Typically a concise string comprising letters and numbers, any text, and commonly referred to as prefixes or suffixes.
-
Delimiters: These are used to separate different name components and may include hyphens, underscores, spaces, and other permissible symbols compatible with file naming conventions.
-
Changeable parts: These variable elements can depend on factors such as client ID, client name, or other parameters. This section may feature variable lengths or be set to a fixed length, for example, 5 characters.
-
Date and time option: This feature enables the configuration of names based on date and/or time parameters.
The Name preview functionality allows you to view the configured folder or file name structure, ensuring its accuracy and correctness.
Please note that Piano Audience validates file and folder names for prohibited symbols, maximum allowable name length, and other relevant restrictions.
Name restrictions
The maximum name length for files and folders is limited to 250 characters.
The following characters are considered prohibited for file and folder names and will be validated by Piano Audience:
-
# pound
-
% percent
-
& ampersand
-
{ left curly bracket
-
} right curly bracket
-
\ backslash
-
< left angle bracket
-
> right angle bracket
-
* asterisk
-
? question mark
-
/ forward slash
-
$ dollar sign
-
! exclamation point
-
' single quotes
-
" double quotes
-
@ at sign
-
+ plus sign
-
` backtick
-
| pipe
-
= equal sign
The delimiters that can be used in folder/file name structure:
-
_
-
- (minus)
-
:
-
<space>
-
.
Data Import configuration
To associate data from your uploaded files with Piano Audience objects, configure the following parameters in the Configure data import section.
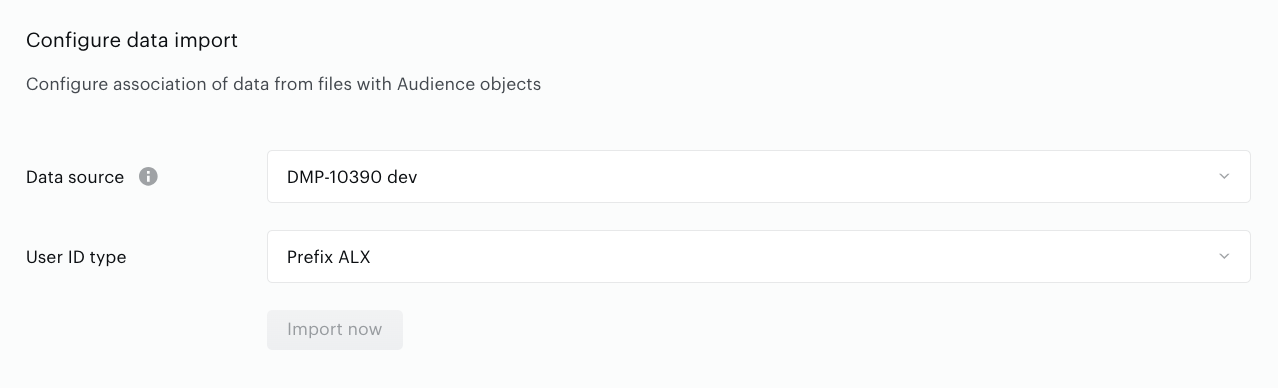
Data Source
This parameter defines the mapping configuration for your file data to Piano Audience properties. Select one option from the dropdown selector.
-
The selector displays only Data Sources where the Usage parameter is set to User profile data import.
-
If the selector is empty (indicating no suitable Data Source exists), navigate to Audience → Accounts Management → Data Sources and create a new Data Source. Once created, return to this configuration.
User ID Type
This is a required field. Specify the type of user identifier used in your files, selecting from available prefixes (e.g. a respective customer prefix).
Select only one option. Ensure the prefixes in your User Profile fields match the selected prefix for seamless data injection.
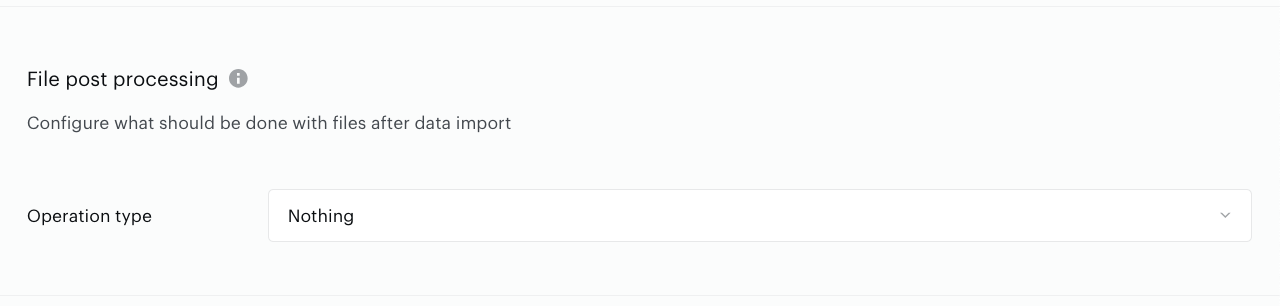
Post processing
You can select one of the available options to determine the action to be taken with files following the import process:
-
Do nothing (default option): No action is performed on the files post-import.
-
Delete: Choose this option to remove files after import. Ensure all necessary permissions for this operation are granted by your storage provider.
-
Rename: Select this option to modify the file name(s) by adding a prefix or suffix. You may specify a custom prefix or suffix; if left blank, Piano Audience will apply the default value: “ok”.
-
Move to folder: Opt for this to relocate files to a designated folder. This is a non-configurable option—Piano Audience automatically creates a folder named “processed” in the same directory, and the folder name cannot be customized.
Import Frequency
Clients can configure the frequency of data imports by selecting one of the following options in the Import frequency section:
-
Once: Files will be imported a single time at a specified schedule.
-
Daily (default): Files will be imported daily at designated fixed times, starting after the configured Start import after time.
-
Weekly: Files will be imported once per week on the selected weekday at specified fixed times.
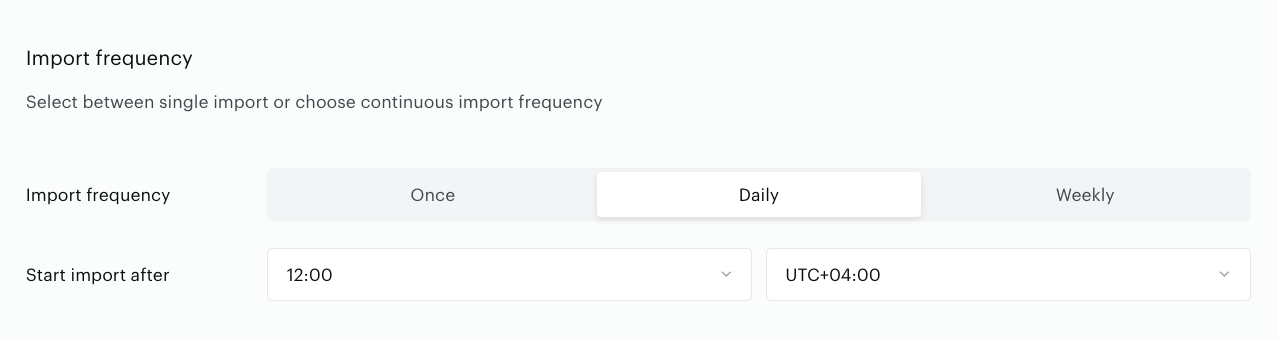
It is highly recommended to set the start time of the importing process (the Start import after parameter) to a time not earlier than the completion of data export to file storage, ensuring data availability before import begins.
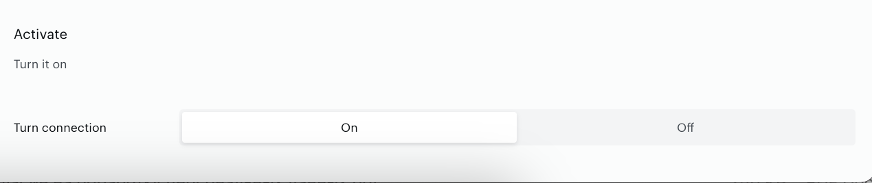
Activate
This section allows you to enable or disable the User Profile Data Import connection. When set to "off," the connection configuration will be saved but will not be executed. Activate the connection to initiate the data import process according to the configured settings.
Import results
The results of data import are displayed on the History tab. Currently, you can expect to receive general information about how many rows from the entire file were successfully processed and how many rows were discarded for various reasons (such as empty rows or incorrect data format).
History and Errors tab
Immediately after creating a connection configuration, the History and Errors tabs become available. These allow you to track information about who made changes to the connection configuration, when, and what changes were made, as well as to view import errors.
For example, you created a connection, the test connection passed successfully, and the connection worked. But after several weeks or months, changes were made on the data storage side - for instance, a token expired, an API key was regenerated, or a folder was deleted/renamed. In such cases, the import cannot be executed, and messages about these errors will appear on the Errors tab.