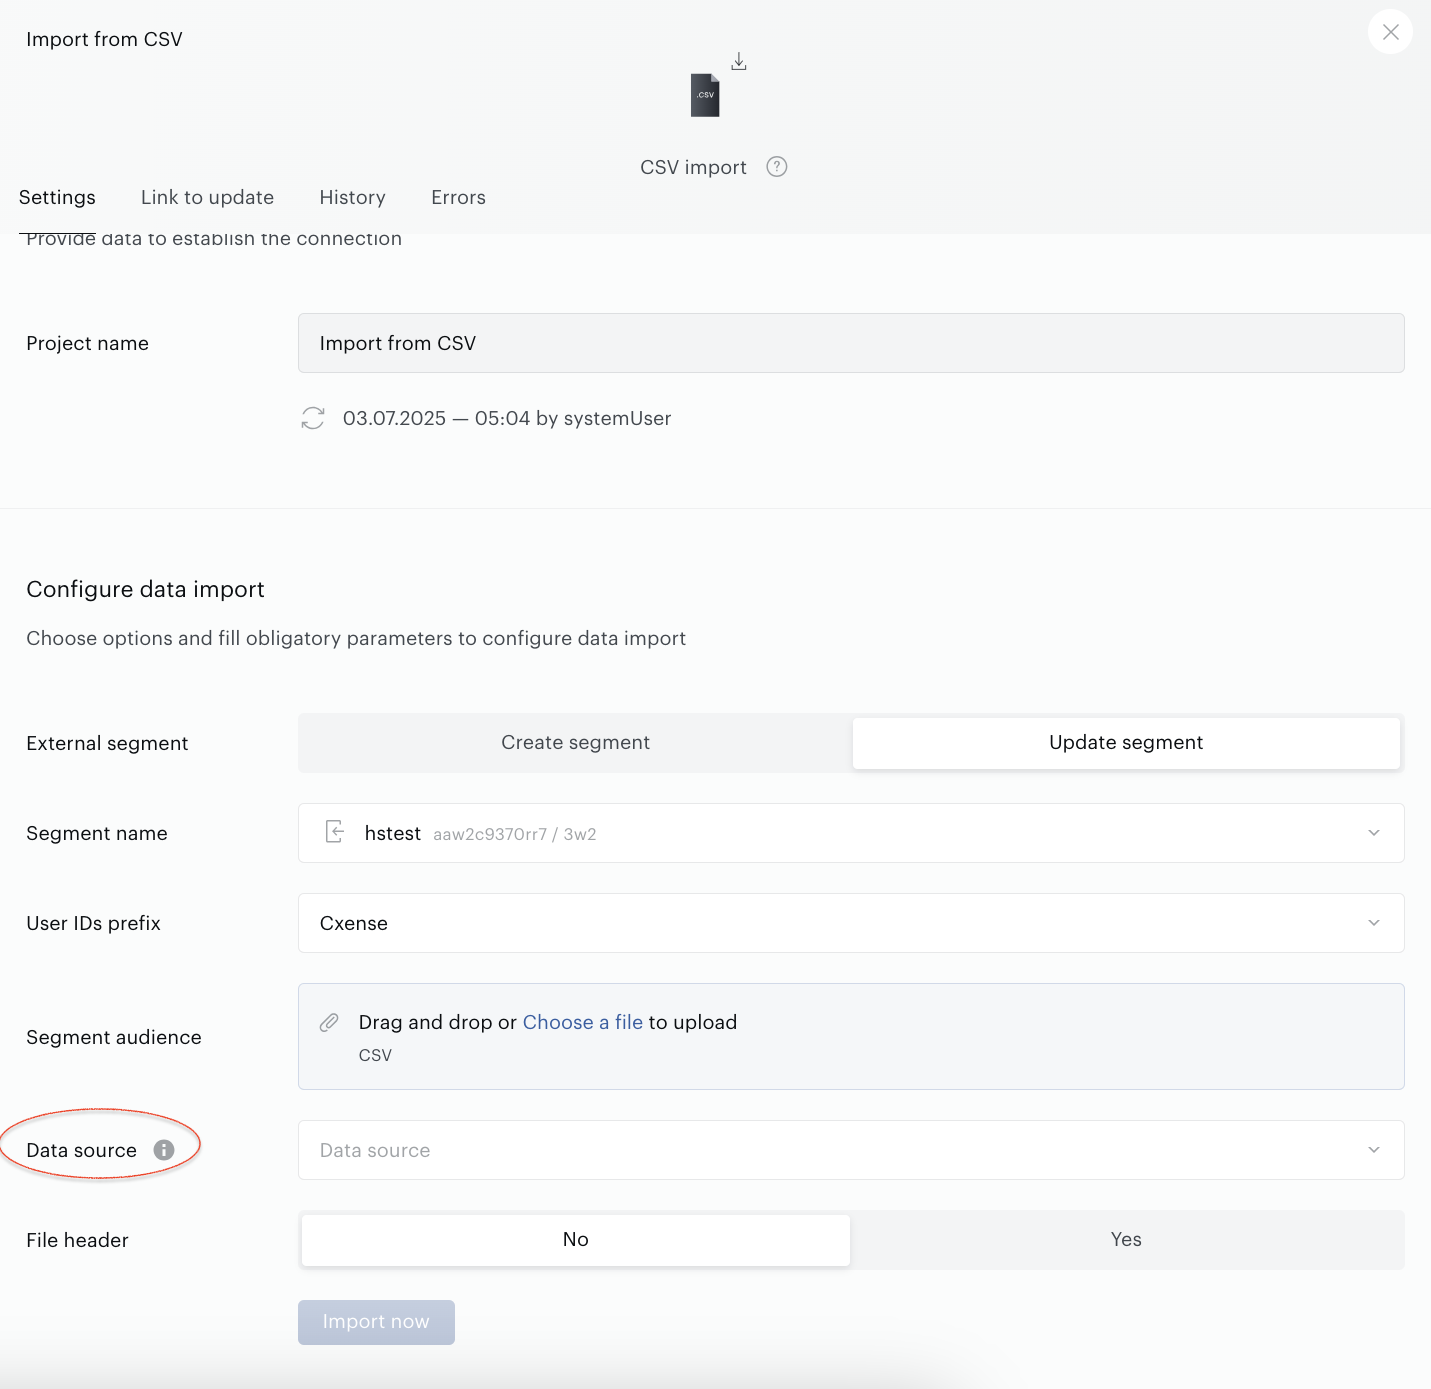
Import from CSV connection in the Audience→Connectivity allows you to import segment data or user profile data from CSV files. In the first case, the import results in an External segment with an up-to-date audience; in the second case, user profiles in the CDP are updated - in particular, with data on the number of vehicles per ZIP code(s).
The integration needs Piano Audience setup completed (available siteGroupId(s) are required).
Create a CSV import connection
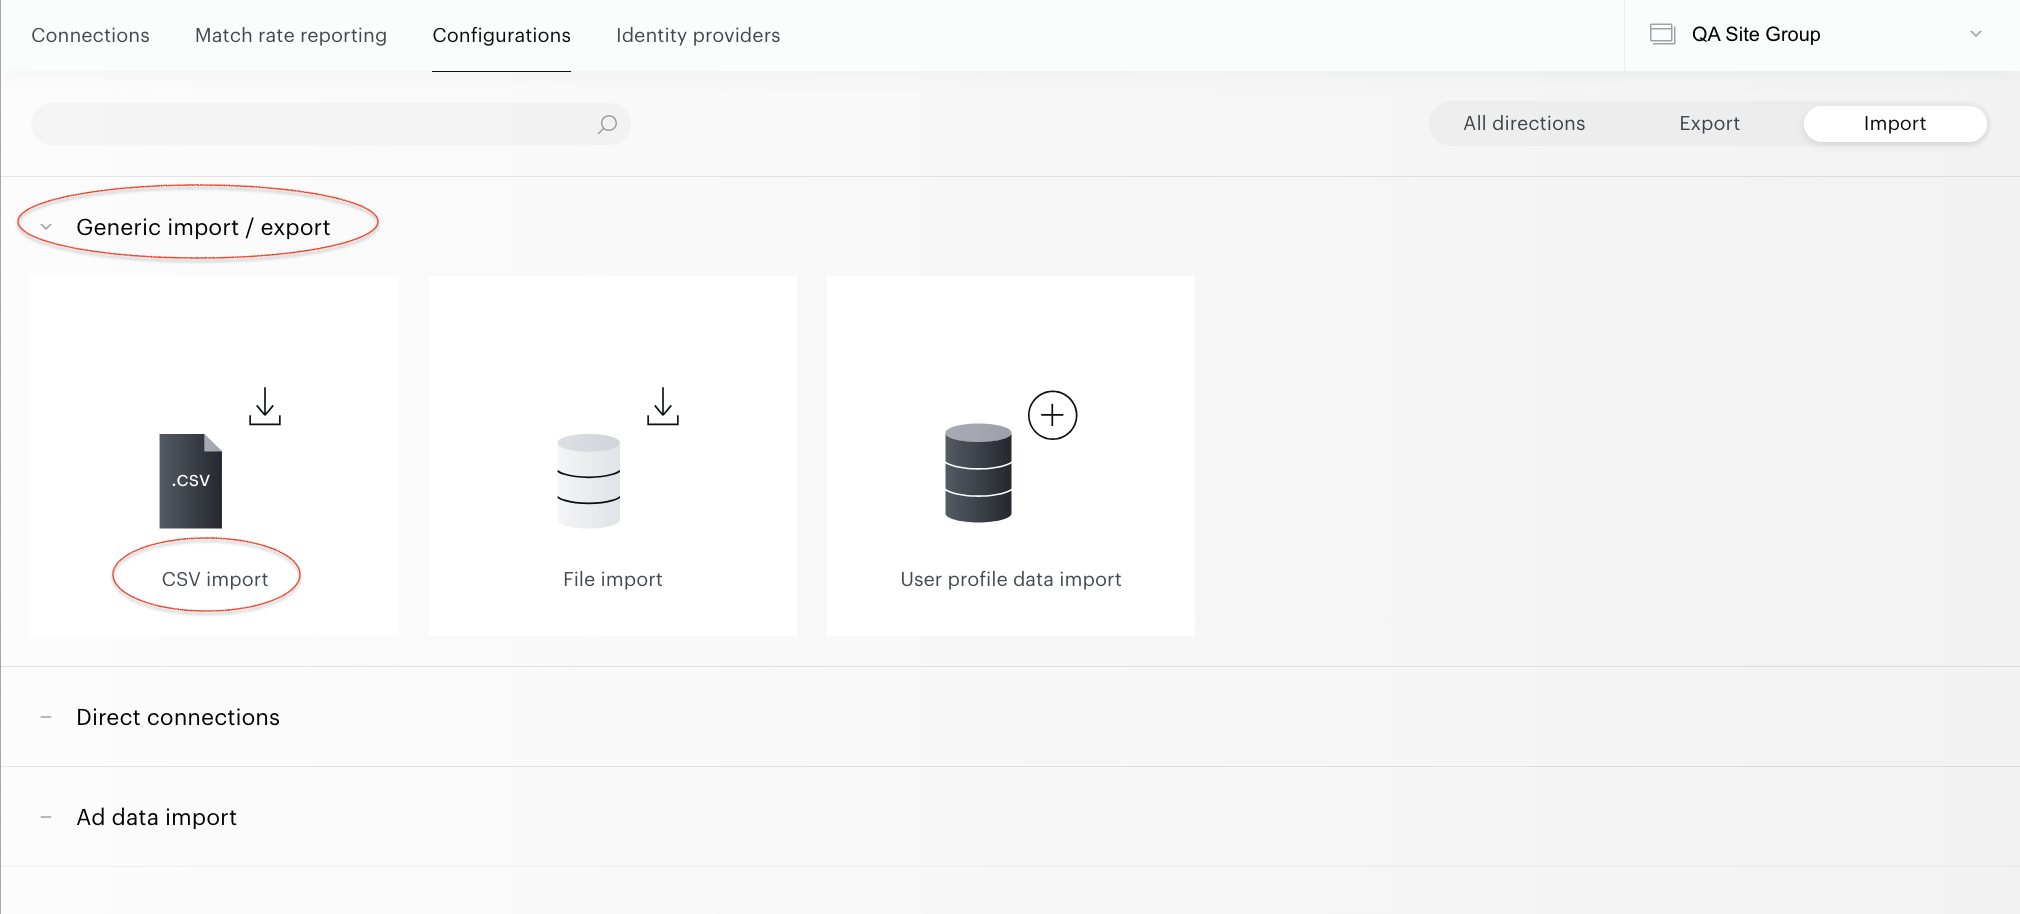
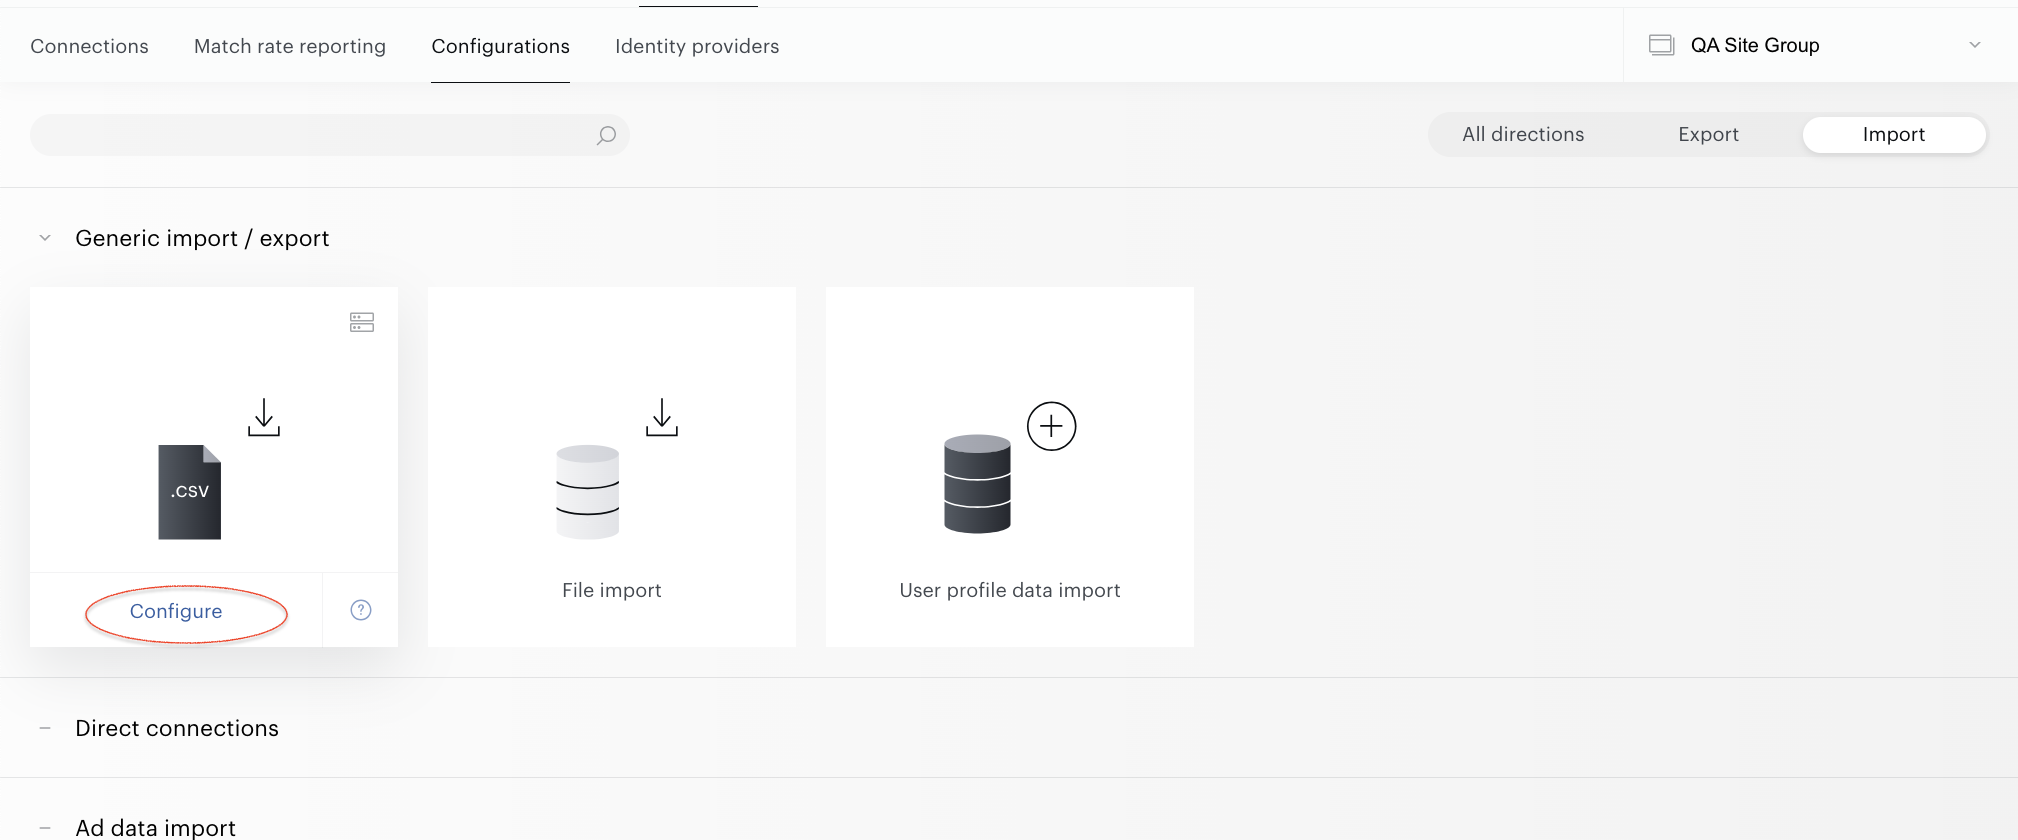
With your site group selected, from the Piano Audience home page, go to the Connectivity tab→the Configurations tab→the CSV import icon and click the Configure button.
Configure the connection
You can create the only CSV import connection within the site group. Project name is predefined and cannot be changed.
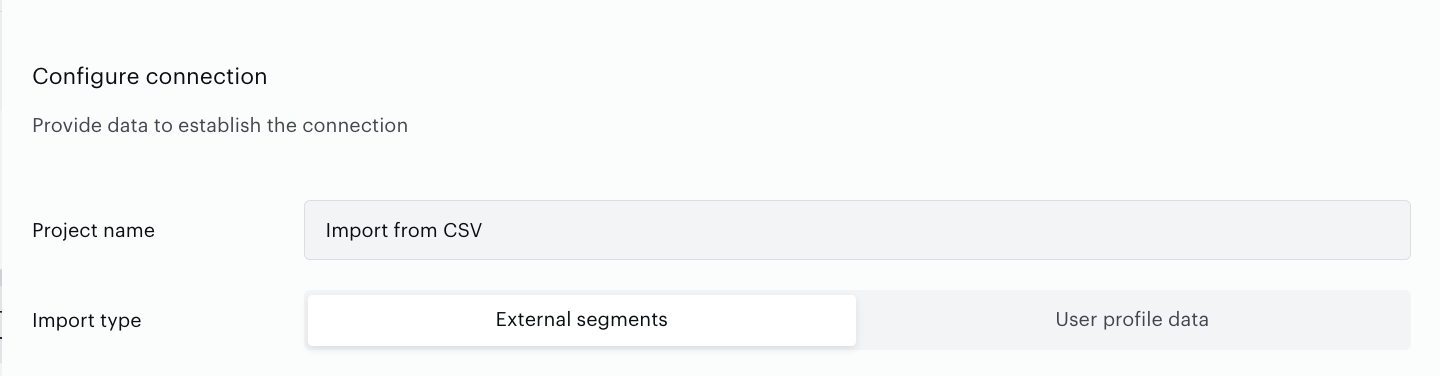
If you plan to create External segments and/or update external segment audiences, choose External segments option. User profile data option is intended for updating user profiles in the CDP. A specific feature of this import is that the ZIP code is used as the user profile identifier instead of a unique user ID. This functionality was originally designed to enrich profiles with data on the number of vehicles per ZIP code.
Scroll down to the Configure data import section and make settings that allow you to import segment data from file.
Configure data import for External Segments
Configure data import starting with a selection of the operation: Create segment or Update segment.
To create an external segment with its audience from scratch, it is recommended to select the option Create segment.
If you have already created an External segment and want to update its audience, it is recommended to select the option Update segment.
Create an external segment with its audience
Go to the Settings tab and scroll down to the Configure data import section.
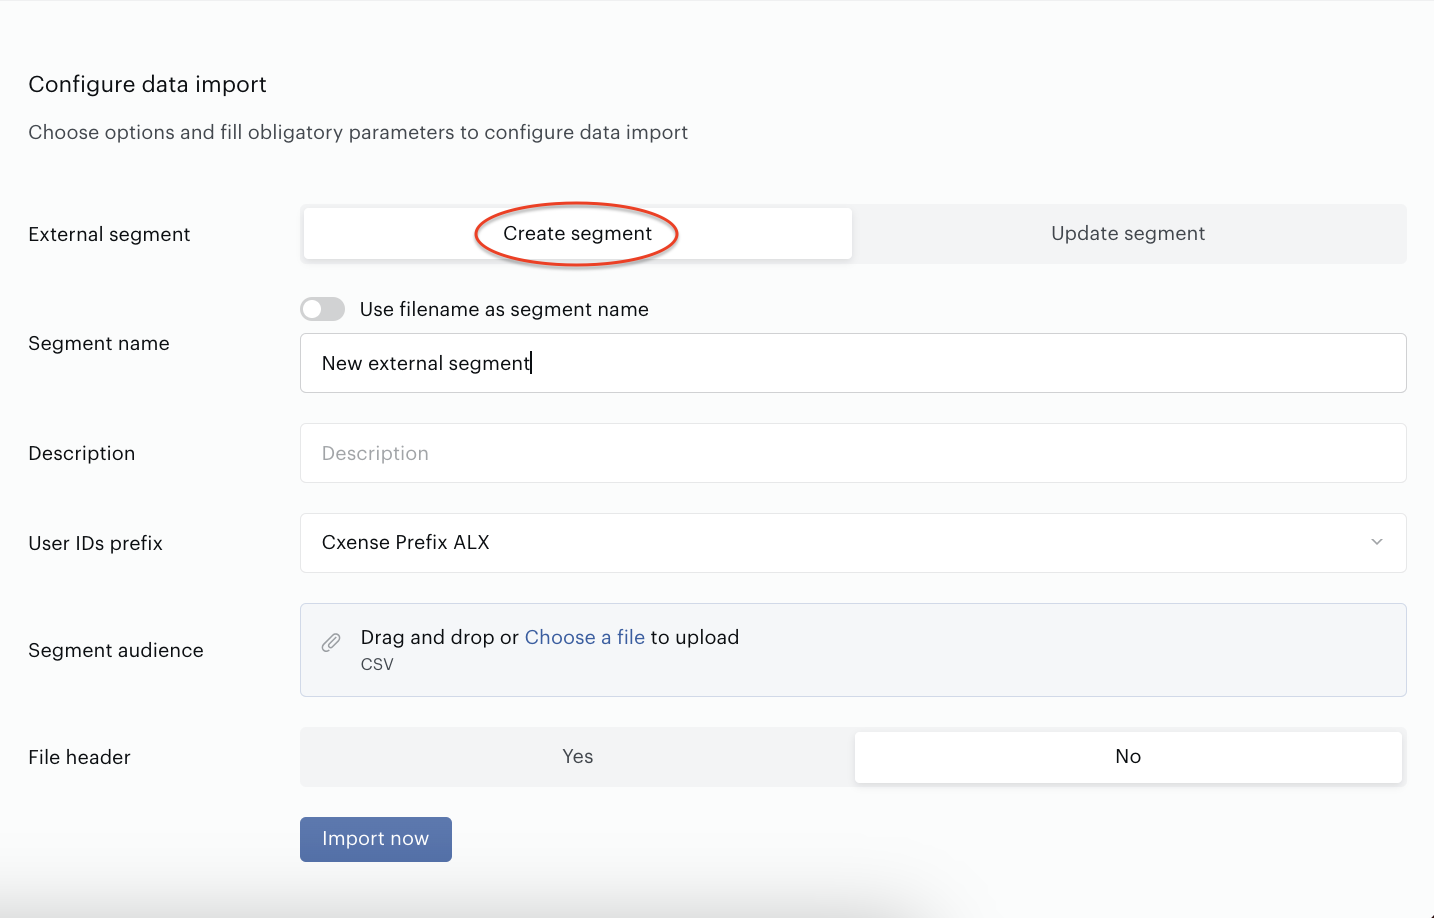
To create an external segment and its audience you need to do the following:
-
Select the Create segment option for the External segment parameter.
-
Fill in a Segment name. This parameter is obligatory. There are 2 ways to do this:
-
If you select the Use filename as segment name the system takes the CSV file name as a name of a new External segment.
-
If you deselect the Use filename as segment name parameter, the Segment name input field will be shown. Feel free to input any suitable segment name.
-
-
Fill in a segment Description. This parameter is not obligatory and can be changed any moment using the Segment Builder in the Audience→Segments.
-
Select the User IDs prefix to associate the User IDs with a customer. Read more about Customers’ prefixes here.
-
Set the File header option (Yes/No). Select the Yes option to skip the first row of an imported CSV file.
-
To create the Segment audience select a file for uploading. Pay attention to the CSV file structure. Be aware that the import works for the CSV files, one file is related to one segment. File should not be compressed.
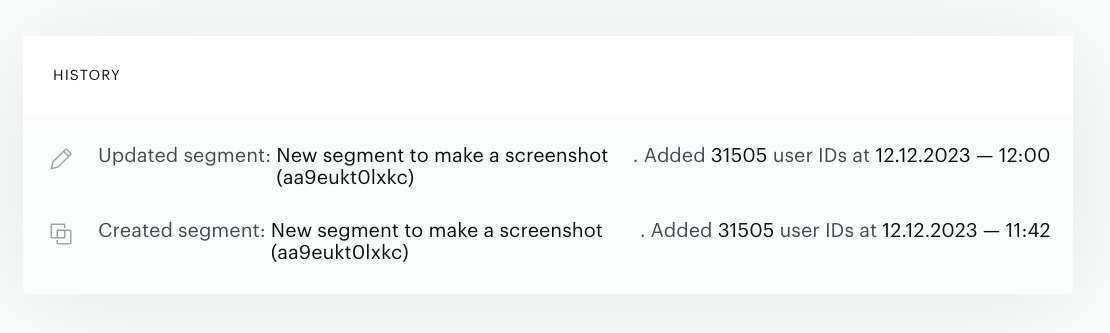
When all obligatory parameters are filled in and selected press the Import now button. The import itself takes some time. You can find the import results in the History tab of the connection form.
If you create the configuration for the first time, press the Create button, in all other cases do not forget to save changes by pressing the Save button.
Update an external segment audience
Go to the Settings tab and scroll down to the Configure data import section.
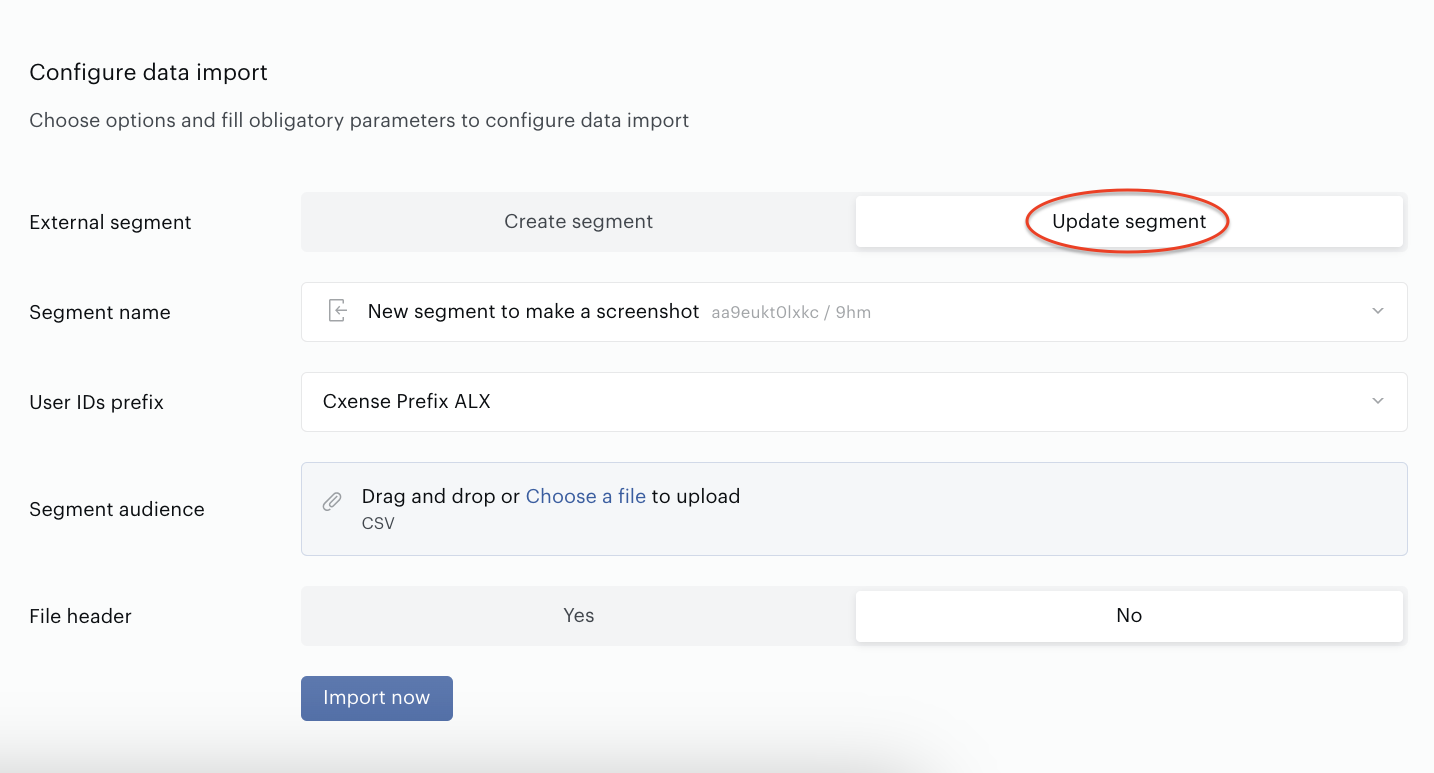
To update an external segment audience you need to do the following:
-
Select the Update segment option for the External segment parameter.
-
Select an external segment that you are going to update. The segment selector includes only External segments within the current site group.
-
Select the User IDs prefix to associate the User IDs with a customer. Read more about Customers’ prefixes here.
-
Set the File header option (Yes/No). Select the Yes option to skip the first row of an imported CSV file.
-
To update the Segment audience select a file for uploading. Pay attention to the CSV file structure. Be aware that the import works for the CSV files, one file is related to one segment. File should not be compressed.
When all obligatory parameters are filled in and selected, press the Import now button. The import itself takes some time. You can find the import results in the History tab of the connection form.
If you create the configuration for the first time, press the Create button, in all other cases do not forget to save changes by pressing the Save button.
Audience forecast
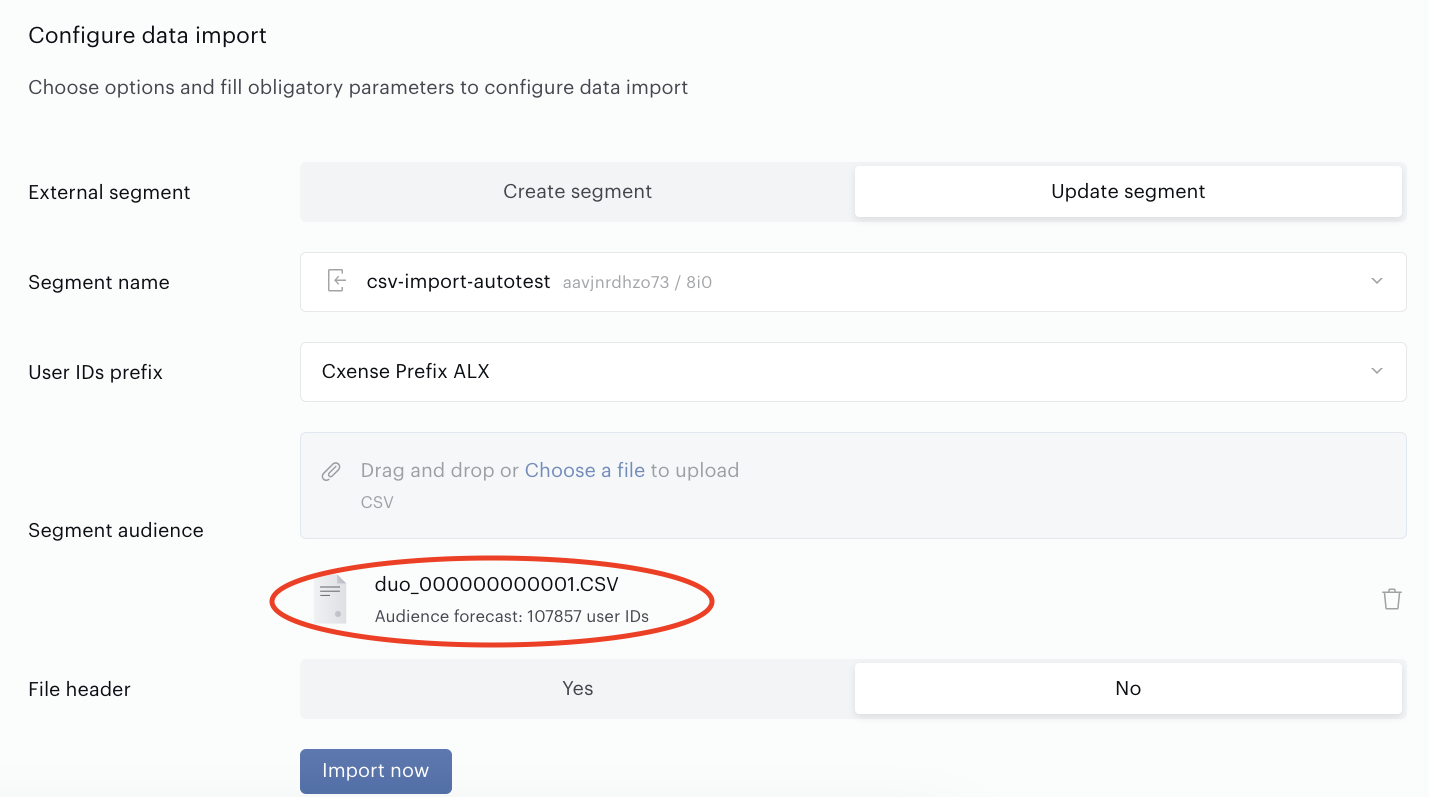
When you create or update the segment audience it is possible to see the audience forecast before the data is imported.
To be able to see the forecast numbers you need to fill in obligatory parameters, such as: User IDs prefix, CSV file and define the File heather option, and then you can see the value. Audience shows the approximate numbers of User IDs that can be imported as an audience of the External segment.
Configure and send links to manage external segments
If the CSV file should be uploaded by the user without access to Piano Audience, you can generate and send a link to an external web page to update the audience of the segment or to create a new external segment from scratch.
If you want to send the link to the user who does not have access to Audience, do the following:
-
Go to the Link to update tab in the CSV import form.
-
Select what you are going to allow external user to do: create a new segment or update one of the existing external segments.
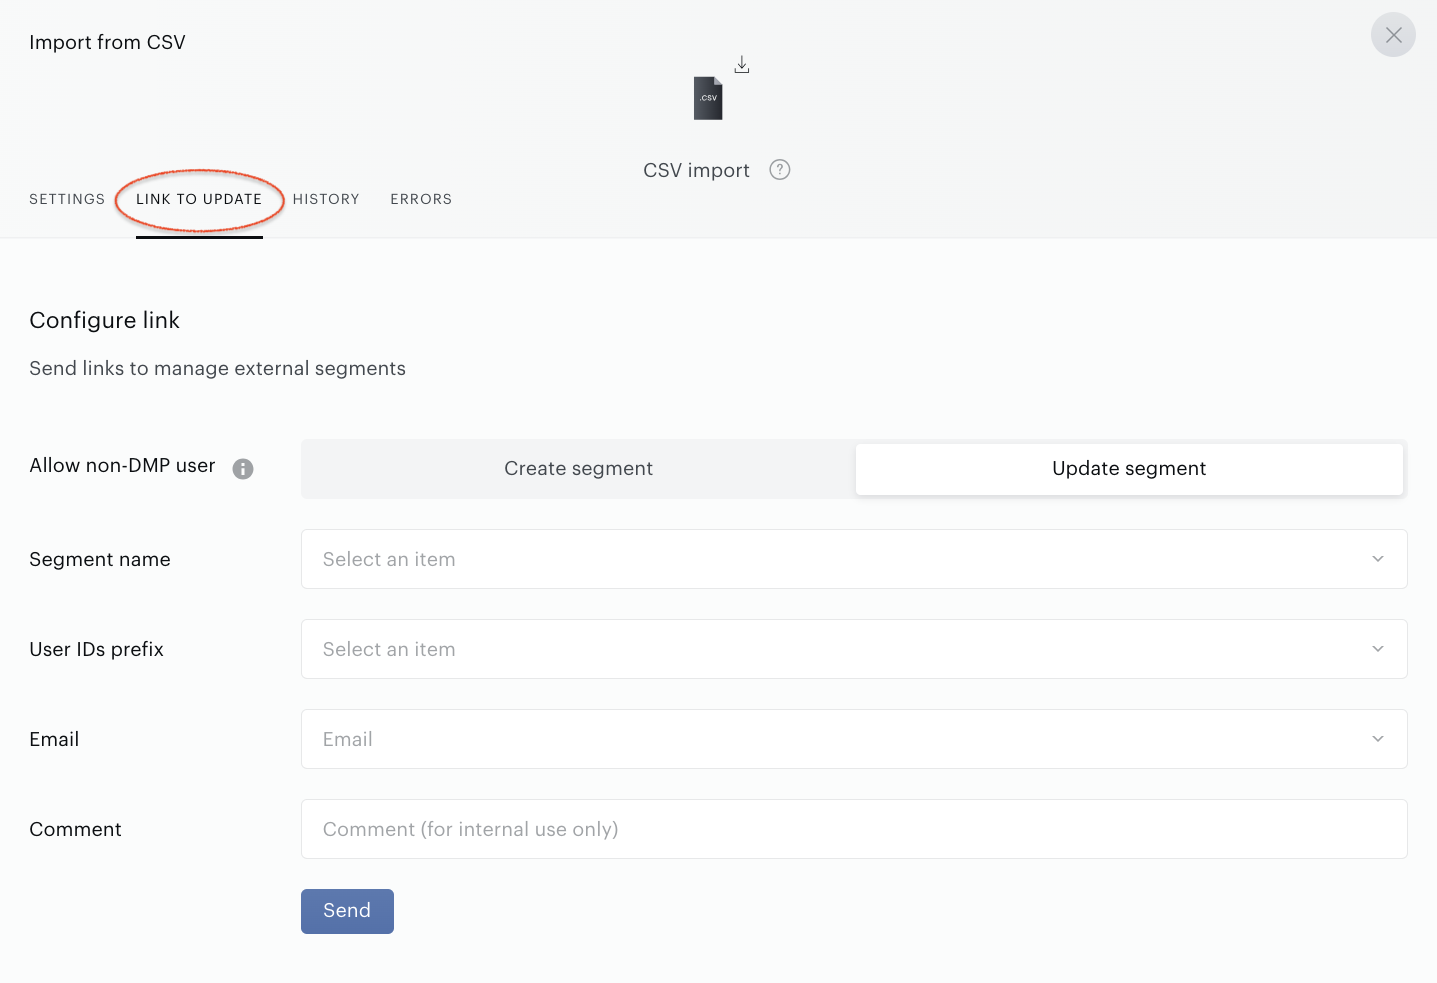
If the existing segment should be updated by the user without access to Piano Audience (the option Update segment has been selected):
-
Select the external segment that will be updated. The Segment name selector includes only external segments within the current site group.
-
Select User IDs prefix to associate the User IDs with a customer. Read more about Customers’ prefixes here.
-
Fill in the recipient's email address or select one that has been added earlier. Pay attention to the format and spelling of an email address for successful email sending.
-
Add a Comment if necessary. The data in this field is used for internal needs only. It will not be sent somewhere else.
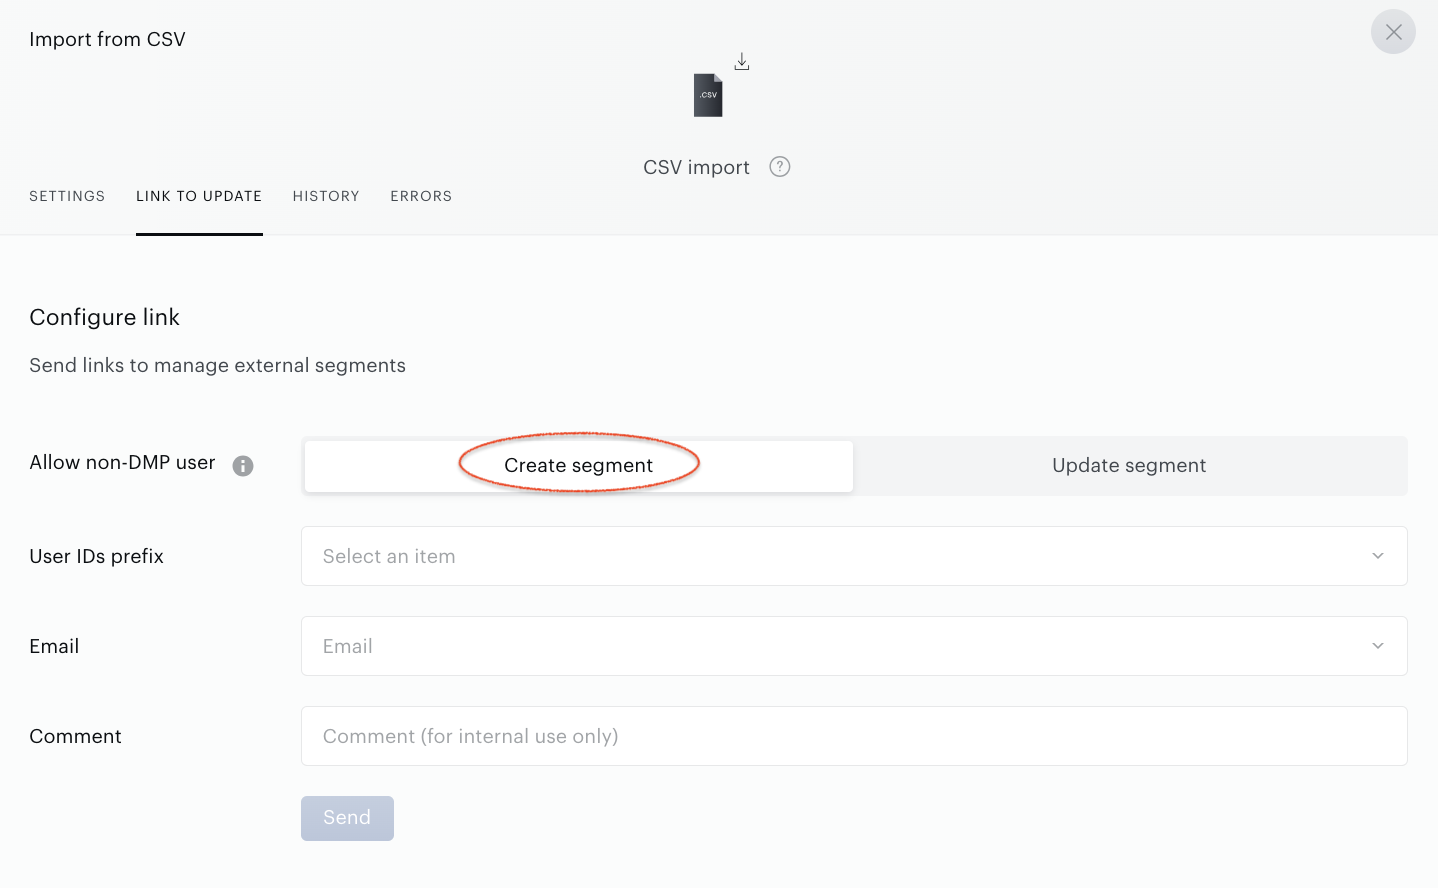
If a new external segment should be created by the user without access to Piano Audience (the option Create segment has been selected):
-
Select User IDs prefix to associate the User IDs with a customer. Read more about Customers’ prefixes here.
-
Fill in the recipient's email address or select one that has been added earlier. Pay attention to the format and spelling of an email address for successful email sending.
-
Add a Comment if necessary. The data in this field is used for internal needs only. It will not be sent somewhere else.
When all obligatory parameters are filled in press the Send button.
If you create the configuration for the first time, press the Create button, in all other cases do not forget to save changes by pressing the Save button.
It is recommended not to send a lot of emails during a brief period to avoid blocking due to the spam.
Be aware that the link and external upload forms will be active for the next 8 hours after the email is sent. The sent URLs can be revoked at any time before the expiration. Read details here.
Read how to create or update external segments using external web form.
Create a new external segment using external web form
Piano Audience provides the feature – external web form – that allows you to create a new External segment even if you do not have access to the Audience.
How can I get access to this external web form?
The app user who has access to Piano Audience should send you a link to your email address, thereby giving you access to the web form and particular operation.
When you receive an email, open it, and press the link inside the email body. The external web form will be opened.
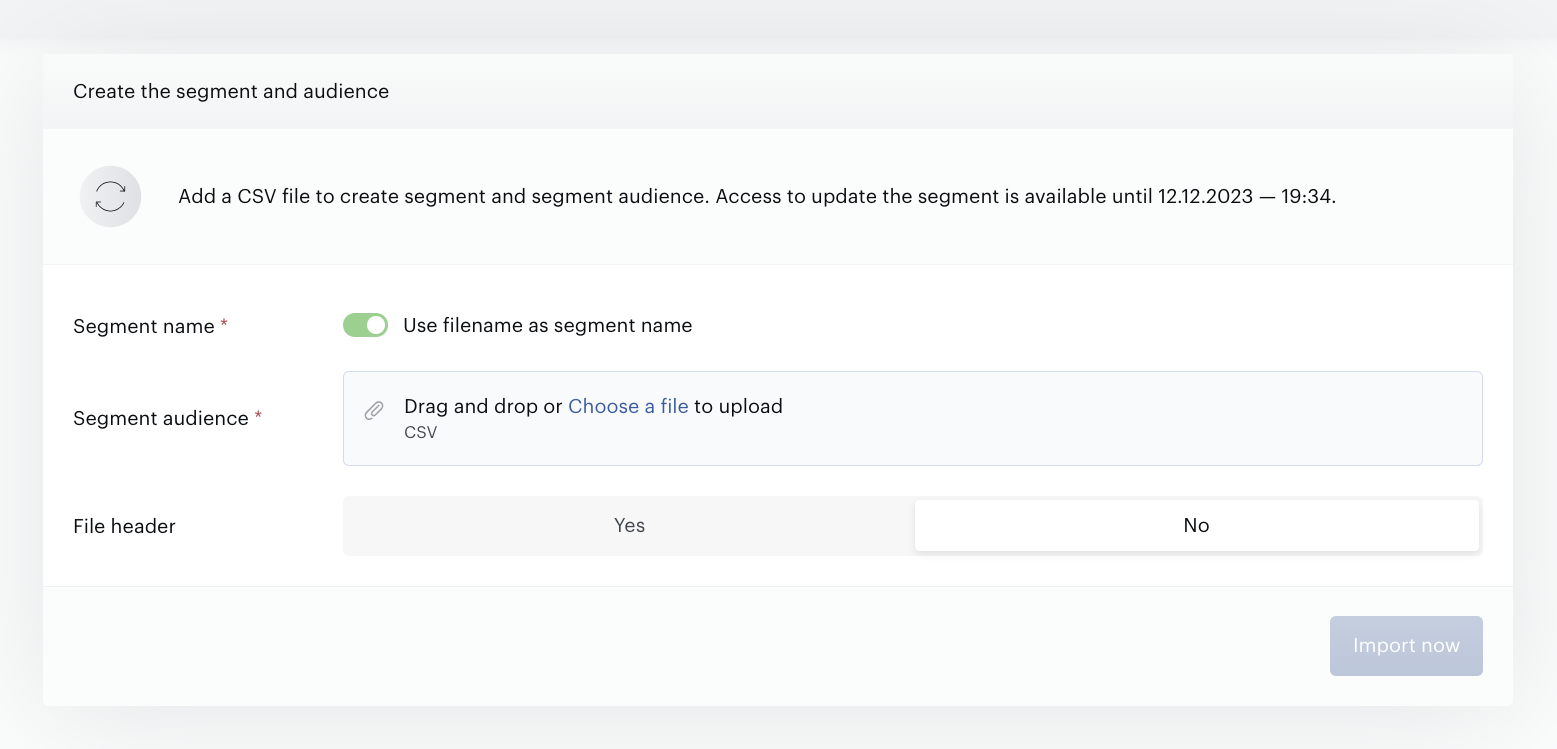
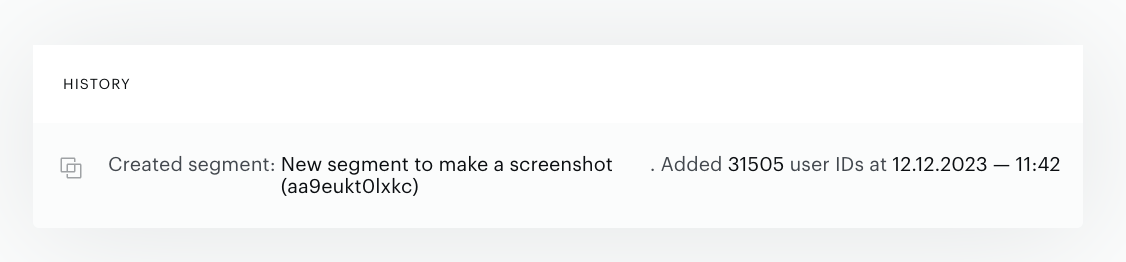
The access to the web form is given to you for about 8 hours. If the operation is completed successfully and the new external segment has been created, the only History of the operation is available within the web form lifetime.
What should I do to create a new segment?
When the web form is opened, complete the setup:
-
Fill in the segment name or use the CSV file name as a new segment name.
-
Select the option for the File header parameter.
-
Upload the CSV file considering the file restrictions.
-
Press the Import now button.
If everything has been filled in correctly, the notification with information about the start of the creation operation will be shown.
Segment creation takes time, the result can be found in the History section in the web form.
How many segments can I create using the external web form?
The unique URL is generated for the only operation. It means you can create the only external segment using the URL received to your email. But you can try several times to complete the operation successfully.
How many attempts do I have to create a segment?
You have up to 20 attempts to complete the operation within the web form lifetime. If the creation has been completed successfully it will not be possible to open the creation form to create one more segment. Only History section will be available within the 8 hours lifetime.
Update external segment using external web form
Piano Audience provides the feature – external web form – that allows you to update external segment even if you do not have access to Audience.
How can I get access to this external web form?
The app user who has access to the Piano Audience should send you a link to your email address, thereby giving you access to the web form and particular operation.
When you receive an email, open it, and press the link inside the email body. The external web form will be opened.
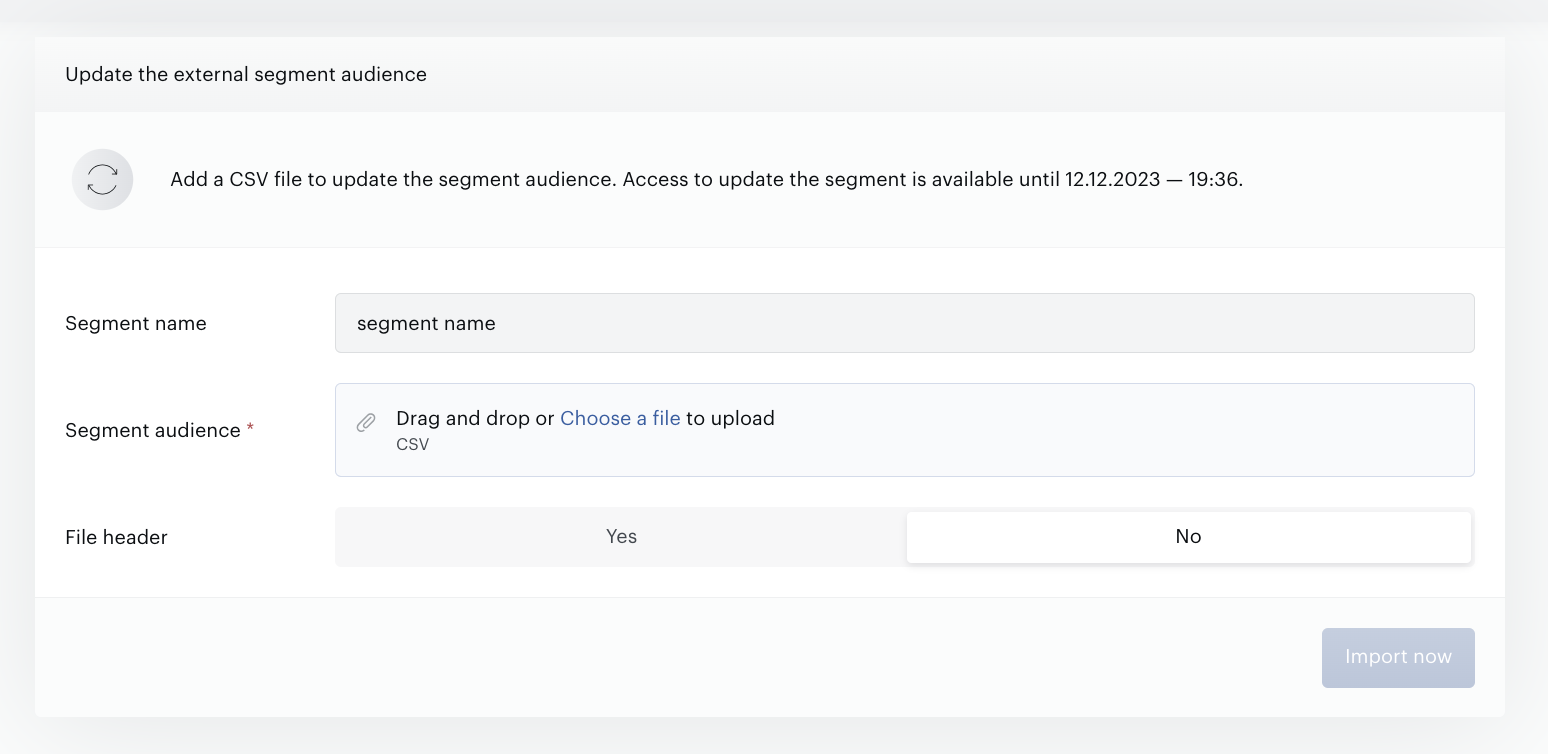
The access to the web form is given to you for about 8 hours. If the operation is completed successfully and the external segment has been updated, the history of the operations with this segment is available within the web form lifetime.
What should I do to update the segment?
When the web form is opened, complete the setup:
-
Select the option for the File header parameter.
-
Upload the CSV file considering the file restrictions.
-
Press the Import now button.
If everything has been filled in correctly, the notification with information about the start of the update operation will be shown.
Segment update operation takes time, the result can be found in the History section in the web form.
How many segments can I update using the external web form?
The unique URL is generated for the only operation. It means you can update only the predefined external segment for you using the URL received to your email. But you can try several times to complete the operation.
How many attempts do I have to update the segment?
You have up to 20 attempts to complete the operation within the web form lifetime. If the update has been completed successfully it will be possible to open the update form to update the same segment one more time.
Revoke URLs
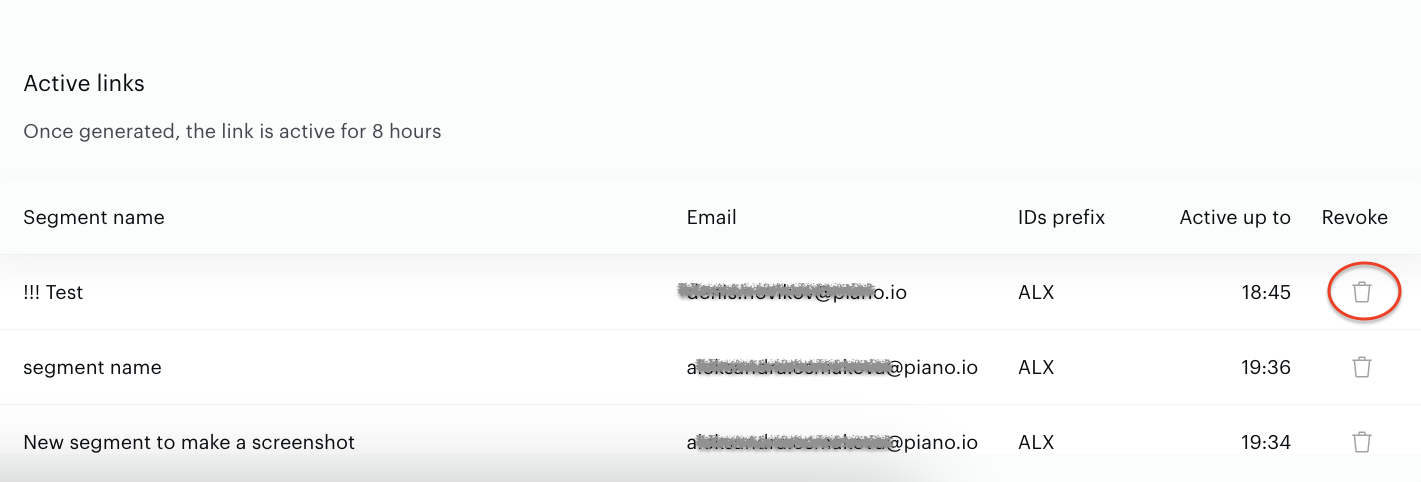
There are several reasons why the URL should be revoked. Any parameters could be selected by mistake, for example, the Prefix User ID has been selected incorrectly, or the external segment itself has been selected by mistake. In all cases the URL can be revoked. No need to wait for the next 8 hours when the link expires.
Being in the Link to update tab go to the Active links section. Select the URL that should be deactivated and press the Revoke button in the row.
File structure
The import connection supports import from files with predefined structure:
-
File extension: CSV *
-
File compression: No
-
File structure: the only column with User IDs that should become a segment audience *.
This column can have or not have the title. To be able to skip the title you have to use File header parameter. Option “Yes” means that there is a title in the column and it should be skipped. Option “No” means that there is no title and the system can use the first row data.
-
File size: the number of user IDs in a CSV file cannot exceed 2 million. Otherwise the system imports the first 2 million user IDs, all other user IDs will be skipped automatically.
The files used for data import must be encoded in UTF-8 to ensure proper processing. Using a different encoding may result in errors or incorrect data interpretation.
* The connection has been updated to support the use of a Data Source. This means you can now use files containing more than one column, and the column with the User ID does not necessarily have to be the first one. By switching to the use of a Data Source, you’ll be able to work with both CSV and TSV file formats, not just CSV.
Configure data import for User Profile Data
Before setting up a CSV import for User profile data, ensure the following:
-
You have access to the Audience → Connectivity → Configurations section in the Piano Audience platform. No extra permissions are required beyond access to the Generic import/export section.
-
At least one Data Source has been created with the Usage parameter set to "User profile data. CSV import". This Data Source must include a configured mapping between file columns and Properties linked to User Profile fields. One of the file columns must be mapped to the attribute designated for storing ZIP codes.
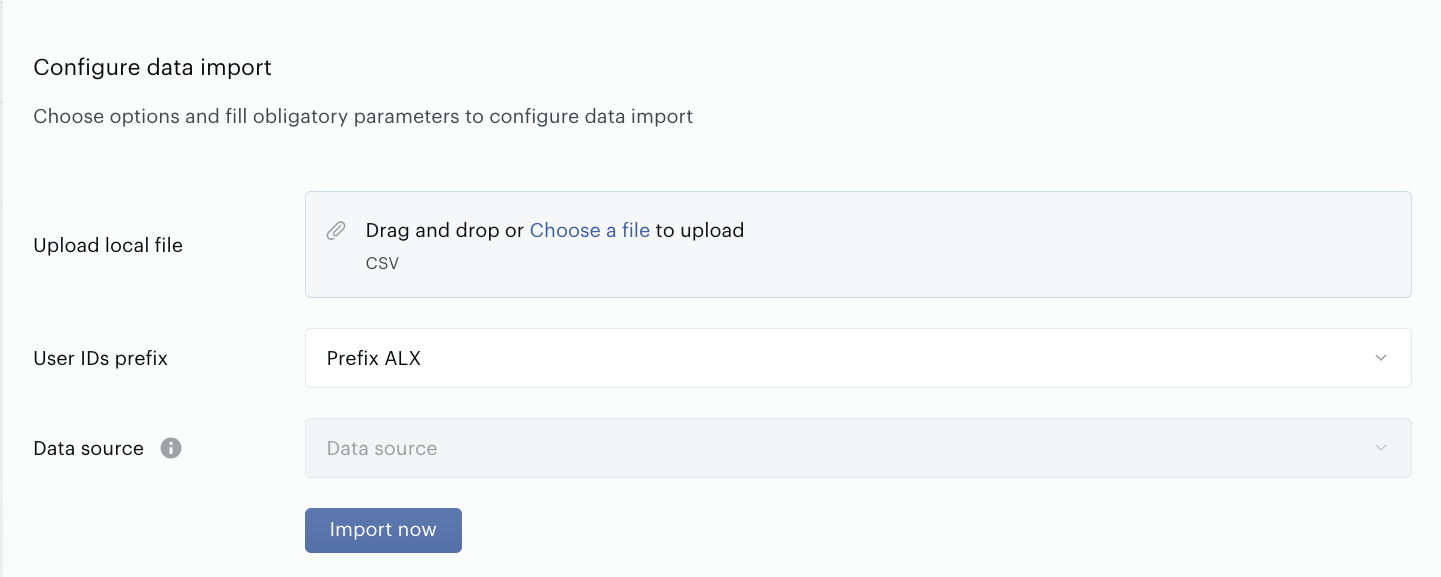
Select a local file, choose a prefix and a Data Source. All of these parameters are required. Click the Import now button - your configuration will be saved and the data import will start. You will see the overall import results on the History tab shortly after the import begins.
Monitoring and updates
Now you can see your connection on the list of existing connections, go to Audience→Connectivity→Connections.
To change the settings and update another segment(s), find your connection on the list of existing connections and choose the Edit option in the context menu or press on the connection name in the Project name column.

Transition to using Data Sources
If you already had connections created before the introduction of the Data Source feature, you can keep them as they are, and they will continue to work. In addition to the fields defining the mapping, you will simply see a Data Source selector. If you decide to switch to using Data Sources, select one of the existing data sources and save the changes - the extra fields will be hidden, and the connection will continue to work.