How to create Global Experiences
Managing Composer Experiences often involves overseeing multiple applications. Experiences frequently replicate across applications, either inspired by success in one or driven by strategic goals to deliver similar Experiences across sites. Global Experiences help users work efficiently across applications by turning Experiences into modular, customizable units you can leverage seamlessly. Create an Experience, customize brand-specific elements, and deploy across applications from a centralized view. Alongside Global Templates, Global Experiences forms part of our Global Management offering. This feature is available on both production and Sandbox.
Configure Global Experience Permissions
Only users with global admin privileges can make changes to, and deploy Experiences from the Global library. Global admin permissions are available through the Team Manager.
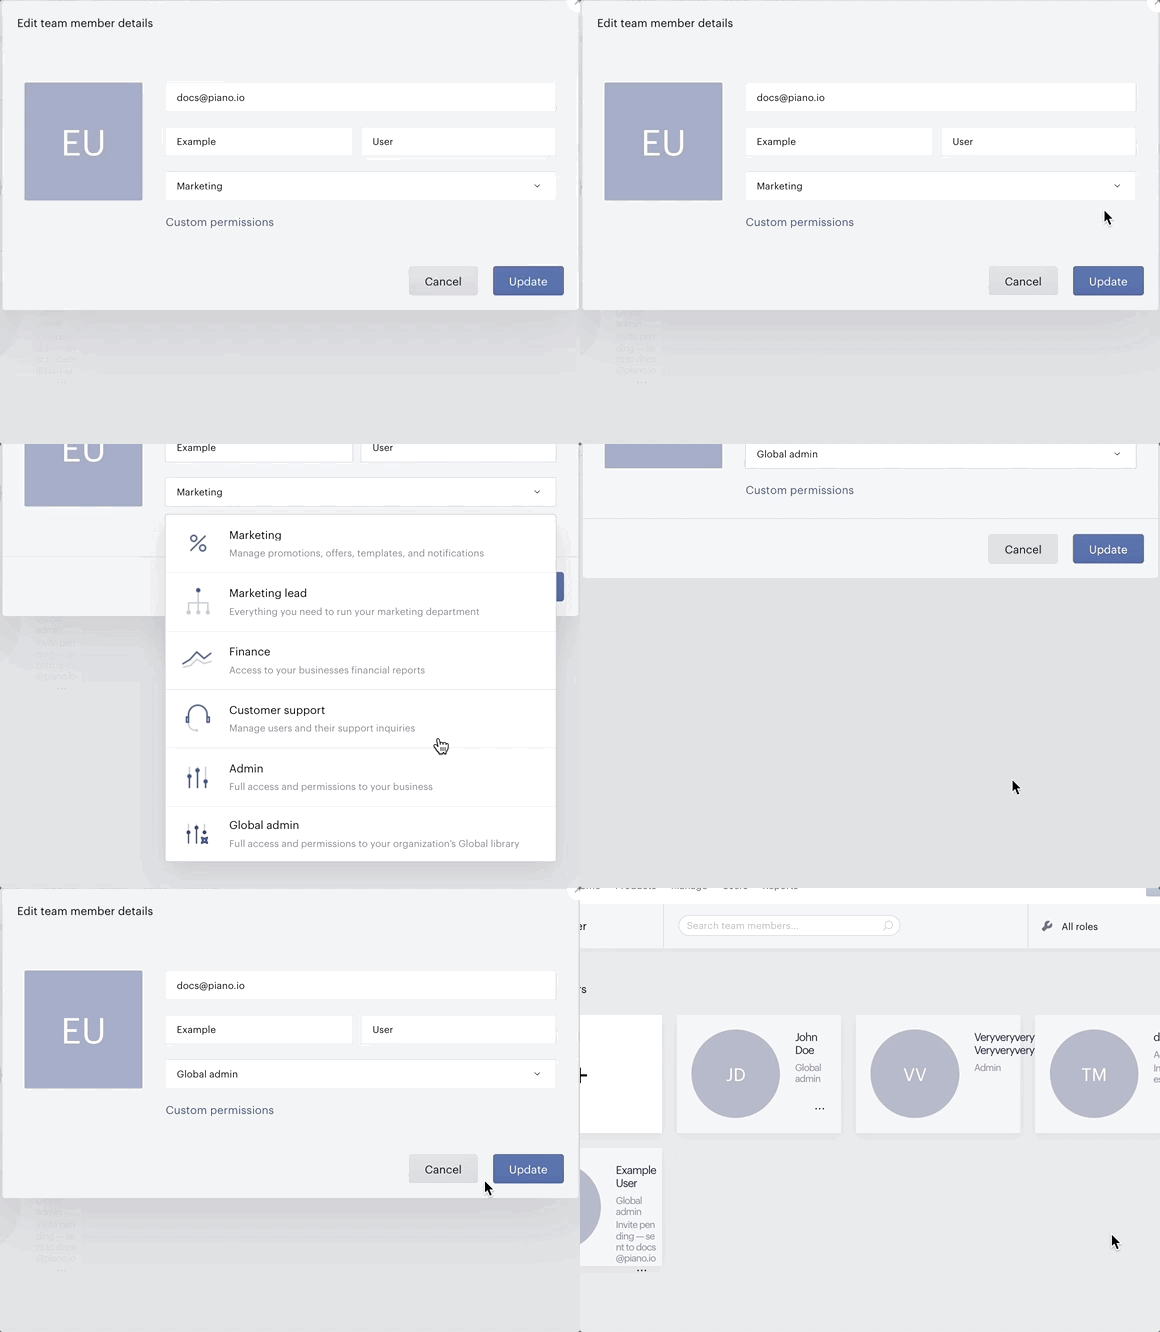
Note that this option is available only when multiple apps are associated with the merchant. Assigning Global admin privileges gives a user administrative access to all applications within your Piano account automatically.
Note, that the features Global Mode and Global Experiences are not connected, so it's possible to utilize Global Experiences without Global Mode being set up.
Parameters
Parameters are variables within Experience cards that you can use across applications once an Experience is global.
Using the pipette tool
Click variables within a card with the pipette to add them as parameters:

For example, like this:
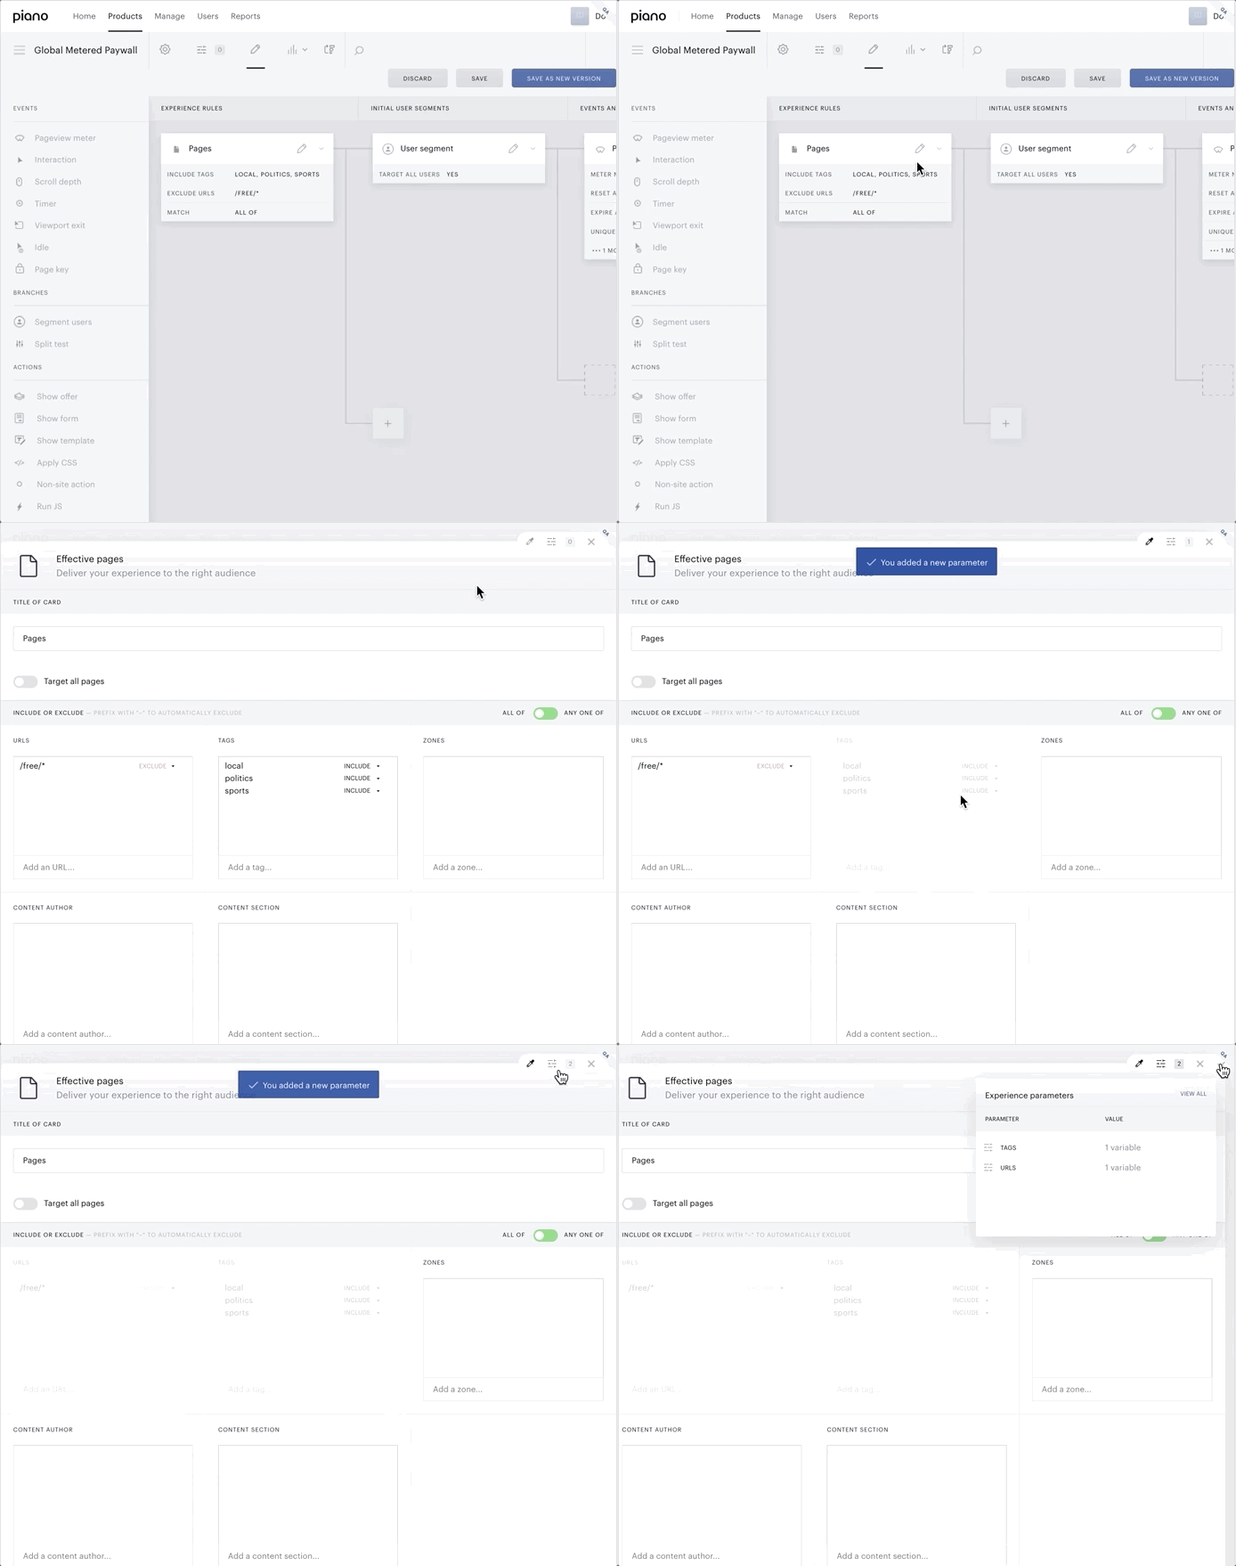
When creating a Composer Global Experience, thanks to the pipette tool, make sure to define several variables within every experience card as parameters that can be leveraged across all your applications.
Once parameters are selected and saved, the number of parameters will be shown on the front of the Experience's card, within the Composer canvas:
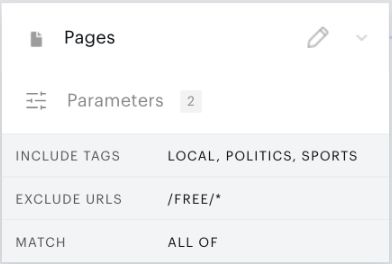
Essential Parameters
Parameters are variables within the Experience Cards in Composer. There are several parameters that are considered essential parameters and must be defined in an Experience before the Experience can become globally available:
User segment card
-
Has no access to- If your Experience contains a card of this type.
-
Has access to - If your Experience contains a card of this type.
-
Composer 1X segmentation engine - If a minimum of one segment is selected.
Show offer card
-
Offer
-
Template - If your Experience contains a card of this type.
Show template
-
Template
Show recommendations card
-
Content widget
If an Experience is made global and contains any of these three cards, the essential parameters will be automatically added to the set of global parameters, before the Experience is made global.
Unsupported Parameters
Some experience criteria are unavailable for parameterization.
User segment card
-
Promotions redeemed
-
Push notifications
-
Apple pay
-
Custom fields
For the following Experience Cards, no card criteria are supported:
-
Timer
-
Split test
-
Viewport exit
-
Interaction
-
Scroll depth
-
Idle
-
Frequency cap
-
Apply CSS
-
Non-site action
-
Show Zuora offer
-
Show Newscycle offer
-
Set response variable
Making an Experience Global
-
To make an existing Experience global, navigate to the Experience Manager, and locate an Experience you want to make Global. You can also create a new Experience.
-
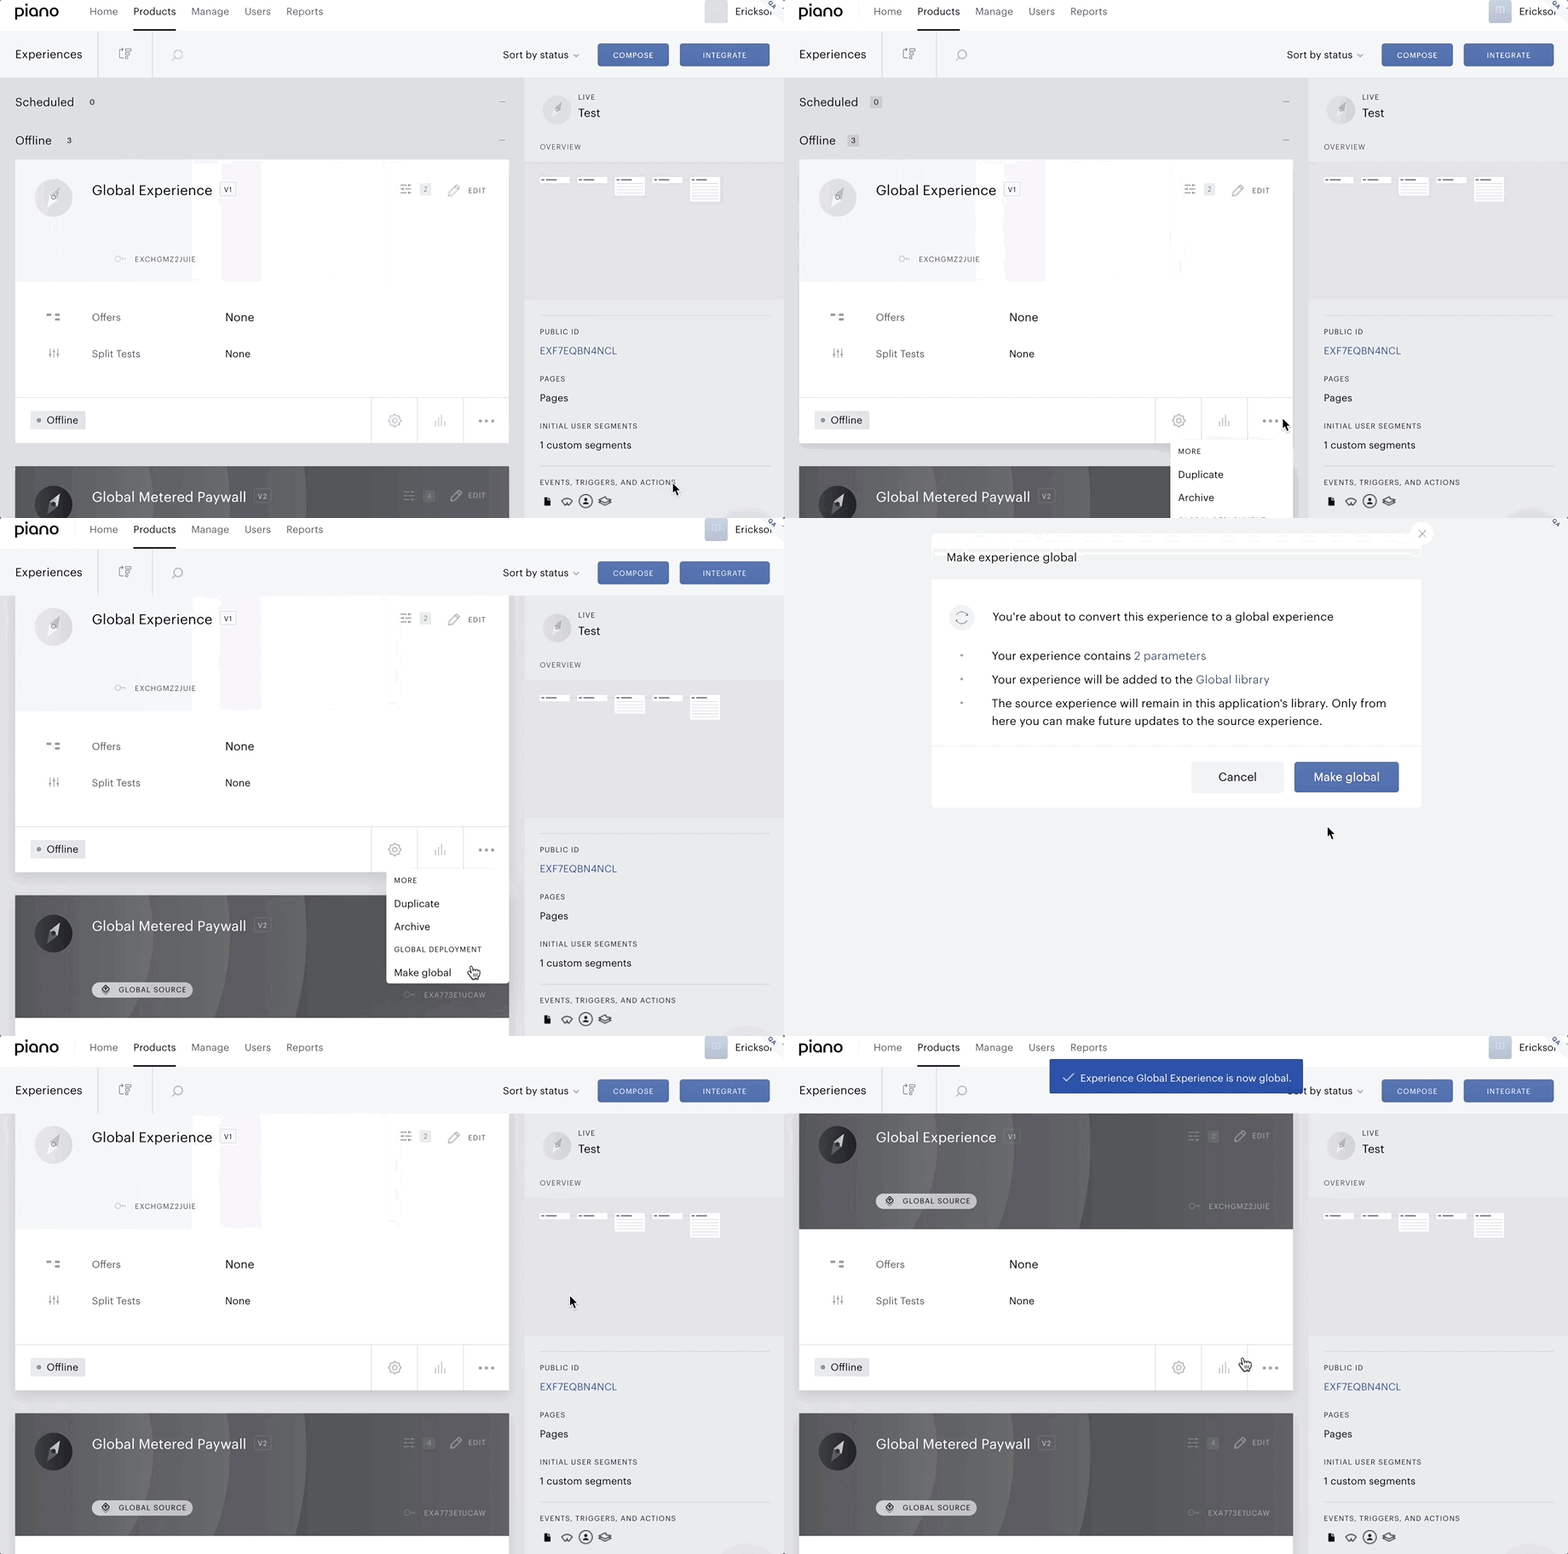
Click the Menu icon in the bottom right corner of the Experience tile and select Make global, a dialogue modal will pop up, confirm the dialogue by clicking Make global. This dialogue contains information about the Experience, including how many parameters it has, and where the Experience can be accessed from:
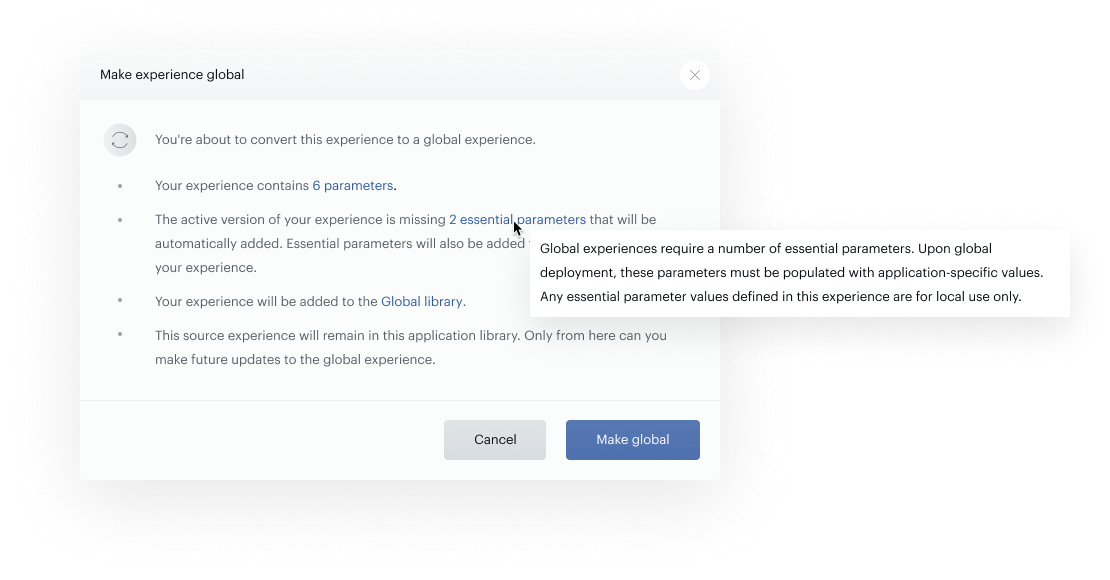
If essential parameters have not been added, the dialogue screen will ask you to confirm the addition of essential parameters to your Experience:
-
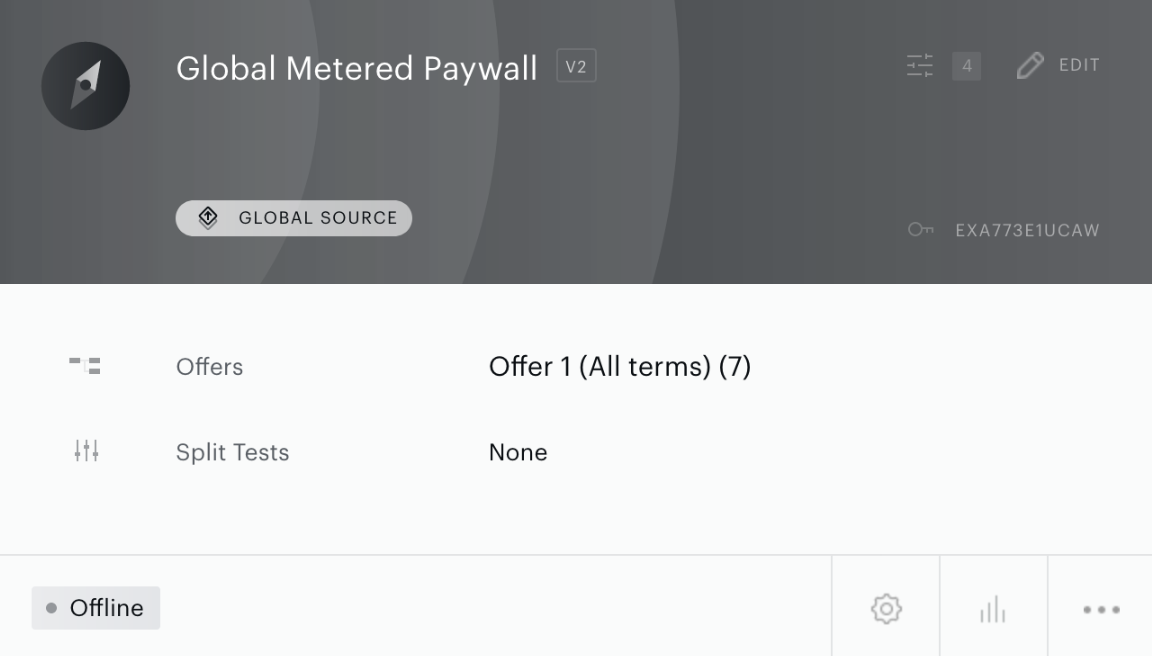
After accepting the dialogue, you will return to the Experience Manager. The Experience will now display the Global Source tag on the Experience card:
-
This Experience is now available from the Global Library.
The Global Library
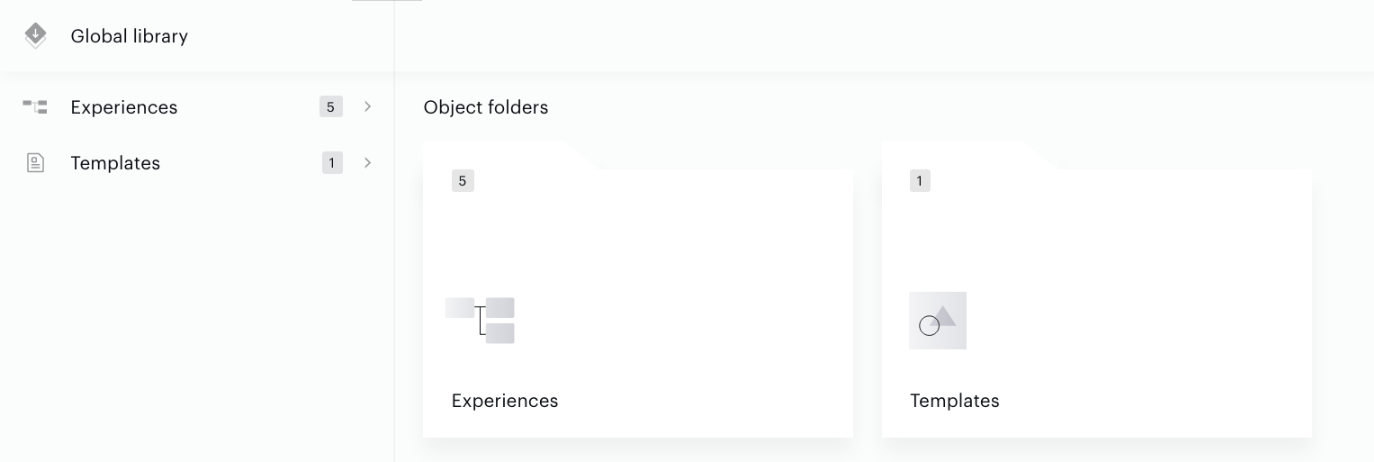
Global Experiences are managed in the Global Library which is available from the Manage dropdown menu in the Piano dashboard. The Global Library houses all globally-accessible objects and is divided into two categories: Experiences and Templates. Within each of these categories, you can view all global Templates and Experiences that can be reviewed, deployed or archived.
In the Global library, you can deploy the Global experience to the selected applications.
-
By clicking on the Deploy button, you can access the Deployment dashboard.
-
Select the applications where you would like to deploy your Global experience by checking the boxes right next to the app names. You can change the status of the Experience in the selected applications. After you have finished selecting the applications, click on the "Customize" button to proceed.
-
Each parameter is now displayed in tabs. Customize and populate the selected parameter values across the selected applications.
-
Please note that you can only modify the status of the inherited Composer Experience in the child applications and not change its content or structure. When you access the inherited experience in the child app, you will see a "Read-only mode" icon shown next to the currently live version. Take note that the "Read-only mode" icon is visible only if you open the Experience canvas:

To make changes, you'll need to adjust the source experience in the parent app and then redeploy the changes to the child app's inherited experience. This will allow you to edit the experience without any restrictions.
If you want to use a cross-property template you can use a Global template. You can create and implement a global template as per this documentation here.
How to deploy Global Experiences
After creating a Global Experience, you can now deploy it to any application. To do this, from the global library, open the Experiences folder and locate the Experience you would like to deploy.
Click Deploy from the Experience card to launch the deployment dashboard:
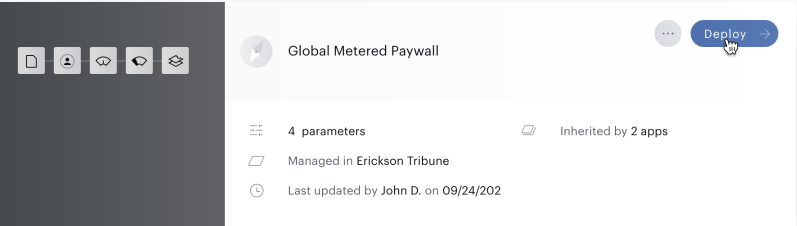
The Deployment Dashboard
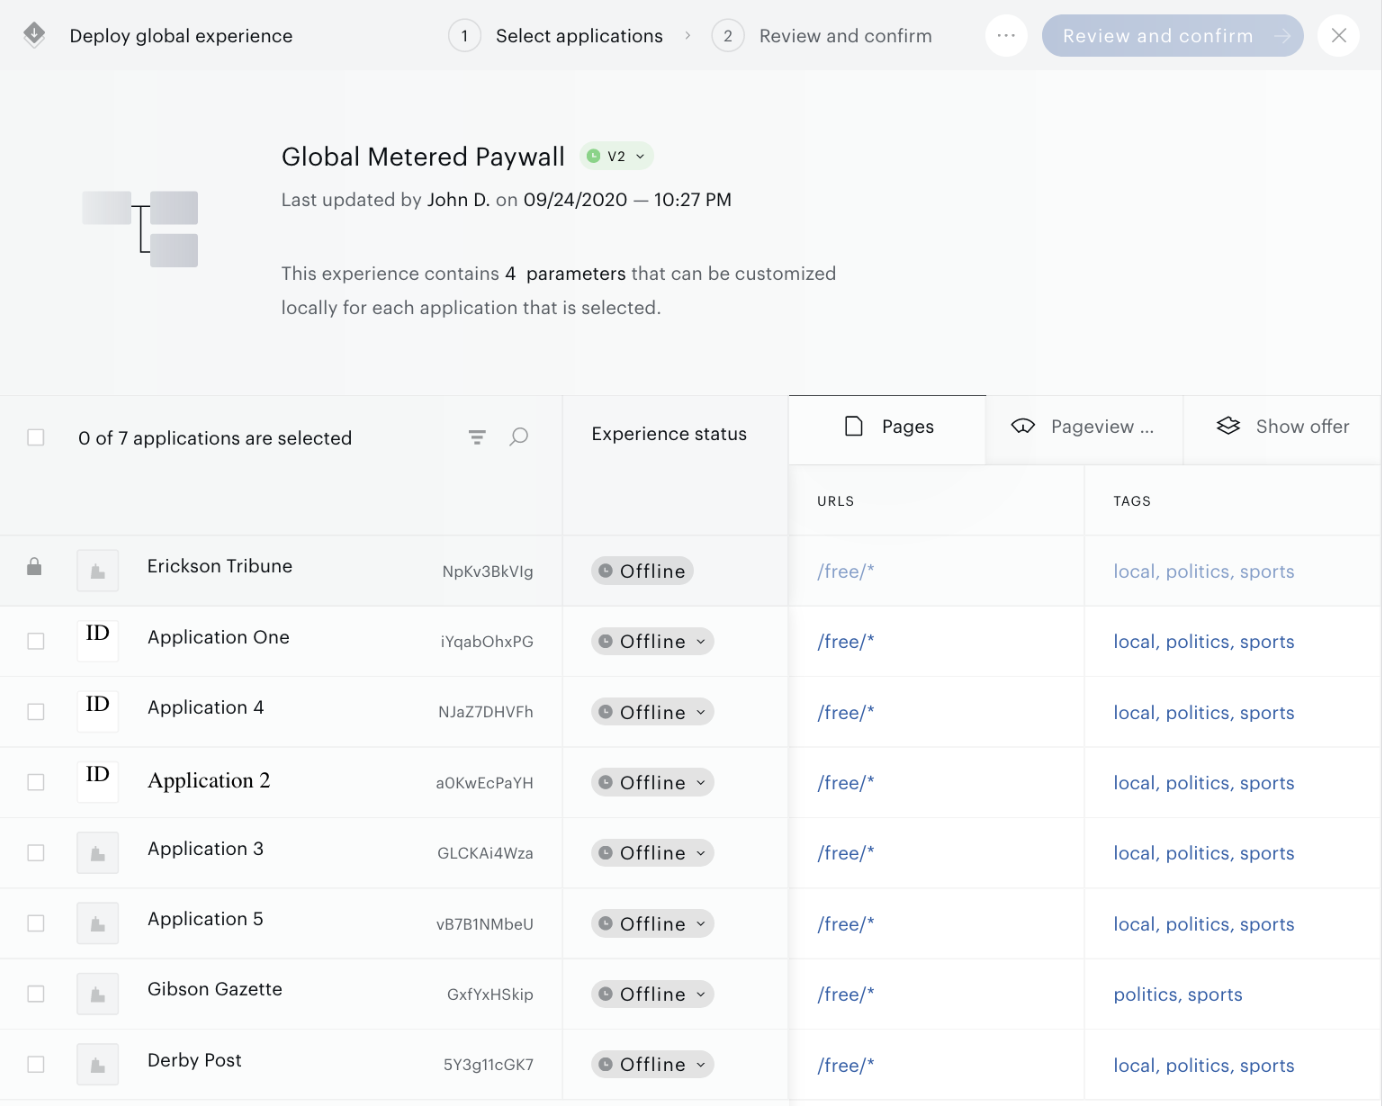
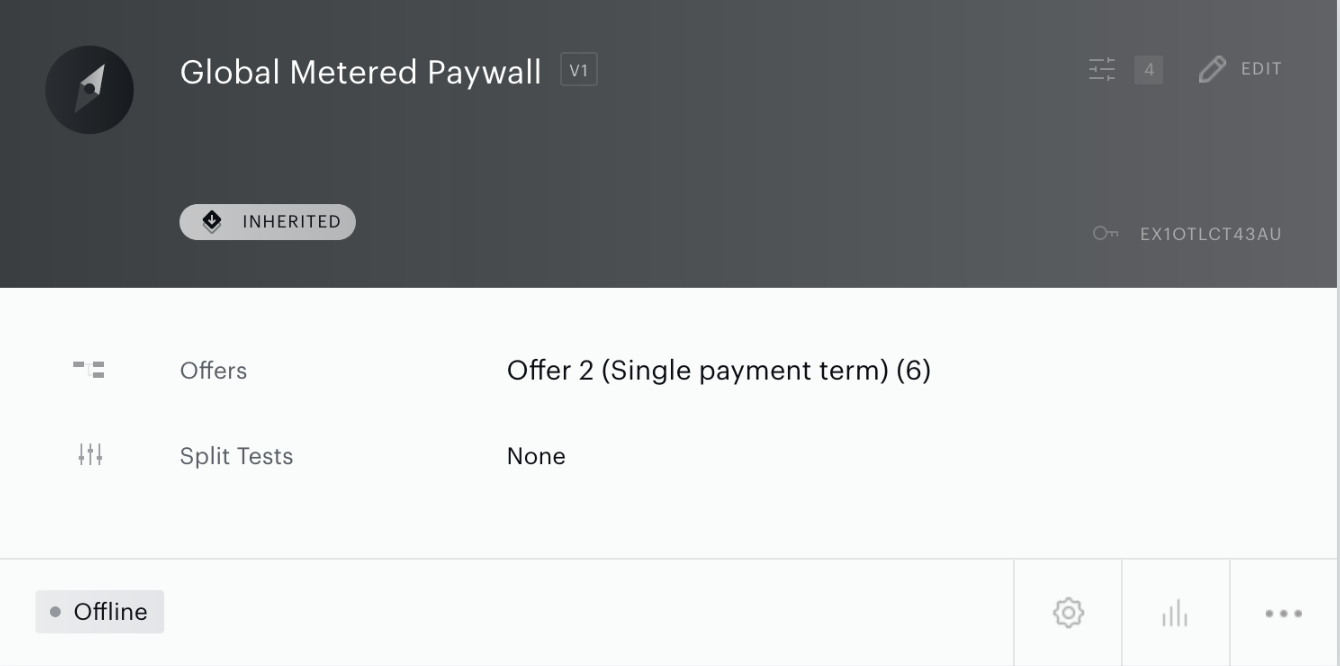
The Experience is now deployed to the selected applications. The inherited Experience is available from within the relevant child applications. Inherited Experiences are read-only, and display the Inherited tag. From the inherited application, you can only change the status of an inherited Experience. If you would like to modify the Experience content or structure, you will need to make modifications in the source Experience and redeploy it to relevant applications. Experiences that have not been converted to Global Experiences, will not have any tags associated with them.
-
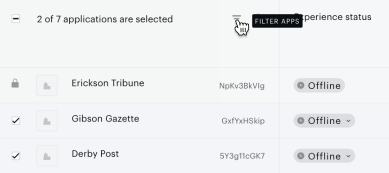
Select the applications you would like to deploy the Experience to by checking the boxes beside the name of the application. All of your applications are displayed here, but you can select to filter them by the ones you have selected:
-
The experience status option defines the status of the Experience in the appropriate application after deployment:
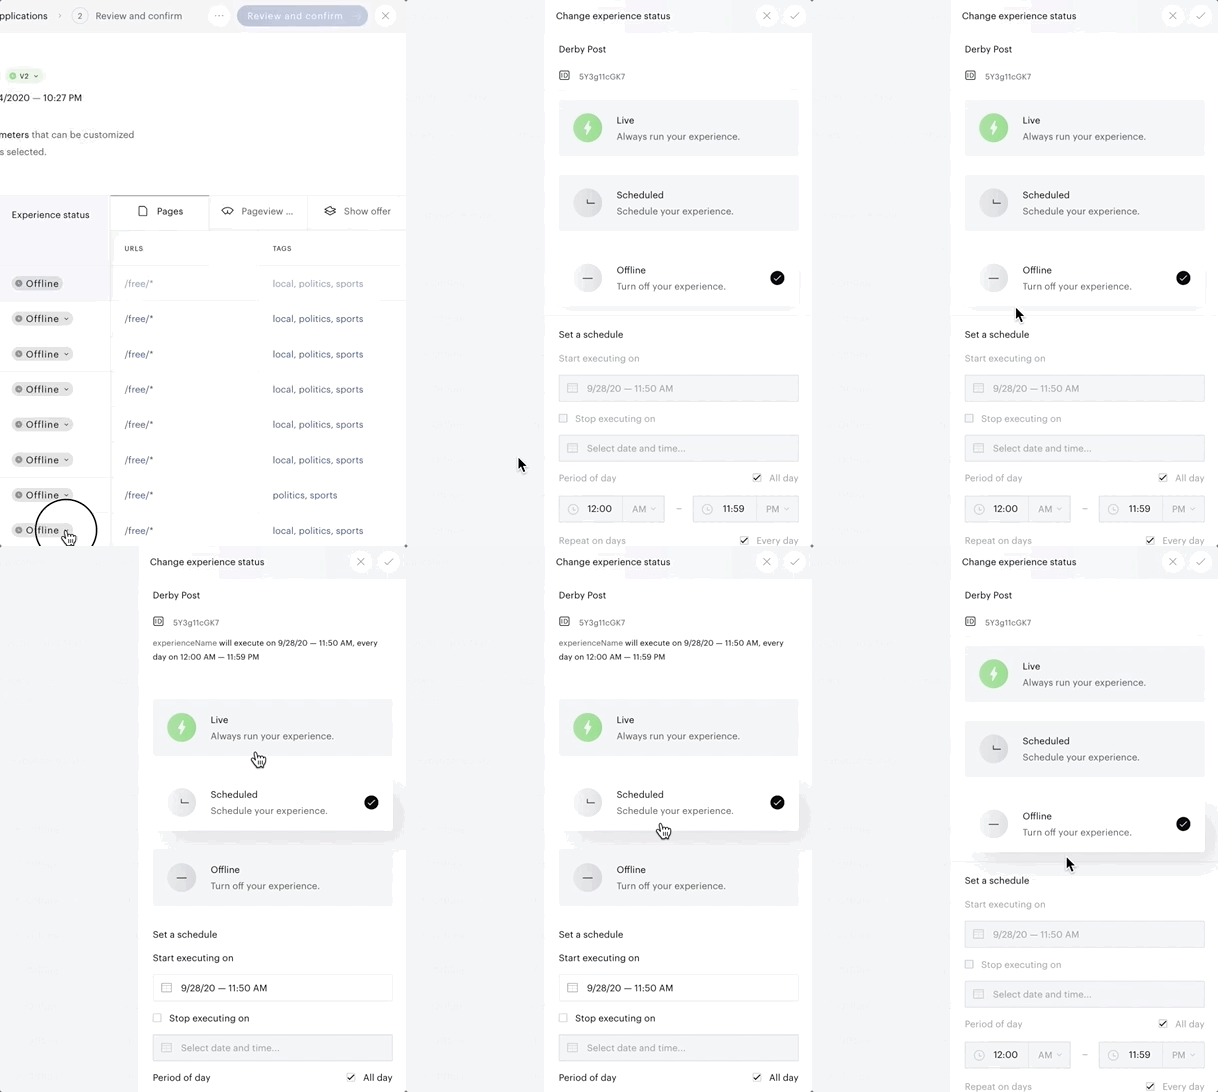
You have three options to choose from in this menu: Live: This Experience will always run, and it will start immediately after the Experience is deployed. Offline: This Experience will be available in the relevant application in an offline state. Scheduled: This Experience will be scheduled to run based on set time frames and options configured within the Experience status drawer.
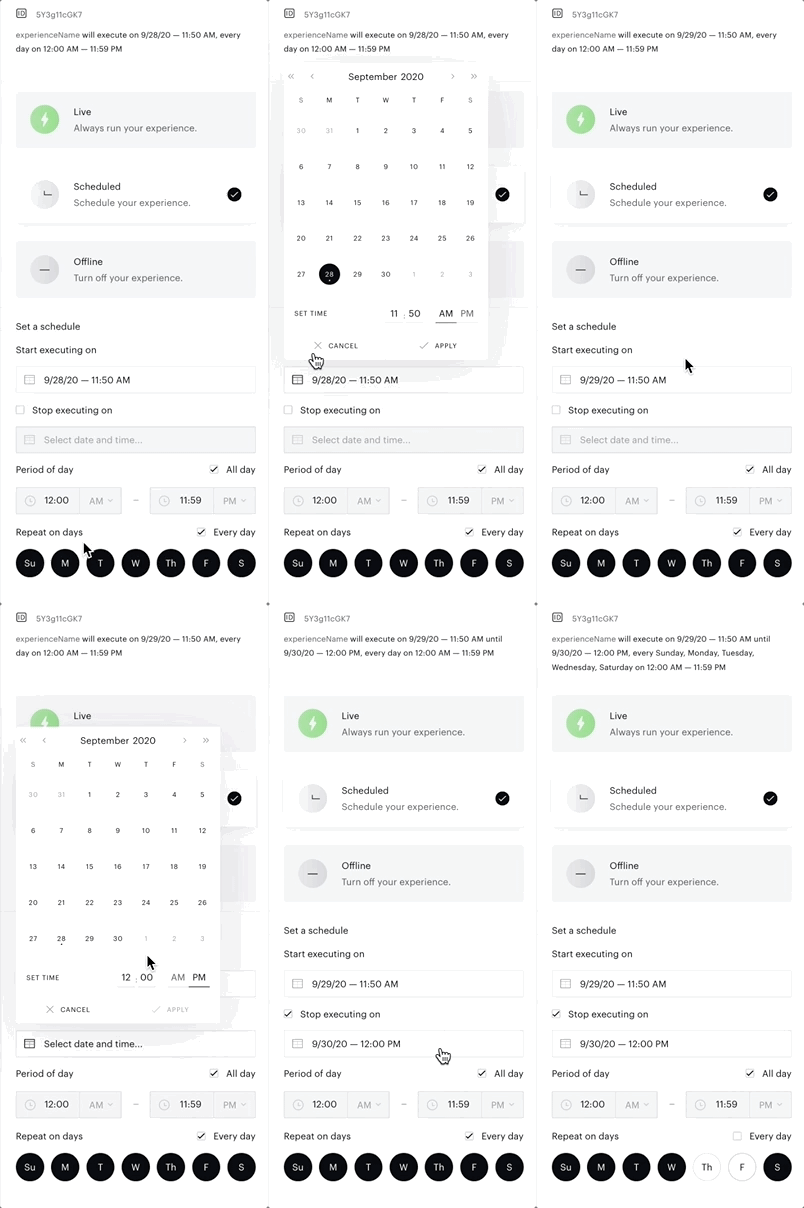
Populating parameters and deployment
-
The next step is populating the parameter values across the selected applications.
-
Each card that was parameterized in the process of creating a Global Experience is now displayed as a tab:
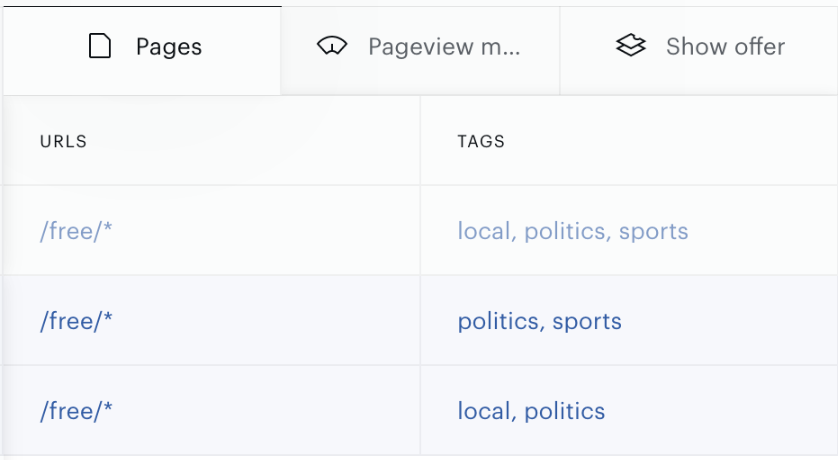
-
Hovering over the tab displays the complete canvas branch for the card:

-
Every variable that was parameterized can now be customized by clicking on the individual fields. Some fields will trigger a modal, and others will be modifiable from the current tab:
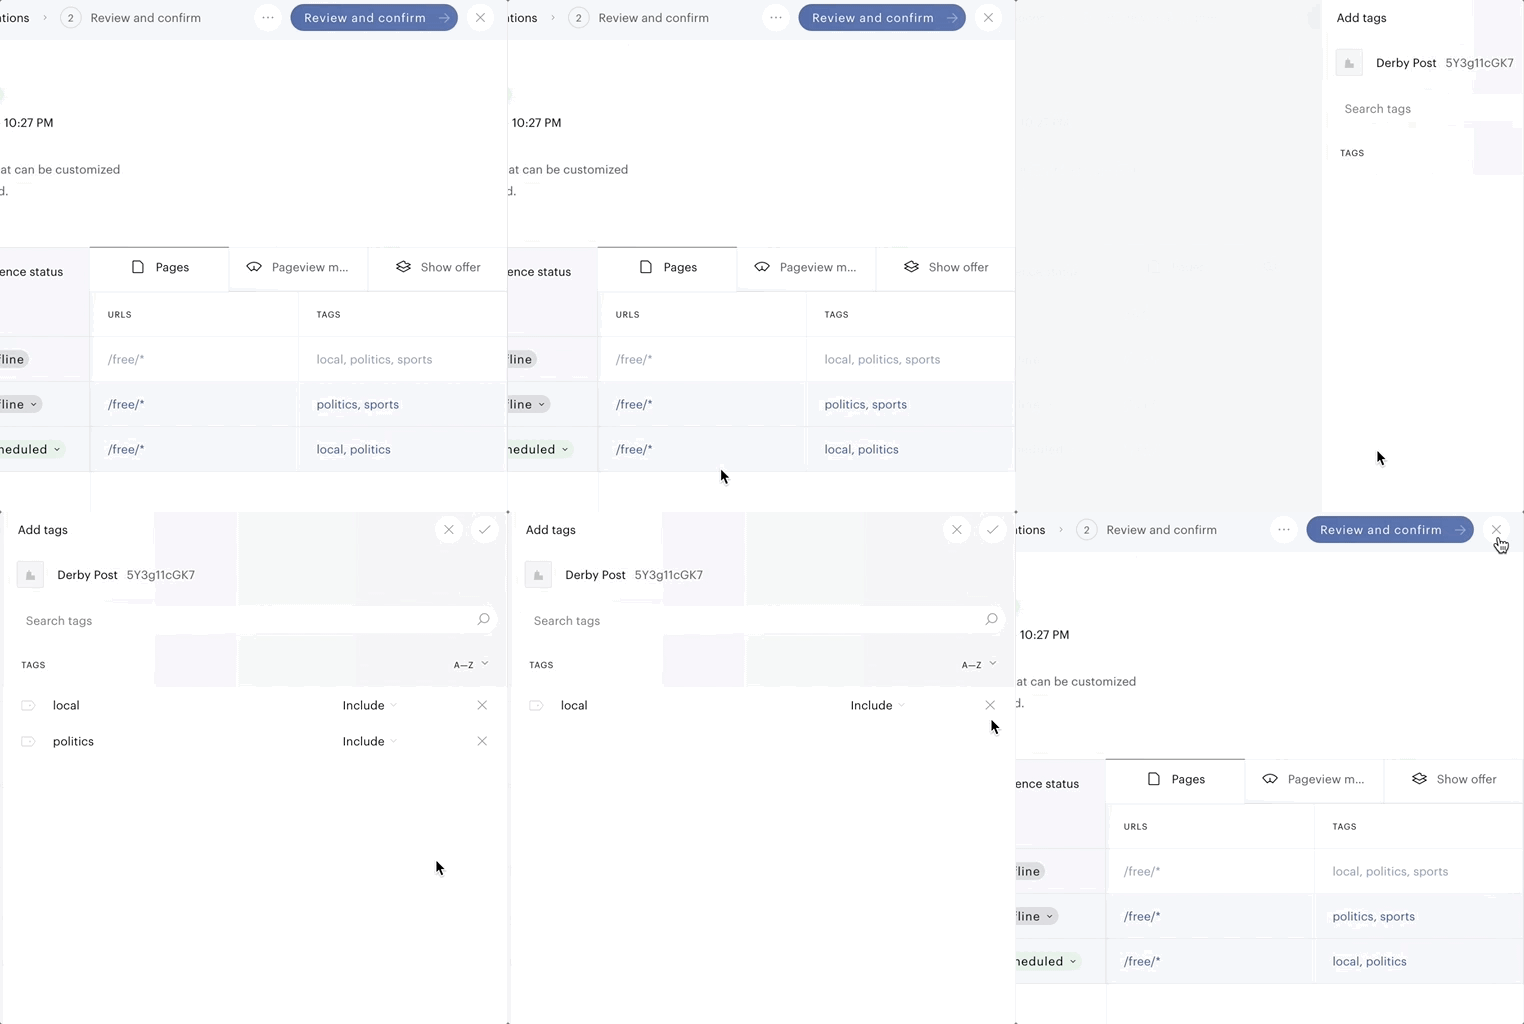
-
When you click on an empty field under the Show template or Show Offer tab to customize a template in the child app, a modal will appear. A template library will be shown in the modal. The first click will open a particular template preview. You need to click again on the selected template and confirm via the checkmark on the top right of the modal to use it in the child app.
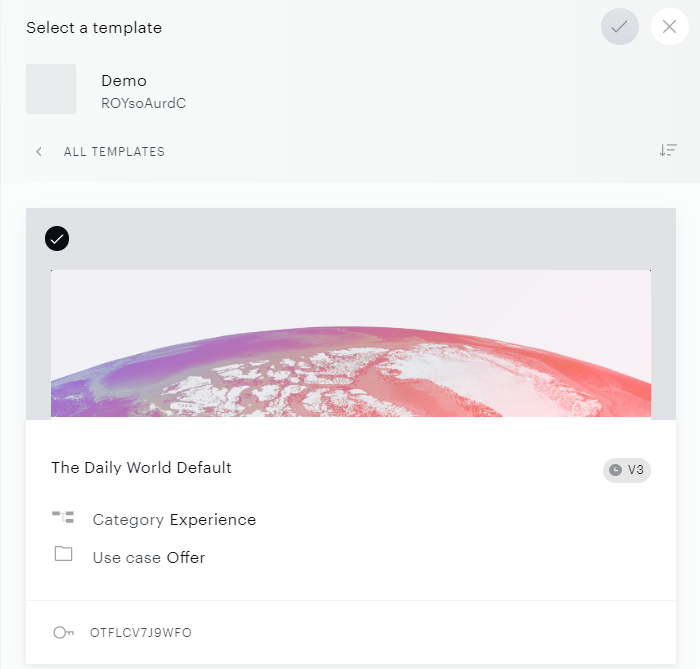
-
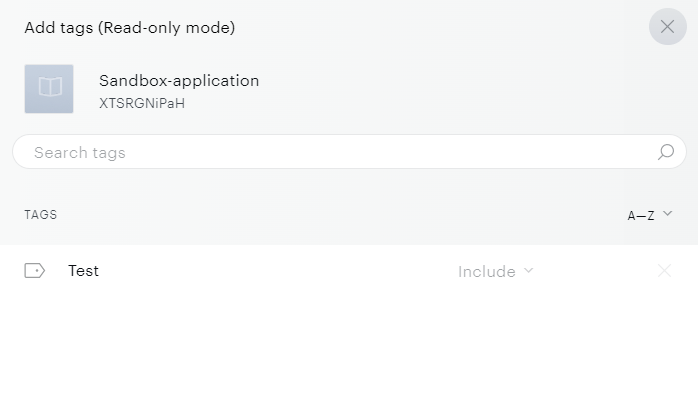
You have the ability to preview also parameter values of the Global Experience when clicking on them:

This will open a drawer on the right-hand side that will allow you a read-only view of the values:
-
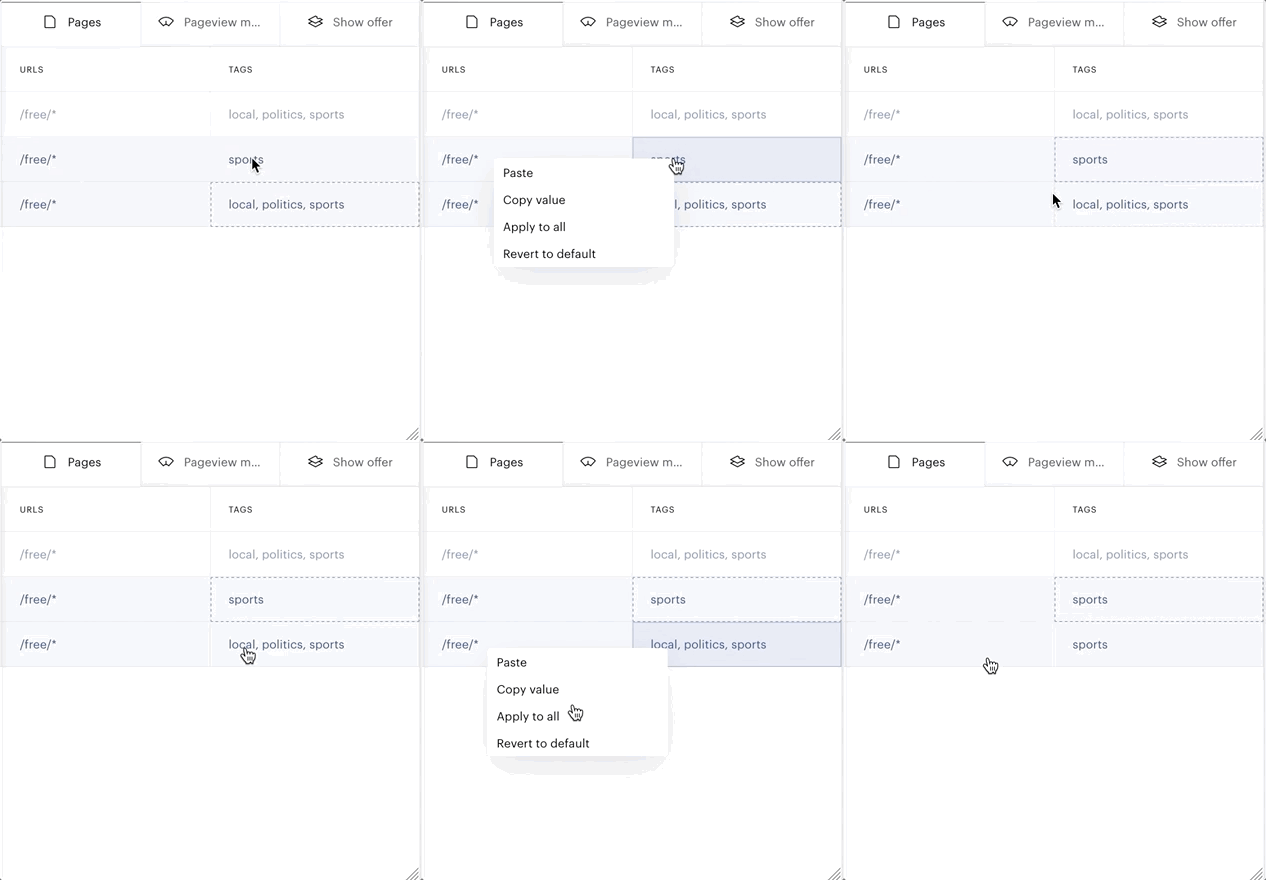
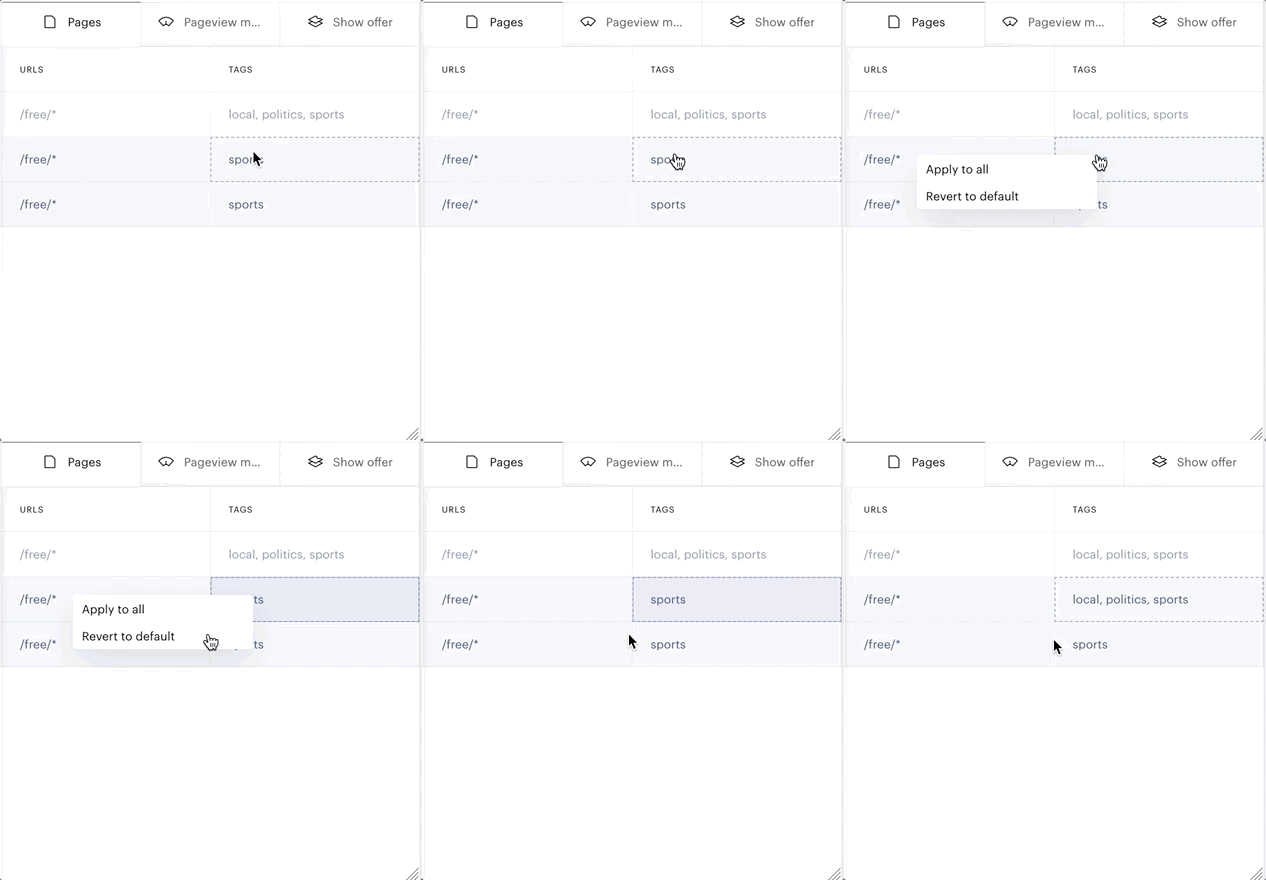
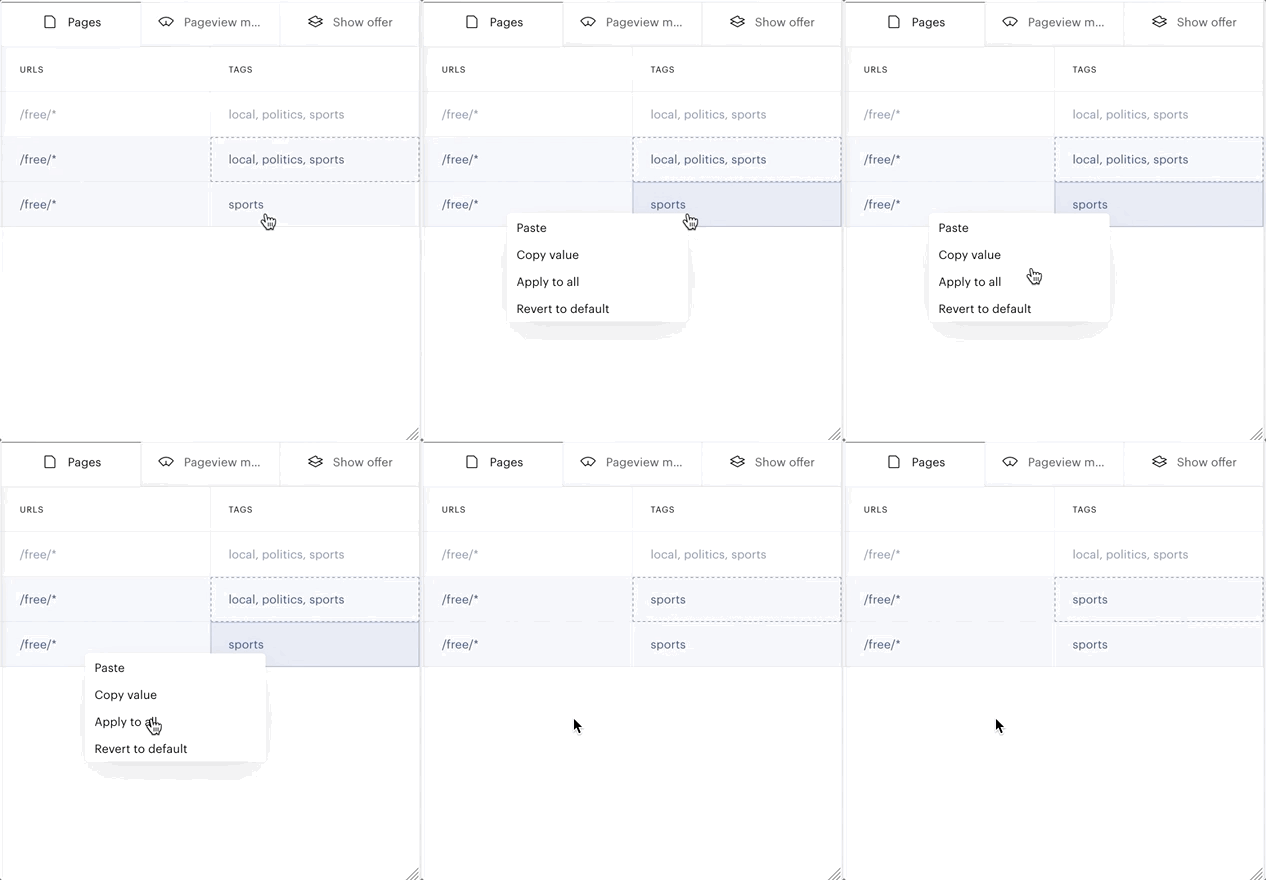
If you right-click a cell you will be given the option to Copy value, Paste, Revert to default, and Apply to all.
-
Copy and paste value:
-
Revert to default:
-
Apply to all:
-
-
For optional parameters that utilize drawers (for example, URLs, Tags, Zones in the Effective Pages, or Geolocation, Referred from in the User Segment, or Run JS code snippets, etc.) we've added a blue visual tag showing that a cell value differs from the Global experience value. This tag is not applied to essential parameters.

-
-
Click Review and Confirm, confirm the settings then click Deploy:
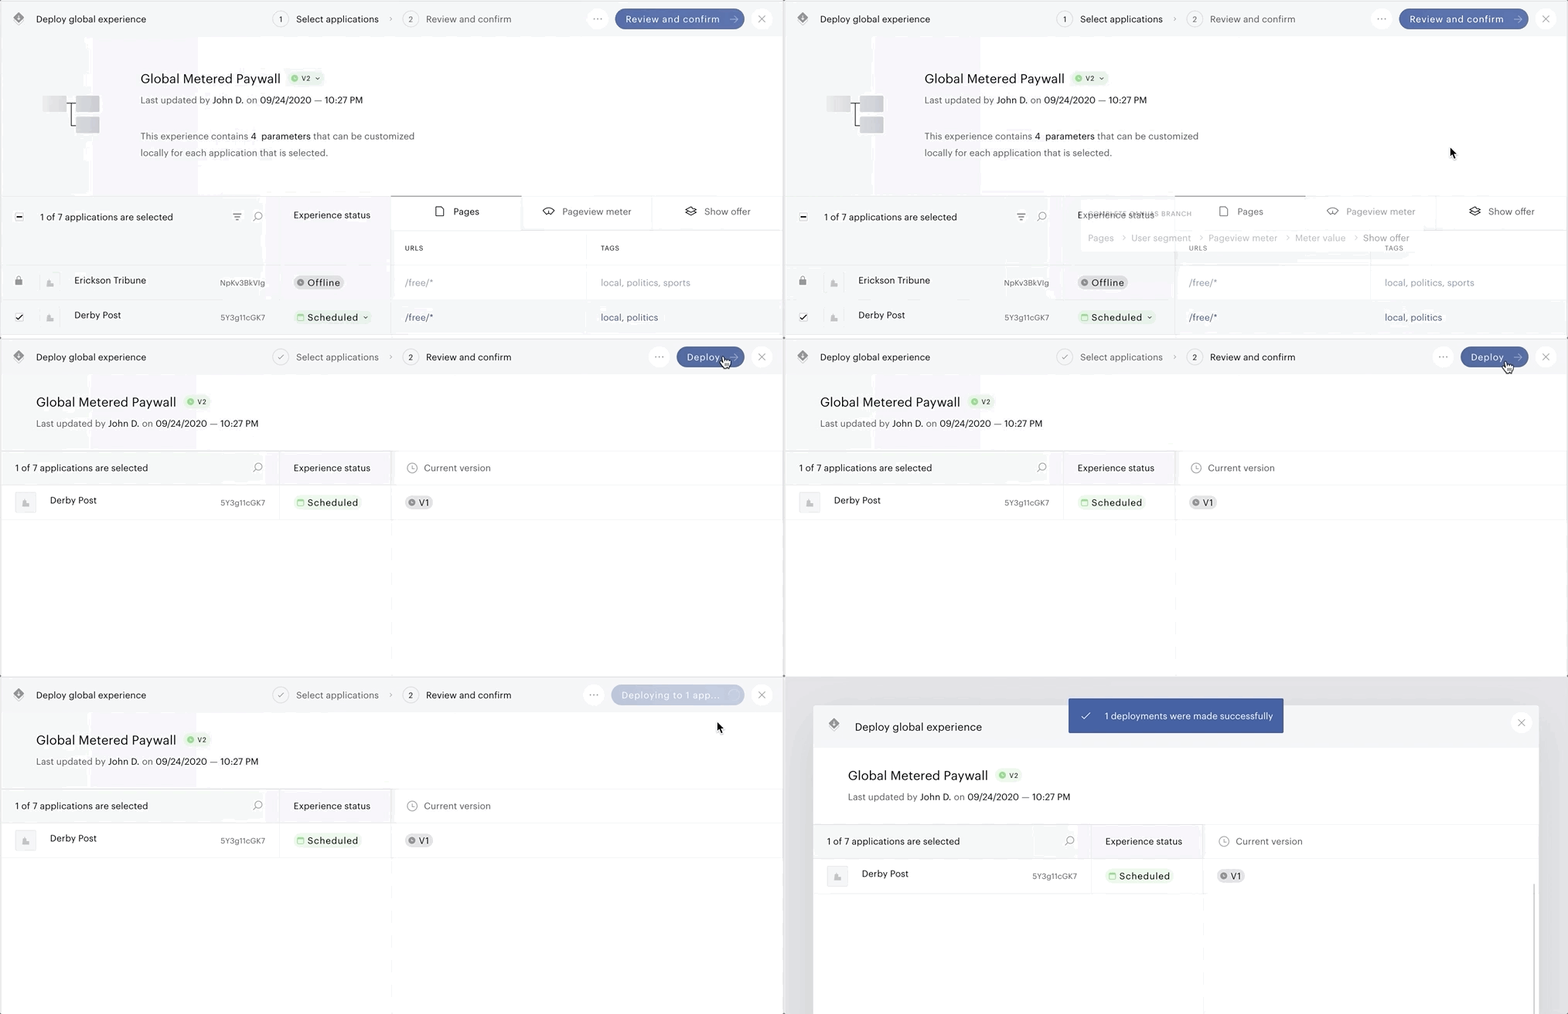
The Experience is now deployed to the selected applications. The inherited Experience is available from within the relevant child applications. Inherited Experiences are read-only, and display the Inherited tag. You can only change the status of an inherited Experience. If you want to make changes to the Experience, you have to modify the source Experience from within the original application, and then redeploy it. Experiences that have not been converted to Global Experiences, will not have any tags associated with them:
Administrative options
Global Management comes with several administrative options to help manage the life cycle of Global Experiences and templates across your applications.
Deployment History
You can check the deployment history for every Experience that has been deployed. Reviewing the deployment history will provide you with deployment logs for each Experience.
-
From the Global Library open the Experiences folder:
-
Click the Menu icon in the top right corner of an Experience tile.
-
Click Deployment history:
-
Review the deployment history of your Experience:
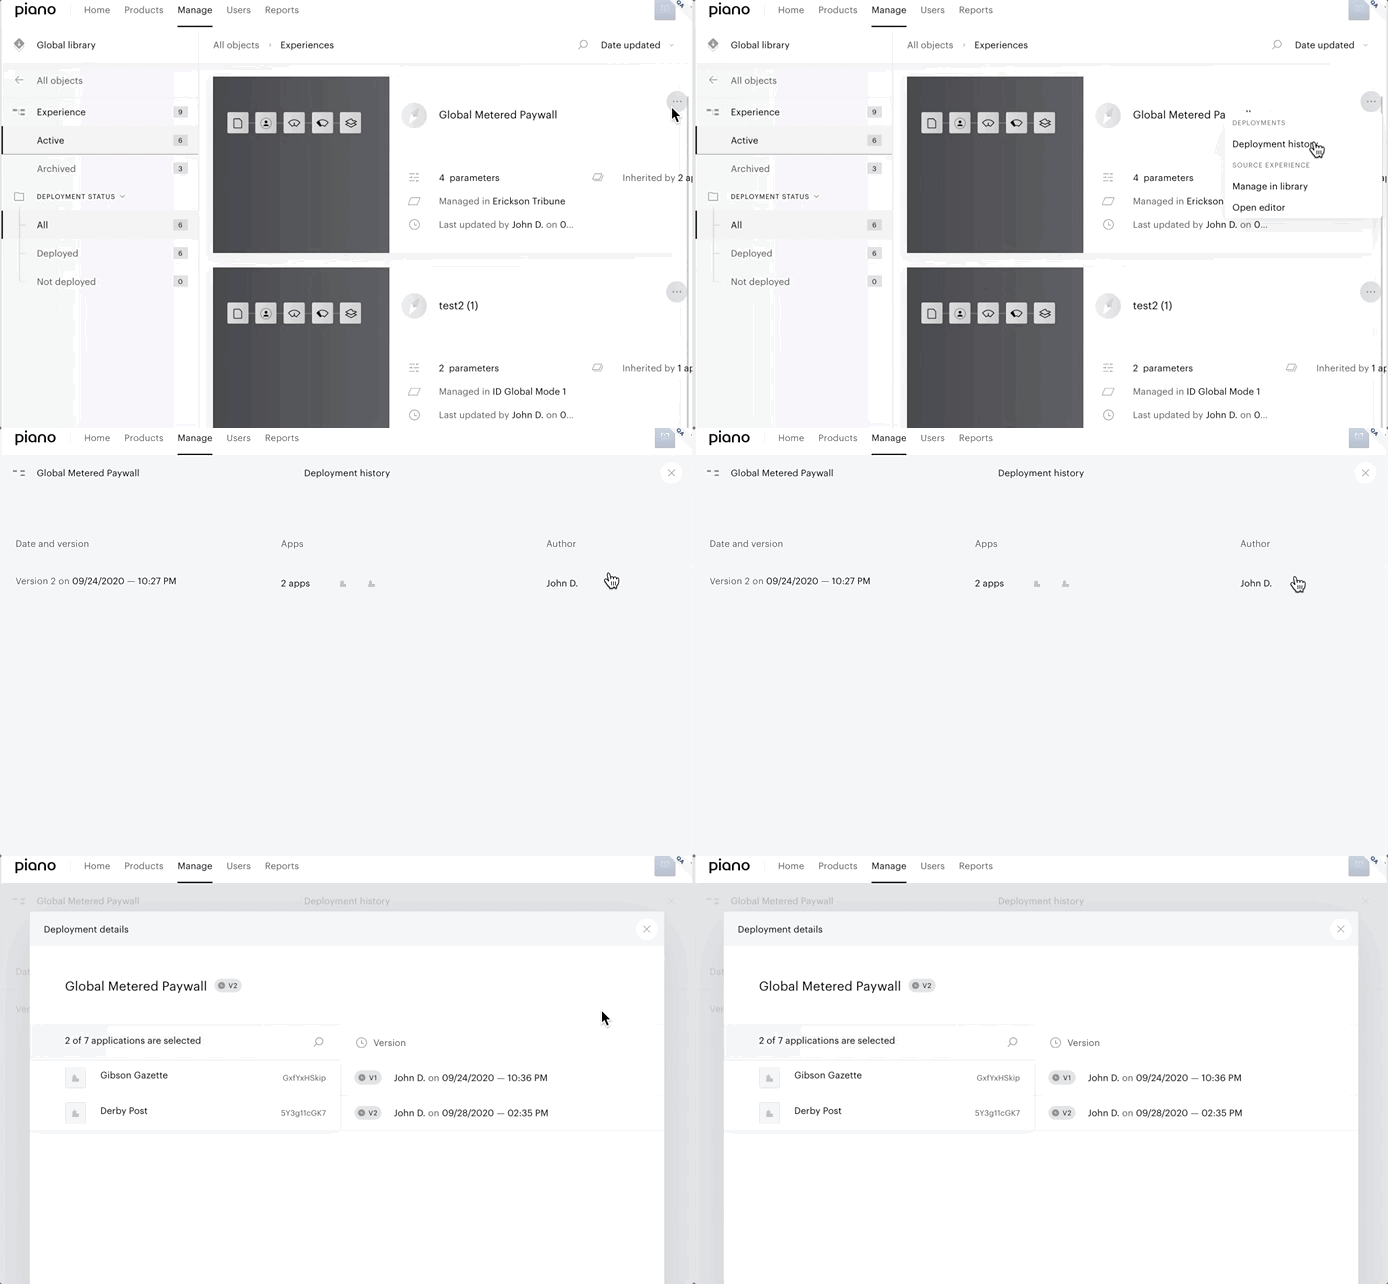
Clicking on a specific deployment will open the deployment details menu, this menu displays detailed information about the history of a specific deployment including applications, dates, and versions.
Archival
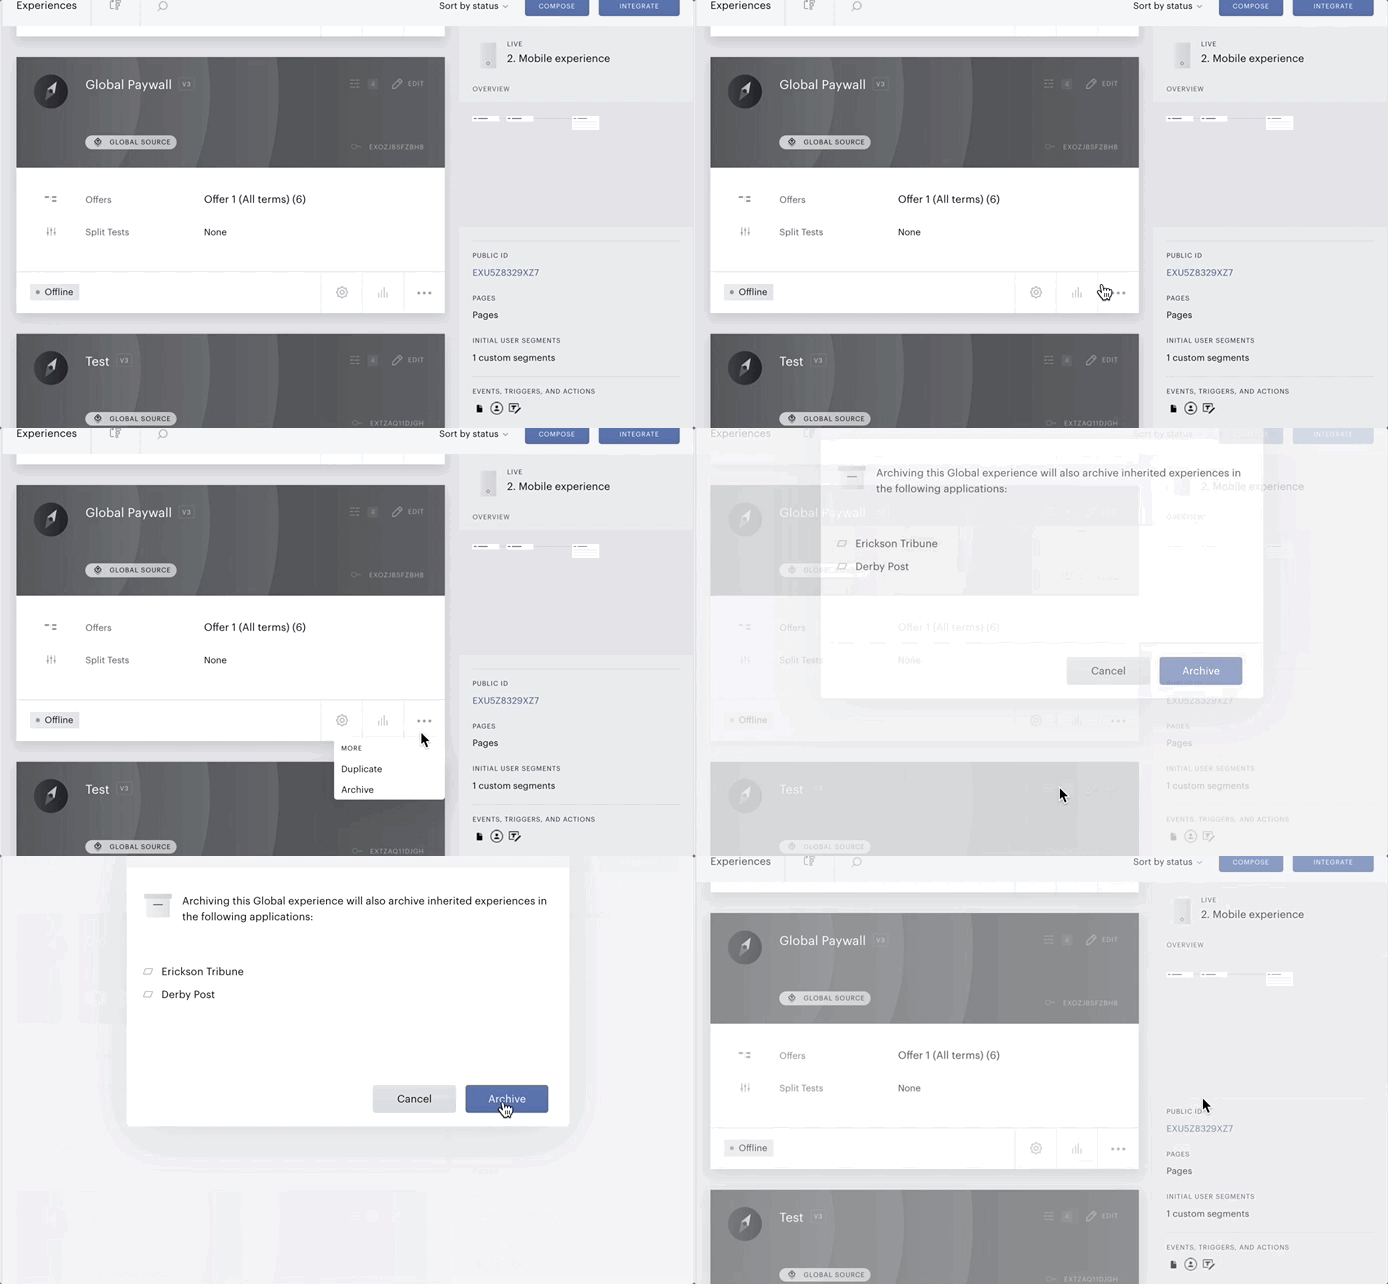
You can archive Global Experiences when they no longer become part of your strategy. Global Experience archival must occur in the application where the Experience was created. If the Experience you wish to archive is currently deployed, you will be presented with a list of the child applications that have inherited this Experience, and have to confirm archival. Upon confirmation, the Global Experience will be archived along with all inherited versions of the Experience across all relevant applications.
-
Navigate to the Experience you would like to archive within its source application.
-
Click the More Information button, then click Archive.
-
Confirm that you would like to archive this Experience across all of the applications that have inherited this Experience:
Note, that once an Experience has been made global, it cannot be reverted back to a local Experience. You can archive the Global Experience (the source as well as any inherited versions) and recreate it as a local Experience.
Restore Archived Experiences
You can restore an archived Experience by:
-
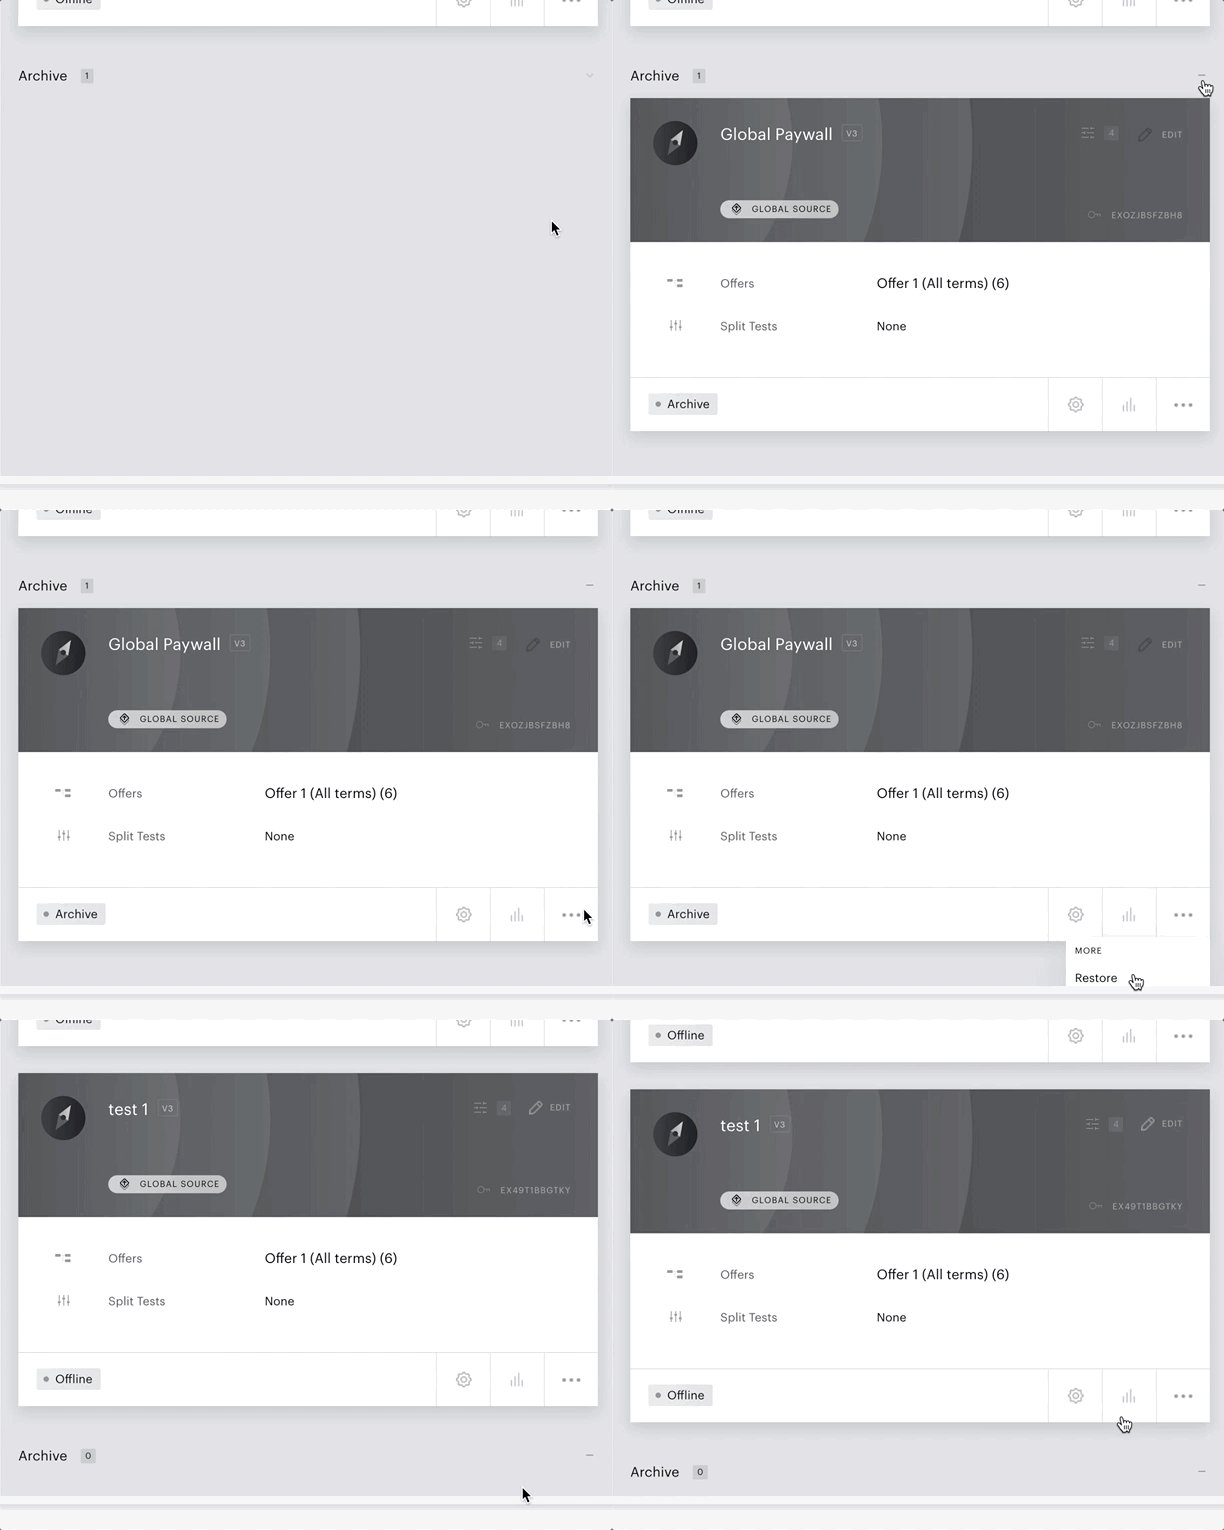
Navigate to the Experience manager and scroll to the archived section. Click Archive
-
Click the Menu icon in the bottom right corner of the Experience tile and select restore.
-
Upon restoration, only the Global Experience will be restored. You must redeploy the Experience to applications for the Experience to be available in other applications: