
As you read through this guide, it's important to keep in mind that some Composer settings connect to functionalities in Management + Billing, Piano's product for commerce management. If you are using Composer without Management + Billing, you won't be able to take advantage of these settings. All functions that require Management + Billing are clearly marked.
If anything within this guide is unclear, you're always welcome to contact support@piano.io with questions.
Essential Composer Terminology
As you read through this instructional guide, there are a few repeatedly used terms that are important to understand:
Experience: This is Piano shorthand for a user experience or online experience. When we write about constructing experiences or including particular types of functionality in an experience, we're talking about using the modular components of Composer to alter the behavior of your site or app. You may have several distinct experiences running on your site at the same time.
Cards: Along the left sidebar of the Composer interface you'll see a number of modules, which we call "cards." You can click, hold, and drag these cards onto the node to the right in order to build an experience. Cards can be chained together in a variety of ways, discussed in more detail below.
Experience Cards: When you go to Product → Composer and hit "Compose" you're creating a new Experience Card, a module wherein you can construct Site, Mobile App, or other experiences. You can create as many of these Experience Cards as you like and can turn the experiences contained within them on or off with the click of a button.
Canvas: This is the working area of the Composer interface where you string together your cards and set your experience rules.
Experience Branches: Composer is often used to create a unique user experience for one segment of your audience and another unique user experience for another segment. In these cases, the behavior of your website branches off, and the user's experience becomes dependent upon their identity and behavior. We call these forking experiences "Experience Branches," or simply "branches."
Pageview: A pageview occurs each time the Piano tracking script fully executes on a page. This is typically implemented as a page.display event that fires when a page loads. Piano counts one pageview for every execution of the tracking script, regardless of how the page load was initiated, whether through user navigation, page refresh, reload, or automatic processes. Both manual user actions (like clicking refresh) and automatic behaviors (like scheduled refreshes) are treated the same way and generate pageviews when the script executes. Note that prefetching typically does not trigger a pageview unless the tracking script actually runs. In single-page applications (SPAs), multiple pageviews can occur without a full page refresh. This is because the client’s integration code must manually call Composer with the appropriate page parameters each time new content is loaded into the viewport.
Creating an Experience
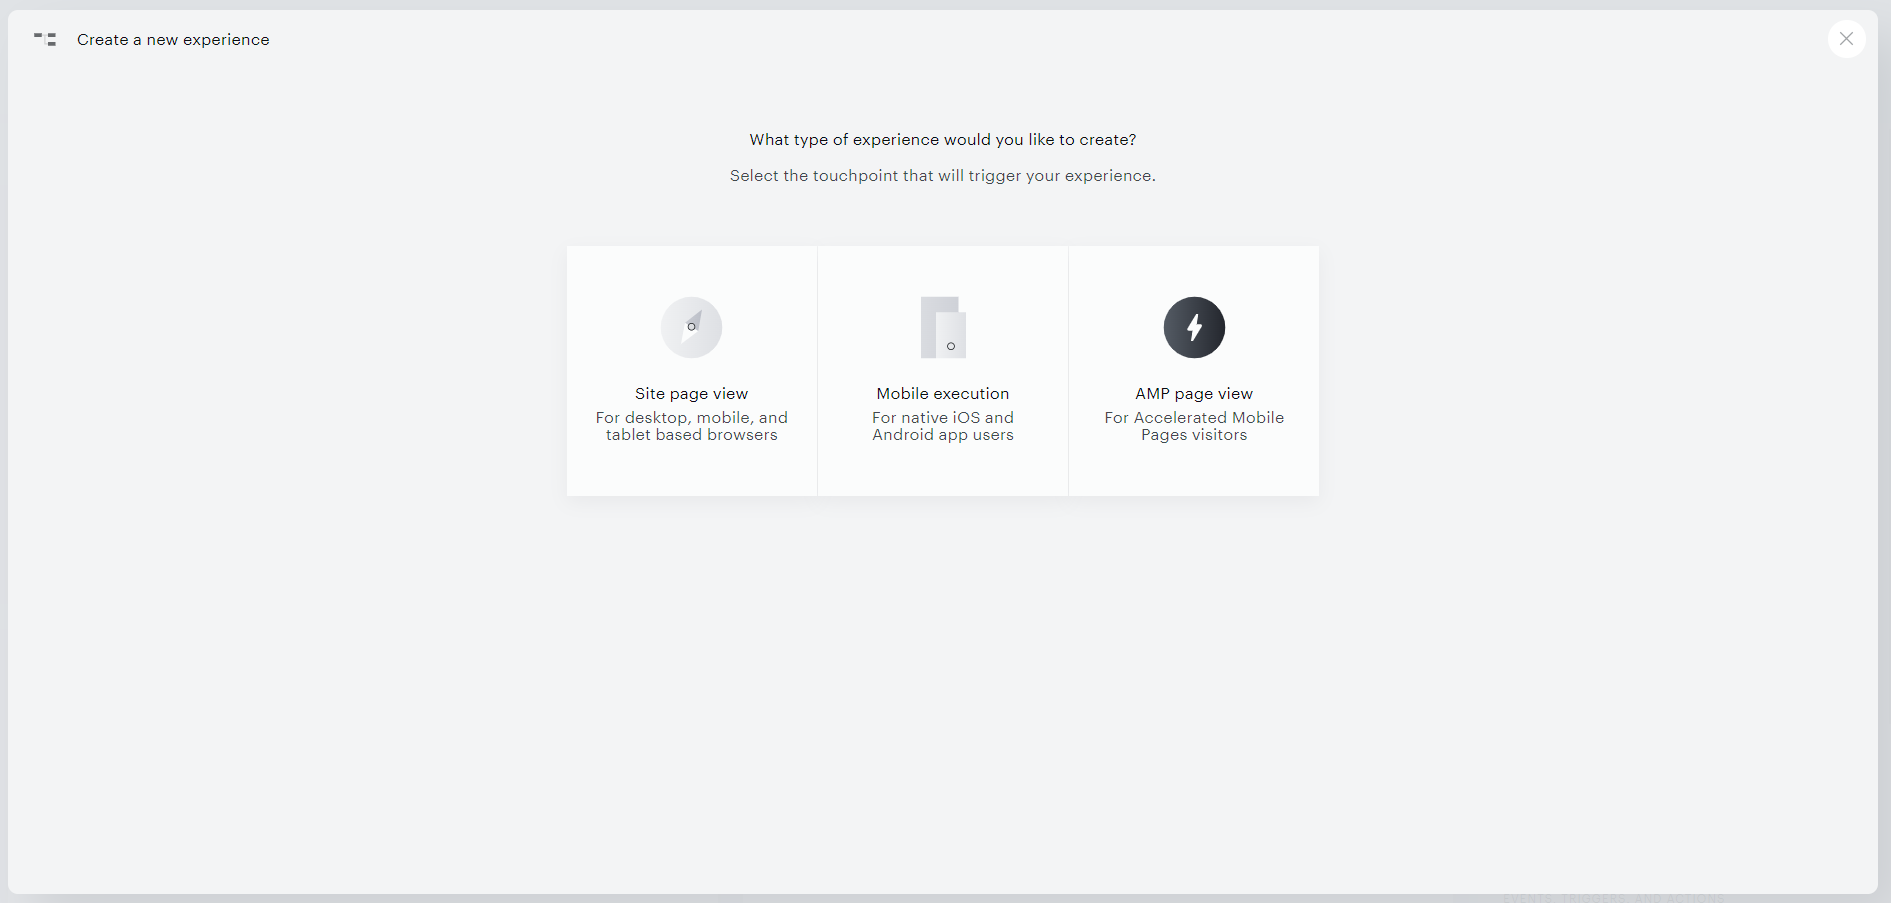
To create a new Composer Experience Card, go to Product → Composer and hit the blue Compose button in the upper right corner of the screen. When you do that, you'll be presented with this screen where you can select the type of experience you'd like to create. To create an experience for web browsers, select Site page view:
Enter a name and description for your Experience (these are for internal use only), then click "Create" to continue.
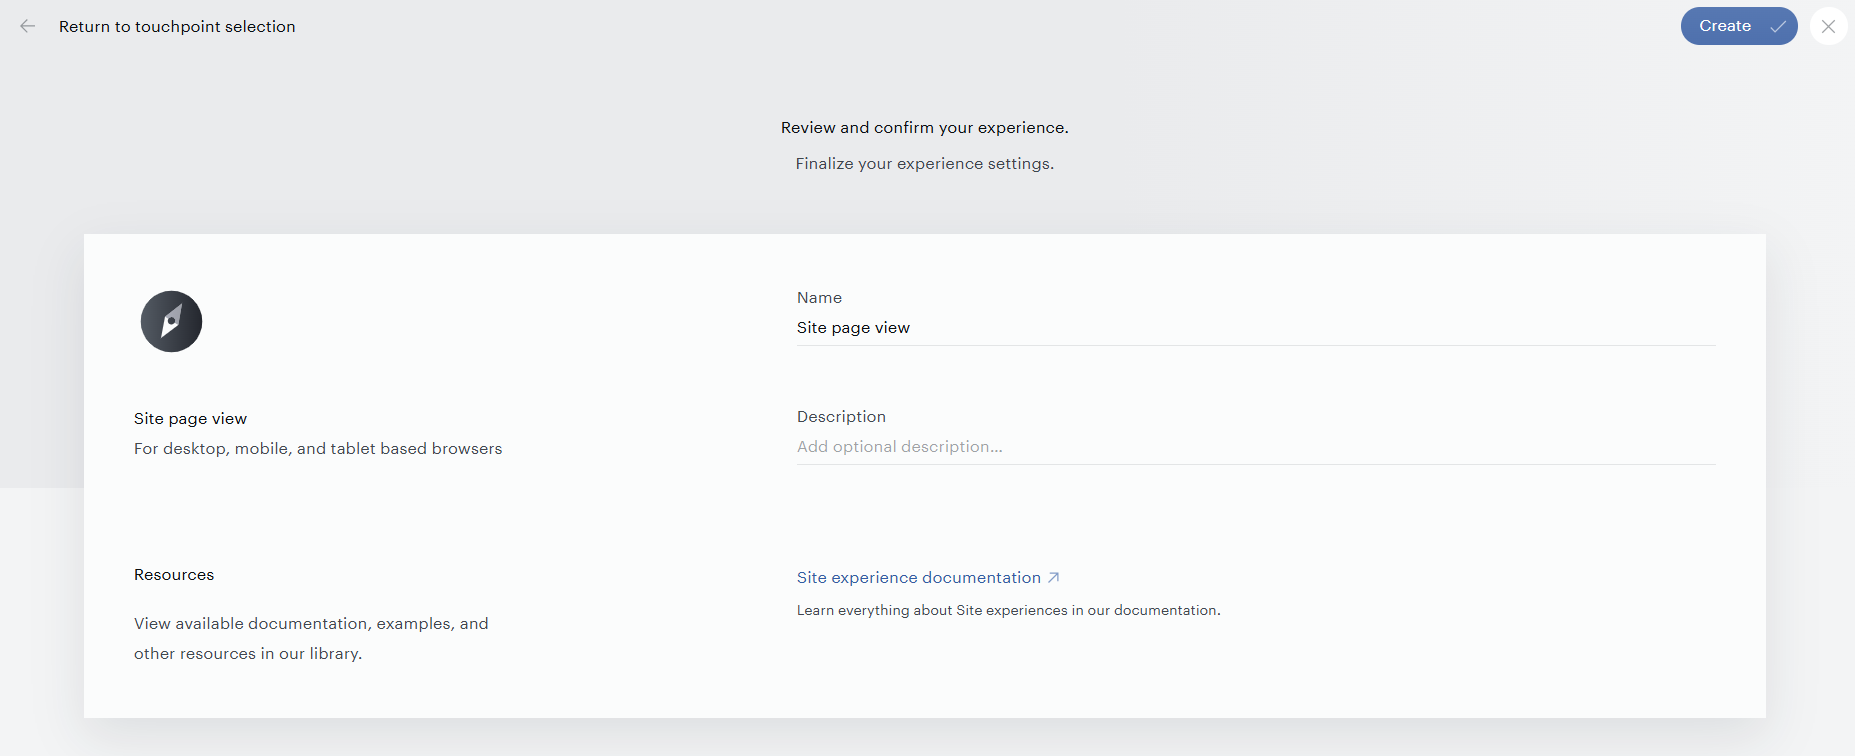
The majority of this guide will focus on Site page view Experiences (used for any online experience that occurs outside of an app, regardless of device). Mobile execution Experiences, which may need to be enabled by your Piano representative, have special settings that are discussed in detail in this article. Other types include AMP, Template Interaction, API Interaction on Edge or API Interaction on Server. Please get in touch with your Piano Account Manager in case you'd like to receive more details about these.
After you've named your Site page view Experience (a description is optional), you'll be taken to the primary Composer interface, which looks like this by default:
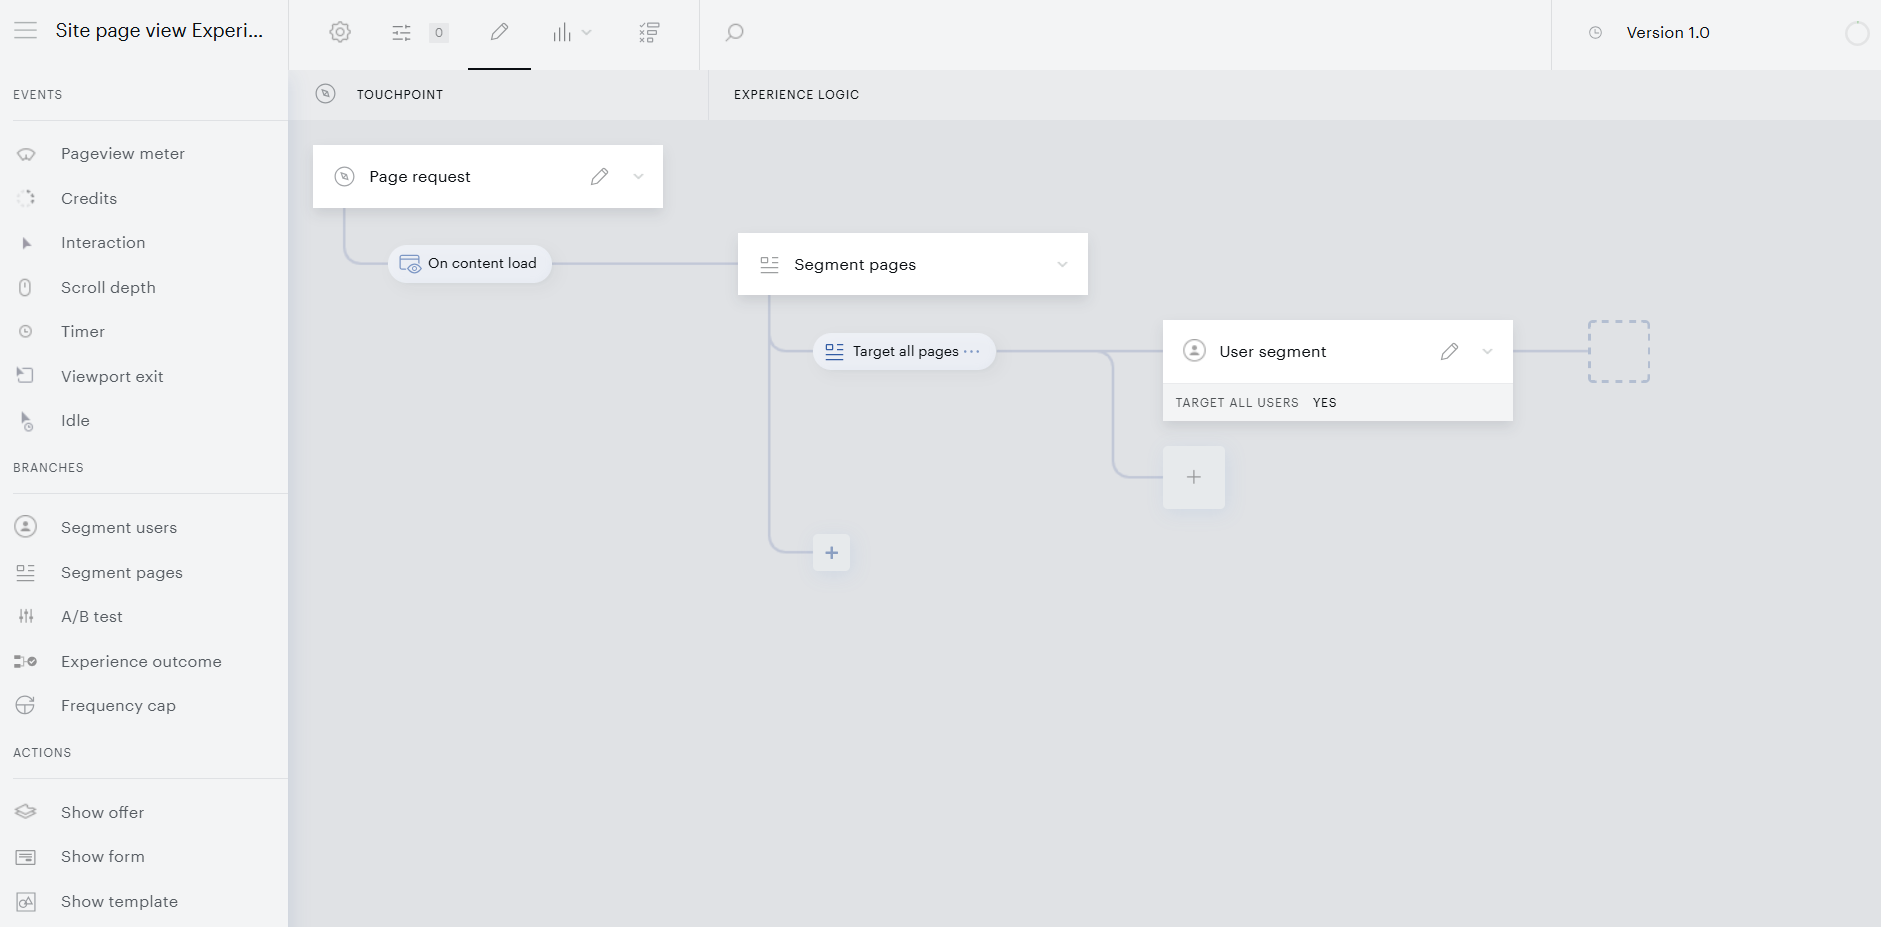
When you open the experience editor, several predefined elements appear:
-
Page request – Serves as a touchpoint that triggers the experience execution.
-
On content load – Indicates when an experience is executed.
-
Segment Pages card – Defines which pages or page segments the experience will apply to.
-
User Segment card – Defines which users or audiences will see the experience.
These elements ensure that every experience has the minimum configuration required before you define events and actions.
By default, both cards are set to target all pages and all users. To adjust the configuration of a card, click the Target all pages icon on the Segment Pages card or the pencil icon on the User Segment card in your canvas.
Each opens a settings panel where you can refine targeting criteria or define specific audiences.
-
Details about Segment Pages card settings can be found here
-
Details about User Segment card settings can be found here
Composer gives you flexibility to define your targeting strategy in the order that best fits your needs, you can start with either page segments or user segments.
As you set up your experience, keep in mind that the order of your cards matters. Composer constructs an experience on your site by reading the cards on the canvas from left to right. The left-most card is analyzed first and the right-most card (which will always be an Action card) is analyzed last. Every experience must include a Segmnet Pages card, a User Segment card, and an Action card of some type.
Between the Segment Pages/User Segment card and the Action card, you can insert and reorder A/B Test and Events cards. You can also add an additional User Segment card after an Event card. This modular setup gives you maximum flexibility to design experiences that fit your site and targeting strategy.
Some existing experiences may still contain the legacy Effective Pages card. For more details, see here.
All of the cards within the sidebar are discussed in detail in subsequent articles.
Experience Size Limit
The more complex your Experience setup is the more branches with User segments and Action cards it contains. As a result, the Composer execution file size increases. In order for an Experience to run properly, a size limit of 250 kB has been introduced.
A real-time Experience size indicator in the top right corner of the Composer Experience canvas provides continuous feedback on the size of your Experience, helping manage large flows more effectively.
A green indicator is permanently displayed on the Experience canvas and updated in real time. Click the circle to view the current size of your Experience. The indicator:
-
Updates continuously as User segments, Action cards, or other rules are added or removed.
-
Provides proactive feedback even when the Experience size is far below the limit.
Starting from a size of 200 kB, there will be an orange indicator near the version selector in Composer which serves as a warning, that your Experience is nearing the maximum size limit.
In case the size of your Composer Experience exceeds the maximum size limit, you will see a note with a warning and will not be able to save your Experience. Learn more about how to decrease the size of a Composer experience.
This empowers clients to:
-
See the size of their Experience at any point, not just when warnings appear.
-
Plan ahead and prioritize features or use cases more effectively.
-
Avoid wasted effort by staying informed about size constraints from the very beginning of Experience design.
Please note that Composer supports up to 2,000 payment terms per application by default. This limit applies to the total number of payment terms and can affect term visibility in the Composer UI, including the canvas and Global experiences.
If the limit is approached or exceeded, some terms may not appear in Composer’s term selection dropdowns or experience configuration.
Interacting with and Editing Your Experience
Cards can be added to your experience in two ways. The primary way of adding a new step to your experience is to drag and drop the appropriate card from the left panel of your screen. In general, this is the recommended way of configuring your experience, as it adds that card in its default state, allowing you to adjust the settings from scratch.
Another way of adding cards to your experience is to copy and paste existing cards within your canvas. To do so, simply click on the dropdown arrow in the upper right of an existing card, and you will be presented with several options.
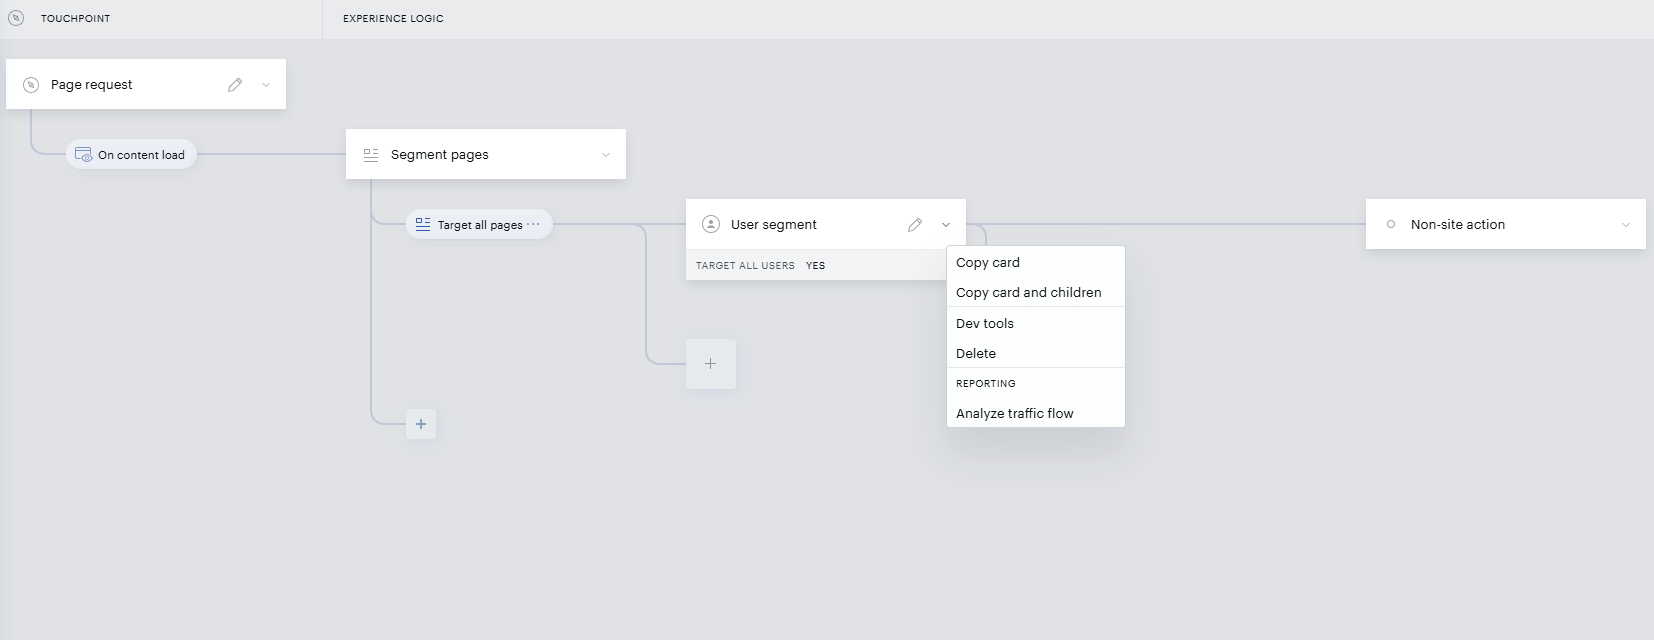
Copy card: Clicking the copy card option will copy all settings of that card, allowing you to paste an identical card in other applicable locations in your canvas.
Copy card and children: Copying the card and children will copy all settings of that card and any other cards beyond it in the user flow (visually, this is all cards to the right of the selected card). This option will not appear if the selected card has no dependencies.
Paste card (and children): This option will say simply "Paste card" when you have only copied a single card and will say "Paste card and children" when you have copied multiple cards via the Copy card and children option. You can use this to overwrite an existing card, or you can click in an applicable section of your canvas with a + icon and paste the card(s) there.
Dev tools: You can use our dev tools to call a method after the user meets the success criteria for the selected card. This is mainly useful for tracking purposes, an example use case is described here.
Delete: Clicking the delete option will not only delete the selected card, but it will also delete any dependent cards. Only select this option if you are sure you want to completely eliminate the card – otherwise, the only way to restore it is to revert to a previously saved version of your experience.
You can copy and paste cards across different experiences, but this functionality works only when the experiences are opened within the same tab. To copy a card from one experience to another, first open Experience A, copy the desired card, then return to the experience manager, open Experience B, and paste the card there. This can also be done when copying a card and its children. However, when experiences are open in separate tabs, the copy-paste functionality will not work between them.
Reordering Experience Branches
Adjusting the priority of experience branches ensures your content executes in the intended sequence.
Supported Experience Types
You can modify a branch priority when you access the experience editor. Apart from a couple of cards, modifying a branch priority is supported in following experiences:
-
Site Page View
-
Mobile Execution
-
Template Interaction
-
API Interaction on Edge
-
API Interaction on Server
Note: This functionality is not supported by certain card types within these experiences.
Access Branch Controls
Take the following steps to modify a branch priority:
-
Open the experience canvas.
-
Locate the branch you want to reprioritize in the execution sequence.
-
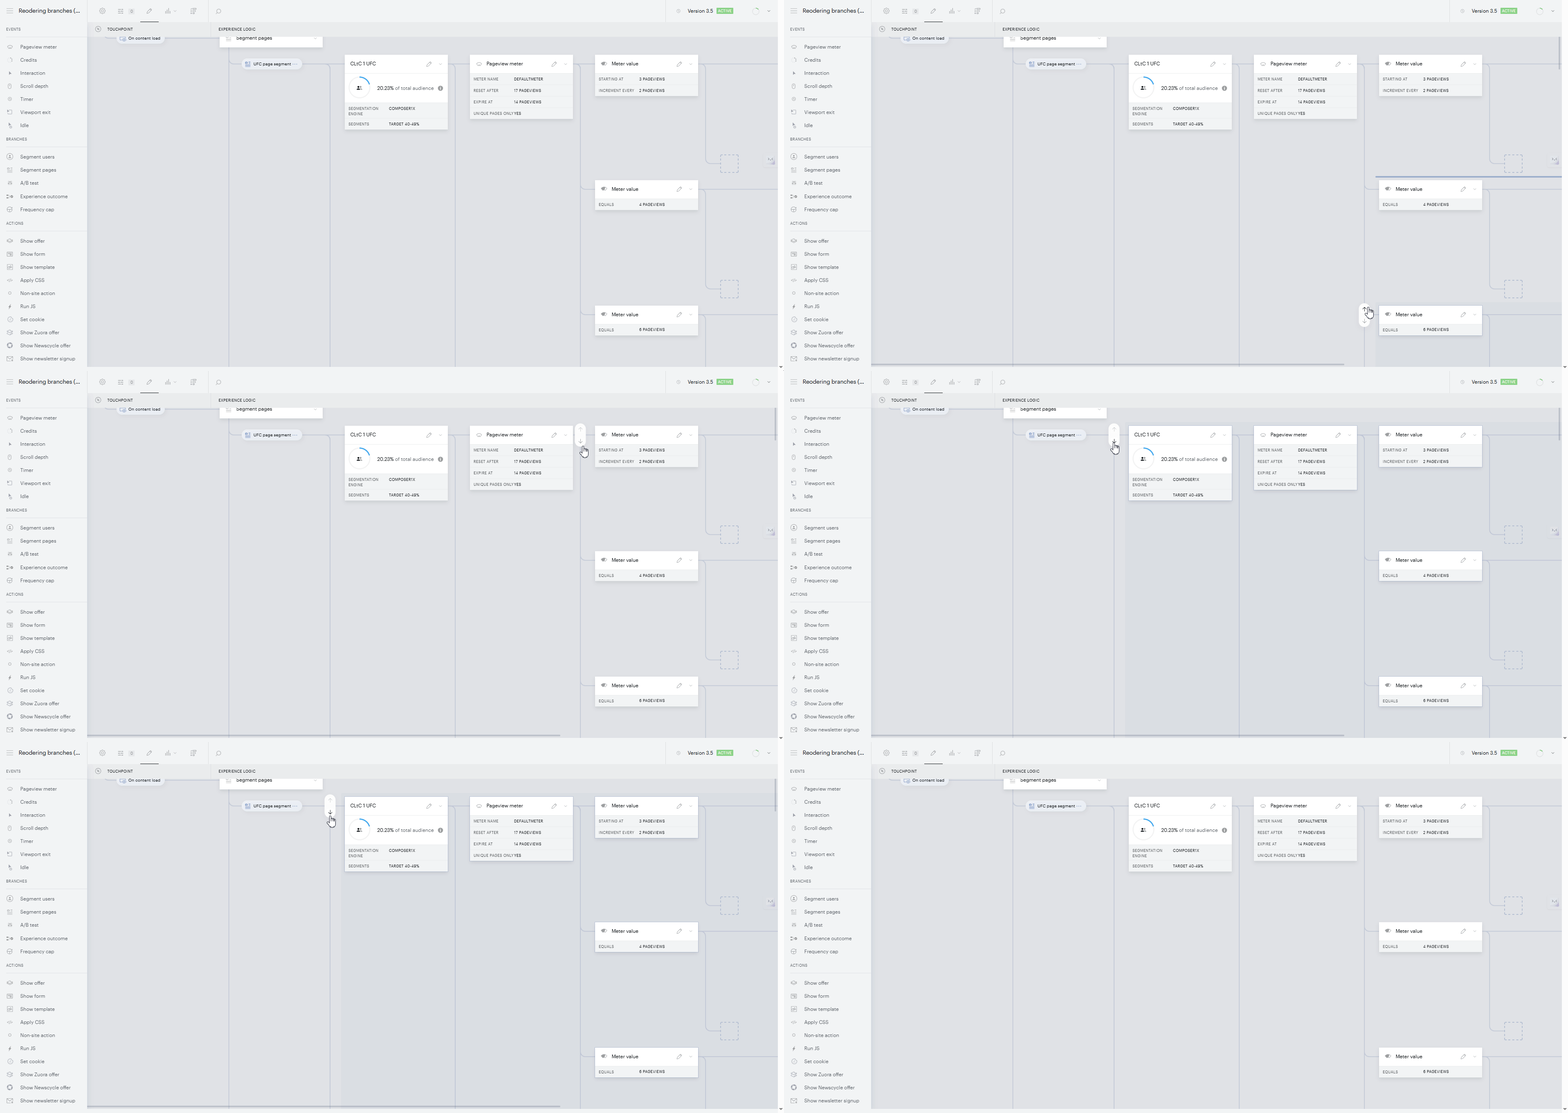
Hover your mouse cursor over the target branch.
Use Priority Controls
When hovering over a branch, you will find two control buttons in the canvas:
-
Up arrow – increases branch priority
-
Down arrow – Decreases branch priority
Click on the appropriate control button to modify a branch priority in the execution sequence.
Adjust Priority
-
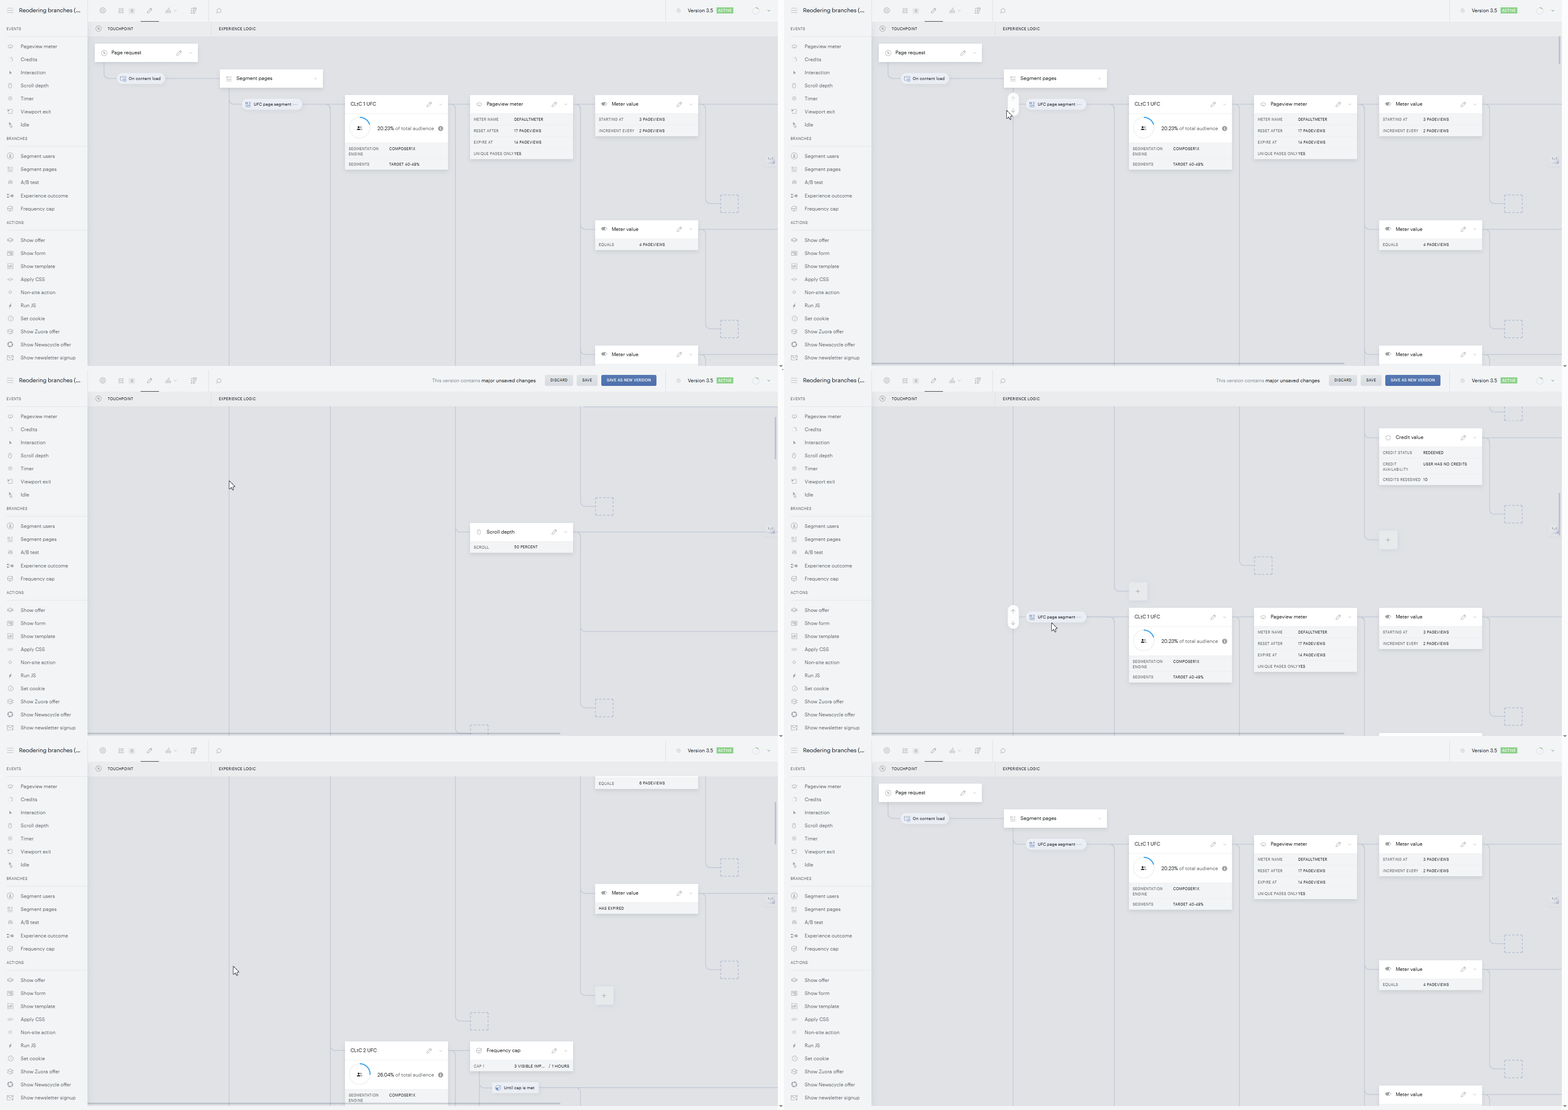
To set a higher priority, click the Up button to move a branch one position higher.
-
To set a lower priority, click the Down button to move a branch one position lower.
Movement Behavior
-
Each click moves a branch one position at a time.
-
All attached cards move together with a branch to new position.
-
Your branch swaps positions with its neighbor, updating the priority sequence.
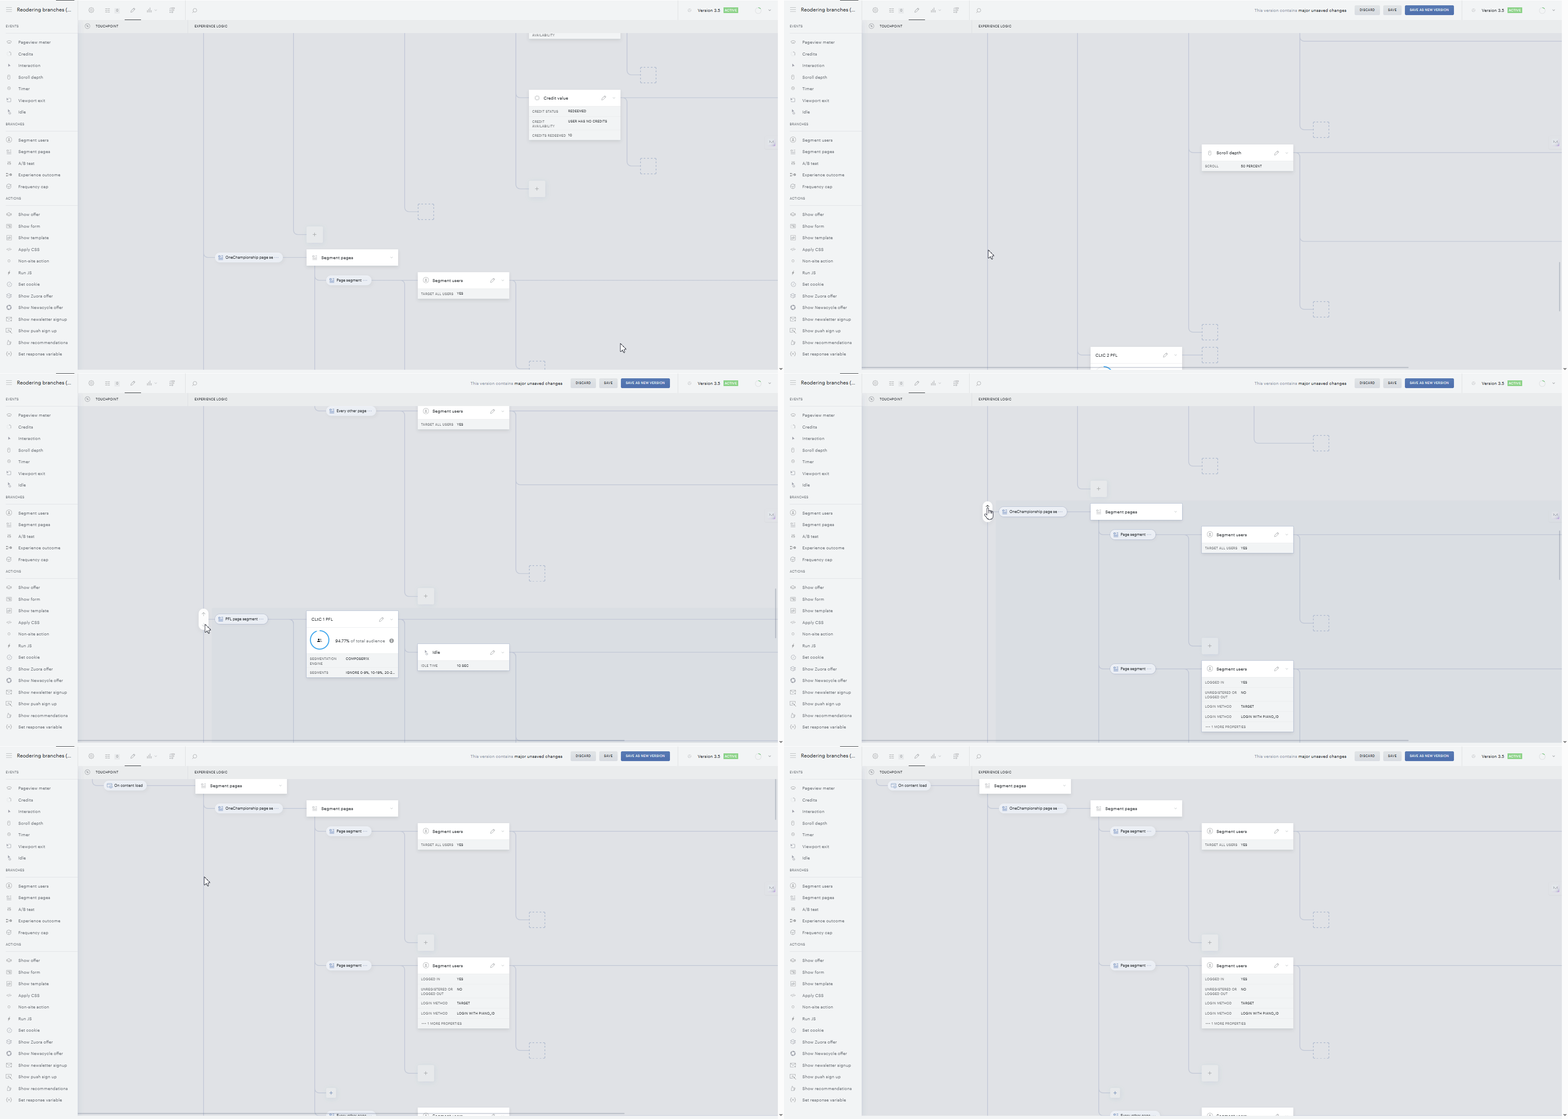
For branches that need significant priority changes, click the control button multiple times until the branch reaches your desired position.
Save Progress
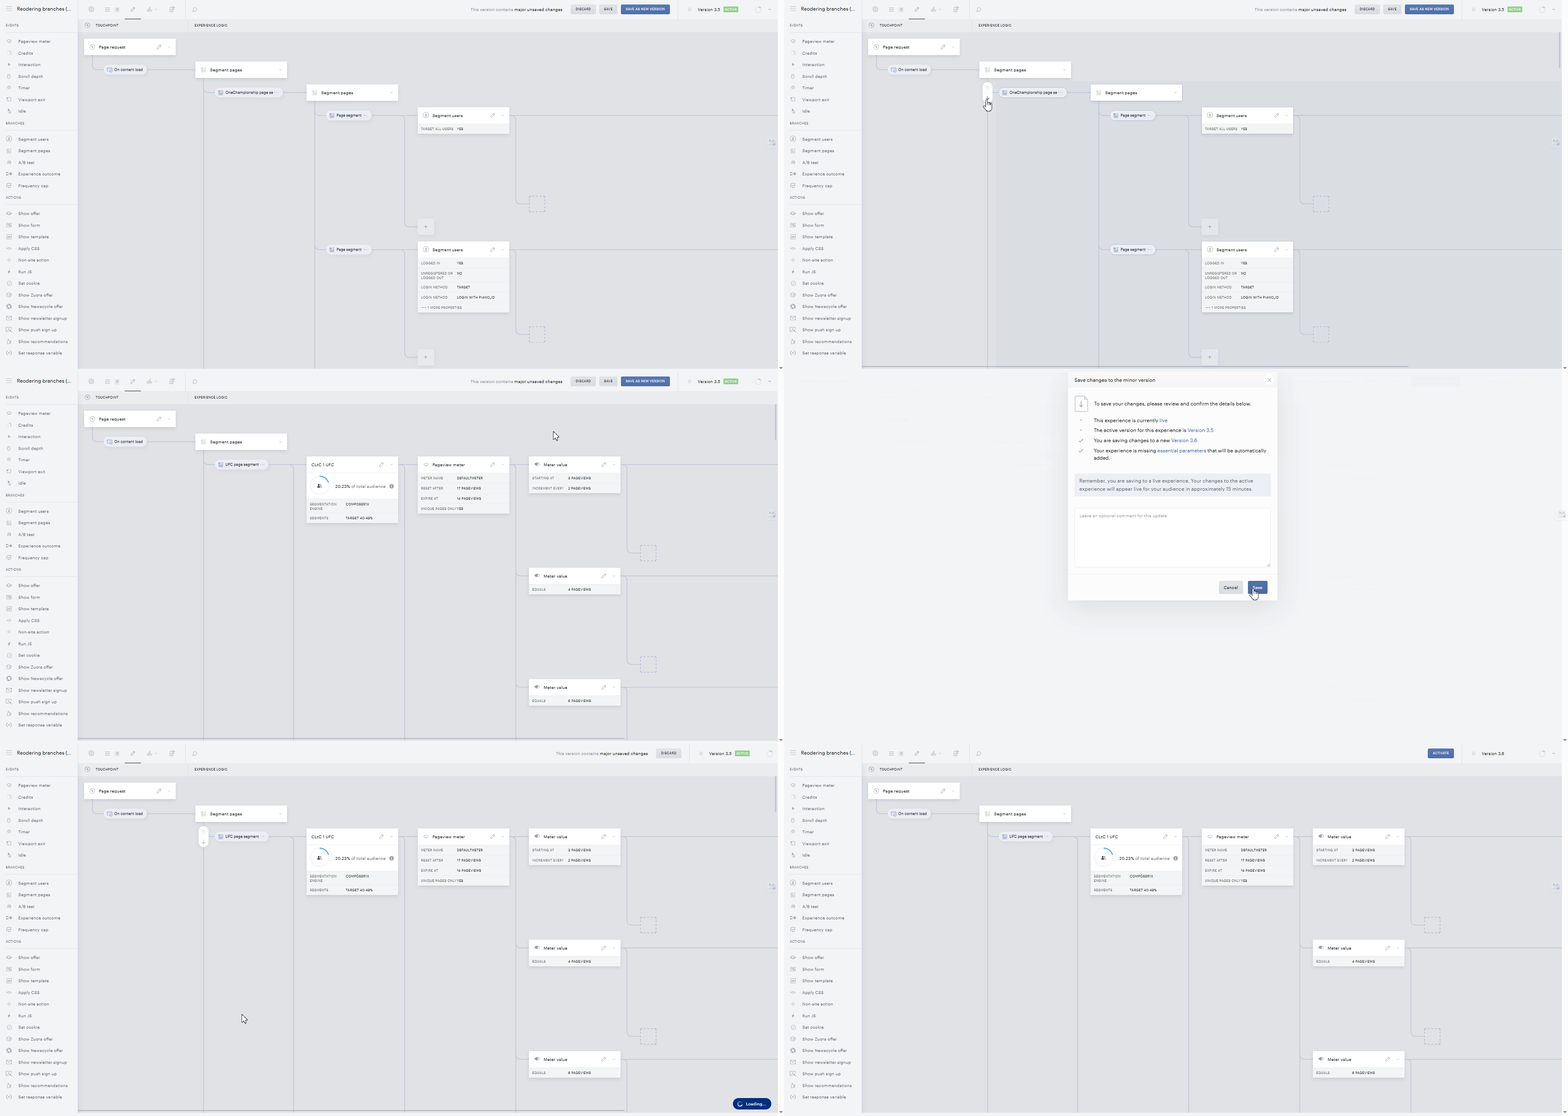
Once you have positioned the branch at the desired priority level, hit Save or Save as new version to apply your changes.
-
“Save” - Updates the current experience version
-
“Save as new version” – Creates a new experience version
Branch Reordering Restrictions
Branch priority modification has specific limitations based on card types and experience configurations.
Site page view
Modifying a branch priority is not supported for branches connected to the following cards:
-
Frequency Cap - All child branches restricted
-
A/B Test - All child branches restricted
-
Segment Pages – Partial restrictions apply:
-
❌ “Every other page” branch – Reordering restricted
-
❌ “Target all pages” branch – Reordering restricted
-
✅ “Page segment” branch – Reordering supported
-
-
Experience Outcome - Partial restrictions apply:
-
❌ "Otherwise" branch - Reordering restricted
-
✅ "Content is loaded" branch - Reordering supported
-
✅ "Content is restricted" branch - Reordering supported
-
Mobile Execution
Modifying a branch priority is not supported for branches connected to the following cards:
-
A/B Test - All child branches restricted
-
Experience Outcome - Partial restrictions apply:
-
❌ "Otherwise" branch - Reordering restricted
-
✅ "Content loaded" branch - Reordering supported
-
✅ "Content restricted" branch - Reordering supported
-
Template Interaction
The following parent cards have fixed positions in the experience canvas and cannot be reordered:
-
❌Auto-renew disabled
-
❌Subscription cancellation
Important note: These cards serve as touchpoint anchors and must maintain their original positions in the experience flow.
Branch priority modification is supported for child branches connected to touchpoint cards.
-
Branches under “Auto-renew disabled” – Reordering allowed
-
Branches under “Subscription cancellation” – Reordering allowed
API Interaction on Edge and API Interaction on Server
Modifying a branch priority for every card that appears on the experience canvas. No restrictions apply to adjusting a branch priority. You can use control buttons for changing branch priority with every branch that appears on the experience canvas.
Saving Experience Changes
When you make changes to your Experience, such as adding or removing cards on the canvas or modifying card parameters, you need to save those changes. There are two save options available in the toolbar above the canvas:
-
Save
-
Save as new version
Clicking either button opens a pop-up window where you can add a comment or description of your changes. These comments are saved as notes associated with the Experience version.
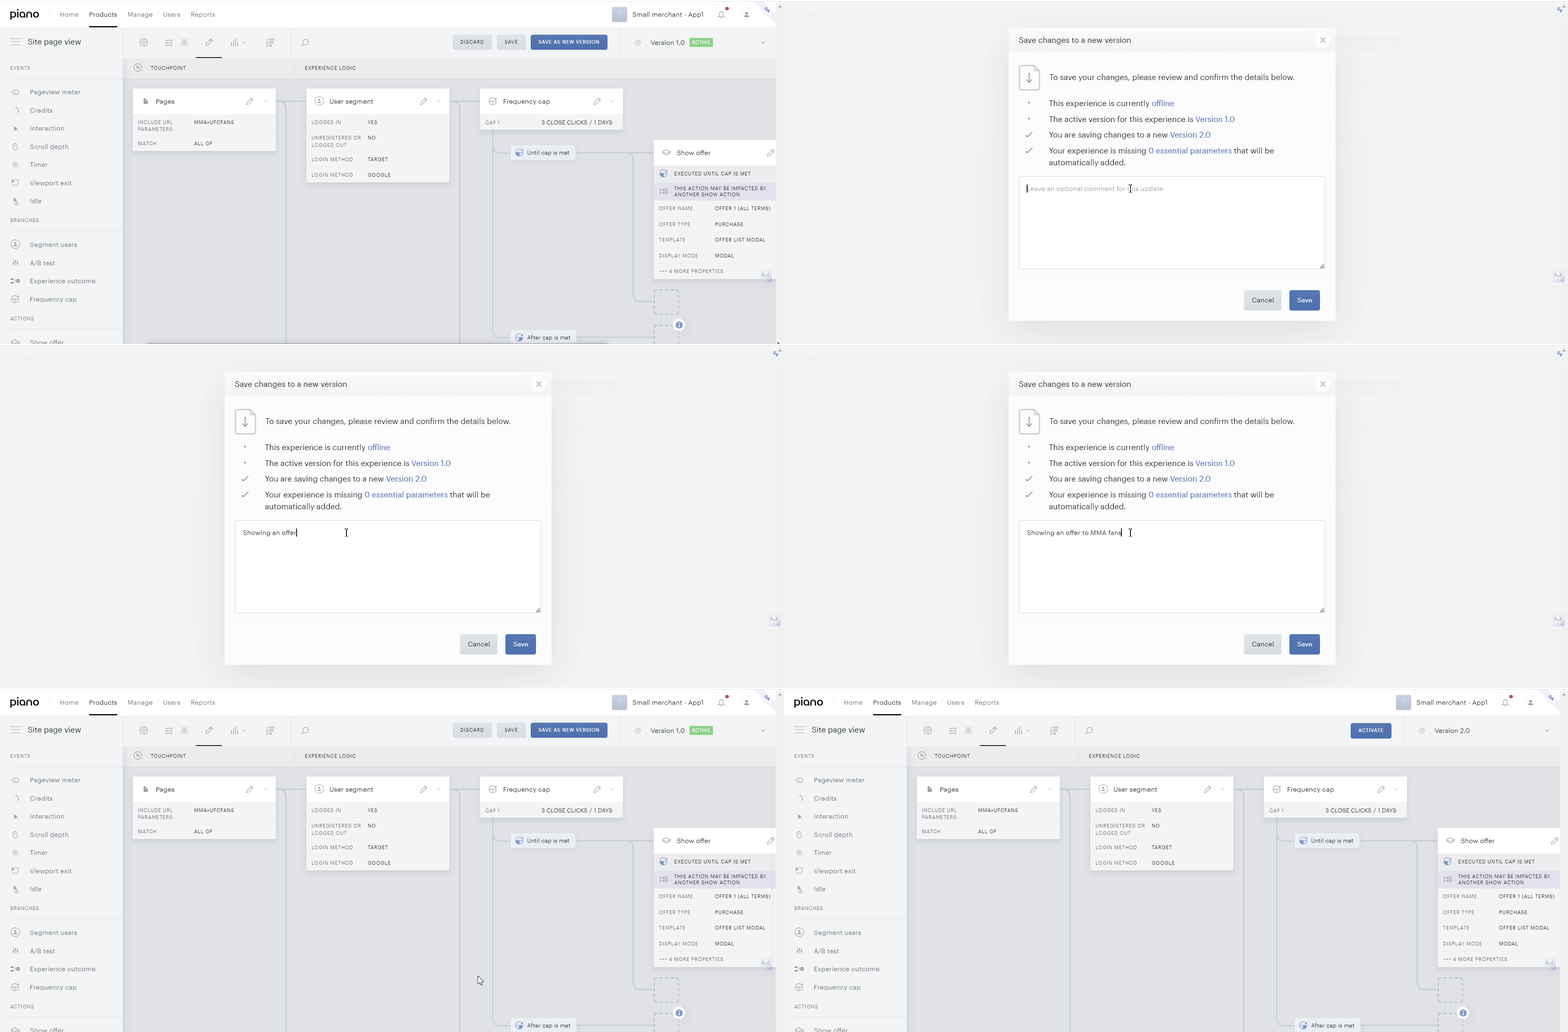
-
You can type up to 2000 characters in the pop-up window
-
After entering your comment, click Save in the pop-up to finalize your changes
Each time you use either option, a new experience version is created. Here’s how they work:
Save (Minor Changes)
If your updates are minor, use the Save button. This will create a new minor version, incrementing the version number by one decimal point.
Example:
-
If you’re editing version 1.1, clicking Save will create version 1.2.
-
If version 1.2 already exists, the new version will be 1.3, and so on.
Save as New Version (Major Changes)
For significant changes, use the Save as New Version button. This will increment the version number by a whole number, creating a major version.
Example:
-
If you’re editing version 1.1, clicking Save as New Version will create version 2.0.
-
If version 2.0 already exists, the new version will be 3.0.
Version Numbering
Previously, experience versions were whole numbers (e.g., version 1, version 2). To align Composer with Composer reports, a more detailed numbering system was introduced. Now, both whole and decimal numbers are used to better track changes.
Example:
-
Old versions: 1, 2
-
New versions: 1.0, 2.0, 1.1., 2.5, 5.5
Important: If you select Save as new version, you need to click Activate after saving to make the new version active and apply changes.
To find a particular Experience version or access the note contents, you need to open the Version Manager.
Accessing Notes and Switching Versions
To view notes or switch between Experience versions, use the Version Manager
-
Click the version number in the top right corner of the canvas to open the Version Manager
-
A drop-down menu will display the following:
-
A list of all Experience versions
-
A note for each version
-
Details such as the version’s author and creation date
-
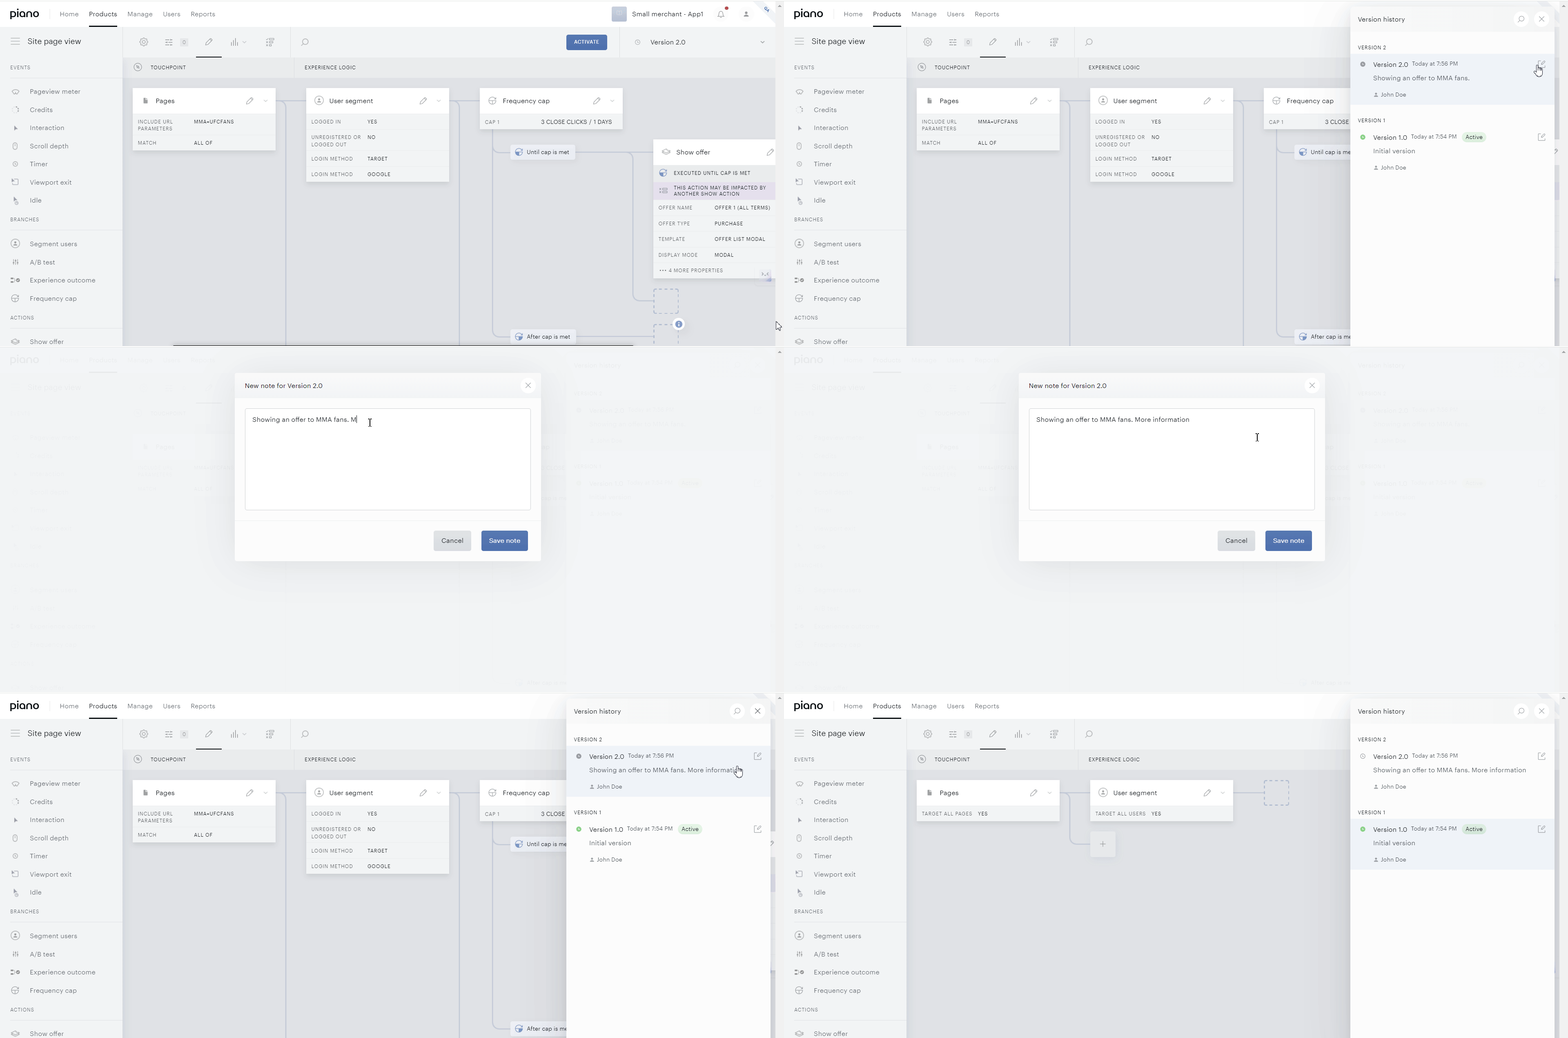
The Version Manager helps you review notes, switch between versions, and access key version details effortlessly.
Next Steps After Saving Changes
Once your changes are saved as a new version of your Experience, you can choose from the following actions:
-
Activate
-
Click Activate to make your recent changes part of the active version. This ensures that your changes take effect immediately.
-
-
Continue Editing
-
Continue making additional changes to the newly saved version.
-
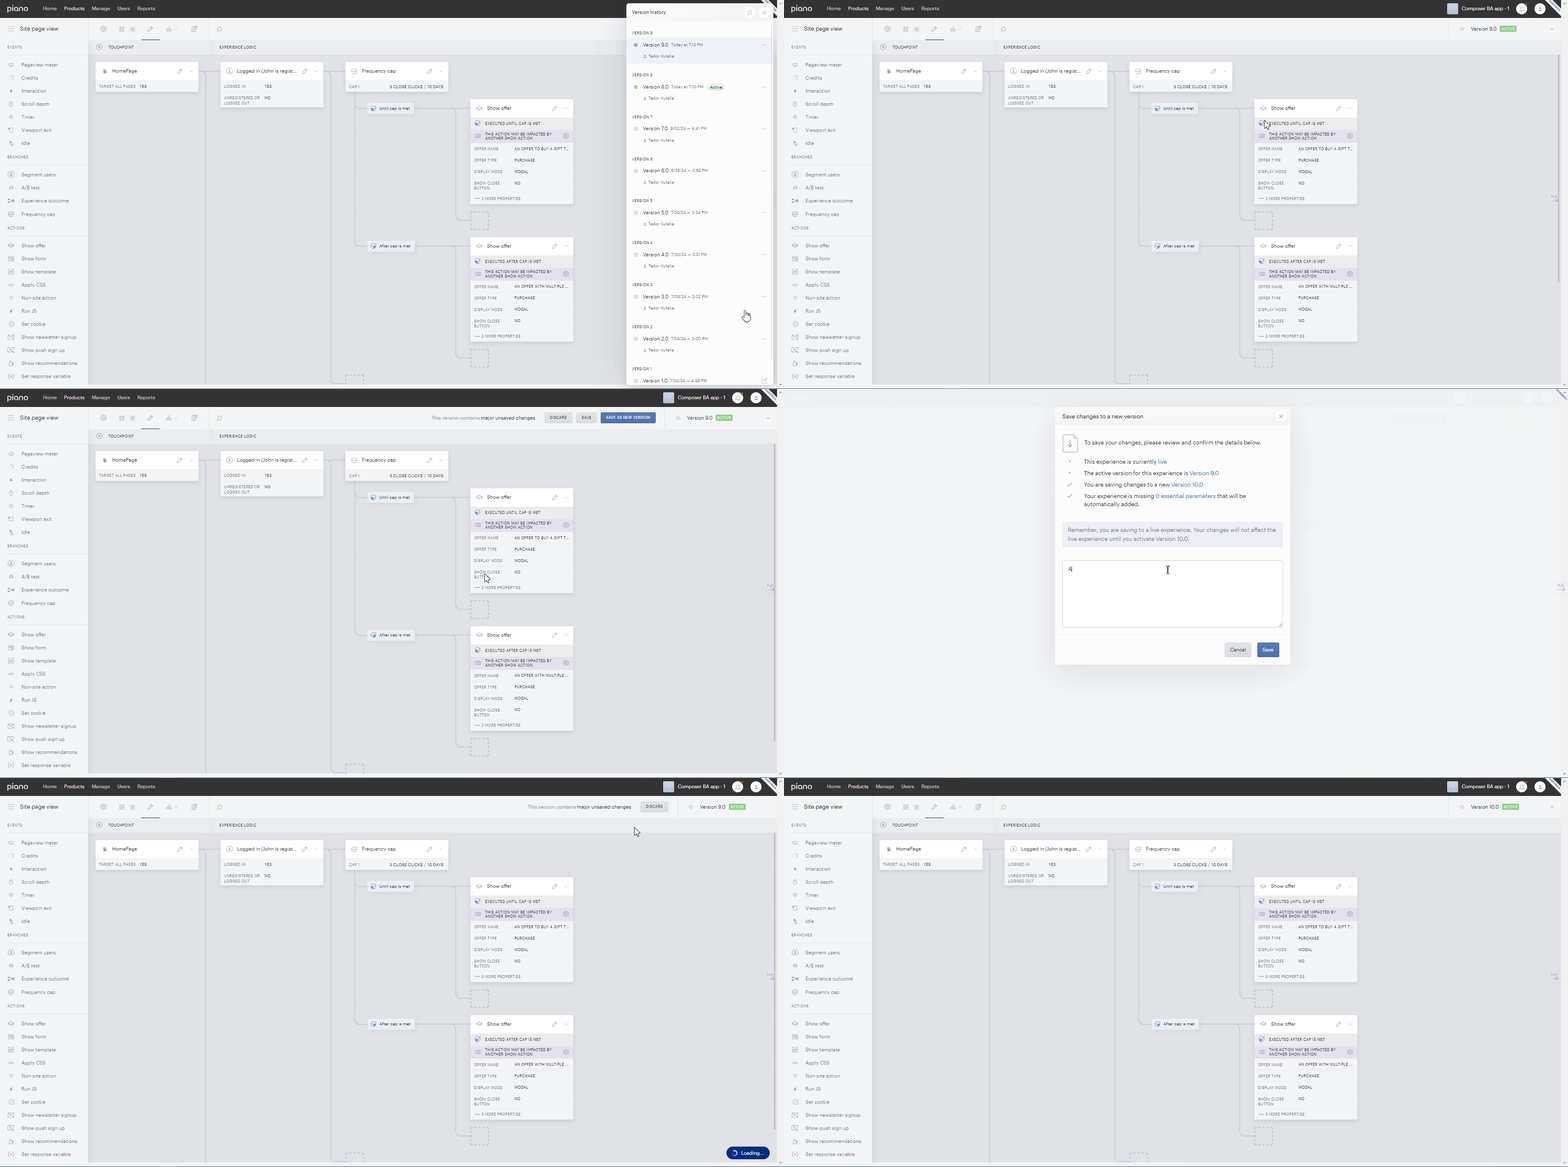
Version Manager Overview
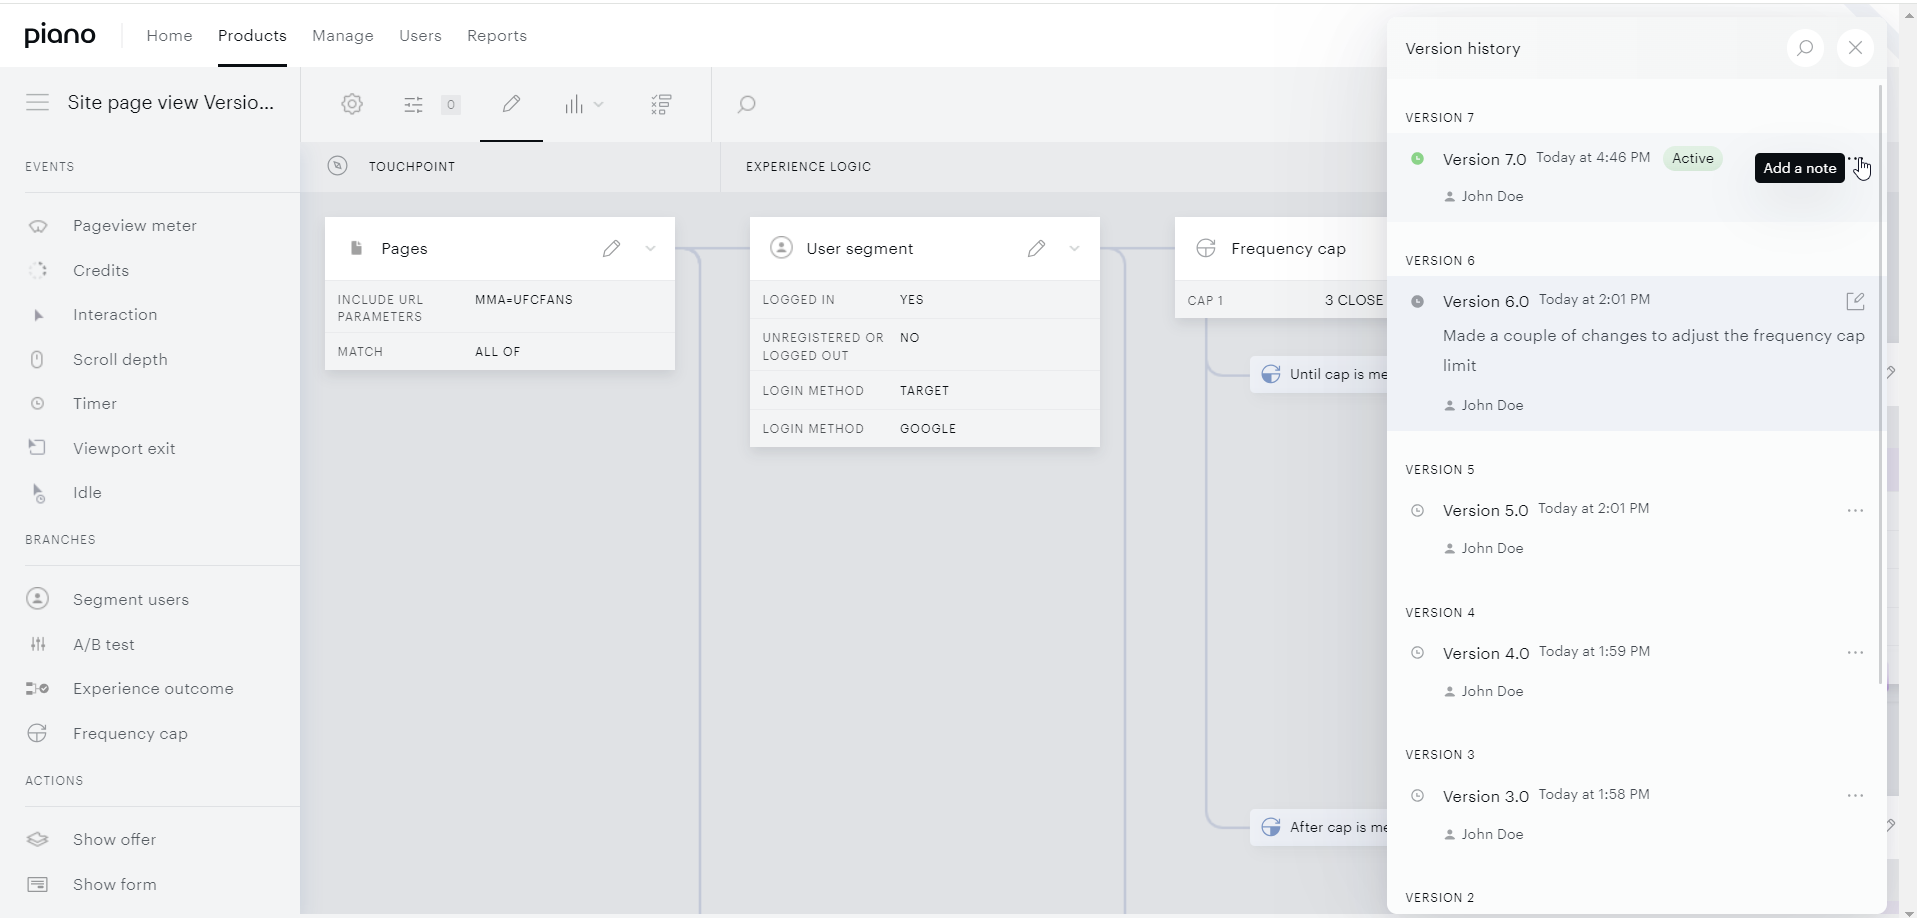
The Version Manager displays the following details:
-
Experience Versions (Versions are displayed in descending order, with the most recent version at the top)
-
Version Serial Number
-
Experience Notes
-
Version Author
-
Creation Date
-
Piano Subscriptions Status
Version Manager Options
The Version Manager allows you to manage Experience notes and navigate through versions. The options are categorized as follows:
Add, Edit, or View an Experience Note
To add a note:
-
Hover over a version without a note to reveal the button.
-
Click Add Note to create a note for that version.
To edit a note:
-
Hover over the note attached to the version.
-
Click Edit Note to modify or access its content.
-
You can enter up to 2000 characters when typing a note.
To view note content:
-
By default, only the first two lines of the note are shown.
-
Click Show More to expand the note or Show Less to collapse it.
Search the Version Manager
If you're looking for a specific version:
-
Click the magnifying glass icon in the top-right corner.
-
Type keywords from the note into the search bar to find the desired version.
Expand/Collapse Versions
-
Click Expand or Collapse to navigate through the list of experience versions.
-
Use these buttons to show or hide the full list of versions.
Close the Version Manager
-
To close the Version Manager, click the Cancel button in the top-right corner.
Accessing the Version Manager in Composer Pages
You can open the Version Manager from the following Composer pages:
-
Experience Editor (Canvas)
-
Global Parameters
-
Deployment Dashboard
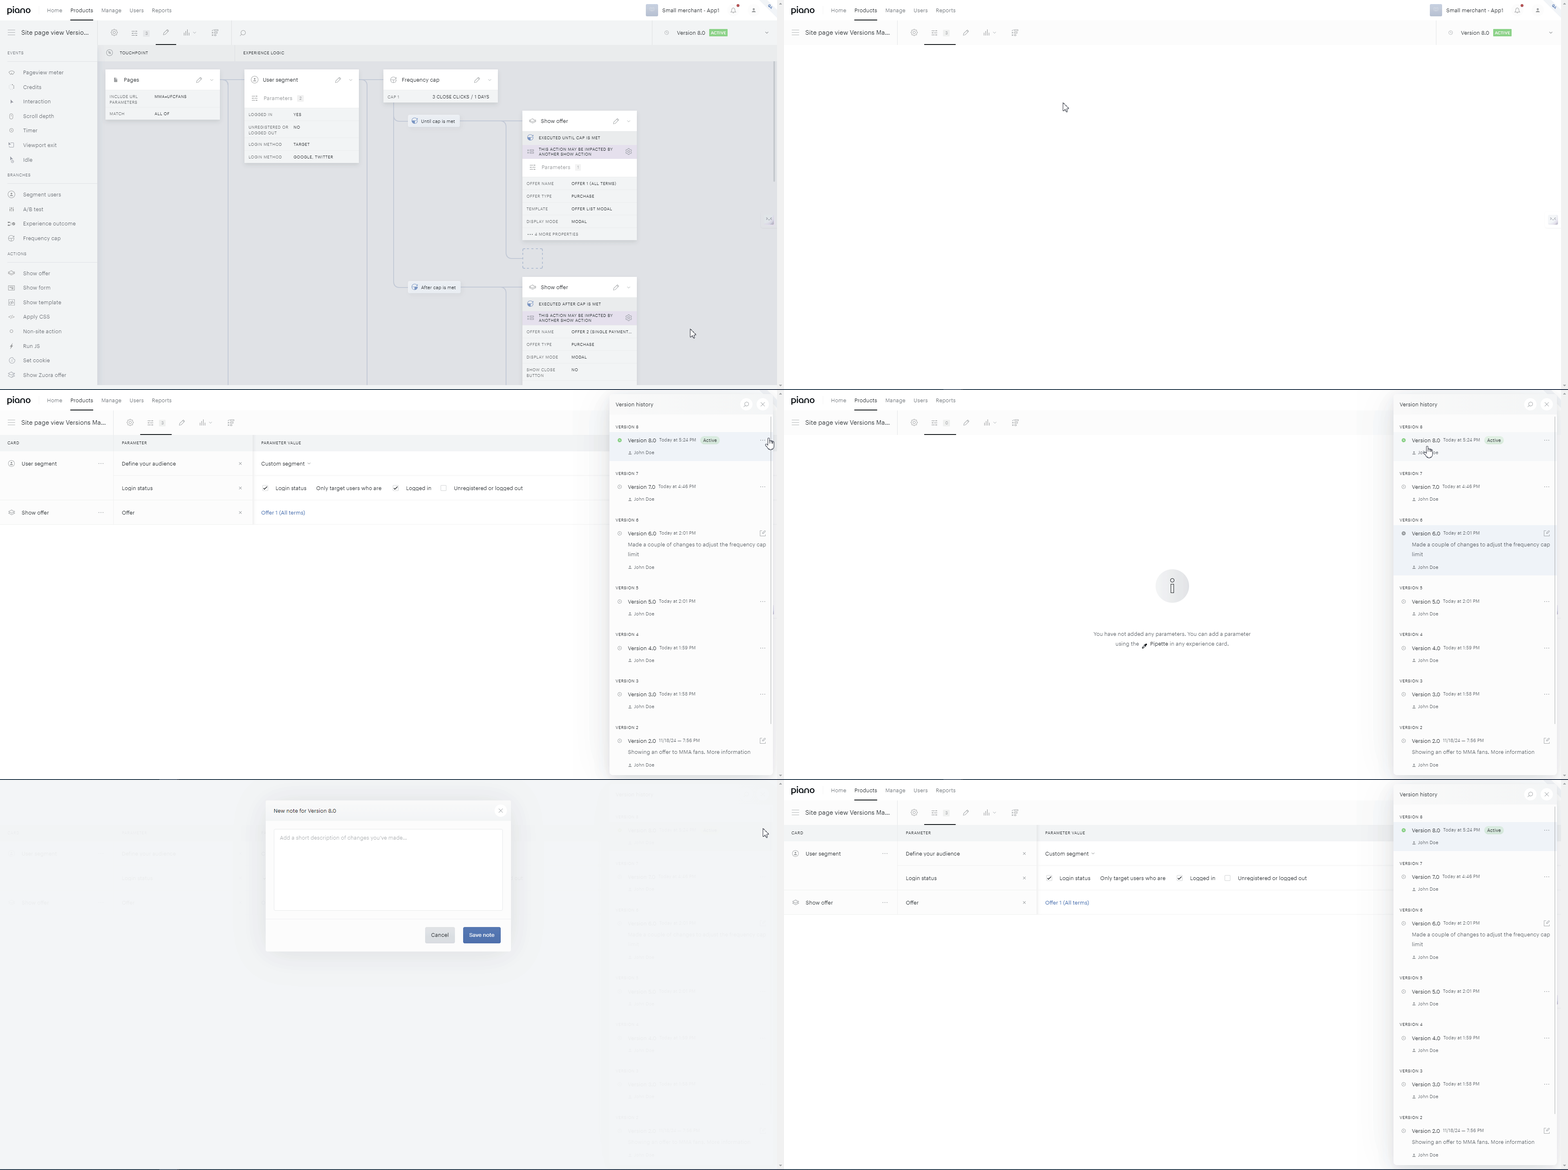
Note: To access the Version Manager from the Deployment Dashboard, the parent app must have more than one experience version.
Restrictions on Global Parameters and Deployment Dashboard
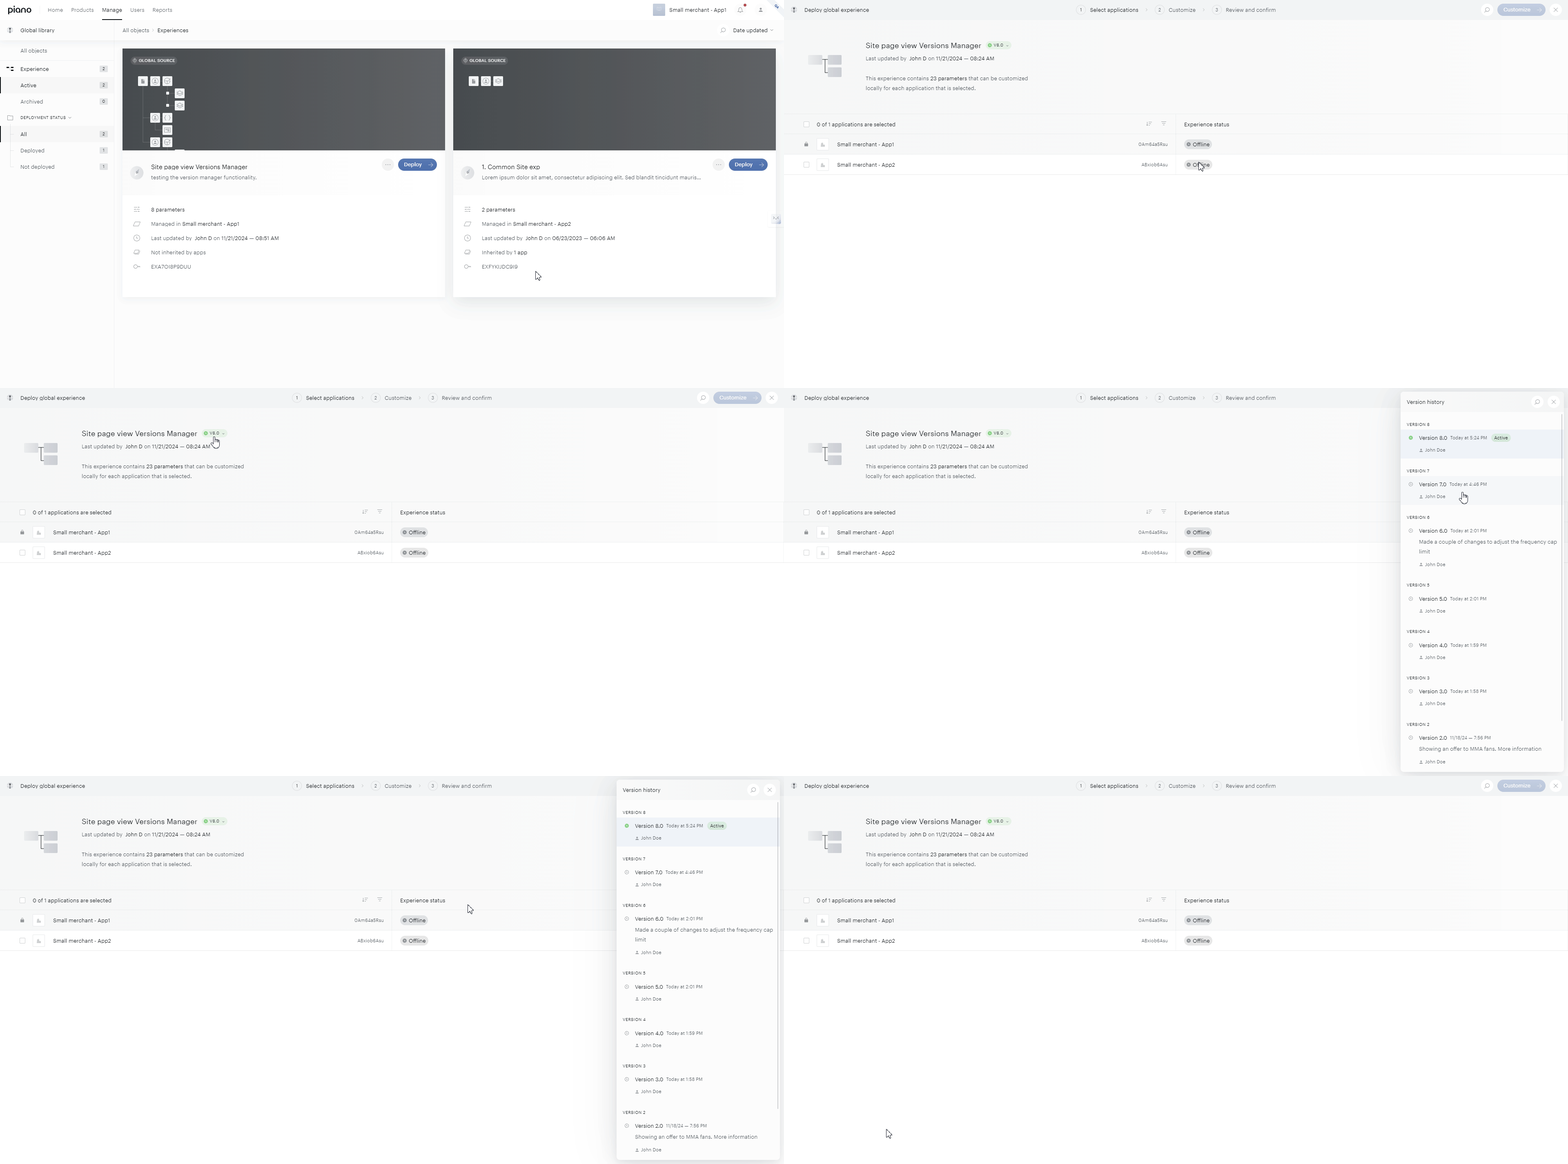
When accessing the Version Manager from Global Parameters or the Deployment Dashboard, certain options are unavailable:
-
Creating or adding notes
-
Expanding or collapsing note content (e.g., "Show more" or "Show less")
Clicking "Deploy" and "Deploy as new version" in the Deployment Dashboard
When deploying a global experience via the Deployment Dashboard, you can choose how changes will be saved. You need to perform the following actions:
-
Go to the Review and Confirm tab.
-
Click Deploy to see a drop-down menu.
-
Choose between:
-
Deploy
-
Deploy as New Version
-
Important note: Choosing either option creates a new version in the child application, while the global experience in the parent application remains unchanged.
Actions After Clicking "Deploy" in Deployment Dashboard
When you click the Deploy button, the following actions occur:
-
The global experience is deployed without creating a new version in the parent application.
-
A new minor version is automatically created in the child applications.
-
In the child applications, the version number increments by one decimal place.
-
Example: If the current version is 2.6, the new version will be 2.7.
-
-
Actions After Clicking "Deploy as New Version"
When you click Deploy as New Version, the following actions take place:
-
No version is created in the parent application, and the current version remains unchanged.
-
A new major version is created in the child applications.
-
In the child applications, the version number increments by a whole number, creating a new major version.
-
Example: If the current version is 2.0 already exists, the new version will be 3.0.
-
-
Experience Cards Manager
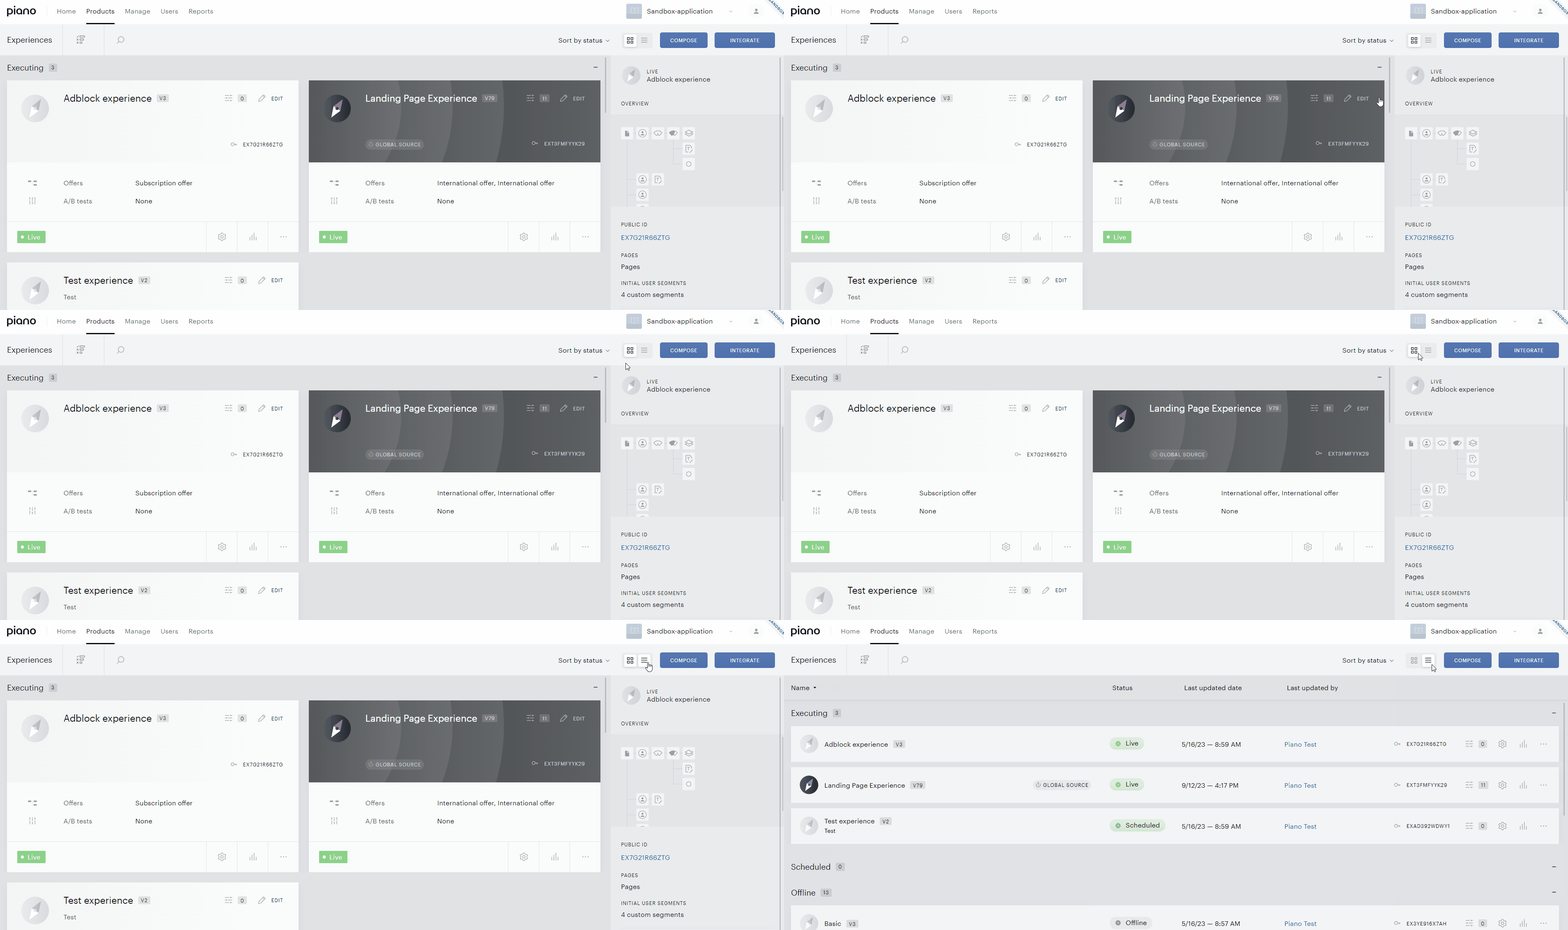
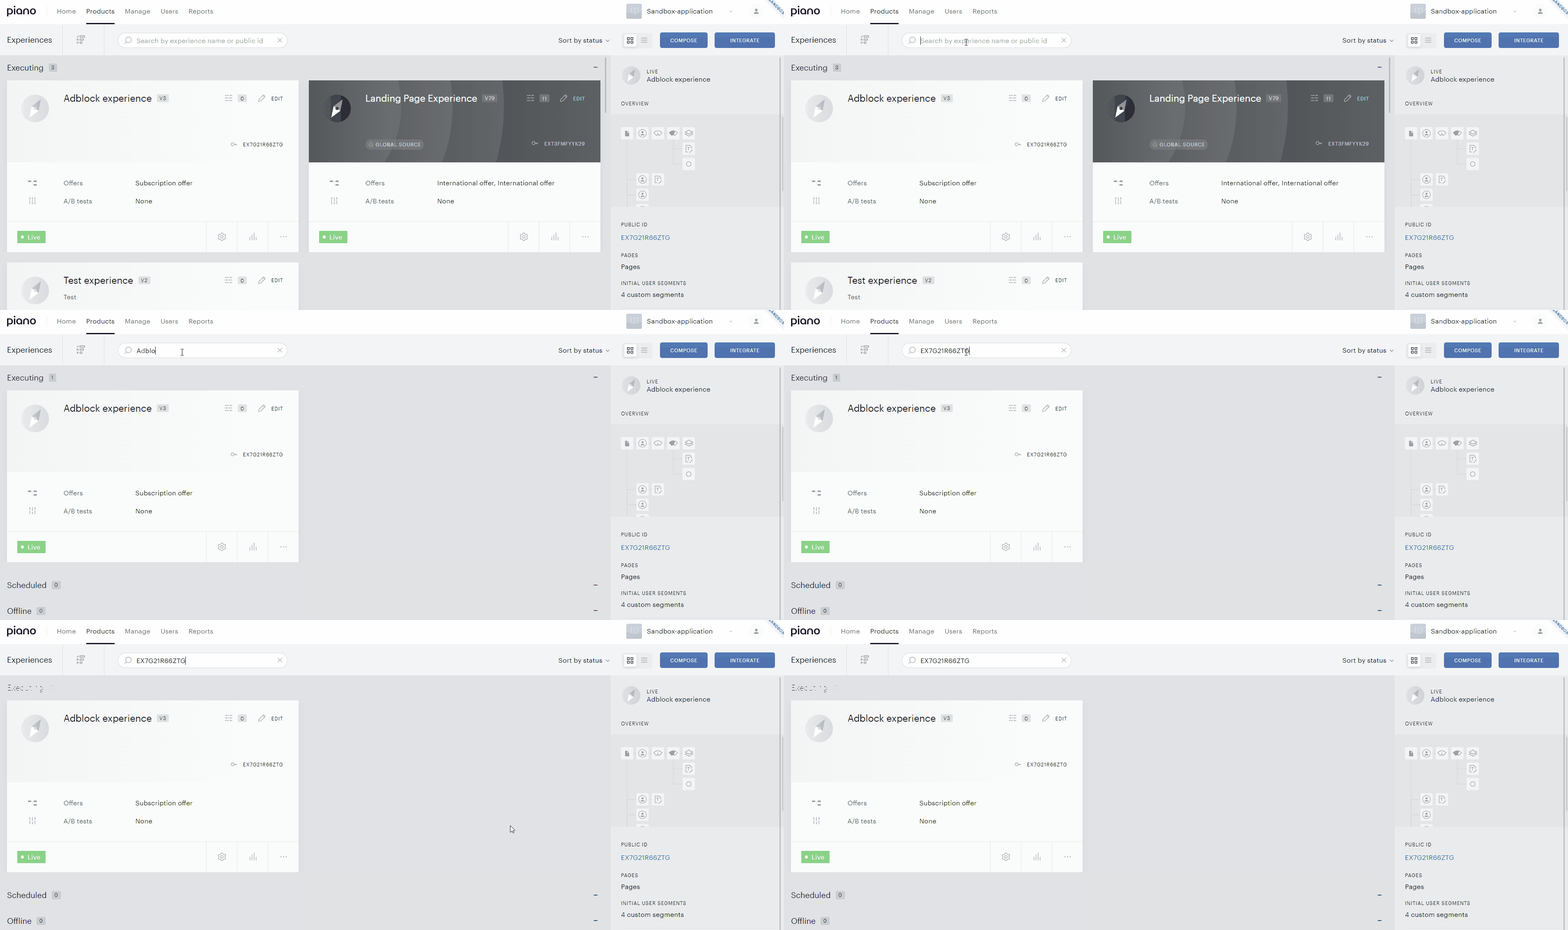
When you access Composer, you will find the screen that contains your Experience tiles. A toolbar with control buttons is attached to the top of that screen. You can use any of these buttons to manage your Experiences.
The Experience Manager has two options to view the experiences. By default, the Experience Manager displays your Experiences in grid mode. You can select the vertical list view by clicking on the selector icon to the left of the "Compose" button.
If you wish to open the Action Exclusivity Manager, click on the exclusivity icon in the toolbar. You will be taken to the Action Exclusivity Manager where you can decide which action should be given a higher priority when two or more experiences target the same page. Find more information about the Action Exclusivity feature here.
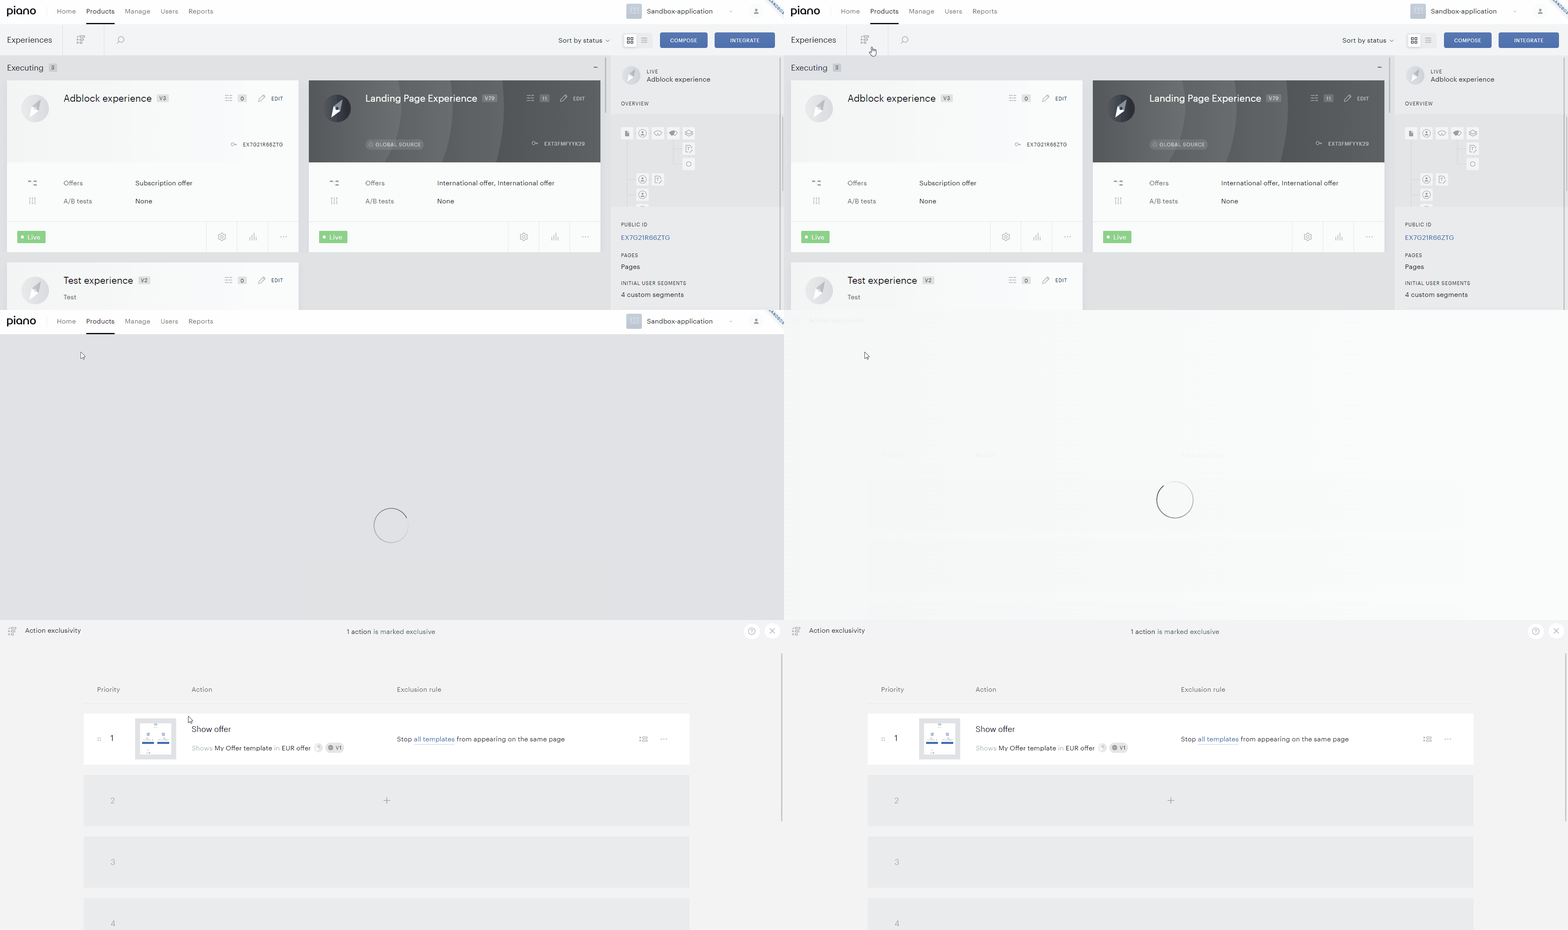
If you need to search for a particular Experience on the list, click on the magnifying glass icon in the toolbar. You can search by the Experience name or Experience ID.
Experience Card Navigation
In the lower-left corner of an Experience card you will see three icons:
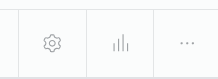
Here's what those icons do:
-
Gear: Takes you to a page where you can change the name and description of the Experience Card.
-
Chart: Takes you to the Composer reports page, where you can view information about activity and conversions related to each Experience Card.
-
Ellipsis: Opens a menu with the following options:
-
Duplicate: Creates a copy of the Experience card, automatically saved as Offline.*
-
Make global: Converts the experience into a Global Experience, allowing it to be managed and deployed across multiple connected applications.
-
Archive: Archives the Experience card so it is no longer active or visible in your default experience list.
-
*Note: When duplicating an experience, Composer copies the active (published) version of the source experience. This means the duplicate will reflect the version that was most recently set to active — not necessarily the latest saved version. If the source experience has never been activated, or the version you want to duplicate has not been set as the active version, the duplicate will appear empty or will not reflect the expected configuration. To ensure the correct version is duplicated, verify that the version you want to copy is set as active before duplicating.
To restore an archived experience, navigate to your archived experiences and click the Restore button on the relevant Experience card.
These icons, aside from the ellipsis, are also present within a Composer experience in the upper right corner of the canvas.
The "Edit" pencil icon:
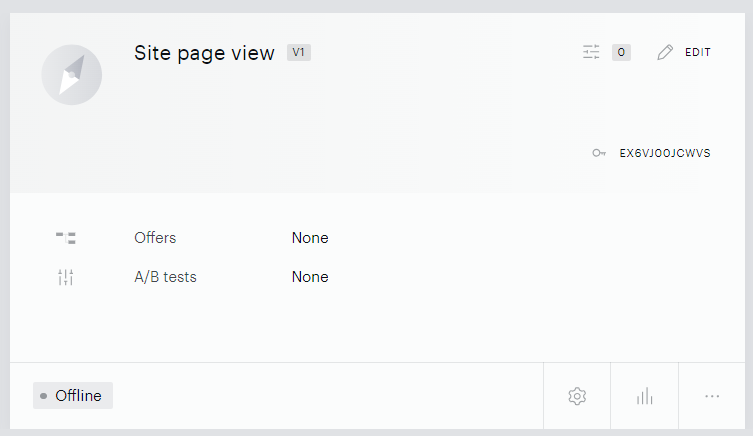
Takes you into the Composer interface, where you can edit or construct an experience and manipulate cards. The pencil icon is also present on every individual card that contains additional settings. By clicking it, you will be able to edit those settings.
Managing Experience Status
When you create a new experience, its status defaults to Offline, meaning it isn't running on your site. After you save a new experience for the first time, you can find it under Product → Composer → Offline.
To change the status, click the status in the bottom left corner of the experience card.
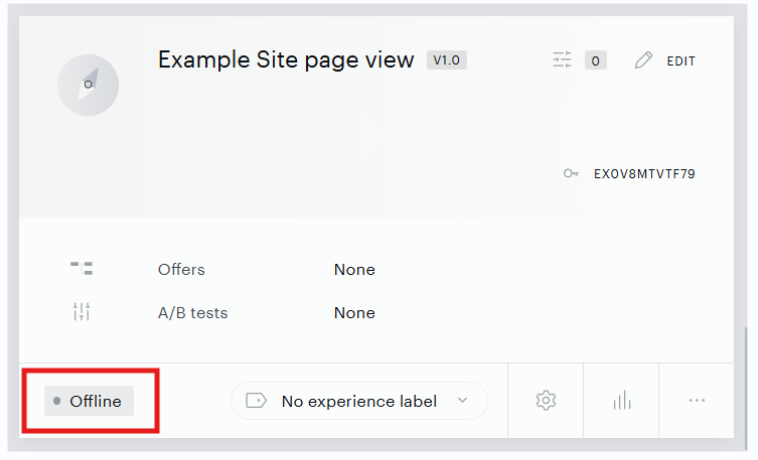
The status modal opens with four options:
-
Live: the experience runs on your site.
-
Scheduled: the experience goes live at a date and time you set.
-
Monitoring: the experience runs on your real traffic without affecting visitors. Use it to check an experience before setting it live.
-
Offline: the experience doesn't run.

Any changes made within an Experience Card (live or not) are automatically saved, but those changes won't take effect until you save them by hitting the "Save" or "Save as new version" button:

You can change the status at any time.
Monitoring an Experience
How Monitoring Works
Before setting your experience live, you can set it to Monitoring. The experience then runs on your real site traffic, with all targeting and branches working as they would when live, but no actions are displayed.
-
Visitors don't see any offers or templates.
-
Scripts and cookies (under “Run JS or “Set cookie”) aren't triggered.
-
No impressions, clicks or conversions are recorded.
To start monitoring, select Monitoring in the status modal and click Save changes.
Monitoring starts immediately and runs until you change the status. You can't set a duration or schedule for it. Switching between Monitoring and other statuses doesn't create a new experience version.
While an experience is in monitoring, the Experience manager shows a Monitoring in progress label on its canvasz.
Monitoring Results
Results appear in the Flow Report, which is refreshed every 10–15 minutes during monitoring. You'll get a one-time notification when the first results are ready. After that, check the Flow Report yourself.
In monitoring, the Flow Report shows how many times each card was executed. Exposures are not shown because nothing is shown to visitors. Monitoring data is kept separate from live data.
Example: you've created a Site page view experience that shows an offer to all Chrome users on example-article.com. You set it to Monitoring. No visitor sees the offer, but the Flow Report shows how many times each card was executed, up to and including the Show offer card. If the numbers match your expectations, set the experience live.
Limitations
-
The Monitoring status isn't available for Edge experiences.
-
Flows that depend on user interaction show no data in the Flow Report. These include Template interaction experiences, branches after a frequency cap, and any flow that requires a real impression or click.
-
If an action runs after a delay, such as a timer followed by Show offer or an in-card delay, its executions aren't counted in the Flow Report.
-
Branches that depend on frequency caps, recency segments or pageview meter progression may not be fully reliable in monitoring.
-
User data isn't kept separate between monitoring and live. Users who pass through a monitoring run carry their meter counts, frequency cap counts and recency data into later live runs of the same experience. Monitoring works best for checking traffic flow on new users or on a small scale.
Running Multiple Experiences
Many publishers create multiple experiences from a single Composer canvas. Since every card includes an empty node by default, you can branch out as many experiences as needed from a Segment Pages or User Segment card. For example, a single canvas could deliver different offers to desktop, mobile, and tablet users.
This type of multifaceted experience works on a single canvas as long as all User Segment branches share the same Segment Pages card rules. Alternatively, you can place each branch in its own Experience if you want to toggle each one on or off individually. If your experience requires different page rules, you can add multiple Segment Pages cards within a single experience.
Whether you organize experiences as branches within a canvas or as separate Experience Cards, it’s important to avoid conflicts or overlaps. In the previous example targeting users by device type, the groups are mutually exclusive, users cannot be both desktop and mobile at the same time. However, if you target overlapping groups (e.g., mobile users and U.S. users), you’ll need to ensure the Action cards work in harmony. In these kinds of scenarios, you can use Action exclusivity to dictate which actions take precedence and under which circumstances to more effectively manage potential overlap.
For more information on how to avoid overlapping experiences, see this section on sub-segmentation at the end of the User Segmentation article.