
Creating Consent Fields
To create a new consent field from the Piano Dashboard, click Manage→Consent fields→New. That will bring up this configuration box:
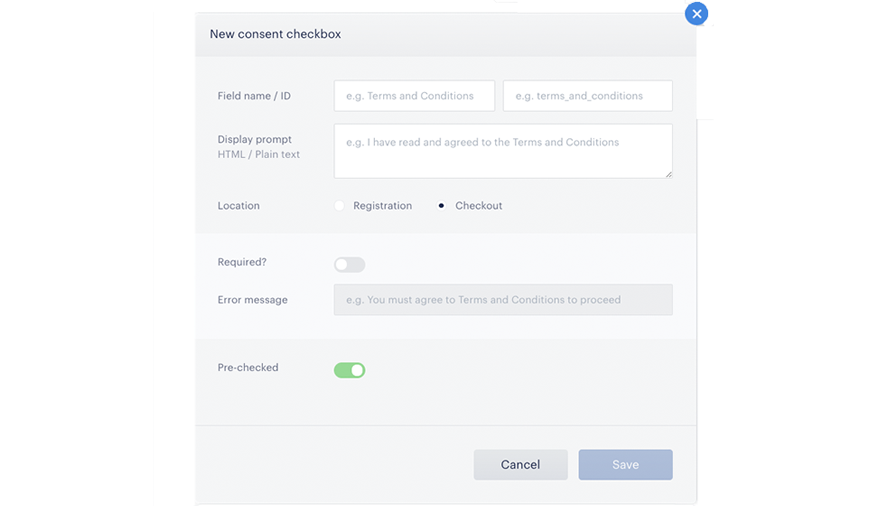
Field Name: This name is for your own reference only. End users will not see it.
ID: The ID is used to insert the consent field into Piano's system templates. After you enter a field name, the ID of your consent field will be generated automatically; you have the option to change it manually.
Display Prompt: This is where you insert the language you want in your consent field. End users will be asked to confirm their consent to this text. You're free to use HTML to insert links to longer legal agreements.
Location: There are only two points during checkout where an end user can be asked to confirm consent: either before registration or before the user converts on a term. Note that you'll need to be using Identity Management in order to put a consent before registration. You can have a consent (or multiple consents) in both locations at the same time. No matter the offer or term, all active consents will always appear during registration or checkout.
Required?: If you require consent, the end user will not be allowed to proceed with checkout until they select the checkbox.
Error Message: For required consents, this error message will appear if the end user tries to proceed with checkout without selecting the required checkbox.
Pre-checked: Determines whether the end user will see the consent checkbox empty or pre-checked.