
Creating a Resource
Resources are used to control the content that you are gating. Resources act as tokens that allow users to view your content. Every subscriber to your site must have access to a resource, by definition – that access distinguishes the subscriber from non-subscribed users.
To create a resource, first navigate to the Manage header in the navigation menu, and click Resources.
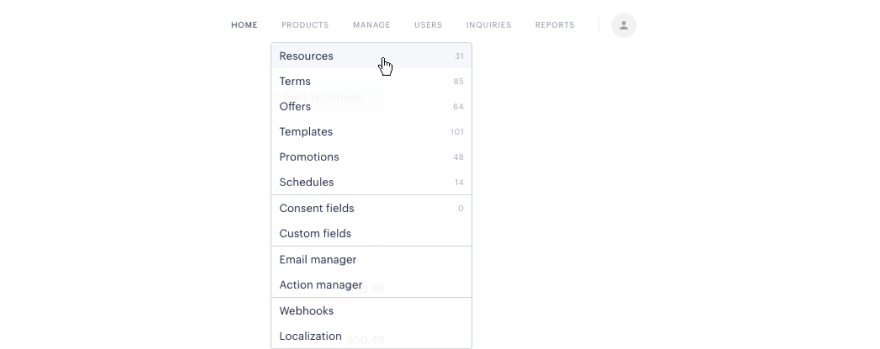
In the resulting screen, click New and select Standard resource from the dropdown.

Then, you will be prompted to give your resource a title, URL, and description. While only the title is mandatory, we encourage you to provide a description for your own internal use and identification, and to provide a URL if you have a page that is dedicated to that resource. When you are finished, click on Create Resource.
More information on resources can be found here.
Creating a Payment Term
Terms are so-named because they define the "terms" of the deal you are striking with your audience. For instance, a payment term is a mutual agreement that you will provide access to a resource (and therefore your content) in exchange for a fee. You can also create external service terms, registration terms, gift terms, or custom terms.
To create a payment term, click the same Manage header as you did for Resources, but instead click Terms from the dropdown that appears. From the resulting screen, click New in the top right corner and then click Payment from the modal that appears..
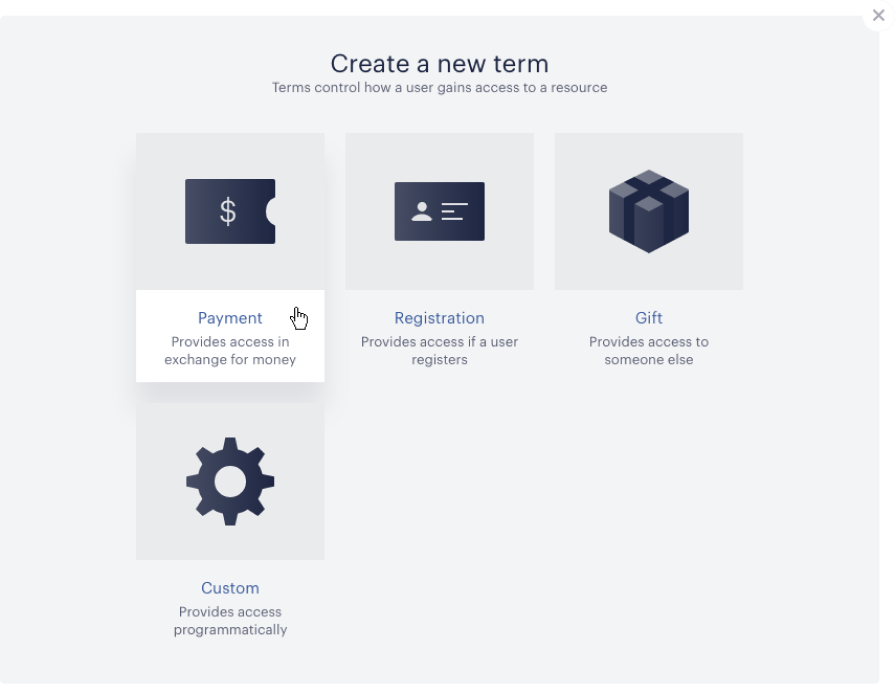
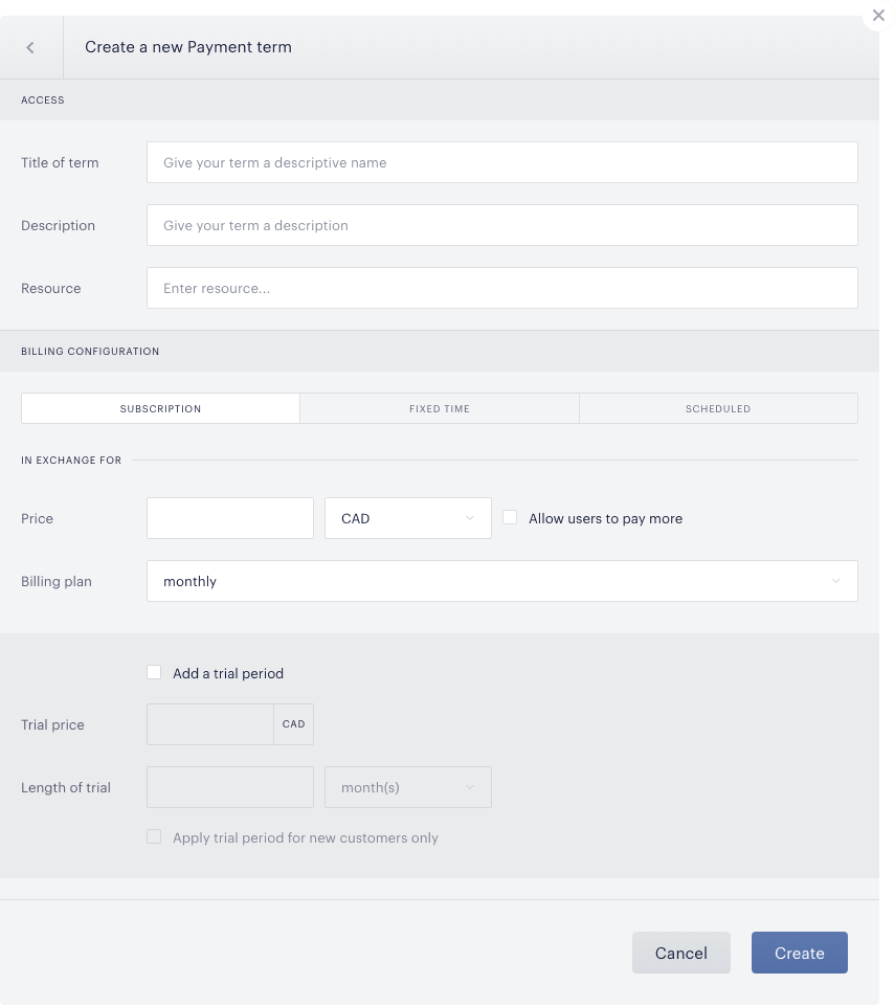
This will present a new modal that allows you to input some configurations for this term:
-
Title of term: Give your term a name of your choosing. This name can be seen by end users, so it should be representative of the service you are offering.
-
Description: Provide an optional description for this term specifying what the user may expect if they convert on this term. This description can also be seen by end users during purchase if you so choose.
-
Resource: Select the resource you are offering in this term by choosing it from the dropdown list.
-
Billing configuration: Select whether you would like this term to be a subscription, or fixed. Then enter the billing information as you would like to charge your users accordingly.
-
Subscription: Access to the resource continues for an interval of time before the user renews. For example, if you would like to bill users monthly for their continued access to your content, you would choose this option.
-
Fixed time: Access to the resource does not have a renewal option. It is most aptly used for one-off products, such as individual articles, movies, or other limited-time offerings.
-
Once you have set the billing details to your liking, click Create. Upon doing so, you will have the option to configure some more advanced settings, which you can learn about here.
Creating an Offer
An offer is simply a collection of terms. Each offer can contain as many or as few terms as you would like. You can then present the offer to the user, who can select which of the contained terms is best suited for them. To create an offer, you must first create at least one resource and at least one term.
Again, navigate to the Manage header and select Offers from the dropdown. Click New in the upper righthand corner, which will bring up the following modal:

Give your offer a name, and then click Save. This will bring you to the Offer manager, which tells you which terms are contained in that offer. Naturally, after just creating an offer, it will be empty. Click on Add to put a term(s) in the offer.
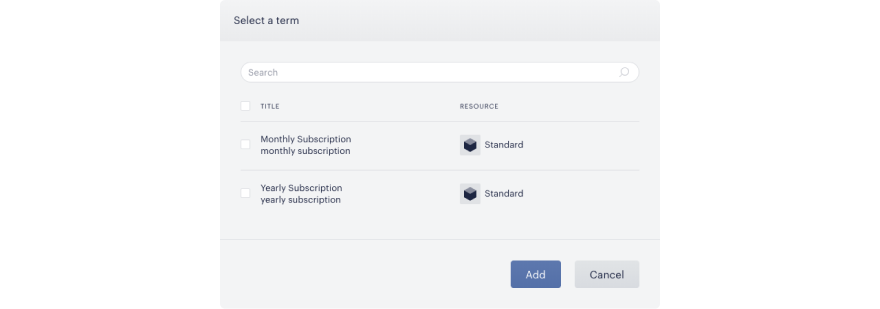
Select the checkbox next to any terms that you would like to add to the offer. You can always go back and add or remove terms from an offer later. Once you have selected the appropriate terms, click Add. Click here to learn more about creating offers.