
Introduction
Piano allows you to utilize the OpenID Connect (OIDC) protocol to connect niche user providers with Identity Management without direct integrations with them.
With this functionality, you can create connections to third-party user providers within Identity Management. This will allow your end users to create accounts and log in with credentials from these user providers and may help you to lower the barrier to registration.
You can also determine what user data will be sent to Identity Management from the provider and the field it will be stored in using a claims map.
We have incorporated the functionality to save custom fields from JSON Web Tokens (JWT). Publishers can configure additional claims and map them to custom fields. Whenever an end user attempts to log in through a social provider, the system will make an effort to save these custom fields.
Note, that we're currently not supporting SAML connections.
Identity Management also cannot act as an OIDC provider but currently supports OAuth 2.0 for authenticating users from external systems. Please refer to this documentation for more step-by-step instructions.
OpenID Connect configuration fields
To add a new OpenID connection, please navigate to the Piano publisher dashboard's homepage and under Edit Business → User Provider → Identity Management → Other login methods (tab) → click on OPENID CONNECT and enter values into the respective fields described below.
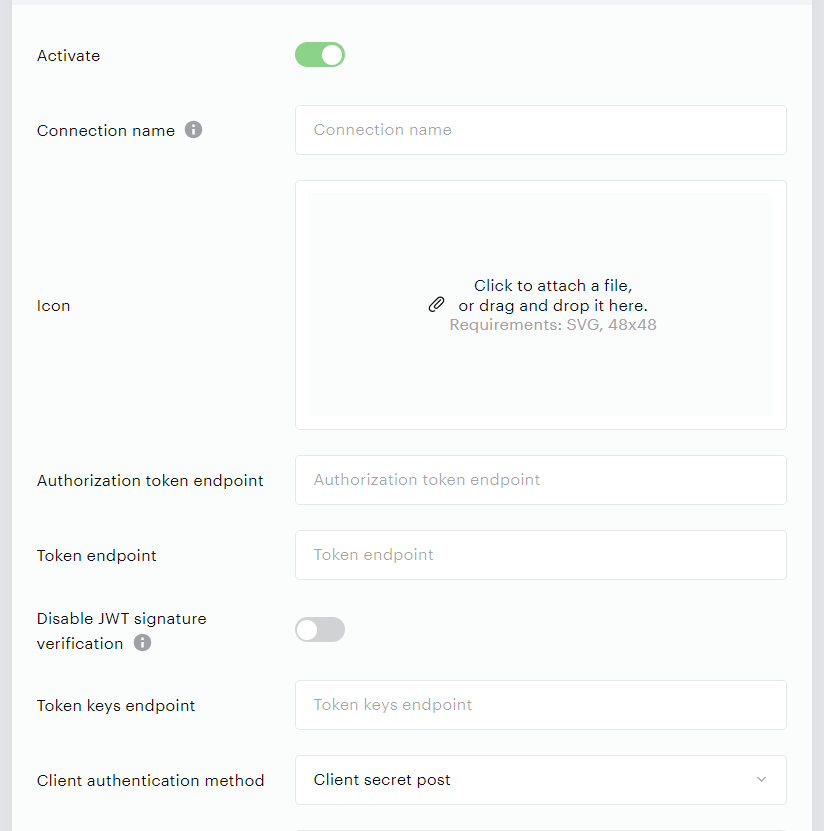
Each of the Client authentication methods has its own customizable fields described here.
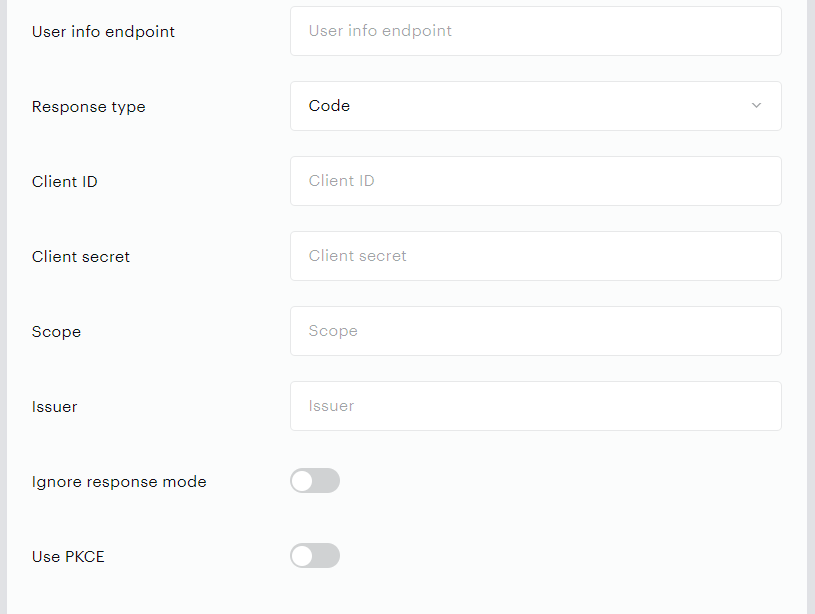
You can also specify a custom Claim configuration:
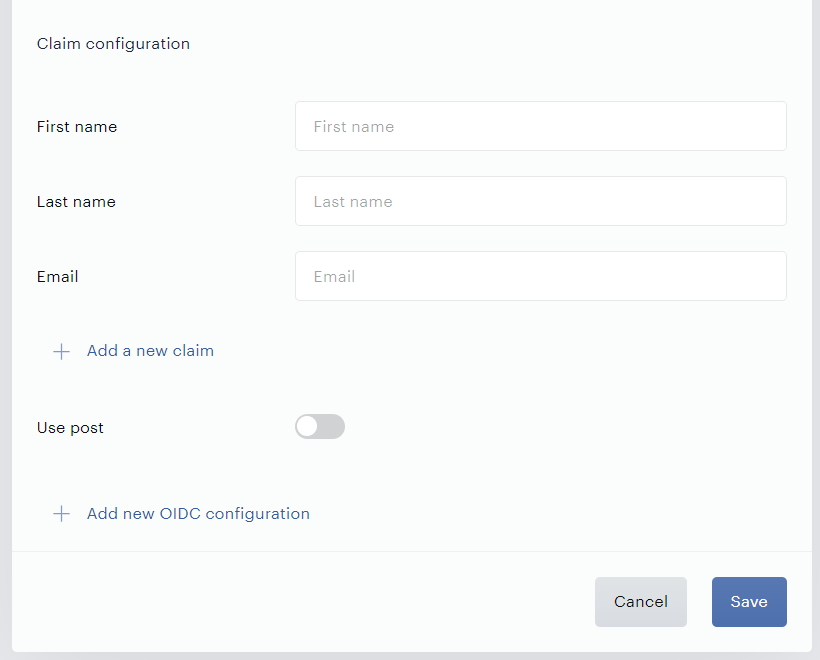
|
Field name |
Field type |
Description |
|
Connection name |
Text |
The connection name will be displayed on login. |
|
Icon |
File upload |
The icon of your OpenID connection. Requirements for the icon format: SVG*, 48x48. If an icon isn't uploaded, the default OpenID Connect icon will be displayed. |
|
Authorization token endpoint |
URL, starting with https:// |
Endpoint for opening the login window from the external user provider. |
|
Token endpoint |
URL, starting with https:// |
Endpoint for exchanging the access_code to retrieve the access_token & id_token |
|
Disable JWT signature verification |
Toggle |
By default the JWT signature verification is enabled. Disable it when a provider doesn't have keys for validating the sign for a JWT. If this checkbox is enabled then we ignore fields |
|
Token keys endpoint |
URL, starting with https:// |
Endpoint which gives the JWKS used to verify the signature of the JWT. |
|
Client authentication method |
Drop-down selection |
Select one of the client authentication methods with different fieldsets described here: Client secret post (default), Client secret basic, Client secret JWT, Private key JWT or None. |
|
Custom key |
Text |
Only used for the OIDC provider uses a custom key. For example, for Swiss-rx, enter the client_secret value two times in a row. So if the value is |
|
User Info endpoint |
URL, starting with https:// |
Provides user data when it isn't returned from the token endpoint. |
|
Response type |
Drop-down selection |
The response_type "Code" is selected by default. Informs the Authorization Server of the desired authorization processing flow, including what parameters are returned from the endpoints used. |
|
OIDC client ID |
Text |
The Client ID. Usually the audience claim in the JWT. |
|
OIDC client secret |
Text |
The secret key for initiating the authorization flow. |
|
Scope |
Text |
OpenID Connect Clients use scope values to specify what access privileges are being requested for Access Tokens. |
|
Issuer |
URL, starting with https:// |
Identifier for the Issuer of the response. The iss value is a case-sensitive URL using the https scheme that contains the scheme, host, and optionally, port number and path components and no query or fragment components. You should be able to get it from the provider's site you would like to use to log in. The URL should be based on the first part of your token endpoint. Note, that this field does not support URNs. (Optional - can be generated automatically) |
|
Ignore response mode |
Toggle |
When the provider doesn't work correctly with the param |
|
Use PKCE |
Toggle |
Additional validation of the response from the provider or required param for some providers. |
|
First Name |
Text |
Claim configuration (Optional) |
|
Last Name |
Text |
Claim configuration (Optional) |
|
|
Text |
Claim configuration (Required) |
|
Use post |
Toggle |
Select this checkbox if you'd like to use POST instead of GET in query requests. |
*Note: SVG files containing embedded CSS styles, non-Latin1 characters (Unicode, Katakana, etc.), or complex metadata may fail to upload silently. If upload fails, simplify your SVG by removing metadata and non-ASCII characters, or use an SVG optimizer tool.
Client authentication method
We currently offer 5 different Client authentication methods with different field sets.
Client secret post
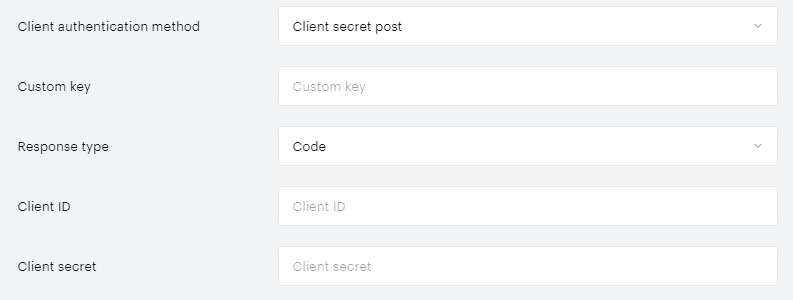
This is the default client authentication method.
To configure it, you will only need the client ID and Client secret from your OIDC provider.
Note, the Custom key value is only used for the provider Swiss-rx.
Client secret basic
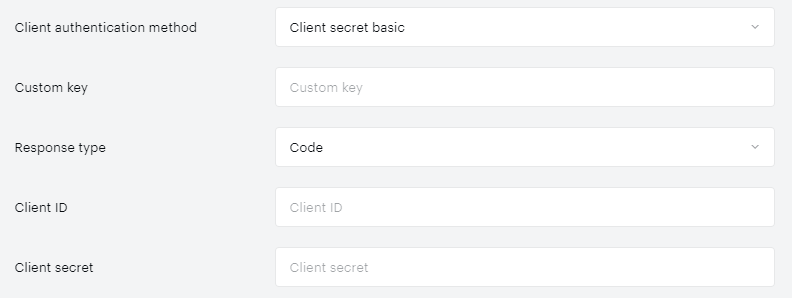
To configure it, you will only need the client ID and Client secret from your OIDC provider.
Note, the Custom key value is only used for the provider Swiss-rx.
Client secret JWT
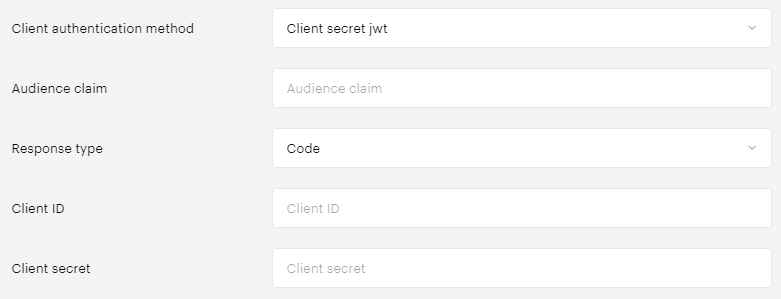
To configure it, in addition to the Client ID and Client secret you will need the Audience claim. This is usually your JWT secret.
Private key JWT
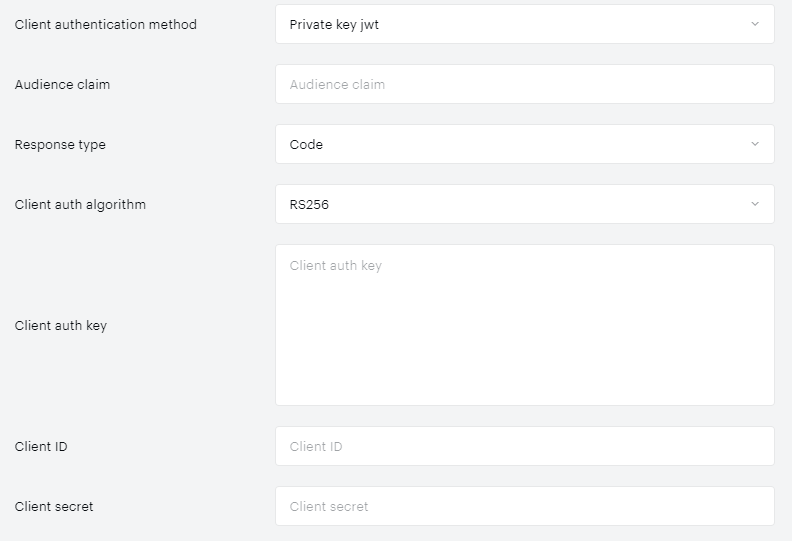
Select your provider's Client authentication algorithm from the drop-down list of available options, and add your Client authentication key, which can link to the key or keys in JSON, for example: {"keys":["key1", "key2"]}
The used format for the client auth key should be Base64.
For example like this:
{
    "keys": [
      {
        "kty": "RSA",
        "kid": "594186c8-aff2-477c-9606-4825ae33c123",
        "use": "sig",
        "alg": "RS256",
        "n": "heHRuqsfHYv6W5OftMfe4DL2kmScgmhKvo9ZEJ5oNrQT-xuLok3O7-GjHul-fnl3ehIJh7OQP4JVYVvSxPzUeKeDRbf1moTYcfydLSajR_uP518cVxeJH7MCk3uWaKqIoACVIJxRFu6Yme6ce7L0dNtzVLFleLurrDVMXCWdEkdWrdDXjXMR7VRpQzBjpGosEzGQdVeTZjIBQ17bXPnsjbsJBzzJ3NIPMZ9f0pQbA75k8QBPT0a88irdqJAmIw7z4TXCxpRL-v1L-9W48bbCH011-h_GliF2GAzO8ce9Zk74om_fIzuUG54e6U8CA6sfgogP30g9UAXS8KrRyaYwFQ",
        "e": "AQAB"
      }
    ]
  }
None
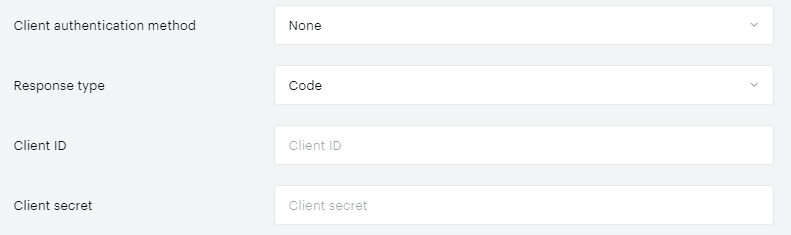
If you select this option, the field Client secret may be empty. But if it's filled then we'll use this value.
Claim configuration fields
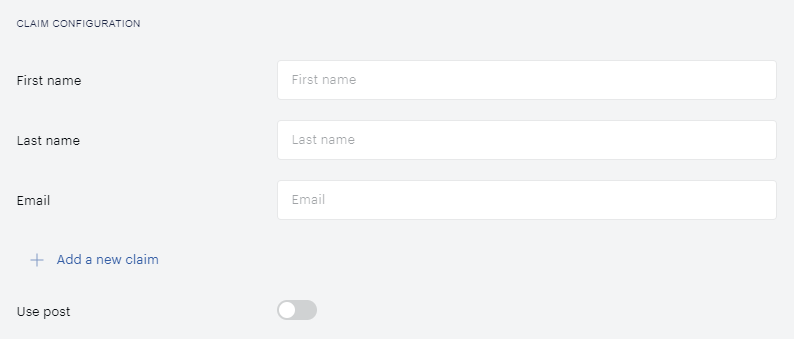
For transferring user data from your provider, custom fields can be (created and) added to the claim configuration. The default claims are: First name, Last name and Email. To add any additional claims, select the "Add a new claim" option.
It's possible to add multiple OpenID Connect configurations for different providers. This will display an additional button on the login screen for the end user.
For this select the option +Add new OIDC configuration at the bottom of the configuration screen.
The maximum limit of OIDC configurations that can be added is hard coded and set to 50.
If you'd like to remove the configuration, you can do so by clicking the Delete (Trash Icon) button. You can also deactivate the current configuration by switching off the "Activate" toggle below the respective OIDC configuration name. The configuration details will remain saved, but the OIDC provider won't be visible in your Identity Management templates.

OpenID Connect configuration example
For every OpenID provider, we use a callback link like: https://{piano-host}/id/api/v1/identity/login/social/callback/{OIDC}
Where {OIDC} will contain the name of the OIDC connection, and will always be in UPPER CASE.
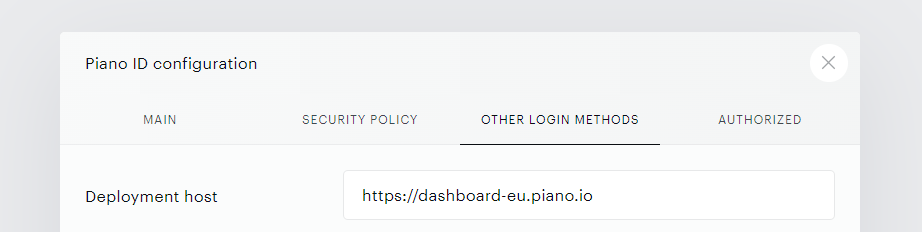
For any social login configuration (incl. OpenID Connect), the deployment host must be equal to the dashboard host.
For example, if your dashboard host is https://dashboard-eu.piano.io then the deployment host also needs to be https://dashboard-eu.piano.io.
Microsoft Accounts
Below are some sample values for a connection with Microsoft Accounts (based on the documentation here).
Configuration on Microsoft's end
Go to https://portal.azure.com/#home. Select Azure Active Directory → Add → Register App.
Input your App's name and select account types → "Accounts in any organizational directory (Any Azure AD directory - Multitenant)" or "Accounts in any organizational directory (Any Azure AD directory - Multitenant) and personal Microsoft accounts (e.g. Skype, Xbox)".
If you select "Personal Microsoft accounts only" you will get an exception on the MS side:
The request is not valid for the application's 'userAudience' configuration. In order to use /common/ endpoint, the application must not be configured with 'Consumer' as the user audience. The userAudience should be configured with 'All' to use /common/ endpoint
Now add the Redirect URI, choose Web and input the Redirect URL.
If you select SPA you will get an exception:
Proof Key for Code Exchange is required for cross-origin authorization code redemption.
After this, you will be able to configure your Microsoft Account app for OIDC.
In the dashboard of the new app select Overview and copy the Application (client) ID and paste it into the Identity Management configuration other login methods tab as the Client ID.
In MS dashboard select Certificates & secrets → new client secret. Fill in a name and expiration date. Afterward, copy the value - and use it as the Client secret for the OIDC configuration.
Configuration on Piano's end
Important note, in case your OIDC configuration's name is "test1".
The RedirectURI should be https://{piano-host}/id/api/v1/identity/login/social/callback/TEST1.
And in your Microsoft account, you will need to add the same link: https://{piano-host}/id/api/v1/identity/login/social/callback/TEST1
|
Authorization token endpoint |
https://login.microsoftonline.com/{tenantId}/oauth2/v2.0/authorize |
|
Token endpoint |
https://login.microsoftonline.com/{tenantId}/oauth2/v2.0/token |
|
Client authentication method |
|
|
Token keys endpoint |
https://login.microsoftonline.com/{tenantId}/discovery/v2.0/keys |
|
Issuer (required) |
https://login.microsoftonline.com/9188040d-6c67-4c5b-b112-36a304b66dad/v2.0 |
|
UserInfo endpoint (optional) |
|
|
Client ID |
clientID (from your User provider's account) |
|
Client secret |
client_secret (from your User provider's account) |
|
Scope |
|
Instead of the {tenantId} we recommend using common but you can configure it according to the Microsoft documentation. Possible values include: common, organizations, consumers.
The value of the issuer may differ from the value specified in our documentation. The general case is to use the parameter specified in the example. You can also configure it according to the Microsoft documentation.
For configuration scope and values that you can use, please see the documentation here.
For those seeking a more easier-to-set-up Microsoft login option, we recommend exploring the benefits of our Microsoft Quick Authentication (MSQA) integration, leveraging advanced features beyond the standard Microsoft Accounts OIDC configuration.
The primary distinction - only for Microsoft Edge - lies in the enhanced user experience offered by MSQA. It introduces the convenience of one-tap authentication, making it attractive for users on the Microsoft Edge browser. Additionally, MSQA provides a separate branded "Login with Microsoft" button, similar to other social login options, allowing for a more personalized and streamlined login experience.
Gitlab
Below are some sample values for a connection with Gitlab (based on the documentation here).
Important note, in case your OIDC configuration's name is "test1".
The RedirectURI should be https://{piano-host}/id/api/v1/identity/login/social/callback/TEST1.
And in Gitlab you will need to add the same link: https://{piano-host}/id/api/v1/identity/login/social/callback/TEST1
|
Authorization token endpoint |
|
|
Token endpoint |
|
|
Client authentication method |
|
|
Token keys endpoint |
|
|
Issuer (optional) |
|
|
Client ID |
clientID (from your User provider's account) |
|
Client secret |
client_secret (from your User provider's account) |
|
Scope |
|
Claims configuration:
|
First name |
|
|
Last name |
|
|
|
|
To configure this Gitlab, please follow the steps below:
-
Authorize in Gitlab
-
Go to Edit profile
-
In the Profile select Applications
-
Add new application → set Name, Redirect URI (looks like https://yourwebsitename.com/id/api/v1/identity/login/social/callback/<OIDC>), select scopes: openid, email, profile. Where the <OIDC> should be replaced with the uppercase value of the OIDC connection name configured in the Identity Management settings
-
Save the application
-
Copy the Application ID, Secret
-
Copy the endpoints from the configuration link https://gitlab.com/.well-known/openid-configuration. (authorization endpoint - https://gitlab.com/oauth/authorize, token endpoint - https://gitlab.com/oauth/token, keys endpoint - https://gitlab.com/oauth/discovery/keys)
-
Note: Gitlab works with response_type = code
In tab AUTHORIZED of the Identity Management configuration, you need to add some URLs into REDIRECT URIS:
-
your website URL (for example,
https://localhost.me)
Swiss-rx
Below are some sample values for a connection with Swiss-rx (based on the documentation here).
Important note, in case your OIDC configuration's name is "test1".
The RedirectURI should be https://{piano-host}/id/api/v1/identity/login/social/callback/TEST1.
And in Swiss-rx you will need to add the same link: https://{piano-host}/id/api/v1/identity/login/social/callback/TEST1
|
Authorization token endpoint |
|
|
Token endpoint |
|
|
Client authentication method |
|
|
Custom key |
Twice in a row the client_secret value, |
|
Response type |
Authorization code |
|
Issuer (optional) |
|
|
Client ID |
clientID (from your User provider's account) |
|
Client secret |
client_secret (from your User provider's account) |
|
Scope |
|
Claims configuration:
|
First name |
|
|
Last name |
|
|
|
|
In tab AUTHORIZED of the Identity Management configuration, you need to add some URLs into REDIRECT URIS:
-
your website URL (for example, https://localhost.me)
LINE
Below are some sample values for a connection with LINE (based on the documentation here).
Important note, in case your OIDC configuration's name is "test1".
The RedirectURI should be https://{piano-host}/id/api/v1/identity/login/social/callback/TEST1.
And in LINE you will need to add the same link: https://{piano-host}/id/api/v1/identity/login/social/callback/TEST1
|
Authorization token endpoint |
|
|
Token endpoint |
|
|
Disable JWT signature verification |
|
|
Token keys endpoint |
empty |
|
Client authentication method |
|
|
Response type |
|
|
Client ID |
clientID (from your User provider's account) |
|
Client secret |
client_secret (from your User provider's account) |
|
Scope |
|
|
Issuer - required. |
Claims configuration:
|
First name |
|
|
Last name |
|
|
|
|
Yahoo! JP
Below are some sample values for a connection with Yahoo! JP (based on the documentation here).
Important note, in case your OIDC configuration's name is "test1".
The RedirectURI should be https://{piano-host}/id/api/v1/identity/login/social/callback/TEST1.
And in Yahoo, you will need to add the same link: https://{piano-host}/id/api/v1/identity/login/social/callback/TEST1
|
Authorization token endpoint |
|
|
Token endpoint |
|
|
Token keys endpoint |
|
|
Client authentication method |
|
|
User info endpoint |
|
|
Response type |
|
|
Client ID |
clientID (from your User provider's account) |
|
Client secret |
client_secret (from your User provider's account) |
|
Scope |
|
|
Issuer - required. |
|
|
Ignore response mode |
|
Claims configuration:
|
First name |
|
|
Last name |
|
|
|
|
OpenPass
Below are some sample values for a connection with OpenPass (based on the documentation here).
IMPORTANT: The config name should always be openpass / OPENPASS.
The RedirectURI should be https://{piano-host}/id/api/v1/identity/login/social/callback/OPENPASS.
And in OpenPass, you will need to add the same link: https://{piano-host}/id/api/v1/identity/login/social/callback/OPENPASS
|
Authorization token endpoint |
|
|
Token endpoint |
|
|
Token keys endpoint |
|
|
Client authentication method |
|
|
Response type |
|
|
Client ID |
clientID (from your User provider's account) |
|
Client secret |
client_secret (from your User provider's account) |
|
Scope |
|
|
Issuer - required. |
|
|
Use PKCE |
|
Claims configuration:
|
First name |
|
|
Last name |
|
|
|
|
OpenID Connect user behavior
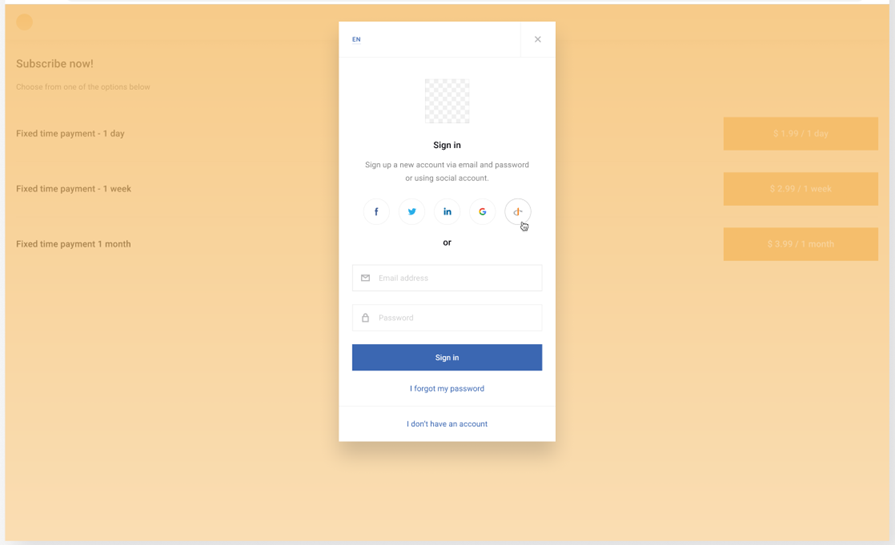
Once an OpenID Connect configuration has been added, users will be able to see an additional button on the Identity Management Login and Registration screen.
The default icon would look like this:
Required template changes
There are no specific template changes needed for OpenID Connect in case you are already using other social login options.
We do recommend reviewing the following templates:
-
Piano ID login page
-
Piano ID register page
In case you have not customized these templates, you can revert it back to their original version by following the steps below:
-
Within the Manage dropdown menu, click on Templates
-
Click on the Revert templates icon in the right top corner
-
In the appearing modal window check "Piano ID login page", "Piano ID register page"
-
Click on the Revert button
-
Confirm reverting by clicking on the Revert button
If you have customized your login and registration templates, please make sure the following line is included:
<social-sign-in></social-sign-in>
For older applications using customized My Account templates, OpenID Connect also may require a modification to the Piano ID profile in My Account template.
Add the <open-id-list> component below the LinkedIn section, for example like this:
<div showIfLinkedinAvailable class="social-group clearfix">
  <div class="social-caption">
    <i class="social-icon linkedin"></i>
    LinkedIn
  </div>
  <span showIfLinkedinLinked class="social-linked"><t>Account connected</t></span>
  <div class="social-buttons">
    <linkedin-unlink><t>Disconnect</t></linkedin-unlink>
    <linkedin-link><t>Connect account</t></linkedin-link>
  </div>
</div>

<open-id-list showIfOpenIdAvailable>
  <ng-template>
    <div class="social-group clearfix">
      <div class="social-caption">
        <i class="social-icon openid" openIdIcon></i>
        <span openIdTitle></span>
      </div>
      <span showIfOpenIdLinked class="social-linked"><t>Account connected</t></span>
      <div class="social-buttons">
        <openid-unlink><t>Disconnect</t></openid-unlink>
        <openid-link><t>Connect account</t></openid-link>
      </div>
    </div>
  </ng-template>
</open-id-list>