
Unlock the full potential of our feature and take your skills to the next level! Dive into our Training Center and discover exclusive Best Practice resources that will elevate your implementation strategy. With expert tips and insider knowledge, you'll become a master in no time. Access the links below to learn more and gain a competitive edge.
Ready to get started? Our Training Center is just a click away: here.
*For more information about our Training center, please visit the article here.
Creating an Audience Segment
When creating a user experience, you can either include All Users or designate a specific audience segment. To segment your audience, start by selecting Custom Segment and then select which attributes you want to use to define that audience. Note that the Everybody Else option is used during sub-segmentation to direct experiences at those users not included in your initial segment.

It's not possible to have a functional user segmentation with one branch's user segment targeting "everybody else" while also having the "all users" segment on a different branch. In the Composer's logic, these two segmentation options cannot coexist simultaneously. The "all users" option already encompasses every user, leaving no room for the "everybody else" option to have any distinct user subset.
When selecting multiple custom segment rules, AND logic is applied.
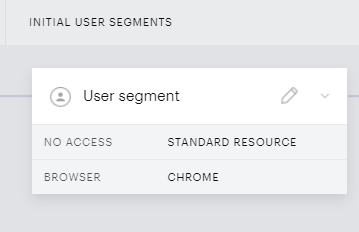
If a Custom segment is created, the Composer canvas will show you a short summary of the selected segmentation options.
For example, in the below screenshot, the Custom user segment consists of users that don't have access to the Standard Resource and are browsing the website on Chrome.
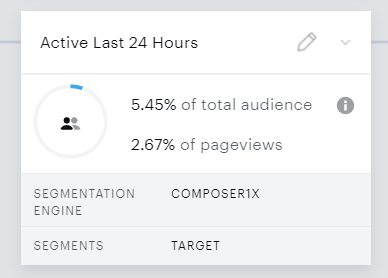
In case Composer 1x segments are used, you will also see a visual display detailing the percentage of your Total audience that is targetted or ignored in the selected C1x segment(s).
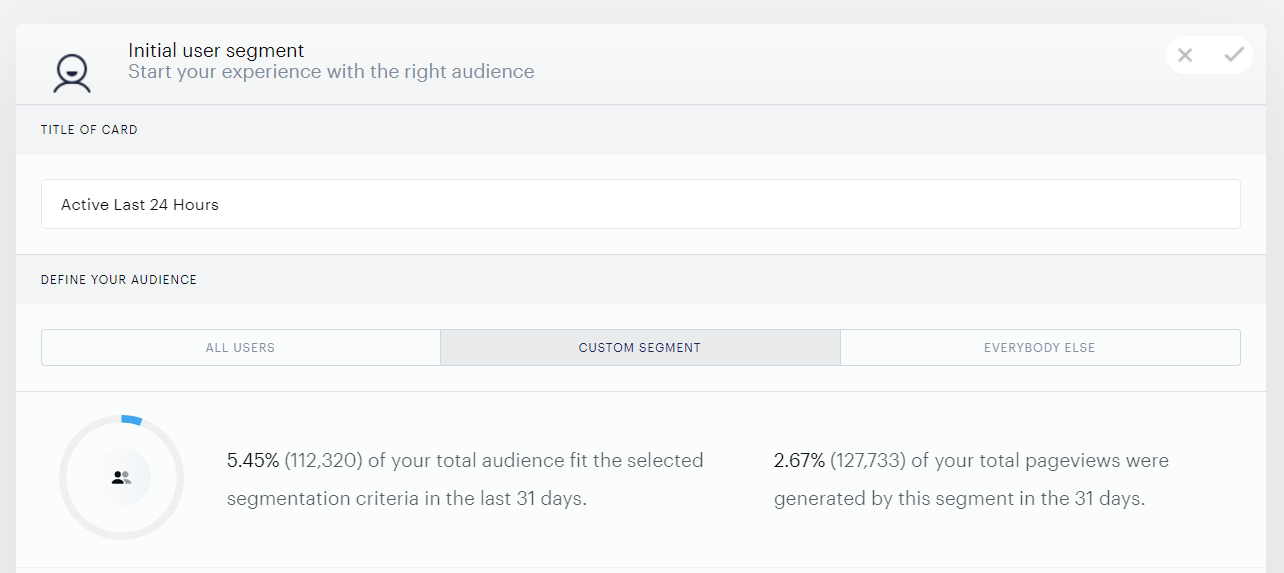
After clicking on the pencil icon, to edit the User segment card you will be able to view detailed information:
If both, Composer 1x segments and Standard segmentation options are used in a User segment card, for example, Churned users that used Safari to browse your website:
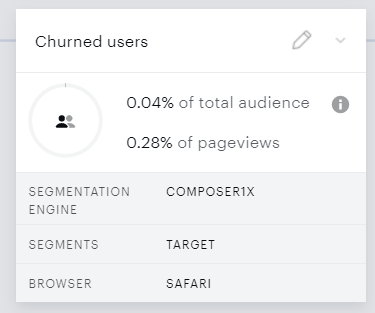
The visual representation of the audience percentage will only include data from the Composer 1x segment(s). The percentage does not take into account the other segmentation options listed here, so selecting these won't have an impact on the displayed audience size even if the targeting will still be tailored to only users matching all the selected criteria of the User segment card.
Segmentation Engine
Segmentation Engine is a server-side feature that analyzes the composition of your audience and sorts your visitors into predefined or custom segments, such as LtS, LtC, or Composer 1x segments. Please get in touch with your Piano Account representative to see if you're eligible for access to these features.
Important note:
The Standard Segmentation Engine (Paid, Direct & Dedicated, and One-offs) was deprecated on November 2nd, 2022. Please visit our documentation here for other available Composer 1x segmentation engine options.
Standard Segmentation Options
Login Status
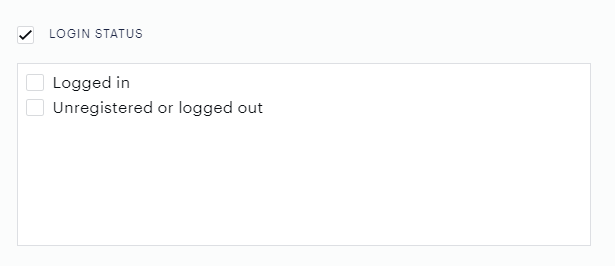
This allows clients using Management + Billing to target based on whether or not a user is currently logged in (either using Identity Management or a third-party registration system). This comes in handy, for instance, if you're presenting a registration offer and want to target just those users who have yet to register with your site. Clients using Composer without Management + Billing will instead want to use custom variables to track login status because user management isn't integrated for Composer-only clients.
Login Method
If you use Identity Management for registration management, you can go one step further and target users based on their login method. User targeting by “login method” is available only in Site and Mobile app experiences.
To set up a new targeting criterion, follow these steps:
-
Go to "User segment” and select "Custom segment"
-
Activate "Login status"and select "Logged in" option
-
Activate "Login method" and select one or more options
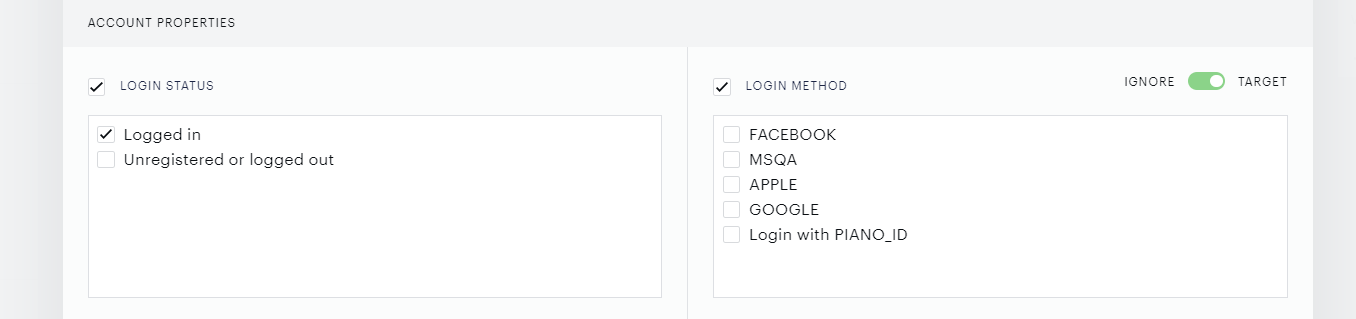
Now you can target users who choose their social network profile or single sign on solution to log in to your application. This targeting criterion will not work if you activate it without selecting at least one of the options.
Switch the toggle to define the operation logic for this targeting criterion:
-
If you set the toggle to "Target", the options you select will operate on "OR" logic
-
If you set the toggle to "Ignore", the options you select will operate on "AND" logic
Please note that if you do not activate alternative login methods in the user provider settings, only one option will be provided in this category. You will find that "Login with Piano_ID" is the only option by default. Learn how to enable other login methods by consulting our documentation. Each time you configure another login method, your list of options in this category will be expanded.
If you choose to target both "logged in" as well as "unregistered or logged out" users in the "login status", the "login method" as a segmentation criterion applies to the former segment of users. You can not apply this targeting criterion if you disable the segmentation by "login status".
Please be aware that this segmentation category will not be available if you select the affiliate membership for experience targeting.
Resource Access vx only
Let's say a subset of your audience owns a resource that provides trial access to your content. You might target those users with a long-term access offer. Or you might use resource targeting to present those users with a low-priced subscription or a higher-priced subscription option.

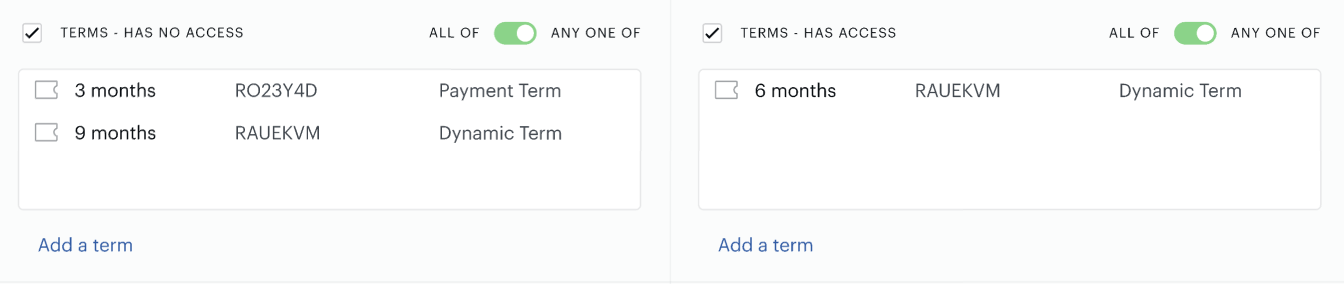
All of: Switch the toggle to All of when you want to ensure that users have access to every resource you select (or do not have access to any, for "Has no access to").
Any one of: Switch the toggle to Any one of when you want to segment users who have access to at least one of the selected resources (or do not have access to at least one of the selected resources, for "Has no access to").
Please note that logged-out users are treated as anonymous. Since their access cannot be verified, they are considered to have no access to any resources.
Term Access
Segmenting users by terms enables businesses to execute term-based offers. This approach can help improve end-user retention and increase customer lifetime value (LTV). For this, you can create a user segment based on users who have (or don’t have) access to one or more specific terms. For example, you can target users on a monthly subscription and offer them an upgrade to an annual subscription with a special deal.

Segmentation by terms is available for all terms except for those associated with site licensing based on IP range contracts.
To target users on an specific email addresses or email domain Site Licence contract, use the Contract ID, which corresponds to the Term ID. To locate this ID, go to Manage → Site Licenses, select a Licensee, then open the Contracts tab and click on the specific contract. The Contract ID will be displayed there.
Promotions Redeemed vx only
If you're a Management + Billing customer, you are able to run sophisticated promotions by generating unique promo codes (which can be included in digital offers, sent in email blasts, or printed out on marketing materials). These promo codes typically provide limited-time discounts on terms or unlock specific terms for free. By using this field in Composer, you can easily retarget visitors who responded to your marketing efforts.

Campaigns Viewed
Campaign codes are unique identifiers you can amend to any link in order to track users who clicked links to visit pages associated with marketing campaigns. As with promotions, you can use this field to retarget those users.

When targeting a campaign in Composer using the "Campaigns viewed" input field, you should enter only the name of the campaign. For instance, if your campaign URL includes the parameter ?tpcc=summersale, you should enter "summersale" in the input field.
First-time Visitors
First-time visitors are those users who do not currently carry a Piano cookie for your site. This feature is frequently used by sites that need to issue cookie or privacy policy warnings to new visitors.

User Device
A user's device is detected by parsing the user agent details a web browser passes to Piano when a page loads. Device segmentation is often used to present different templates to desktop, mobile, and tablet users (alternatively, you could use a single responsive template). It can also be helpful for presenting device-specific messaging, such as informing mobile users of your app.

If you activate Tablet as a type of device in the user segment, iPad users will not be targeted by Composer.
With the release of the iPad operating system (OS), the embedded Safari browser on iPad started to send the same OS identifier (request string) as the one that is sent by the Safari browser on MacOS. This has been confirmed by the development community on Apple’s website. Please, access the following link for more information.
To target users who use iPad devices, please activate the following configuration in the user segment:
-
Go to the "Browsing properties" section;
-
Select "Desktop" as a type of device in the "Device" section;
-
Select "Mac" as a type of operating system in the "Operating system" section (more details here);
Operating System (OS)
Target users by their operating systems.
Desktop devices:
-
Windows - all desktop Windows devices
-
Mac - all desktop Mac devices
-
Linux - all desktop Linux devices
-
Other desktop systems - all other desktop devices that do not fit any of the previous segments. For example, the user-agent for Google Chrome OS -
Mozilla/5.0 (X11; CrOS x86_64 10066.0.0) AppleWebKit/537.36 (KHTML, like Gecko) Chrome/105.0.0.0 Safari/537.36.
Mobile/tablet devices:
-
iOS - all mobile iOS devices
-
Android - all mobile Android devices
-
Other mobile/tablet systems - all other mobile devices that do not fit any of the previous segments. For example the user-agent for Blackberry - BB10 -
Mozilla/5.0 (BB10; Touch) AppleWebKit/537.1+ (KHTML, like Gecko) Version/10.0.0.1337 Mobile Safari/537.1+.

There is an exception when it comes to targeting Googlebots.
When the option Other mobile/tablet systems is selected, it will segment users with the user agent
(Googlebot desktop) Mozilla/5.0 AppleWebKit/537.36 (KHTML, like Gecko; compatible; Googlebot/2.1; +http://www.google.com/bot.html) Chrome/105.0.0.0 Safari/537.36 and (Googlebot smartphone) Mozilla/5.0 (Linux; Android 6.0.1; Nexus 5X Build/MMB29P) AppleWebKit/537.36 (KHTML, like Gecko) Chrome/105.0.0.0 Mobile Safari/537.36 (compatible; Googlebot/2.1; +http://www.google.com/bot.html).
There is no way to segment the user-agent (Googlebot) Mozilla/5.0 (compatible; Googlebot/2.1; +http://www.google.com/bot.html), it will not belong to any segment due to a limitation of the external library we use to detect the user agent.
If you need to detect and segment Googlebots more accurately - you may use the segmentation by Device and Browser.
Browser
Target users in one or more browsers. Browser options include:
-
Chrome
-
Safari
-
Firefox
-
IE
-
Edge
-
Opera
-
Other browser - This option targets any browser(s) not selected here.

Push Notification Settings
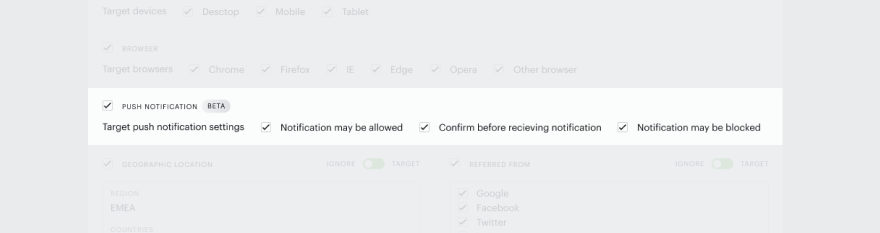
To target push notification settings, you must select at least one supported browser option in the Browser category. Please note that Safari is not currently supported as a browser option for push notification settings targeting.
Push notification settings include:
-
Notifications may be allowed - The user has enabled push notifications in their browser.
-
Confirm before receiving notification - The user has enabled the ability for domains to ask to receive notifications in their browser.
-
Notifications may be blocked - The user has disabled push notifications in their browser.
Note: If a user is already enrolled in a particular push campaign, they will not be offered the option to enroll in the same campaign again.
Geographic Location
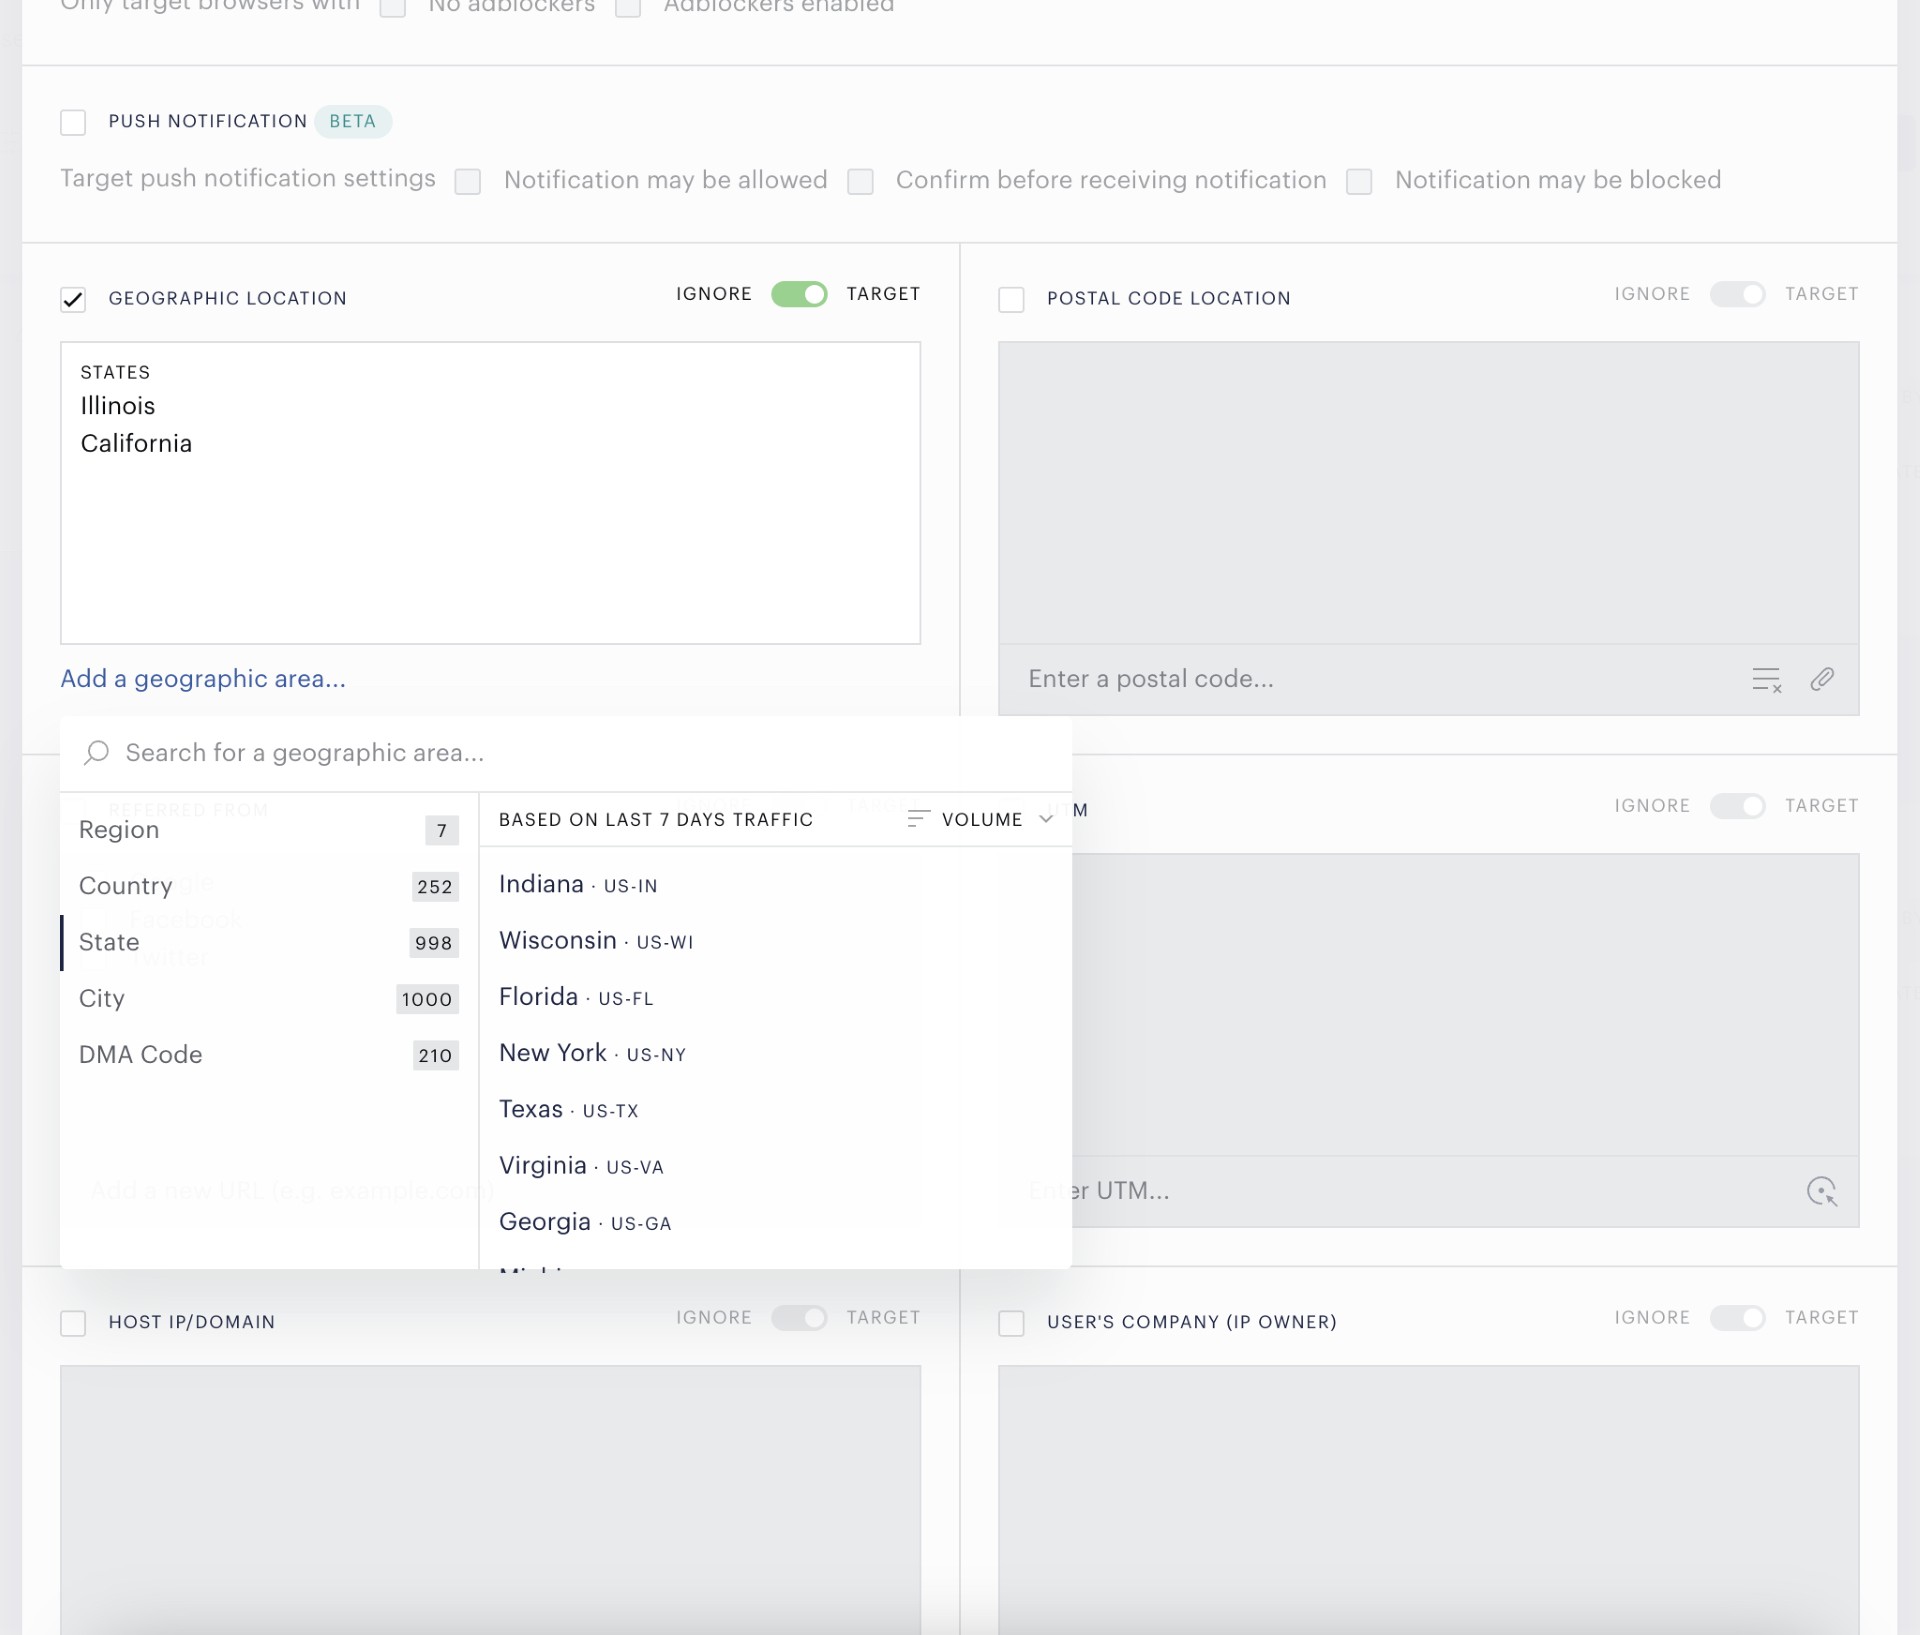
Composer relies on Digital Element, a third-party geolocation provider, to identify visitors based on their region, country, state (e.g., California), city (e.g., Kansas City), metropolitan or designated market area (DMA)*. This enables more precise targeting for content and marketing efforts. For example, you can use targeting a city or metropolitan area to promote products related to a local sports team or display house ads for an event only to users within driving distance of the venue.
*A Designated Market Area (DMA) is a U.S.-specific geographic region defined by Nielsen that represents where local TV and radio audiences receive the same broadcast content. It is commonly used in advertising and media to target viewers in specific local markets.
The DMA can be included in a template as a parameter and shown to end-users. To use it, insert the variable {{dmaCode}}. For example, like this:
<tr><td><t>DMA Code: {{dmaCode}}</t></td></tr>
Both City and State geo-targeting options are generated primarily from traffic observed over the last 7 days. City data displays only locations with recent visits for the last 7 days. State data is also based on the last 7 days of traffic, but additionally includes states that currently have zero activity (no traffic). By default, data is sorted by traffic volume. Alphabetical sorting is available via the filter icon, and the UI can display up to 1,000 values for both cities and states. Region, Country, and DMA code values are predefined for each application and remain available for targeting at all times, regardless of recent traffic.
If further granularity is needed, targeting by postal code may be an alternative, as outlined in the following section.
Postal Code Location
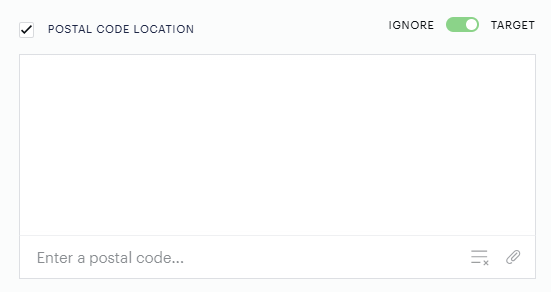
Postal code targeting is available for all experience types. Composer identifies visitors through their IP addresses and uses Digital Element’s database to translate these addresses into postal codes. It then compares the visitor’s postal code with those in the user segment card, and if they match, Composer will display the relevant offer, template, form, and more. However, if users are using a VPN to mask their IP address, user segmentation may not function as expected. Additionally, some internet service providers may broadcast the main router's IP address, which could lead to a postal code that is slightly different from the user’s actual location (e.g., the neighboring postal code). In such cases, we recommend using User’s Company targeting, as detailed in one of the following sections.
To add a postal code, you can either manually enter each one in the input field or upload a .csv file containing postal codes via the attachment icon, as shown below.
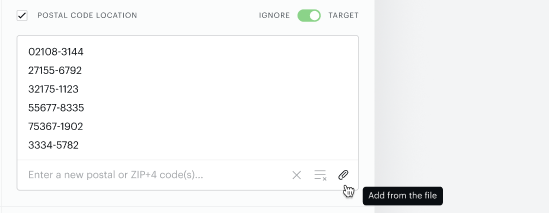
Both regular postal codes and ZIP+4 format codes are supported. For file uploads, ensure the .csv file contains a single column with postal codes in either regular or ZIP+4 format. Any additional columns will be ignored. The system will automatically skip invalid or empty rows and remove duplicate entries. Once the upload is completed, a confirmation modal will display the number of successfully uploaded rows.
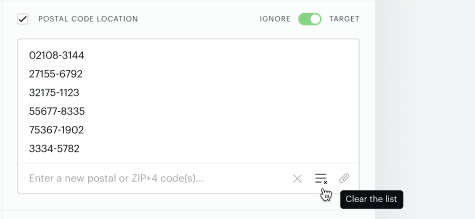
If necessary, you can use the button below to clear the entire list of postal codes or remove individual entries by clicking the cancel button next to each item.
Note: Currently, wildcard or postal code range targeting is not supported.
UTM
Typically, UTMs parameters (source, medium, campaign, content, and term) are used by marketers to track the effectiveness of online marketing campaigns across traffic sources and publishing media. You can find these parameters as part of the URL similar to this one: https://www.example.com/page?utm_content=buffercf3b2&utm_medium=social&utm_source=facebook.com&utm_campaign=buffer.
Piano segments users based on the parameters available in the URL so that you can display promotions, content recommendations, upsell opportunities, etc. to users who may be part of your marketing campaigns. Entering UTM can be done in two ways: manual entry or automatic parsing. You can manually enter the parameter value (i.e., "Facebook") and select the associated parameter. As a default, the "source" parameter option is selected. You can also enter the full UTM parameter, and its value (i.e., "utm_source=Facebook"). The section will automatically parse the input and enter the correct parameter option and value. The section can also automatically parse a full URL with UTMs and enter the right parameter option and value to the target list. The use of the wild card (*) is allowed and follows the same rule as on the Effective Pages card.
Multiple UTM parameters added in this category will operate on "AND" logic. For both below toggle settings, the operation logic is the same.
If you set the toggle to "Target", you will be segmenting users who meet every UTM parameter key-value pair that you submit in the field.
If you set the toggle to "Ignore", you will be excluding users who meet every UTM parameter key-value pair that you submit in the field.
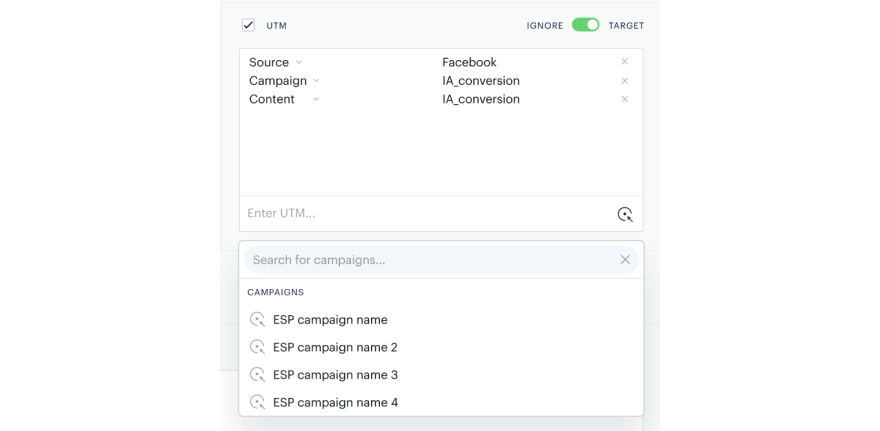
If you are using Piano's ESP, you can pull the UTMs from ESP mailing campaigns by clicking on the icon on the bottom right of the section. Choose the active campaign you wish to target, and the UTMs automatically add to the target list. Note that targeting two or more parameters of the same type is not allowed (i.e., "campaign = 1" and "campaign = 2" are part of the target list).
UTM targeting as a category of rules allows the entry of multiple values with UTM parameters of the same type. To add another value to the UTM in the input field, you should enter the full UTM parameter with a different value (i.e., "utm_source=LinkedIn"). You will find that the number of values will increment each time you submit another value in the input field.
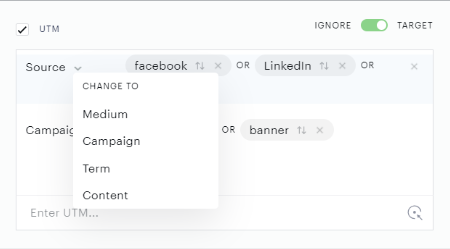
You can insert a particular value first, then change its UTM parameter. Click on the icon next to the value in the input field and choose a different option (UTM parameter) in the drop-down selector.
You can change the UTM parameter that is used with multiple values. Click on the icon next to the particular UTM parameter in the list. Choose a different UTM parameter in the given list of options.
You can delete a particular value using one of the control elements next to that value in the input field
UTM targeting is available for Site, Mobile, and Facebook experience types. AMP experience type will not be supported.
Referrers
Referral information is obtained upon page load from the referrer field in the browser's HTTP request header. This segmentation can be used, for example, to present social media users with share requests or provide special messages to visitors arriving from sister sites and content partners. See here for more information on how to target users referred from search and social media.
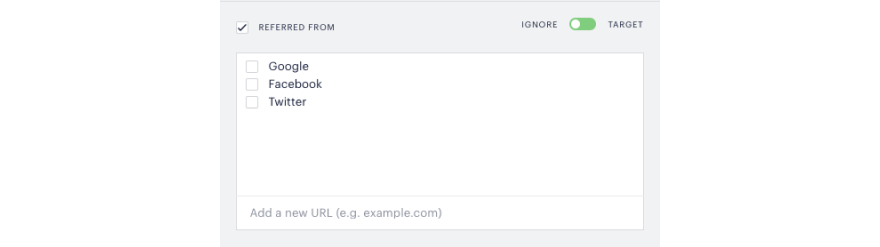
Selecting the available platform options will automatically include various URLs associated with each referrer, as listed in the table below:
|
Platform |
Target/Ignore URLs |
|
|
"*.google.??"
|
|
|
"*.facebook.com",
|
|
|
"http://t.co/*"
|
Host IP/Domain
Targeting based on IP address or domain allows you to grant access to all corporate subscribers at a specific location or direct visitors arriving from a university portal to a personalized registration process. This feature is also used by clients to exclude their own offices from an experience. If you enter a domain, Piano will determine the IP address of that domain and target based on it. Piano supports Classless Inter-Domain Routing (CIDR), which can be used to specify an IP range (e.g. 127.0.0.0/24).
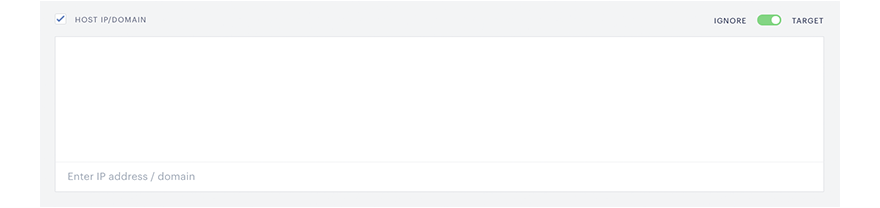
Please note, that this option allows you to target users by the website domain of their university, business, or office (e.g. piano.io) not the domain of email addresses (e.g. @piano.io). If you'd like to target users with a specific email domain, you can take a look at our Site licensing functionality here.
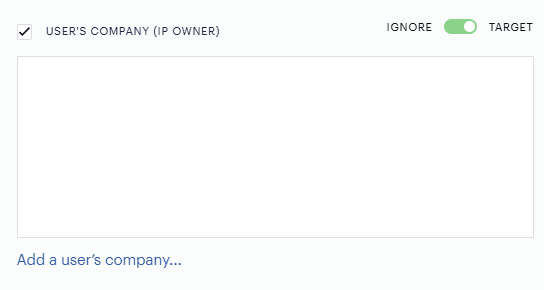
User’s Company (IP Owner)
The User’s Company (IP Owner) targeting functionality is available to all clients and enables users to target specific internet service provider companies by selecting organizations from a dynamically updated list.
This feature uses company data from Piano Audience traffic events but requires a Composer 1x integration to function.
Users can multi-select companies from a drop-down that auto-populates with available organizations based on traffic from the last 7 days. The list updates over time, reflecting recent site visitors, but once a company is selected for targeting, it will remain active even if it's traffic later drops. Companies that are verified to have had traffic in the past but currently have no traffic are listed under the "Others" section and can be found by typing at least the first three letters in the search field appearing after clicking on "Add a user's company".
The company and city lists can contain up to 1,000 entries, with the highest traffic companies appearing at the top. New companies are continuously detected and added, ensuring that targeting options stay current and relevant.
You can also incorporate the name of the IP provider into your Offer templates to create more personalized offers using the variable {{companyName}}. For example, like this:
<p>IP provider: {{companyName}}</p>
Ad Blocker
After setting up ad block detection by following these instructions, you'll be able to target ad blocking users with custom offers such turning off ad blocking in exchange for access or continuing ad-free in exchange for a subscription.

Custom Variable Segmentation
Custom variables are freely defined by you and can be any variable recognized by your website. If you're using a service like Krux or BlueKai to segment your audience, you might want to use a custom variable based on that data to make sure a high-value ad segment never gets blocked from your content. Examples of common custom user variables include:
-
Newsletter status: Target just those visitors who haven't signed up.
-
Event attendees: Send a message to past or future conference-goers.
-
Social graph data: Leverage demographic information you've gleaned from social sign-on.
-
Third-party data: Repurpose segments from Cxense, Krux, SalesForce, Omniture, and other tools.
-
First-party data: Segment based on data stored in your own data warehouse.
Another use case for utilizing custom variables includes segmenting users by email domain. When a user enters the website, you can push a custom variable key=value pair, if their email address includes @XYZ.com and then segment users based on that custom variable.
To include a custom variable, first allow Piano to recognize it by following these steps. Then enter the variable name and value in the field provided. Finally, use the slider to include/exclude users based on the custom variable value. If multiple custom variable key-value pairs are provided, they operate on AND logic and all conditions need to be met.
Important: Composer-only clients will want to use custom variables to target based upon a user's subscription, registration, or login status because that user information is not stored within Piano for Composer-only clients.

Custom Cookie Segmentation
Custom cookies allow you to specify the names and values of any readable cookies you’ve created using Composer’s Set cookie card (or any cookies you’ve created manually that are prefixed with "_pc_") and then target or ignore users based on the presence of those cookies. For more information, see our Set cookie card documentation.

Custom Fields Segmentation
You can segment your audience based on their responses to Custom Fields. You can execute experiences based on the given user's preferences, allowing you to better connect with your users. To define a segment in Composer, open the User Segment card. Scroll to the bottom of the modal, where you will see a section labeled "Custom Fields." This can be a very powerful tool for engaging more personally with your users, and the flexibility of Piano's segmenting allows you to target users based on multiple different criteria for each field type.
The matching logic for multiple sections is AND for all fields, and also between the target/ignore section. You can define multiple rules for the same field within a single section, but with a different response time, in this case, OR logic will be applied for such field rules.
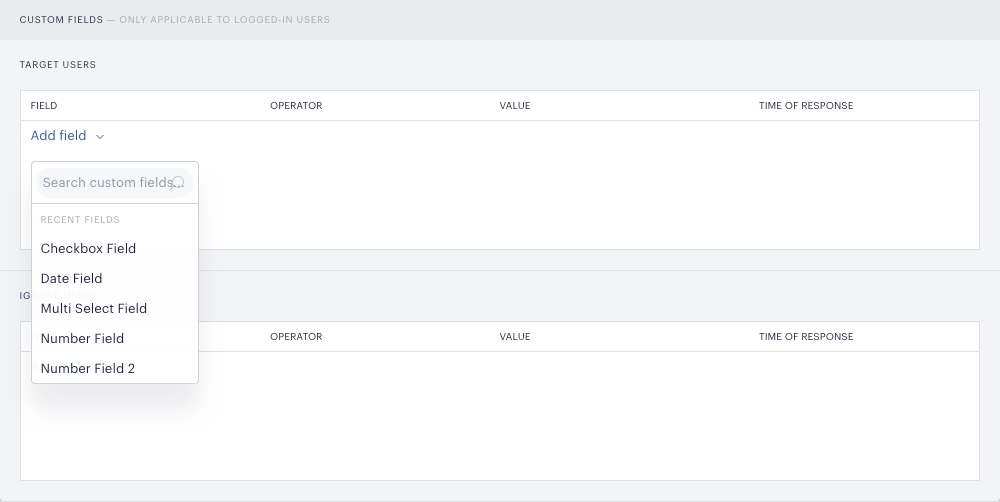
In the subsection labeled "Target users," you may add a segment based on any field you have created by clicking the "Add field" option. Then, you must select an operator and input a comparison value. There is a fourth data field you can complete labeled "Time of response." This field allows you to access users' historical data when defining the segment. In other words, it does not need to be their current response, but it can instead be a response they had previously entered but have since changed. You may define a specific time frame for the response, or you can select "Current" which refers to their present response.
Below this is a separate subsection labeled "Ignore users." Here, you may define criteria that define users who should NOT be targeted with this experience, even if they have the appropriate credentials for other sections, including the "Target users" section.
Two operators are constant across all field types: Is empty and Is not empty. These target users who saw the field but did not populate it with a response, and users who saw the field and did respond to it, respectively. The operator options for each field type are defined below.
Text
-
Matches: Only users whose response matches your input value will be targeted. Capitalization is disregarded.
-
Contains: Users whose response contains the text you enter will be targeted. Capitalization is disregarded.
-
Does not contain: Users whose response does not contain the text you enter will be targeted. Capitalization is disregarded.
Date
-
Occurs on: Users whose date is exactly that of the input date will be targeted.
-
Occurs before: Users whose date is before the input date will be targeted.
-
Occurs after: Users whose date falls after the input date will be targeted.
-
Occurs within: Users whose date falls within the two dates will be targeted, inclusive of those dates.
-
Does not occur within: Users whose date does not fall within or on either of the two dates will be targeted.
The comparison value for date fields is somewhat more complicated than that for other field types. This is because date fields allow you to define a relative time frame in addition to solely an absolute range. For example, instead of only being able to specify values that fall within the constant range of, say, Jan. 14, 2018 – Jan. 28, 2018, you can specify values that fall within the past two weeks, updated dynamically. So each day, you could have a different segment than the day prior without having to edit the segment card.
For operators Occurs on, Occurs within, and Does not occur within, you will see a tab under Value labeled "Time frame" and another tab labeled "Date range." The time frame option will allow you to specify the range relative to the present day. You can define the time frame in terms of days, weeks, months, or years. You may also choose whether the given range is defined in the past or future based on selecting "ago" or "from now" accordingly.
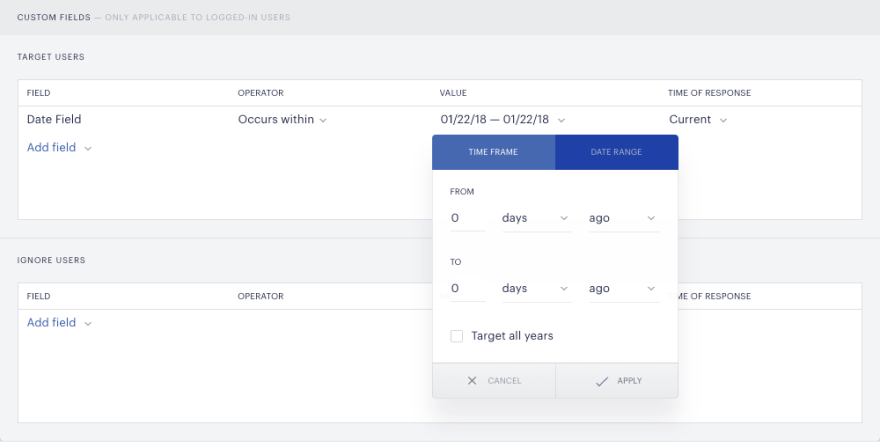
Marking the checkbox labeled "Target all years" tells the system to disregard the input year when filtering. For example, if you were to leave this unmarked, targeting people based on their birthday with a time frame "from 1 month ago to 0 days from now" would return people who were literally born within the past month (likely not a large portion of your audience). With the checkbox marked, it would return all users who celebrated their birthday in the past month regardless of which year they were born.
Number
-
Equal to: Users whose submitted value exactly equals the input value will be targeted.
-
Not equal to: Users who submitted any value other than the input value will be targeted.
-
Greater than: Users whose value is greater than the submitted value will be targeted.
-
Less than: Users whose value is less than the submitted value will be targeted.
Checkbox
-
Equal to: You may select either "True" or "False" within Value and only the users who checked or did not check the box will be targeted, respectively.
-
Is empty / Is not empty: You may target users who never submitted a form with such a field or submitted it with any value.
Single-select list
-
Equal to: Users who submitted the same response as the response you indicate will be targeted. Only one value may be selected.
-
Not equal to: Users who submitted any response other than the one you indicate will be targeted. Only one value may be selected.
-
Any of: Users who submitted a value that falls within an array of values that you choose will be targeted. Multiple values may be selected.
Multi-select list
-
Equal to: Users who submitted the exact same responses as those you indicate will be targeted. Multiple values may be selected, but users must have matched all of the values to be targeted.
-
Not equal to: Users who submitted any responses that do not fall within those you select will be targeted. Multiple values may be selected.
-
Any of: Users who submitted a response that has at least one shared entity with the values you select will be targeted. Multiple values may be selected.
User Profile Segmentation
User Profile targeting is available through the User Segment card in Composer and integrates seamlessly with Integration Designer, which allows you to manage and activate data attributes from multiple sources.
Learn more in our User Profile Segmentation documentation.
Sub-segmentation
Should you wish to define an audience sub-segment, you can drag a segmentation card to the grey box below and to the right of your initial segment. You'll then have the opportunity to create a sub-segment using the methods outlined above. You can also insert sub-segmentation cards later in the experience chain, after an Event card.
When creating a sub-segment or another Experience card, watch out for potential overlap between your initial segment and any subsegment(s). If you are targeting mutually exclusive segments (for instance, desktop users and mobile users), then presenting an offer or template that's a modal (a pop-up message) to the first segment and another modal to the second segment will work seamlessly. But if you're targeting two segments that overlap (New York City users and mobile users), and you try to present a modal to each group, only one of those modals will activate for users who belong to both target groups.
This issue can easily be avoided by adjusting settings so you exclude the attributes of users from your initial segment when constructing a sub-segment. Or by using inline offers or templates with separate containers. This article on Action cards includes more information on how offers and templates work together.