
Although we go through the setup process with you, here is some information you may need to return to after you've been set up.
-
Adding and Removing Social Accounts
-
Account Settings & Publishing Limits
-
Day Parting
-
Feed Settings
-
Link Shorteners
-
User Permissions
Adding and Removing Social Accounts
To Add:
-
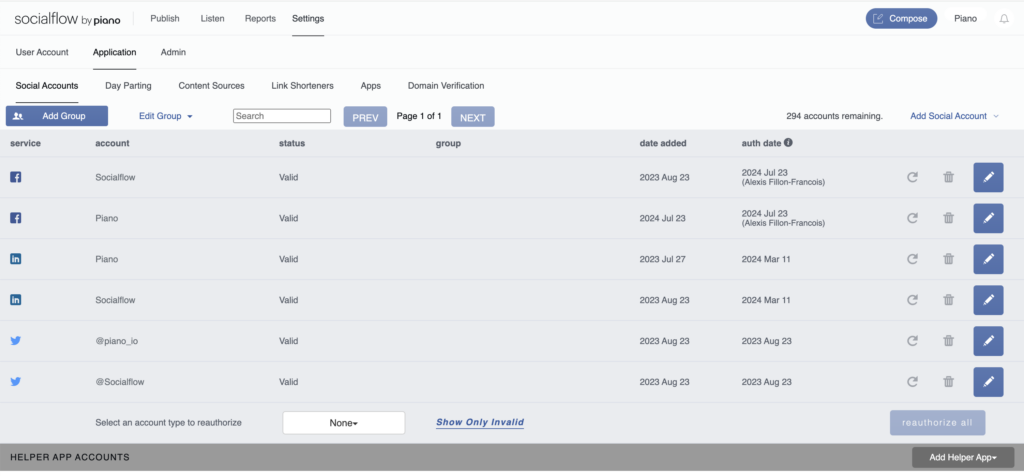
Navigate to Settings / Application / Social Accounts
-
Find the "Add Social Account" drop down on the right in blue text.
-
Click the drop down to select a social network
-
Click the network (Facebook, X, etc.) to be prompted for login and authorization steps.
To Remove:
-
Navigate to Settings / Application / Social Accounts
-
Find the account you wish to remove
-
Click the trash can icon on the far right
-
Click to confirm removal
Account Settings
From the Settings / Application / Social Accounts page you can also click the pencil icon to access settings for that handle.
Here you may want to update Publishing Limits or Tracking Tags. This is also where you can Pause All Publishing in case of emergency.
Publishing Limits
These limits allow you to set a general volume and frequency cap on your optimized publishing.
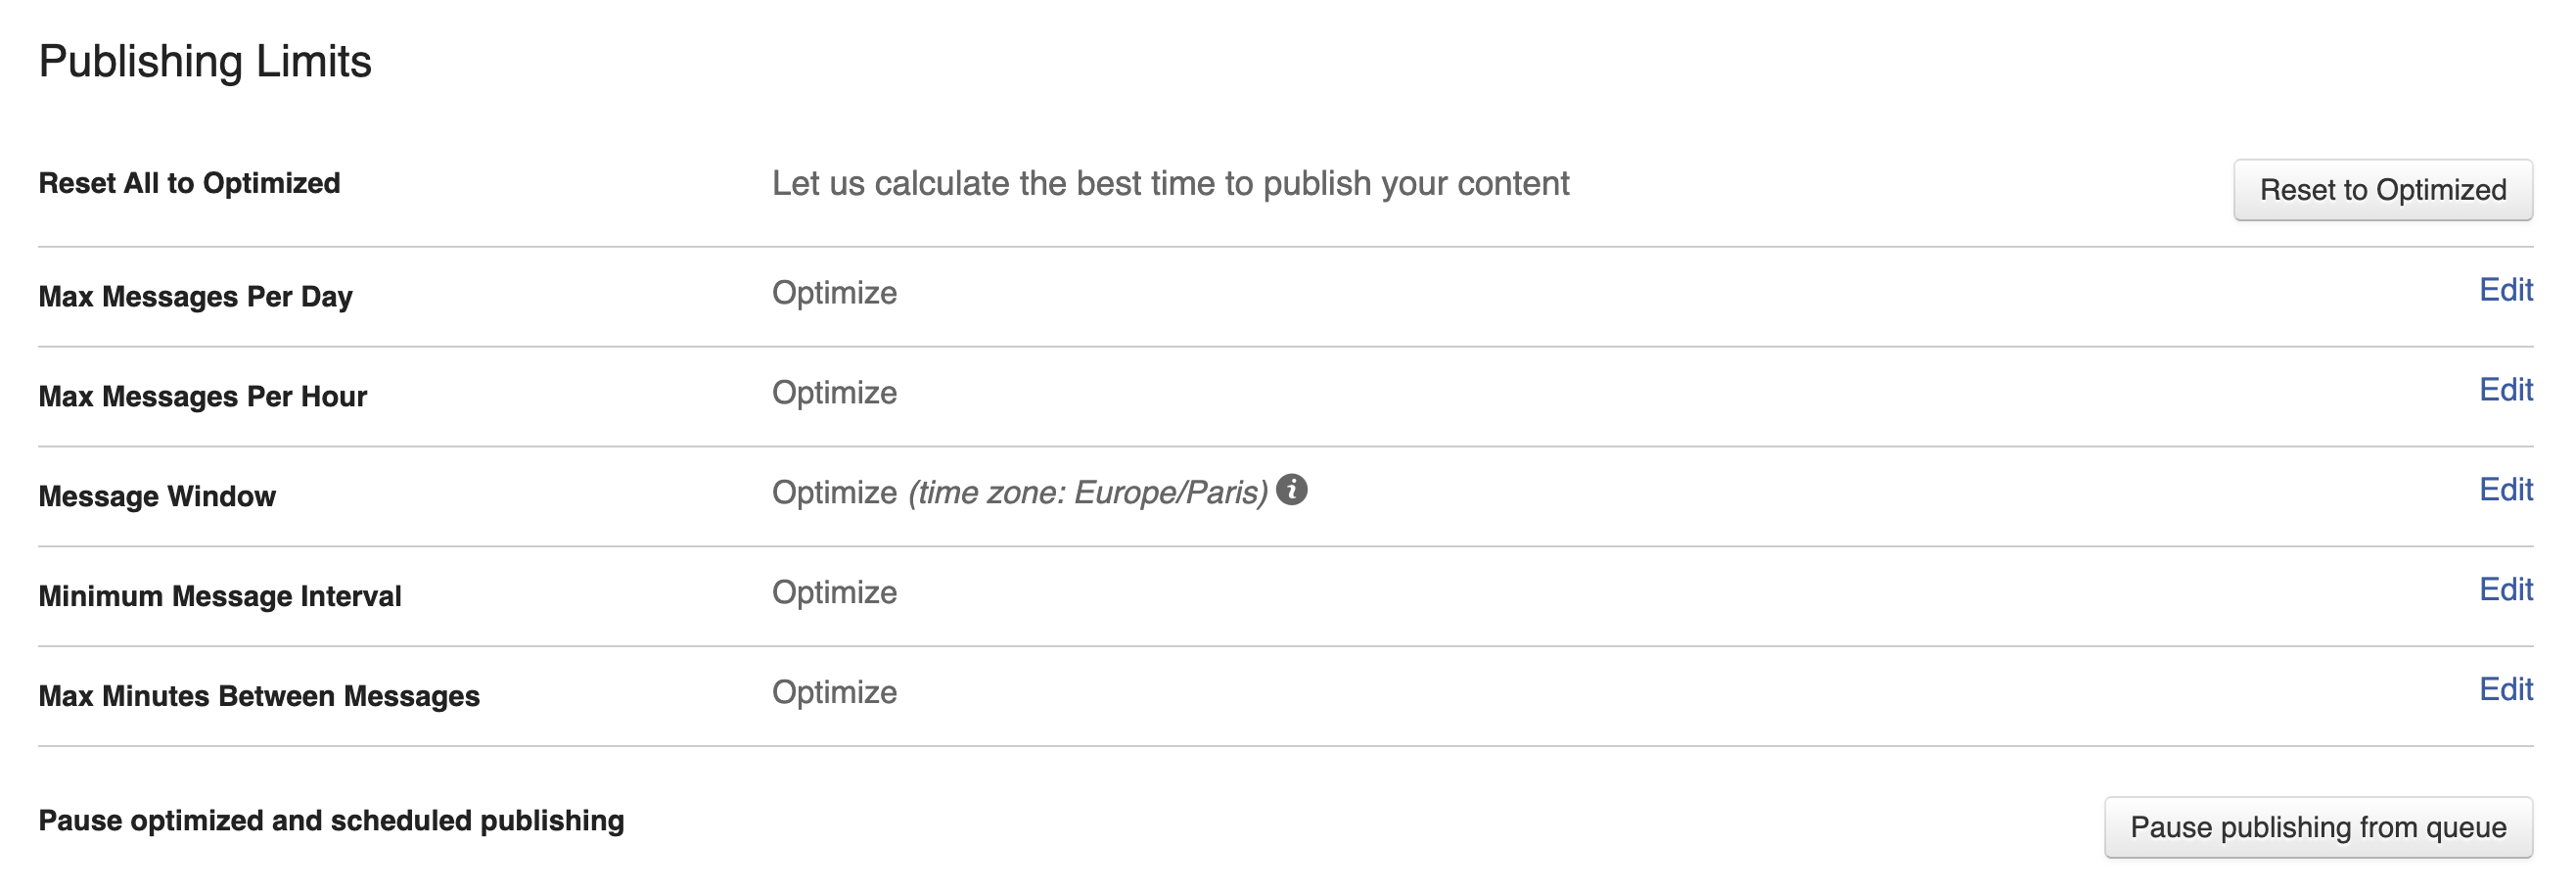
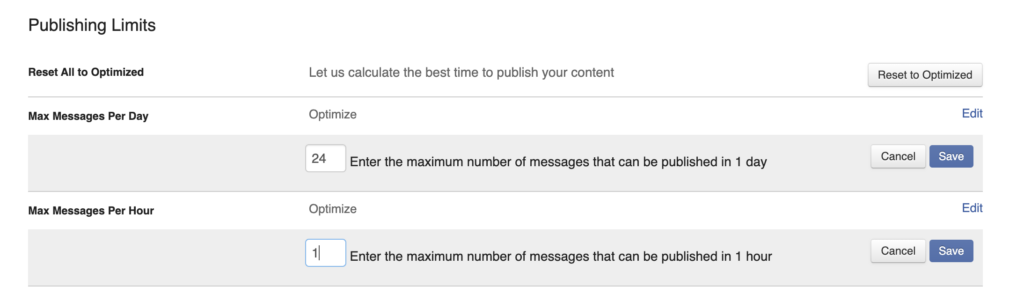
You can use one or all of these settings depending on how specific you want to be. For instance, you can just use the Max Per Day or Max Per Hour. Here's an example defining 1 post per hour over the full 24 hour period.
You could also choose to say you only want to publish between the hours of 9 am and 11 pm (to avoid overnight).

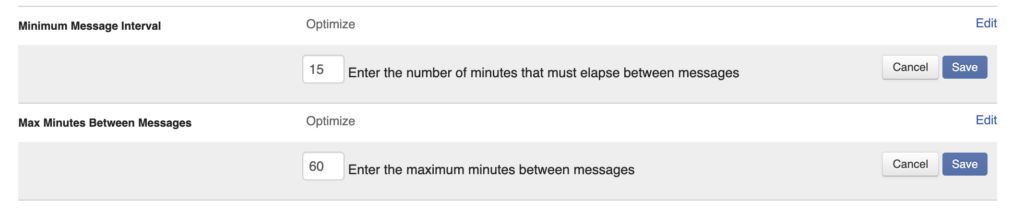
And for example, you can even say you want at least 15 minutes between your posts but no more than 60 minutes. This timing is fully customizable and will help our system to space out your content.
Note: Optimized Can Send content will always follow these rules, if there is too much content to meet these limits, they can simply expire. Publish Now messages, Scheduled messages and Optimized Must Send posts will always publish no matter what, and they count towards the limits you set. The system will simply send fewer Can Send messages and allow you to go over the limits if you have too much content.
Day Parting
Since Publishing Limits apply generally to every day, we added our Day Parting feature to provide a more layered set of publishing limits where you can control frequency and volume per set time frame, breaking the day up into individual parts.
When you click into Day Parting, you'll land on the Schedules view.
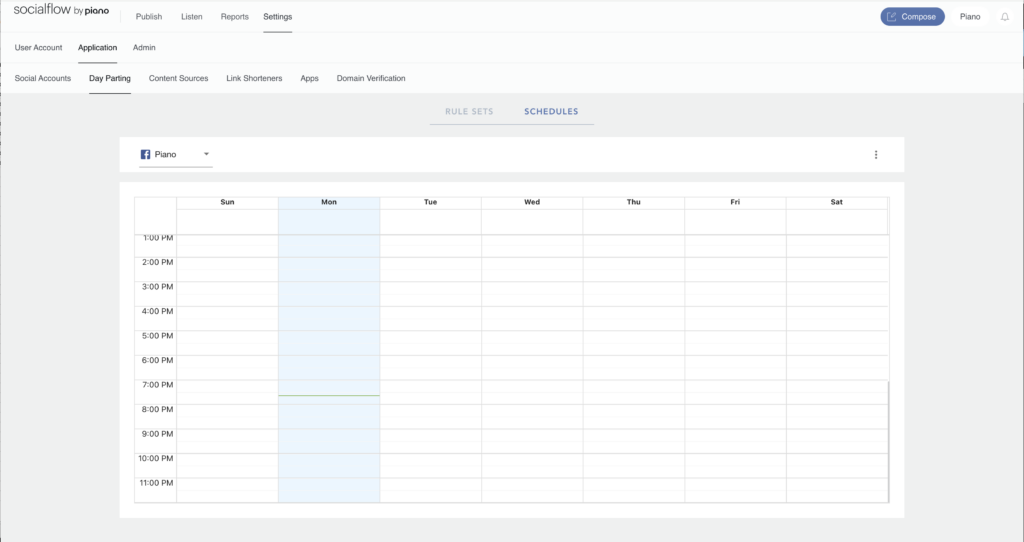
It will start blank so the first step is to create a rule set on the Rule Sets tab. Rule sets follow the same structure as the Publishing Limits but can be used for specific parts of the day or timeframes.
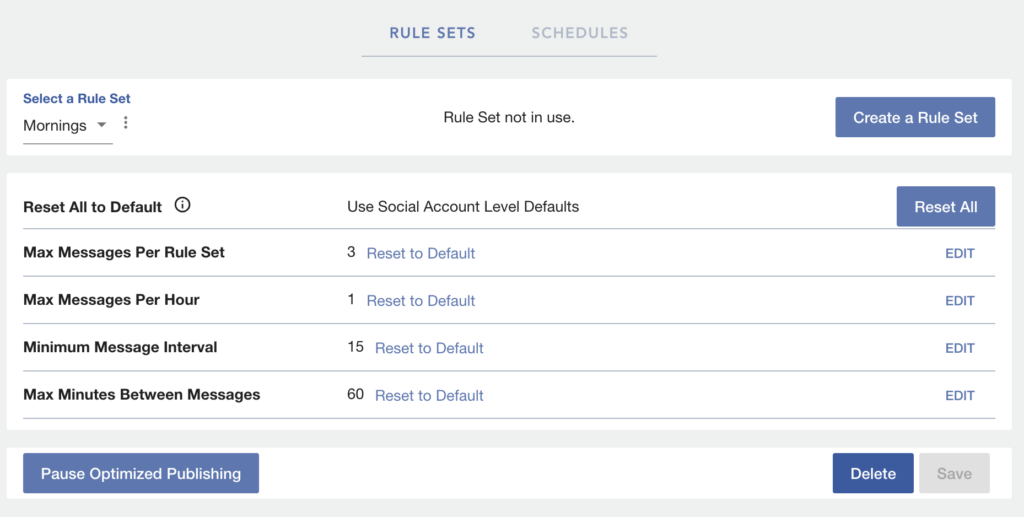
Once you create the rule set, you need to apply that rule set to some part of the day.
Back on the Schedules tab, you can click on the start time to add the rule set for any duration. For this example below, a Mornings rule set might start at 8am and last for 4 hours, ending at 12 noon.
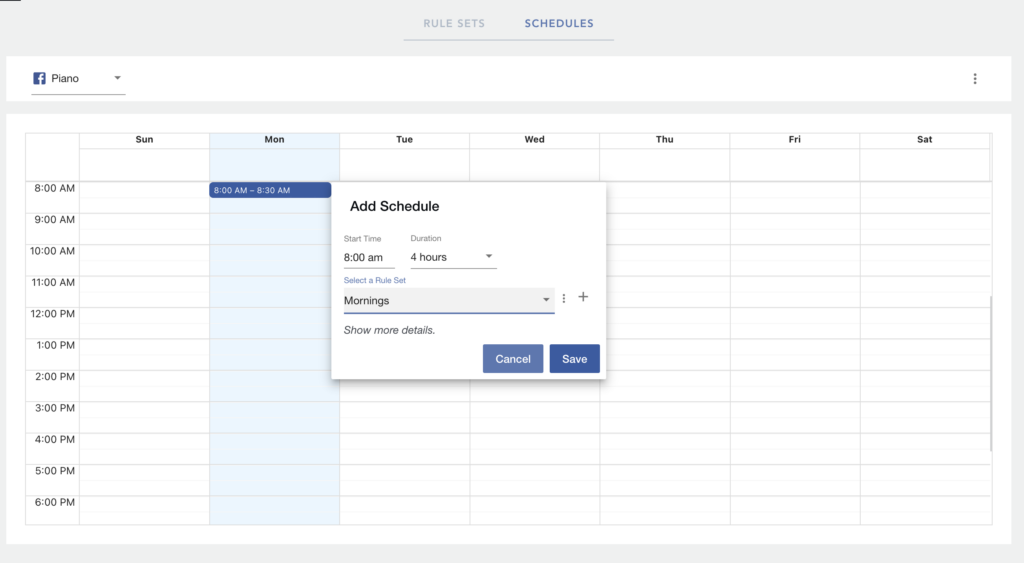
Once you click Save in the example shown above, you would see the blue block fill in from 8am-12pm.
You can continue to add rule sets to fill the schedule. However, covering every time frame is not required. Any part of the day that is not covered by a rule set will simply default to the general Publishing Limits. If you don't use the regular Publishing Limits, the content will be sent out solely based on the individual message settings.
Feed Settings
To update feed settings after set up, navigate to Settings / Application / Content Sources to see a list of your feeds. Then click the pencil icon to get to the settings page for a particular feed.
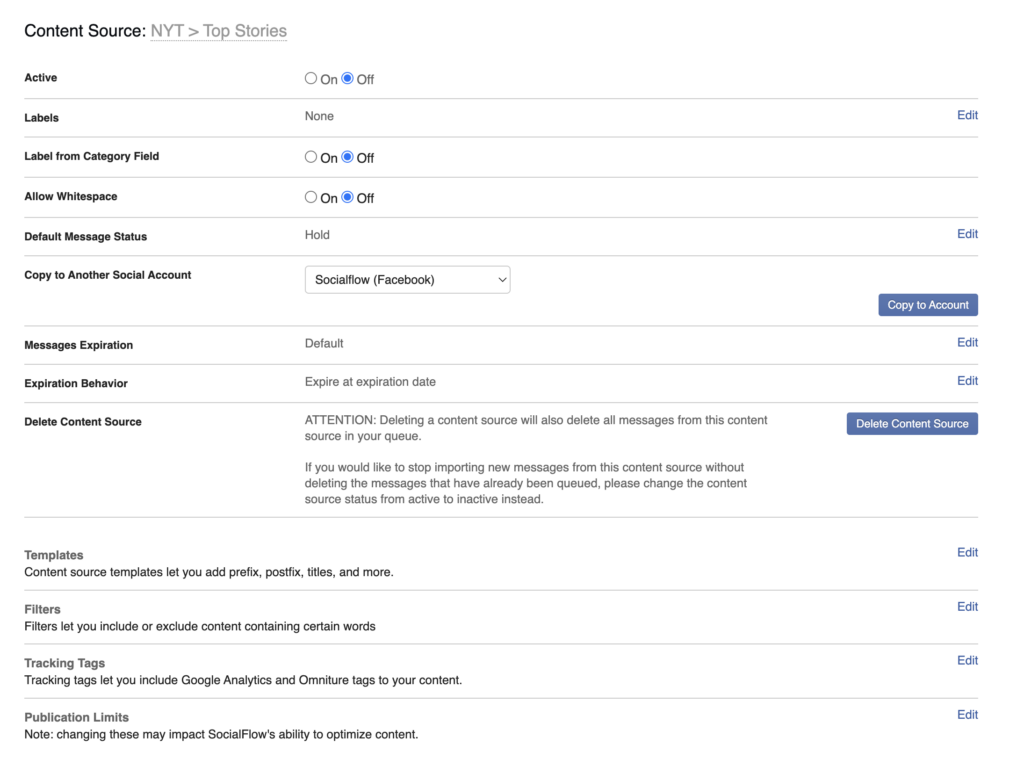
These settings can be modified at anytime. You can review all the feed settings on our Adding an RSS Feed page.
Link Shortener
In case you want to change your link shortening service or add a custom short domain, navigate to Settings / Application / Link Shorteners.
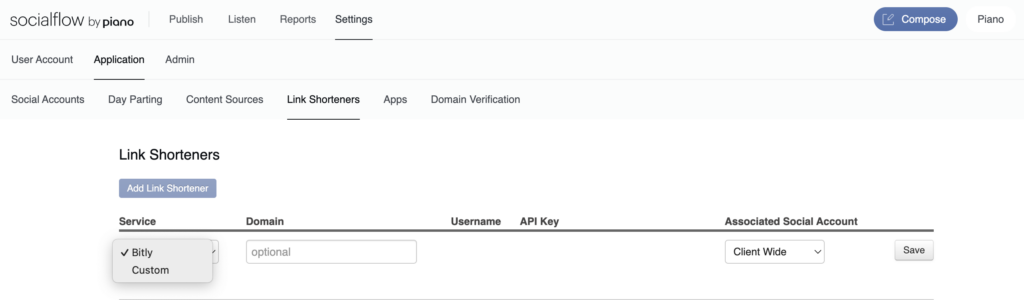
You can choose to sync your current Bitly account and use that shortener. Or you can install a custom short domain, which require additional instructions. If you have any questions, please reach out to support@piano.io or your Client Success Manager.
User Permissions
Navigate to Settings / Admin / Users and Permissions and here you can either invite a new user, remove a user, or edit permissions for an existing one.
To invite a new user, simply click the blue Invite New User button.
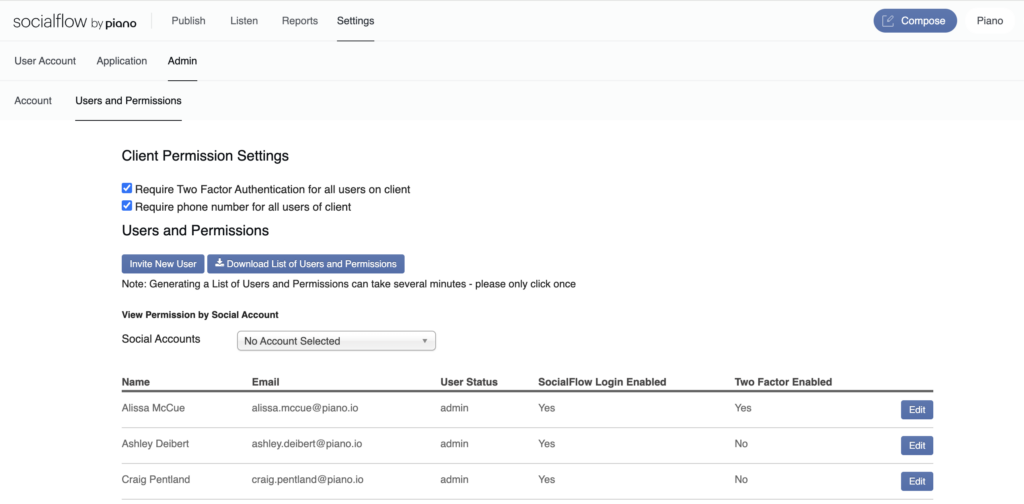
This will take you to a form page where you can fill in the name, email address, and timezone of the new user. Then you can select their level of permissions.
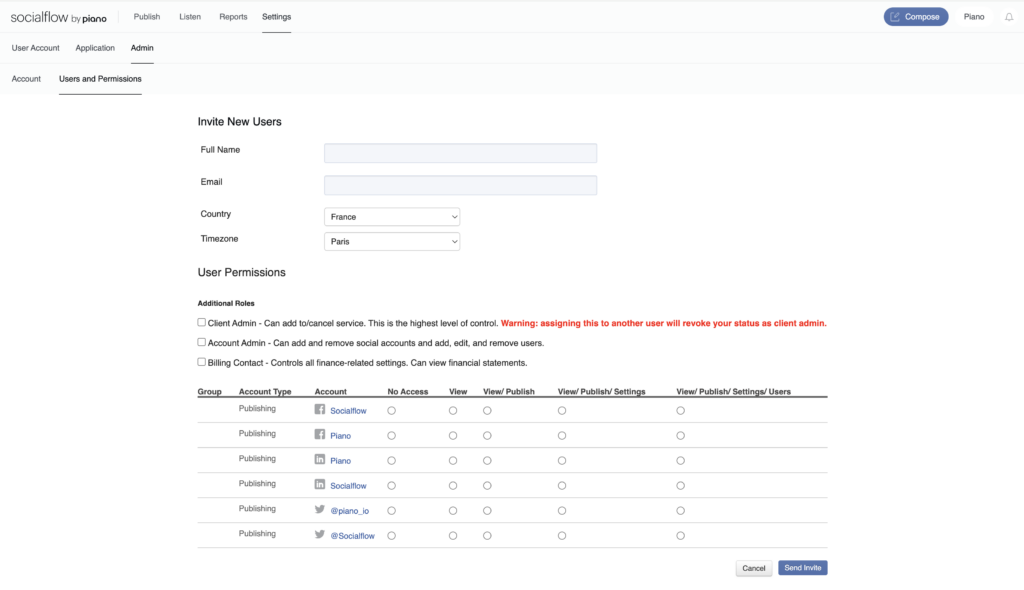
Here are the different permission levels:
Client Admin: A superuser who oversees all of the accounts, users and settings. Automatically has publishing rights to all social accounts.
Account Admin: A secondary superuser who can oversee all accounts, users and settings. Automatically has publishing rights to all social accounts.
Note: You can ignore Billing Contact as it is no longer relevant. We manage billing contacts outside of the platform.
Permissions Per Social Account:
-
View — Allows users to view the queue, timeline and reporting for a specific social account(s). This user is not able to publish any content.
-
View/Publish — Allows users viewing rights plus the ability to create and publish posts to specific social account(s).
-
View/Publish/Settings — Allows users viewing rights and publish rights plus access to settings for a specific social account(s).
-
View/Publish/Settings/Users — Allows users viewing, publishing, and settings rights as well as the ability to add or remove users for a specific social account(s).