
RSS Feeds
RSS feeds can be added into Socialflow allowing you to automatically import content from your website, blog or WordPress or anywhere else, directly into your Queue.
All you need is the RSS feed URL to paste into Socialflow, and our system will continually populate your queue with the latest content from that feed.
There are many feed settings that allow you to automate publishing either sending content immediately (great for breaking news) or at the optimal time. You can also have the feed bring content in on “Hold” so you have plenty of time to review and edit posts or tweetsbefore they publish. More information on feed settings is available in the Settings chapter.
Batch Import
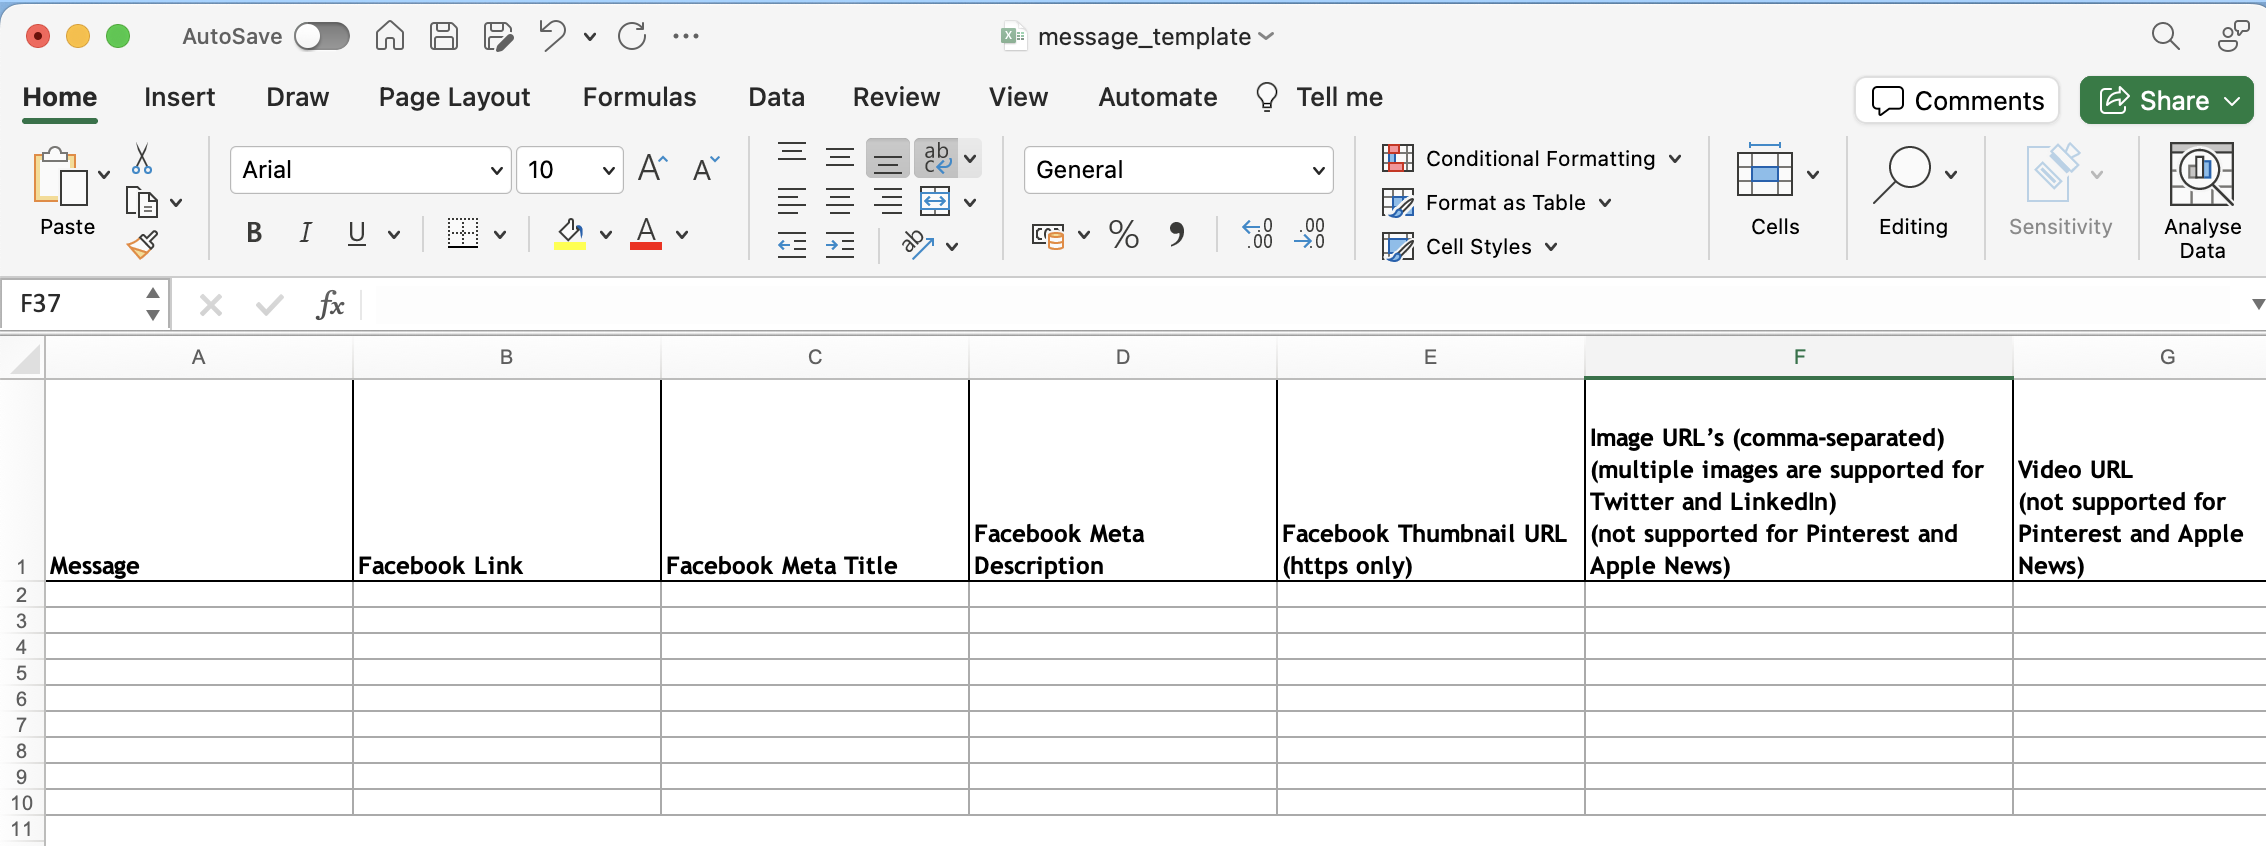
Using our Message Template (a preformatted Excel file) you can import dozens or even hundreds of messages directly into Socialflow with the social copy, link, custom metadata (optional) and even photo or video by URL. You can download the latest version of our Message Template here.
Manually Compose
Add posts or tweets anytime using our Compose Box. The Compose Box icon can be found in the upper right corner:
Compose offers many of the same features as publishing directly to the social networks.
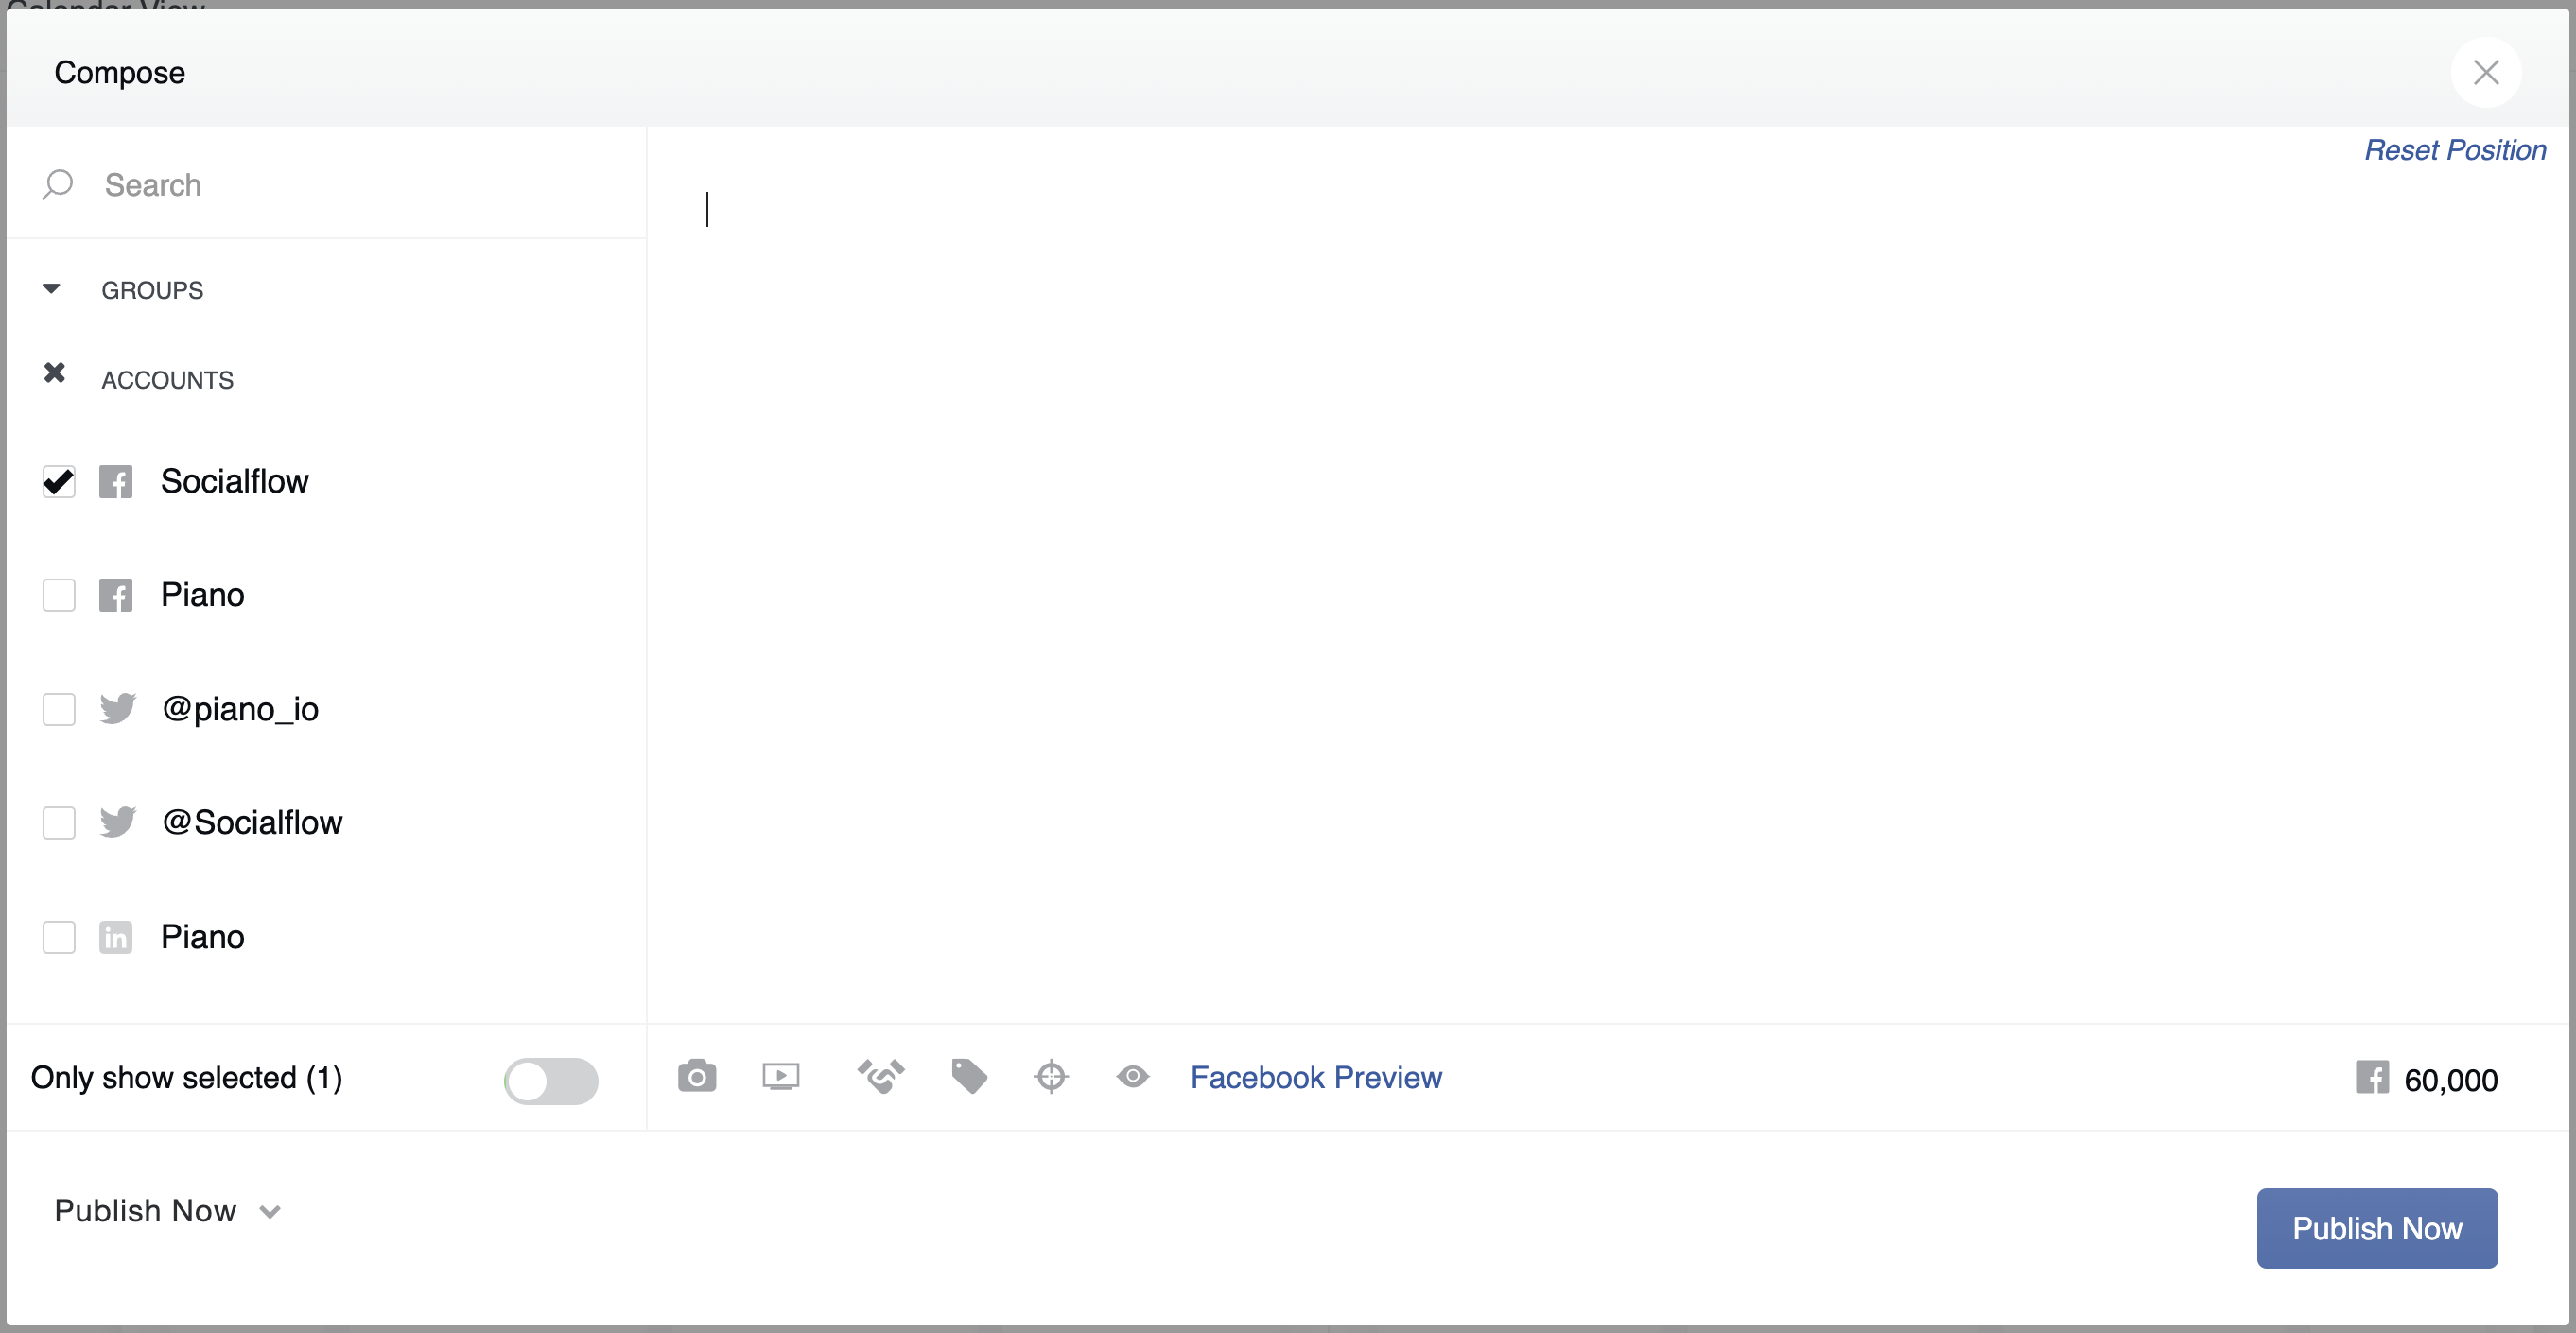
First, notice that on the left you have a list of all of your available social accounts. You can multi-select social accounts here by individual or group to create the same content for more than one account at a time.
*Note: Twitter/X has a rule against sending the same content to multiple X accounts at a time, however you can select multiple X handles and put that content on Hold. You can easily select multple Facebook pages or Linkedin pages, etc. Or a combination of Facebook and Linkedin and so on.
As you select different social networks, you will see different buttons and icons grey out or disappear, since not all features are available for all social networks.
Compose Box Features
Selecting an Account: Select a social media account or accounts from the menu on the left inthe Compose Box. A check mark will appear next to each selected account.
Note: The character counters associated with social platforms will automatically track thenumber of characters in your message in the lower right-hand side of the Compose screen. Ifyou go over the limit, your message will not post.
Entering a link: If you add in a link, be sure to use the full version of the link, including http:// atthe beginning. This way our system will recognize the link and shorten it for you. We have ourown link shortening service built in, called Tribal and we also support Bitly and custom shortdomains.
Note: For Facebook, you can remove the URL from the post copy at the top of the Compose box, after we've pulled in the link information at the bottom, and it will publish as expected.
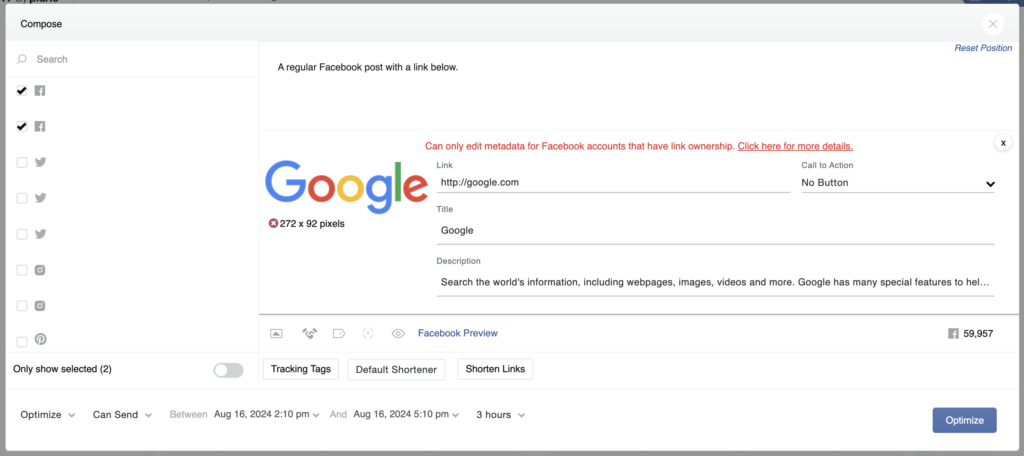
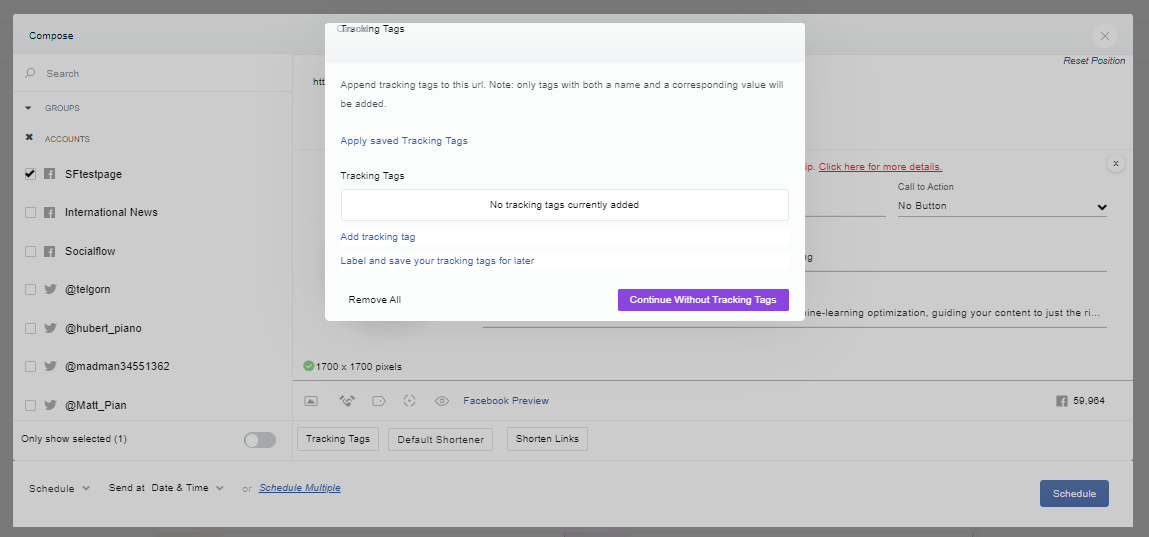
Tracking Tags: Once you add a URL in Compose, you will see the option to add tracking tags.
When you open the tracking tags option, you'll see several tracking services to choose fromincluding Google Analytics.
You can also label and save a set of tracking here to re-use easily.
Pro Tip: You also have the option to append tracking tags to all of your links automatically by entering tracking tags in the social account settings.Navigate to Settings>Application>Social Accounts and click the pencil icon to find these settings.
Compose Box Icons & Functions
Photos & Videos: Upload photos or videos to accompany your content by using our simple upload feature, available by selecting the image icon or dragging your media into the compose box.
Pro Tip: You can use the image icon to upload up to 5 images automatically creating a carousel post on Facebook. You can upload up to 4 images to create the grid photo design on 𝕏 or upload a single photo, video, or multi-media carousel for Instagram.
See exact media specifications for each social network in the chart below.
Facebook Branded Content: This handshake icon will allow you to tag a partner or sponsor in your post in the approved Facebook format.
Labels: Labels help organize your messages into categories for reporting or to easily find later. Labels are not published with your message and can only be seen by you and Socialflow users accessing this account.
Facebook Targeting (Preferred Audiences & Audience Restrictions): The target symbol below the text field will allow you to choose targeting for your Facebook content. You can target Interests or Pages under the Preferred Audience tab and geotarget or set a minimum age target under the Audience Restrictions tab.
Note: 𝕏 will allow some organic geotargeting IF you have an ads account with 𝕏
Facebook Video Settings: This is an additional icon that only appears when a video fileis attached for Facebook. It includes options such as allowing a video to be available forcross posting, adding Video Tags and using or creating video playlists.
𝕏 Studio (Video) Settings: If you are already using 𝕏 Studio, you will see this icon when a video is uploaded. It opens a window for metadata options and the ability to monetize videos depending on your level of access with 𝕏 Studio. Having this integration also allows our TW Studio users to upload videos up to 10 minutes in length.
Unpublished Page Posts: This feature creates a hidden post not visible to your audience and only accessible by direct URL. These are often used in conjunction with an ads campaign.Facebook Preview: This allows you to see how the post will look once it publishes to either desktop or mobile.
Favoriting Accounts Feature: You can now star or favorite the social accounts you publish to most often in the Compose box. Simply hold down the SHIFT key on your keyboard to add the star icon.
These accounts will always be at the top of the list when you open the compose box. You canunstar them if you need to by holding the SHIFT key and clicking the account again.
For more details on Compose functions specific to each social network, please view the following:
Content Supported by Network
We support the following types of content by network:
|
Channel |
Content supported |
Specifications |
|
𝕏 |
Single image, multi image (4),140 sec video, animated gifs(up to 10 minute videos if using Pro Media Studio)
|
Image dimensions smallerthan 4000 pixels, Gifs smallerthan 15MB, 512 MB video
|
|
|
Single image, multi-imagecarousel (up to 5), video |
Up to 1GB video |
|
|
Single image, multi-image (upto 9), video |
The size limit for an uploadis 5 MB. At least 552 (width)x 276 (height) pixels. Theimage frame ratio rangesfrom 3:1 to 2:3(width/height). If the ratio islarger, the image will becentered and cropped. Maxfile size: 200MB
|
|
|
Single image |
2:3 or 1000x1500 Pixels,32 MB
|
|
|
Single image, video, carousel (up to 10 images and videos), Link in Bio |
Minimum image width: 500 pixels Minimum aspect ratio: 400x500 Maximum aspect ratio: 191x100 Video: 100MB maximum (3 seconds to 60 seconds). Container: MOV or MP4 (MPEG-4 Part 14), no edit lists, moov atom at the front of the file. Audio codec: AAC, 48khz sample rate maximum, 1 or 2 channels (mono or stereo). Video codec: HEVC or H264, progressive scan, closed GOP, 4:2:0 chroma subsampling. Frame rate: 23-60 FPS. Picture size: Maximum columns (horizontal pixels): 1920 Minimum aspect ratio [cols / rows]: 4 / 5 Maximum aspect ratio [cols / rows]: 16 / 9 Bitrate: VBR, 5Mbps maximum |
|
Apple News |
Link to article only |
Publishing Options
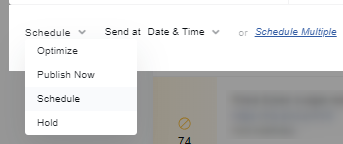
Once you have filled out the Compose box, there are different publishing options and priority level settings you can use to control your publishing.
-
Optimize
-
Publish Now
-
Schedule
-
Hold
-
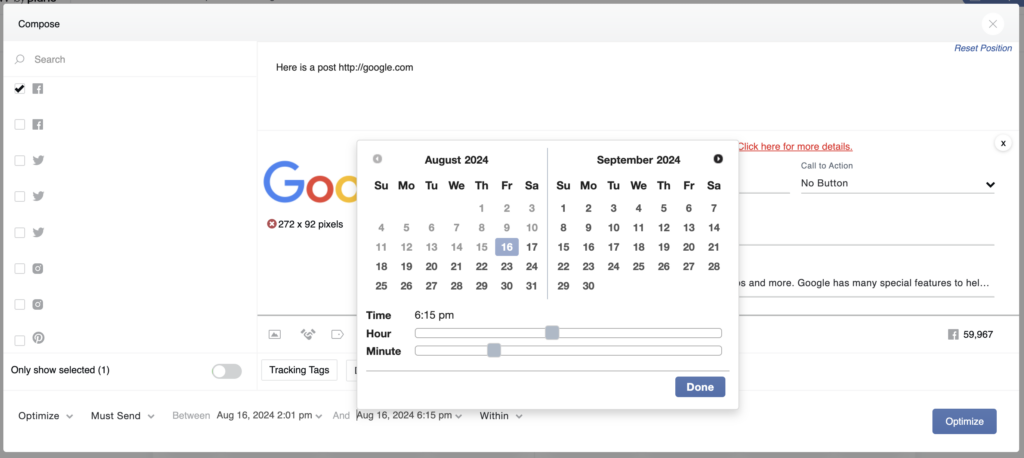
Optimize: this means that Socialflow’s algorithm will determine the exact timing for publishing the post based on your audience’s availability and topical interest to maximize engagement. However, you can enter a window of time in which you would prefer to publish the post (e.g., between 2pm and 6pm). You can also set a priority level on the message in the form of Can Send or Must Send.
-
Can Send - this is considered low priority and best for more evergreen content. Our system will look for the best time to publish the message, but in the event that we don’t see an optimal time or if you have too many messages competing to send, the system may choose to expire this lower priority message and send a more relevant message instead for better engagement.
Note: We recommend using Can Send on as much content as possible with longer time windows. Longer time periods mean more opportunity to find the right time to publish. However, Expired content is not deleted, it's simply moved from the queue to the Expired Column on the Listen page where you can choose to send back to the queue for another chance at publishing. -
Must Send - this is considered high priority and great for time sensitive content. Our system will look for the optimal time, but even if no optimal time is available in the window, our system will make sure the message is published by the end of the time window, no matter what.
Note: We recommend using Must Send sparingly and for short time windows. There is a risk with using Must Send that multiple messages can go out at the same time, IF the end of the time window is the same for multiple messages. For example, if 6 posts are all set to Must Send by 5pm, 2 or 3 could send at 5pm if there is not enough time in the day or too much content to possibly spread them out.
-
Publish: Time-sensitive messages or breaking news can be sent out immediately.
-
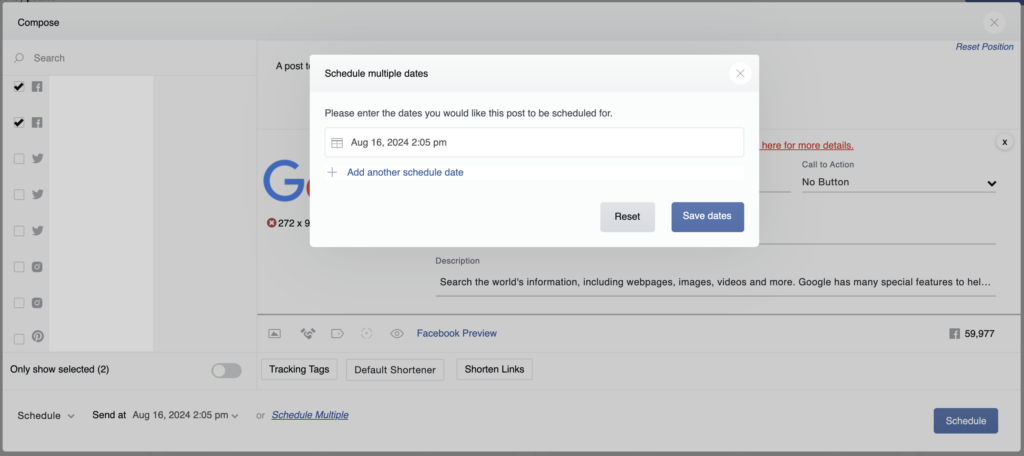
Schedule: For messages that need to go out at a specific date and time. We also offer a Schedule Multiple feature, allowing you to schedule the same post for multiple dates and times in one window.
-
Hold: If you’re not ready to publish a message, you can place it on Hold. Hold items wait in the queue for further editing and cannot publish. You will need to change the message to Optimize, Publish, or Schedule when you’re ready to publish it.
Note: Hold items can also expire if needed. You can set the Expire At date to make sure content doesn't wait around in the queue forever.
Queue Options
Once you’ve added messages to your queue pictured here on the left, there are editing and customization optionsavailable.
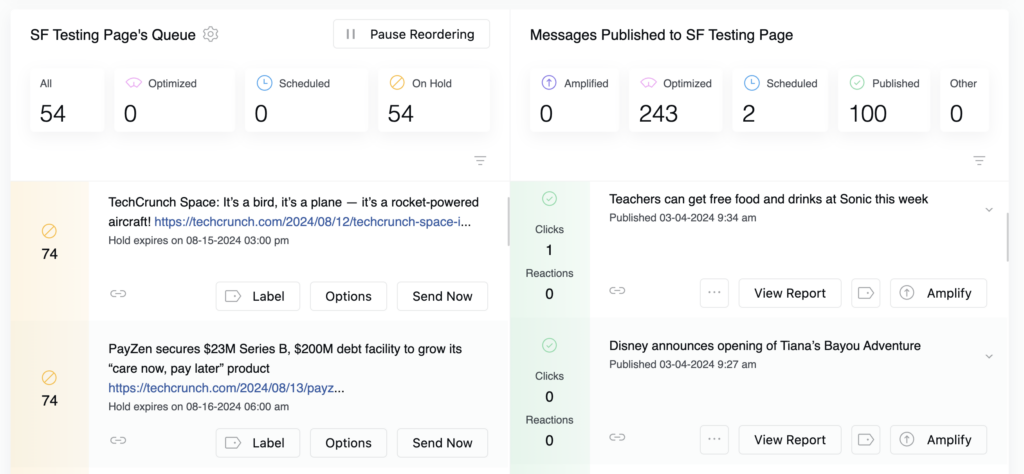
When you click on Options, you'll see the following in a menu:
Quick Edit: Allows you to quickly edit only the time window of the message or the publishing status, i.e. Optimized, Scheduled Or Hold.
Quick Duplicate: Quickly duplicates the message into the queue with the same text, copy, image or media but also opens a small window to add a different time frame and/or publishing status.
Edit: Opens the message in the Compose box where you can edit the copy, the image or media if any, and the timing and publishing status.
Duplicate: Once you click Edit, you’ll see you can duplicate content you want to send more than once. When you click Duplicate, it opens in the Compose box. This is useful for creating a new version of the same post or tweet for publishing later.
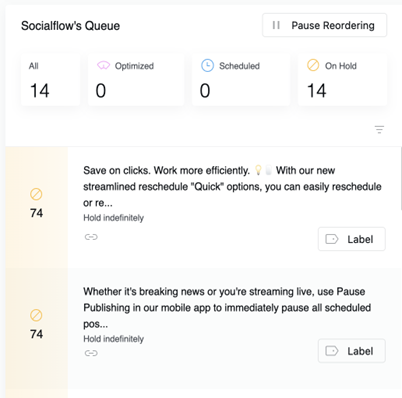
You'll also notice the Pause Reordering button on the upper right of the queue.
Pause Reordering: Since your content will be scored and ranked continually throughout the day, with your most relevant content always floating to the top by default, you can pause this action in order to focus on specific content when needed.
Searching & Filtering: By selecting filter in the queue, you can sort the content which is normally in score order by other criteria: Statuses, Sources (RSS feed name or bulk import file name), and most often used, the "Sort By" dropdown for date order.
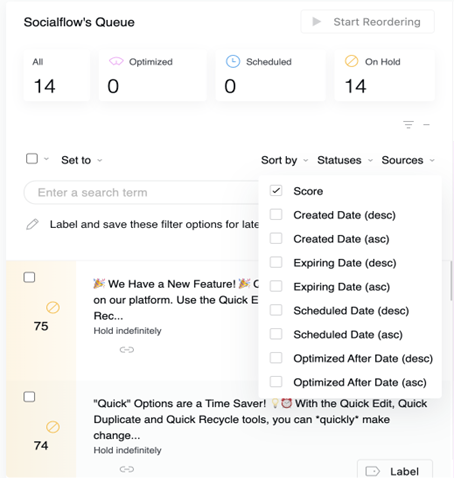
If you prefer to have your content always sorted by Date for example, you use the Label & Save option to make that sort order your default every time you log in to Socialflow.
Here’s how:
-
Navigate to the top of your Queue
-
Click on the + icon next to Filter.
-
These choose one of the following:
-
Sort By: Allows you to sort content by optimized date, scheduled date, creation date, expiration date or score (the default).
-
Search: Used to look for a particular keyword or phrase.
-
Sources: Shows which content source the content came from. You can isolate one feed or source at a time to view only those pieces of content.
-
Statuses: Groups the content based on how it is set to send out i.e.: Optimized, Schedule, or Hold. You can click the boxes at the top of the queue to filter these from view.
-
-
Click “Label and save these filter options for later…” and give this sort a name
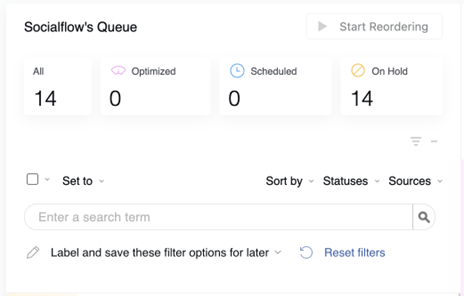
Pro Tip: You can also batch select using the checkbox next to Set To to change messages to optimize, hold, or even delete.
What to do when you have a social emergency...Pause Publishing
You can pause all publishing for a social account as needed. We made this possible for rare cases such as:
-
Breaking news and world events when you need to exercise extreme discretion about what you publish
-
Live publishing when all posts should be specific to the event taking place and you don’t want any interference from optimized or scheduled content
How Do I Pause Publishing?
There are two ways to pause publishing:
-
Navigate to Settings > Application > Social Accounts. Click the pencil icon next to the social account you want to pause. Under the Publishing Limits section you will find the button at the bottom right that says Pause publishing from queue.
-
A faster way to pause publishing is to click the gear icon near the top of your Queue on the Publish page. This is a short cut to the settings page for that specific social account. You can then pause publishing as you would above.
Note: Only admins in Socialflow can pause publishing.
What Happens When I Pause Publishing?
-
Content from your queue will stop publishing and there will be a screen overlay on the queue to ensure any team member who logs in will be informed.
-
All optimized and scheduled messages from any source, added manually or from feeds, with any publish setting will NOT be sent. As long as your queue is paused, all messages that are supposed to publish during that paused time, will be marked as ‘Failed.’
-
You can still create a message and publish it immediately from the Compose box, if needed while the queue is on pause.
-
Once you resume regular queue publishing, the messages that failed to publish will appear in red at the top of your queue. You will need to edit the status of each message in order for them to be considered again for publishing or you may delete them.
Published messages
As well as customizable options for scheduled and upcoming content, there are also ways to make the most of the messages you’ve already published.
Searching for Published Content
Using the Filter drop down, you can access search options like Classic Search (or the default search) as well as enhanced search options like Post Editor, Link, or Label. Here is a complete list of options:
-
Post Message
-
Post Title
-
Post Description
-
Link
-
Post Editor (email address of a user who edited the post
-
Post Publisher (email address of the user who published the post)
-
Post Creator (email address of the user who created the post)
-
Label
-
Post Type (video, link, or text posts)
-
Published Status
-
IAB Content Category (Category of linked-to content by IAB categorization)
-
Media Topics Category (Category of linked-to content by Media Topics categorization)
-
Keywords (keywords from the linked-to content)
-
Service Message ID
For more information on how to search, see our video tutorial.
Amplifying Content
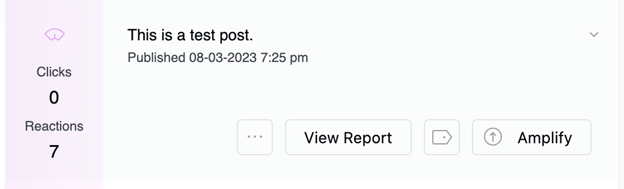
The Amplify button will appear on all of your published messages on the main Publish page. This button may display in orange any time a message is performing above average in terms of
engagement. You can click the amplify button to connect your ads account and boost or promote the post, adding budget in order for the message to reach a larger audience.
Recycling Content
You might want to put evergreen content or content that has performed well back in your Queue.
Here’s how:
-
Navigate to: Publish Page and view your Messages Published Timeline
-
Click the expand button on the piece of content in your Timeline, then click the recycle icon to create a duplicate version back in the Compose box.
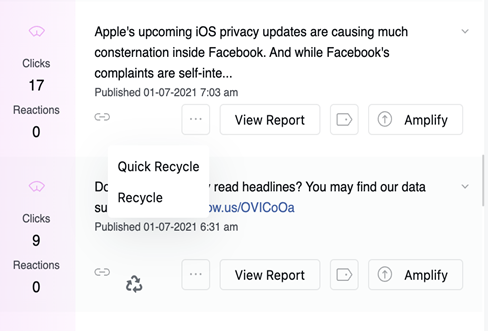
Likewise, you can duplicate from the queue by clicking Options. This will place a copy of the message back in the compose box and you can send the message out again or from a different social account.
You can also recycle in bulk by using the Filter drop down and selecting multiple messages. Please note, because of 𝕏’s new policy, you will not be able to recycle tweets to another 𝕏 handle in bulk.