
Granting access gives users access to a resource without a purchase, for complimentary subscriptions, customer service goodwill, or a group of subscribers you are migrating in. Go to Users → Grant Access, or use the grant access icon while viewing a user list or a single profile.
Choose the resources and an expiration date, or set the access never to expire, then identify the users one of three ways: upload a newline-delimited .txt file of email addresses, type them in, or select them from a user list before you start.
How to Grant Access
Go to Users→Grant Access or click the grant access icon in the upper right corner when viewing a list of users or an individual user profile. That will bring up this screen:
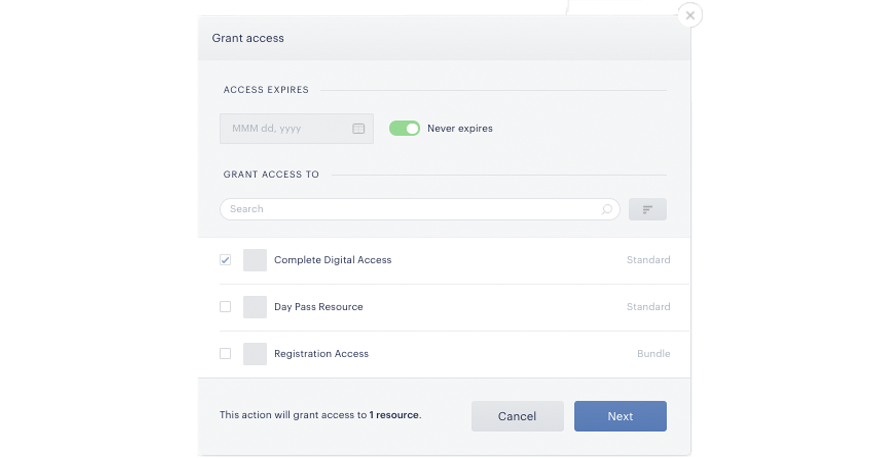
Simply select which resource(s) you want to grant access to, as well as the expiration date for when that access should expire. If you never want the access to expire, toggle on “Never expires.” Then click “Next” to proceed to the next screen, which looks like this:
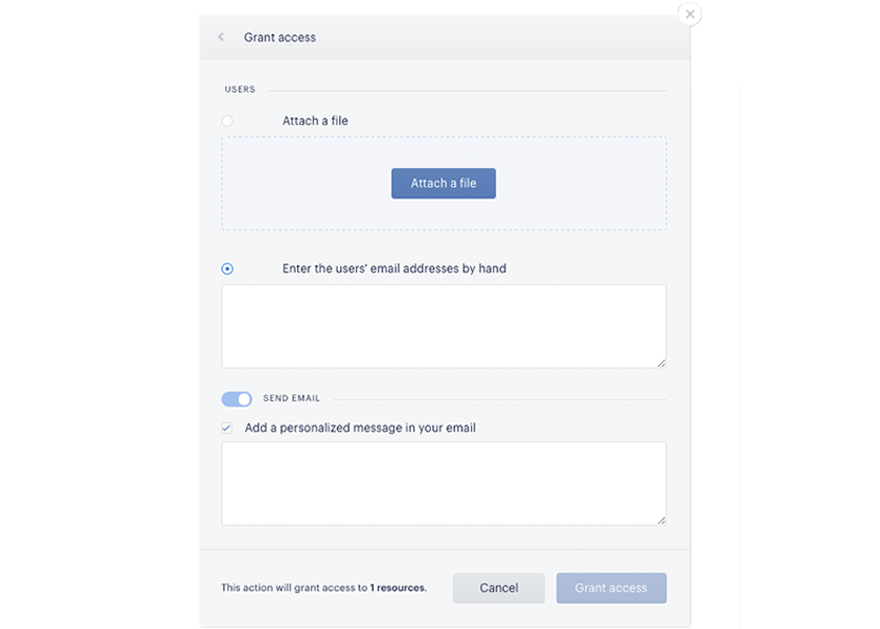
There are three ways to grant access to a resource: by uploading a list of email addresses, entering email addresses by hand, or selecting users from the users list prior to clicking "grant access."
Please note that for the first 2 options, the maximum number of rows that can be imported in one go is 5000. Although, for better tracking purposes, we recommend dividing up the users into smaller batches.
If Double opt-in is enabled, publishers cannot grant access to users until their accounts have been confirmed.
Uploading email addresses: If you are uploading a list of email addresses, ensure that the list is a newline delimited .txt file and that each email address is on its own line in a single column.
Entering emails by hand: When entering email addresses by hand, you can separate emails by a comma or put each email on its own line within the text box.
Selecting users from a users list: If you have selected a list of users prior to clicking "grant access," the emails of those users will automatically be populated in the "enter users' email addresses by hand" field. You can select an individual user by clicking the grant access button when viewing that user's individual profile. Or you can select multiple users by clicking the check boxes next to their profiles when viewing a list of users. You can also select an entire group of users at once by checking the "All results" box at the top of a list of users. This is particularly useful when you've created a select list of users with Piano's Mine Users tool.
Sending emails after granting access: By default, no email will be sent to users after access is granted. To send an email to users, toggle on “Send email.” In order to send an email, you will need to first configure the "free access granted" email notification template by going to Manage→Email Manager. You also have the option to add a personalized message to be included in the grant access email.