With the Google Ads connector, you can leverage first-party data, behavioral data, and extended prediction data from your site to target ads under Google Ads conditions. You can also use Piano Audience segments to display ads on YouTube or across the Google Ad network.
This integration lets you share a Piano Audience segment ID with Google Ads. To target users based on a segment, you’ll first need to create a segment-ID-based user list in Google Ads. The process involves getting a remarketing tag, customizing it, and then building a user list (targeting condition) using your Piano Audience segment.
Configuring Google Ads
-
Get the remarketing tag
-
Log in to the Google Ads admin screen.
-
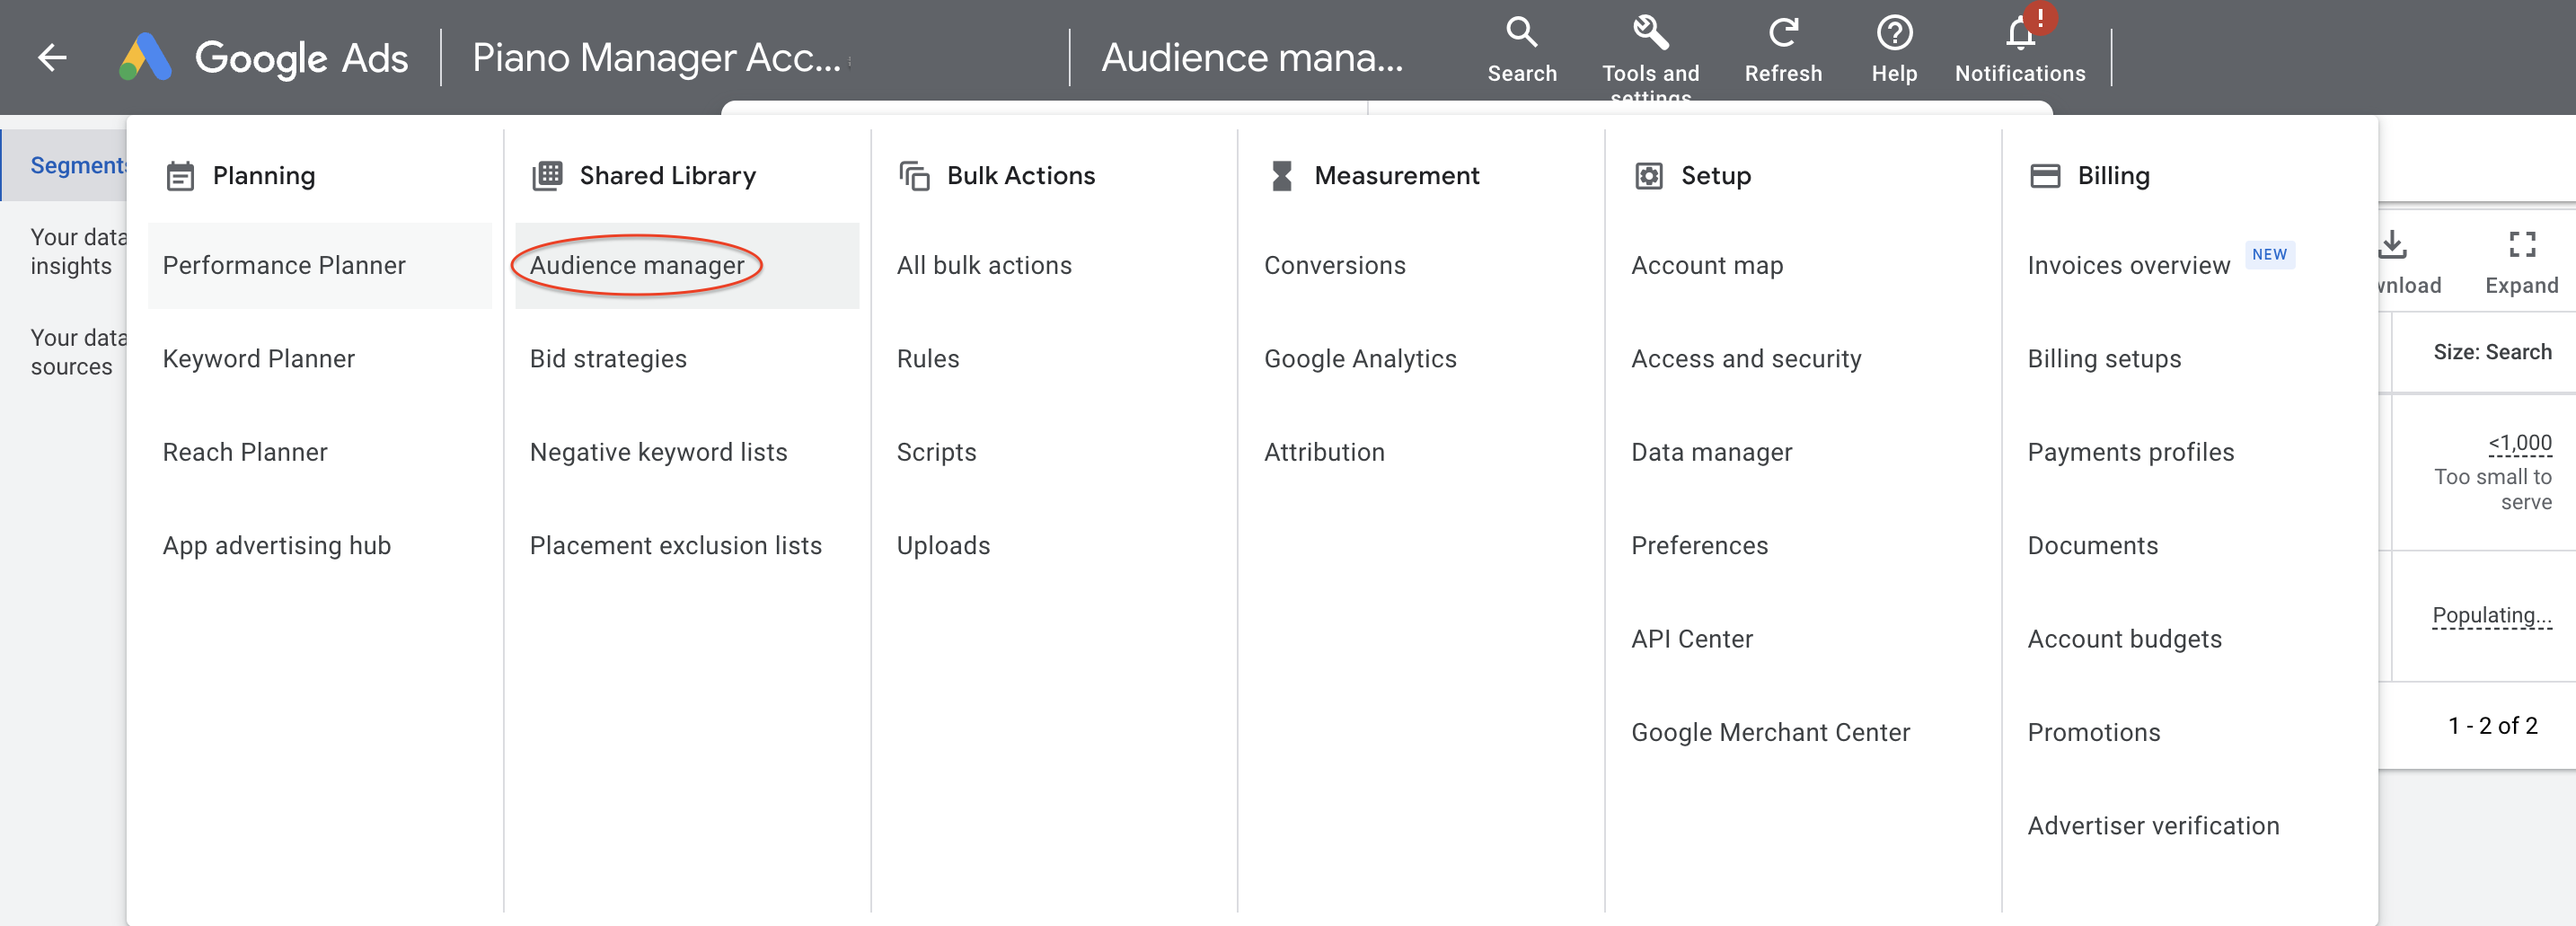
Click Tools and Settings in the top navigation bar.
-
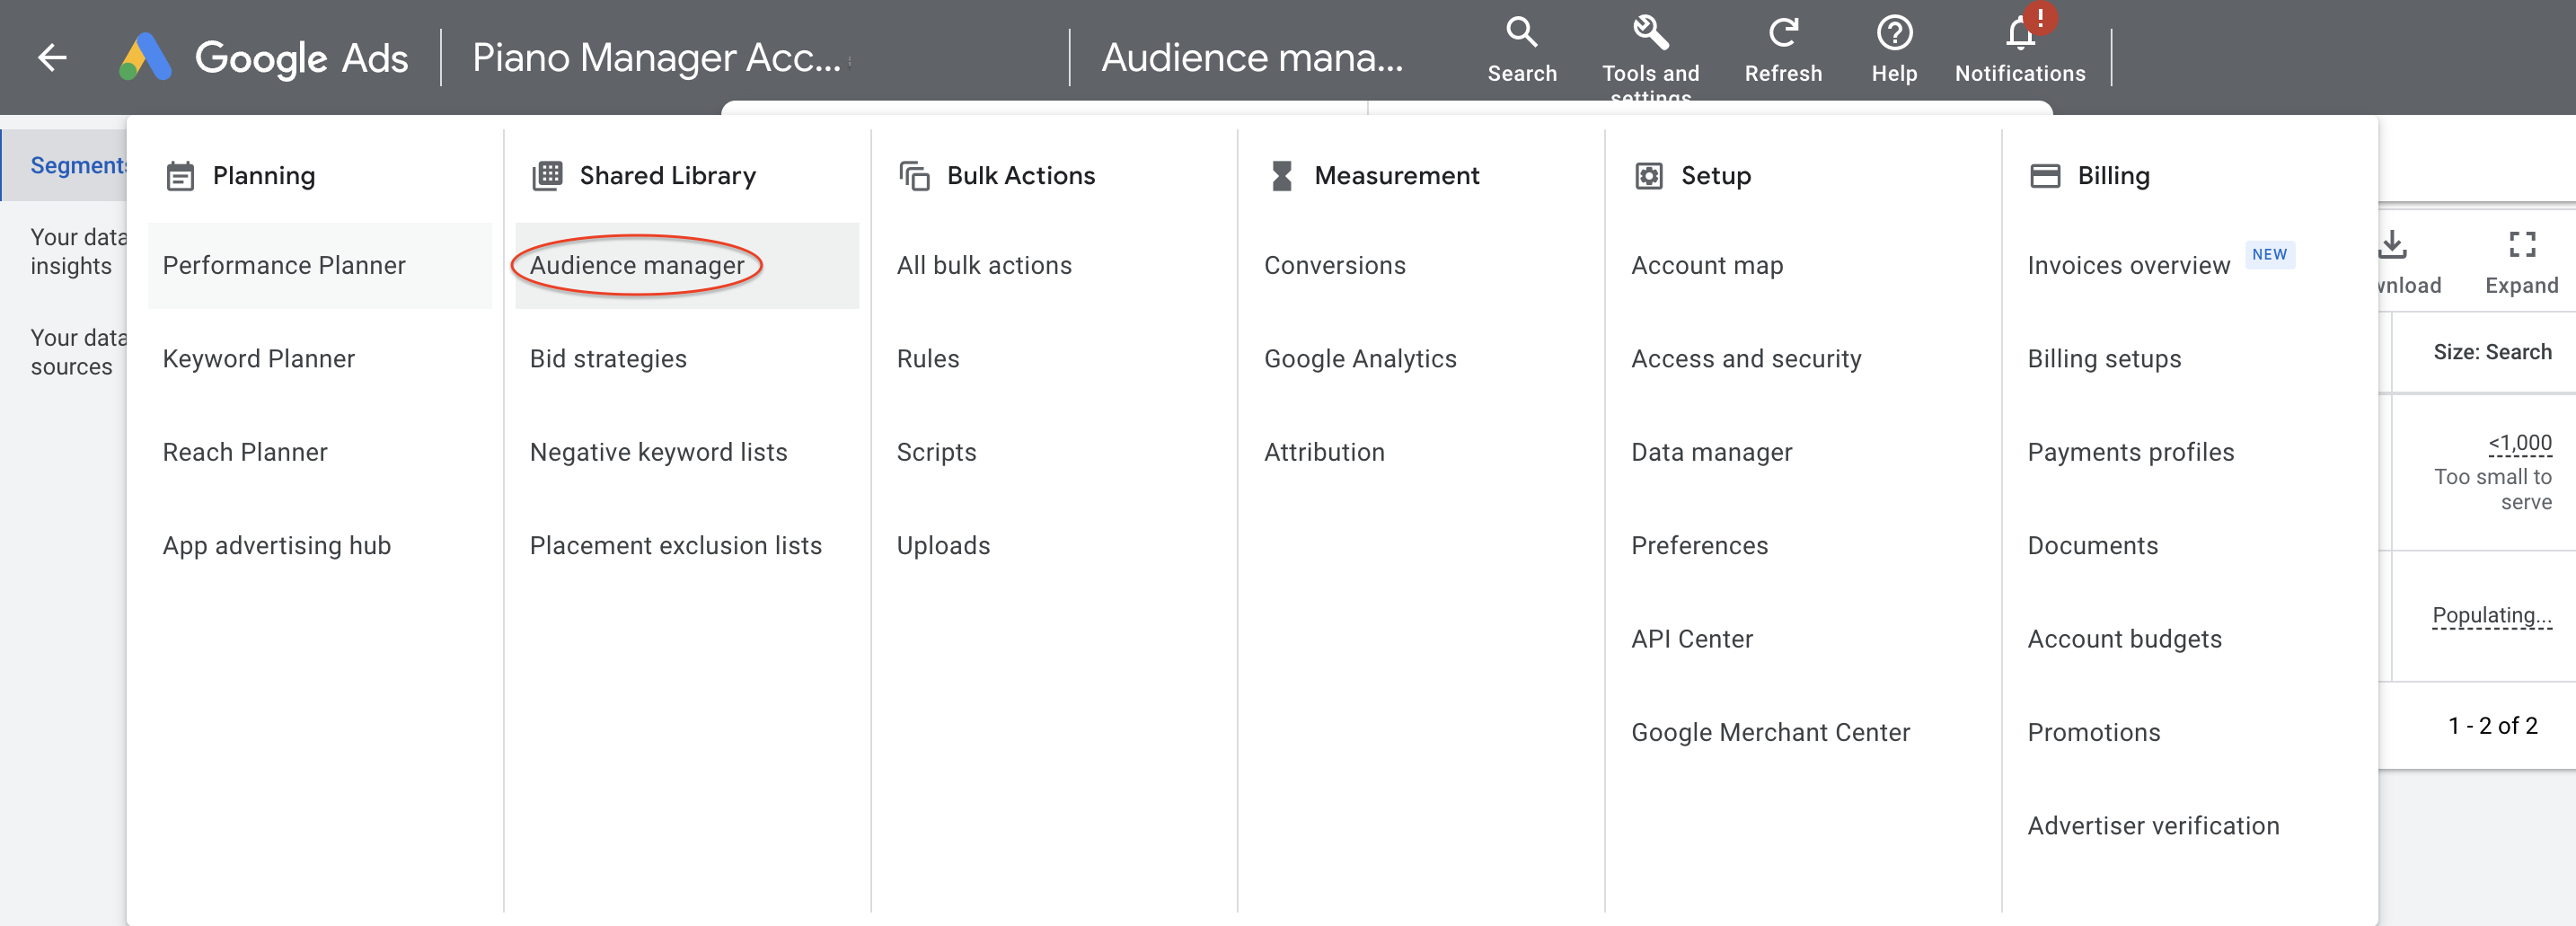
Click Audience Manager in Shared Library.
-
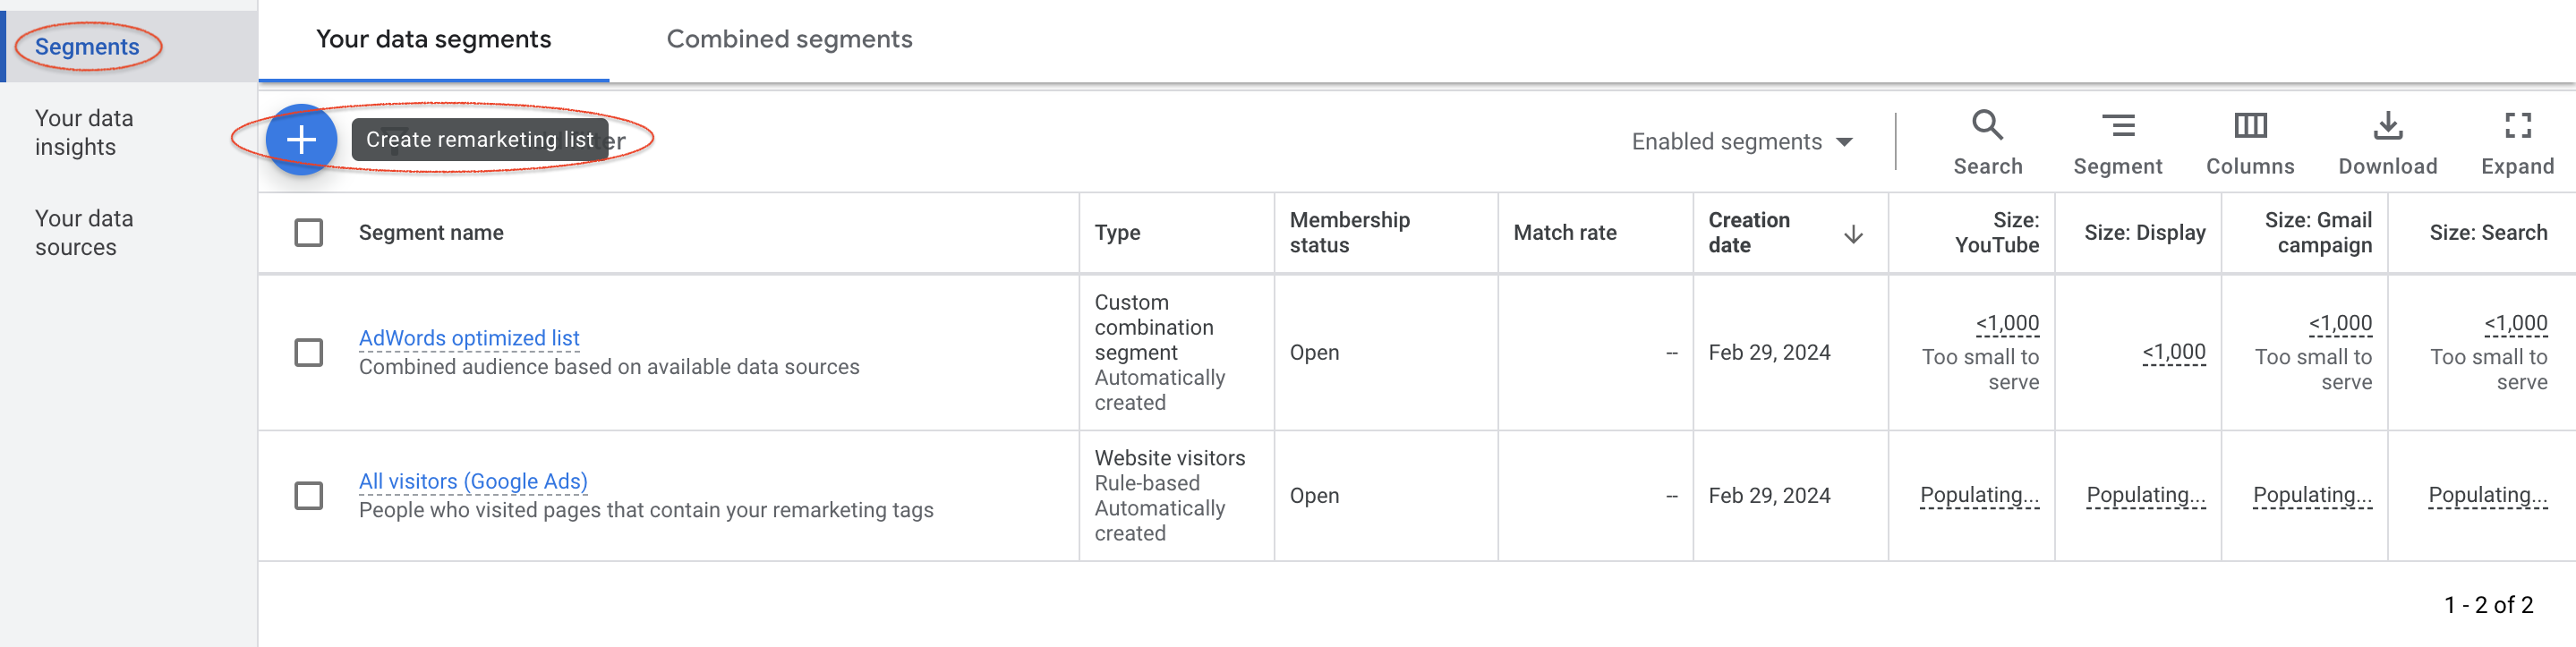
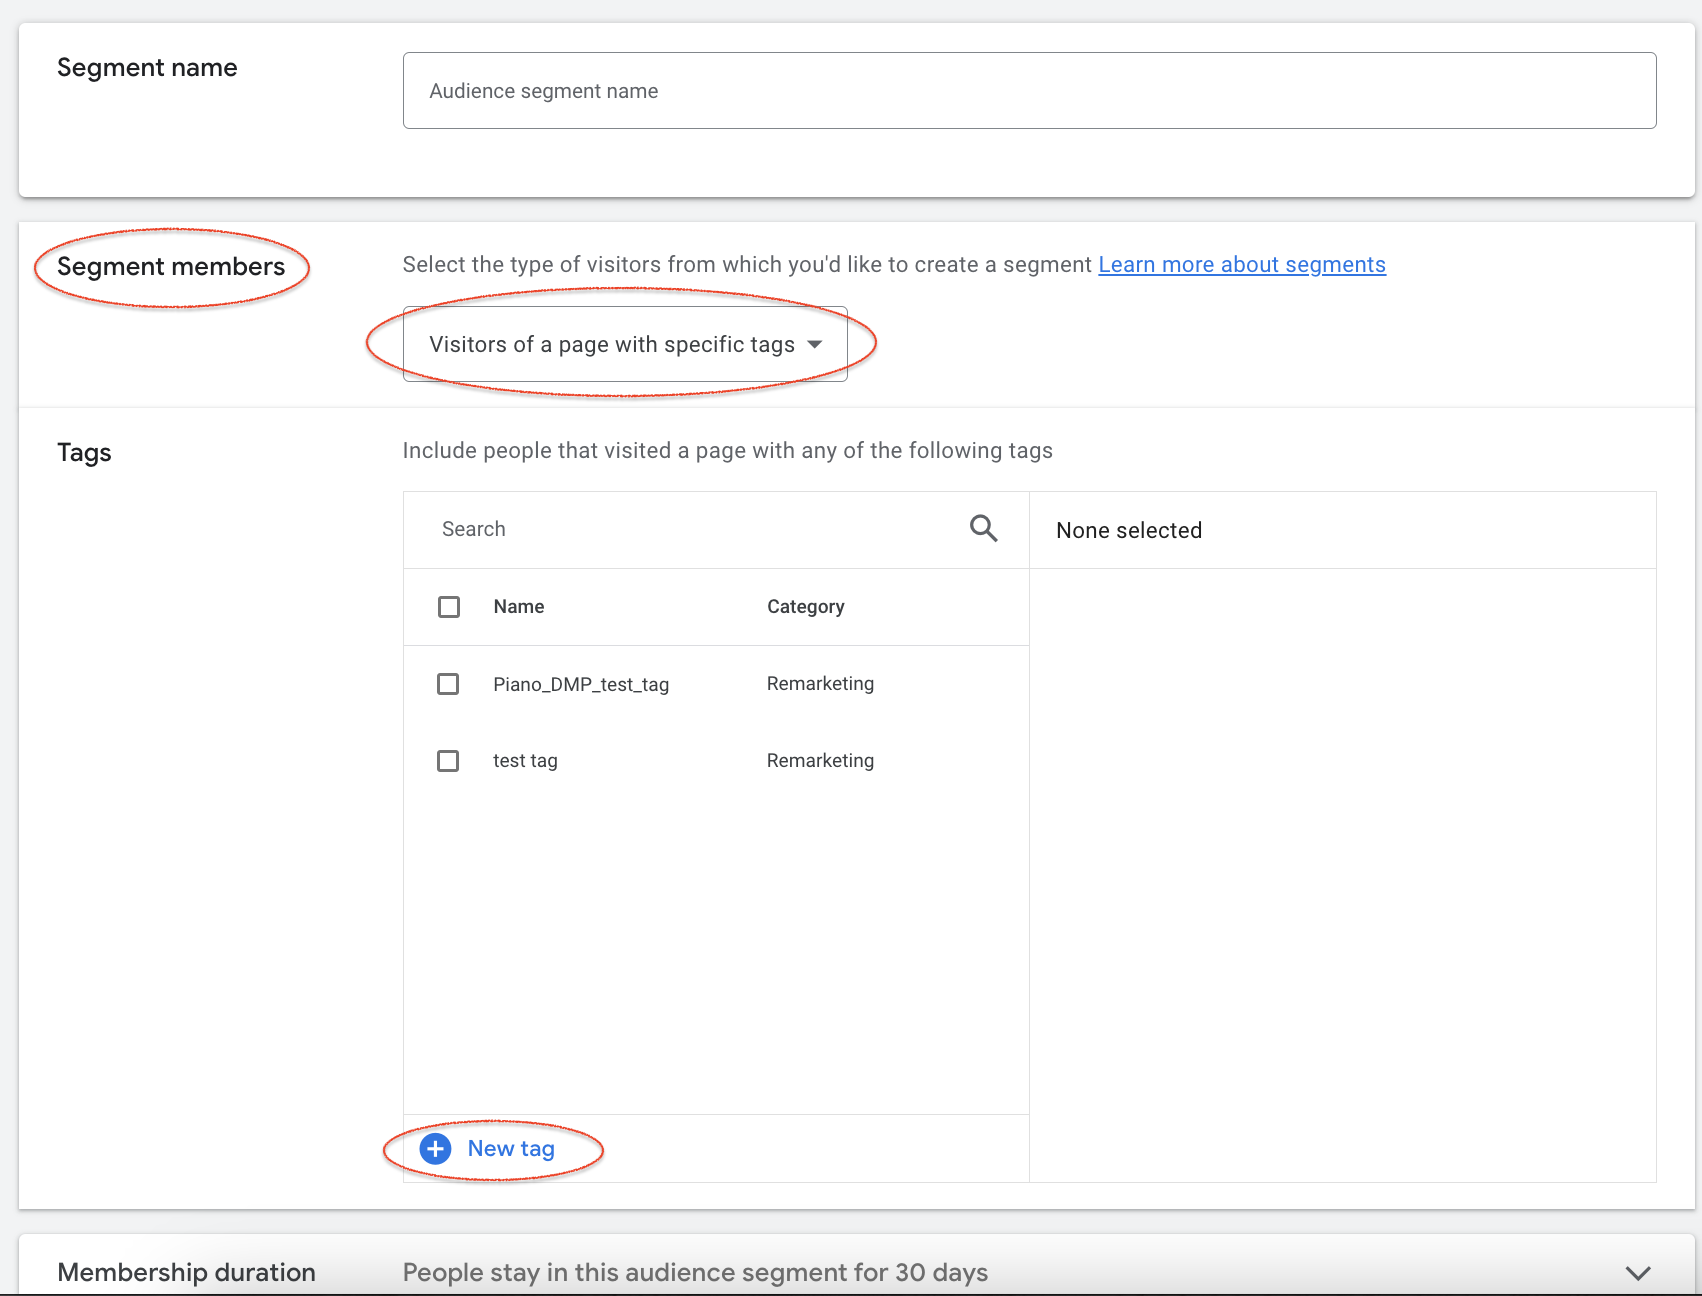
Click Segments on the left side of the screen and then click Create remarketing list bottom . Click on the [bolder] item in the list.
-
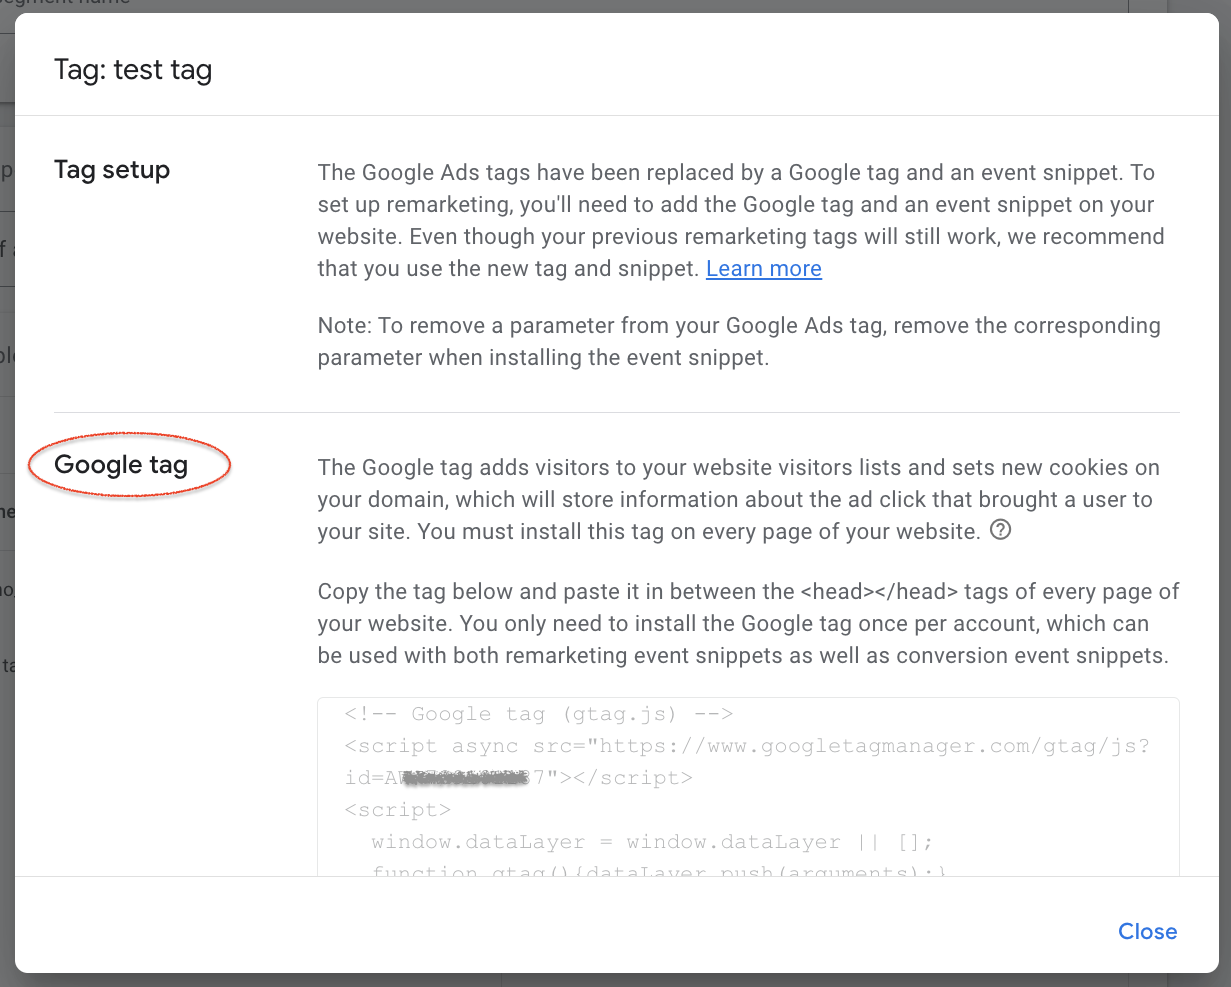
Click on New tag button. You can see the tags for the Google tag and event snippet.
-
Check the Google tag section.
-
The snippet tag below will be customized later.
-
Individual IDs are automatically assigned to XXXXXXXXX locations.
Google tag sample
<!-- Google tag (gtag.js) -->
<script async src="https://www.googletagmanager.com/gtag/js?id=AW-XXXXXXXXX"></script>
<script>
  window.dataLayer = window.dataLayer || [];
  function gtag(){dataLayer.push(arguments);}
  gtag('js', new Date());

  gtag('config', 'AW-XXXXXXXXX');
</script>
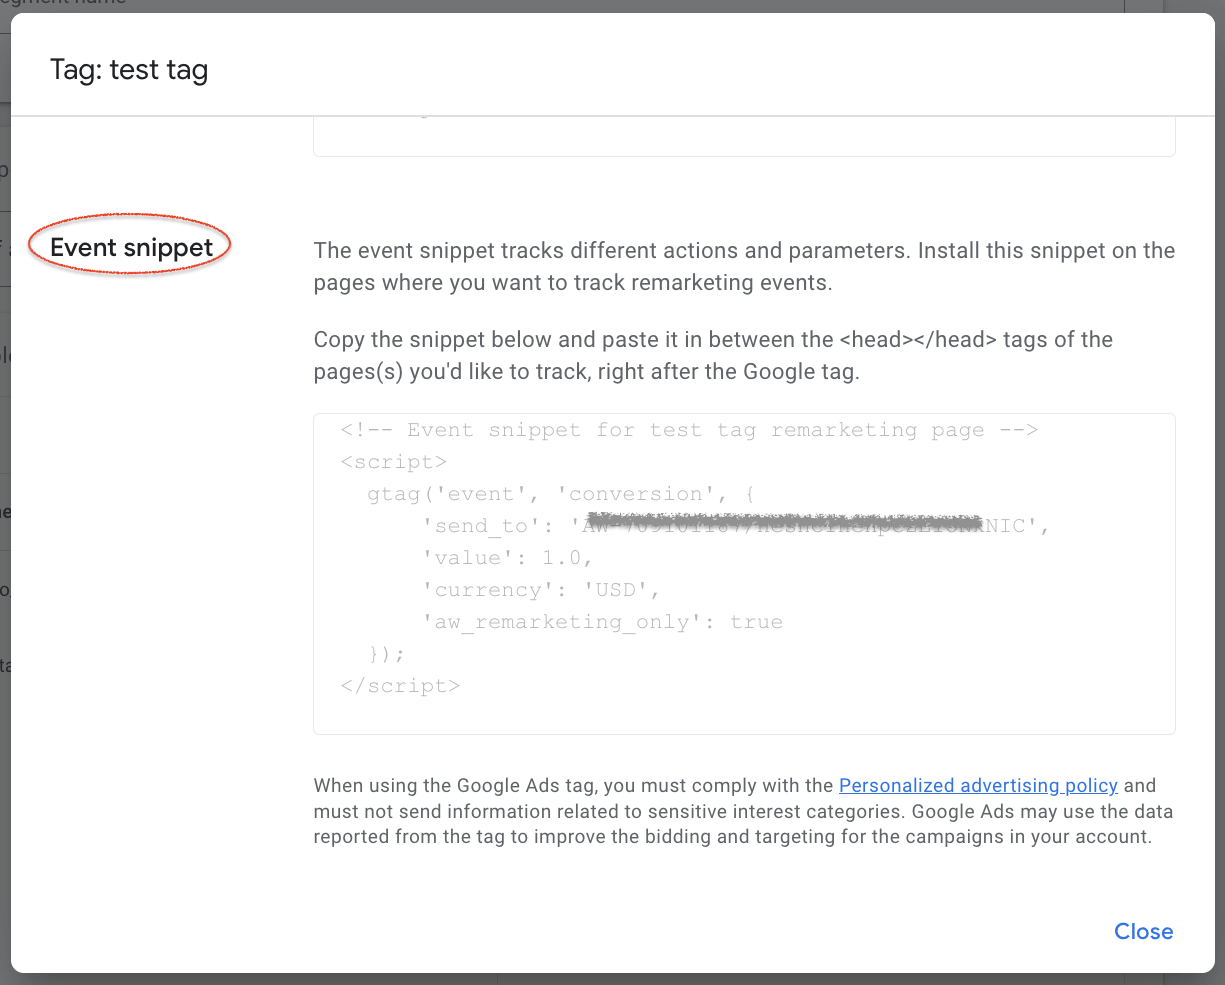
Event snippet samples
<script>
  gtag('event', 'page_view', {
    'send_to': 'AW-XXXXXXXXX',
    'dynx_itemid': 'replace with value',
    'dynx_pagetype': 'replace with value'
  });
</script>
<!-- Event snippet for test tag remarketing page -->
<script>
  gtag('event', 'conversion', {
      'send_to': 'AW-XXXXXXXXX/XXXXXXXXXXXXXXXXXXXX',
      'value': 1.0,
      'currency': 'USD',
      'aw_remarketing_only': true
  });
</script>
-
Paste the Google tag between the <head> and </ head> tags (as described on the screen above).
-
Customize the tag
To customize the Google tag for passing segment IDs, start by creating a PersisterQuery to execute the segment lookup. This assumes the Piano script is already installed on the page where the Google tag will be added.
When using short IDs, include the additional parameter "segmentFormat": "short_ids" in the <a href="https://docs.piano.io/audience-api-segment-lookup/" rel="noopener" target="_blank">/segment/lookup</a> API call for YOURCONFIGUREDPERSISTEDID.
Once you’ve obtained the Google tag, place it in the <head> section of your page. Then, customize the event snippet tag and add it below the Google tag in the <head> section. When passing segment IDs as parameters to Google, keep in mind Google’s 99-character limit for custom data. To stay within this limit, we strongly recommend using the shortIds option when requesting segments—use these shorter IDs to pass to Google.
For clients with many segments, we also suggest using the candidateSegments parameter in your segment request. Include a list of your preferred segments here, and our segment lookup will only check those, reducing the number of segments returned by the API. This helps ensure you stay within Google’s 99-character limit for custom data, which can easily be exceeded without this filter, even when using shortIds.
Google tag example
<script async src="https://www.googletagmanager.com/gtag/js?id=AW-XXXXXXXXX"></script>

<script>
  window.dataLayer = window.dataLayer || [];
  function gtag() {dataLayer.push(arguments);}
  gtag('js', new Date());
  gtag('config', 'AW-XXXXXXXXX');
</script>
Customized example
<script>
  var cX = cX || {}; cX.callQueue = cX.callQueue || [];
  cX.callQueue.push(['getSegments', {
      persistedQueryId: 'YOURCONFIGUREDPERSISTEDID',
      callback: function(segments) {
         // Filter out segments with type 'contextual' and extract shortIds
         const filteredSegmentIds = segments
            .filter(segment => segment.type !== 'contextual')
            .map(segment => segment.shortId);

         gtag('event', 'page_view', {
            'send_to': 'AW-XXXXXXXXX',
            'custom_parameter': filteredSegmentIds,
            'aw_remarketing_only': true
         });
      }
  }, {
     candidateSegmentIds: ["<segmentId1>", "<segmentId2>", "<...>"]
  }]);
</script>
See below for a description of the Google Ads remarketing tags.
-
Standard Google advertising remarketing https://support.google.com/tagmanager/answer/6106960?hl=en
-
Dynamic remarketing of Google Ads https://support.google.com/tagmanager/answer/6106009?hl=en
If you would like to get conversions via event snippet tag, you'll need to add the description separately.
-
Create a retargeting list using Piano Audience segment
-
Log in to the Google Ads admin screen.
-
Click Tools and Settings (spanner icon) in the top navigation bar.
-
Click Audience manager in Shared library.
-
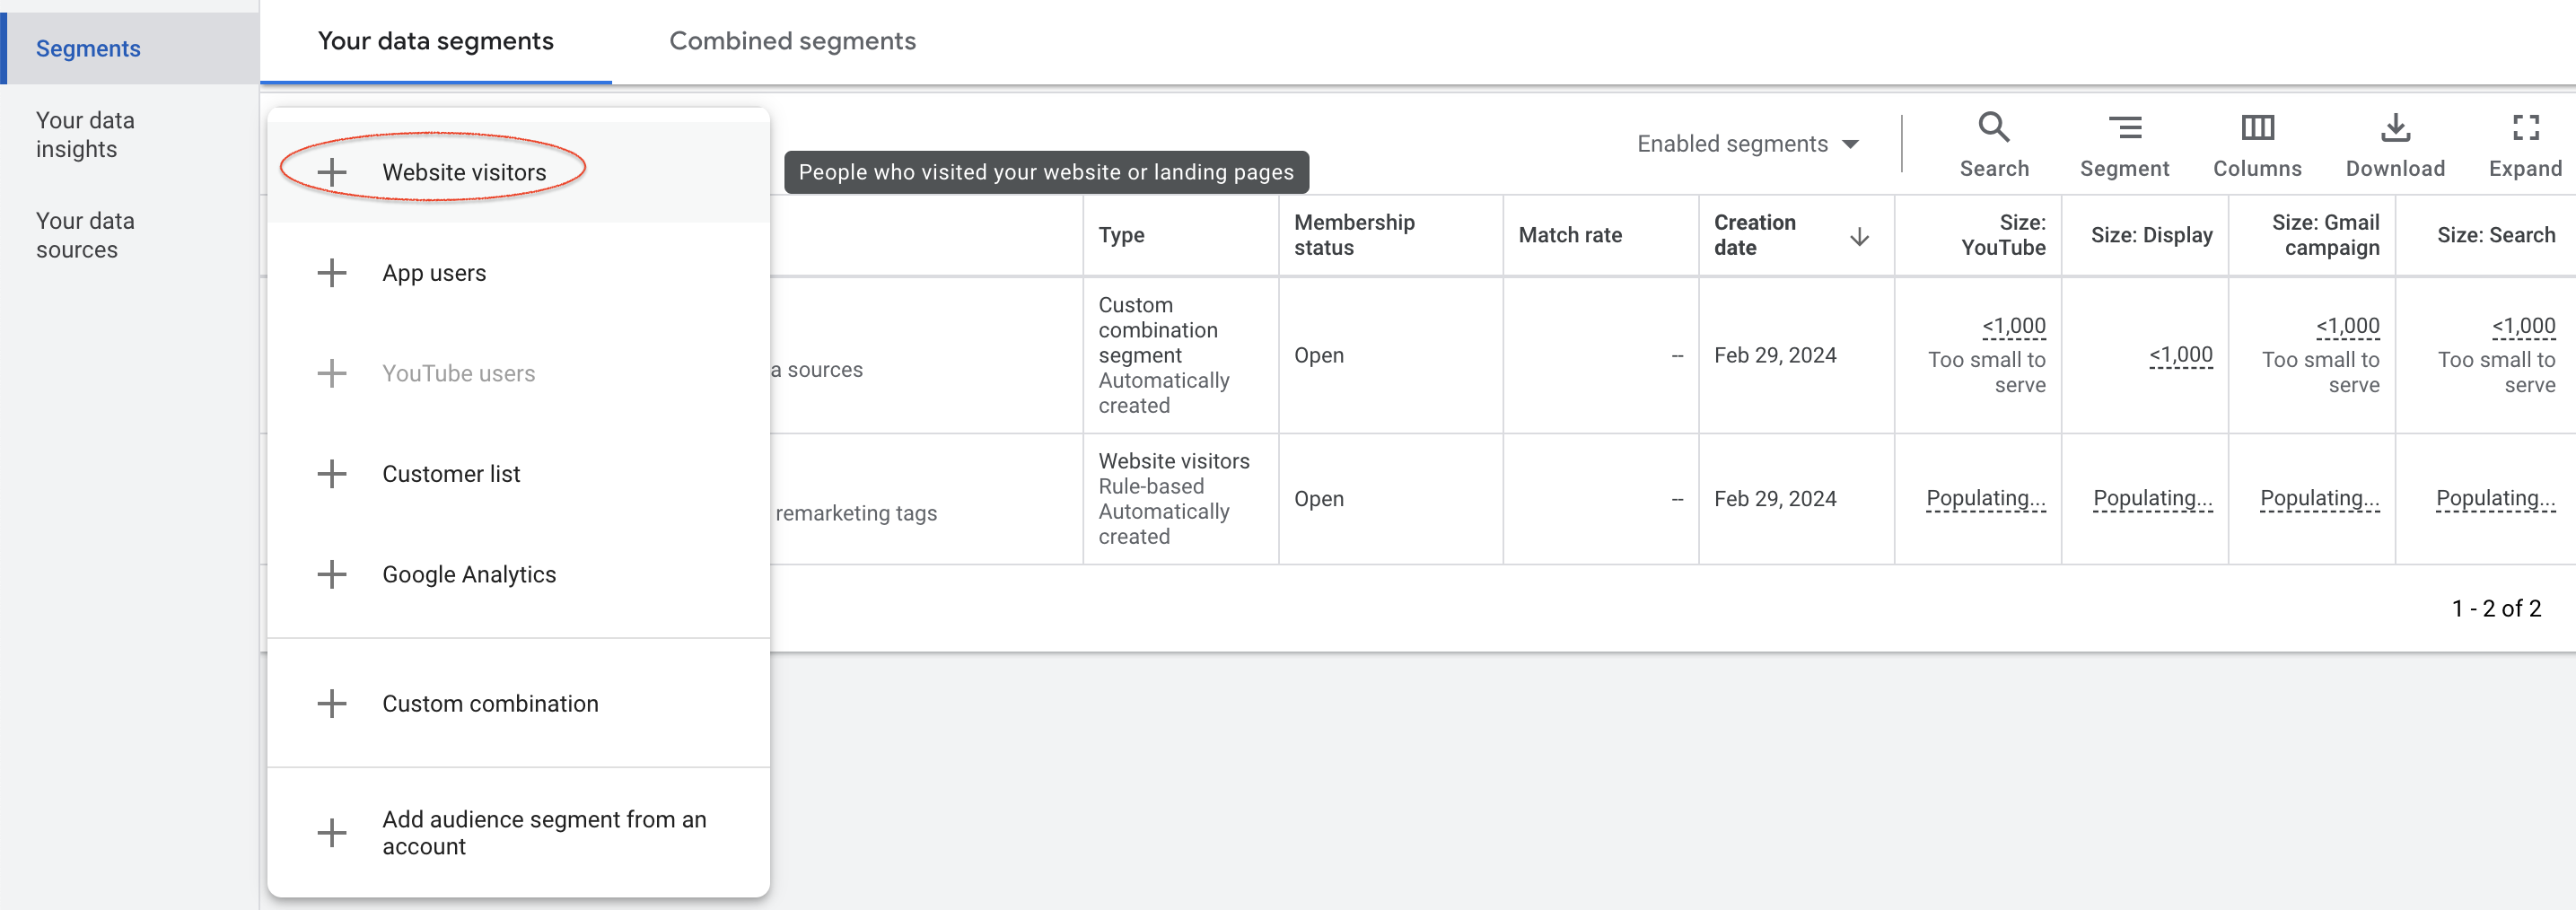
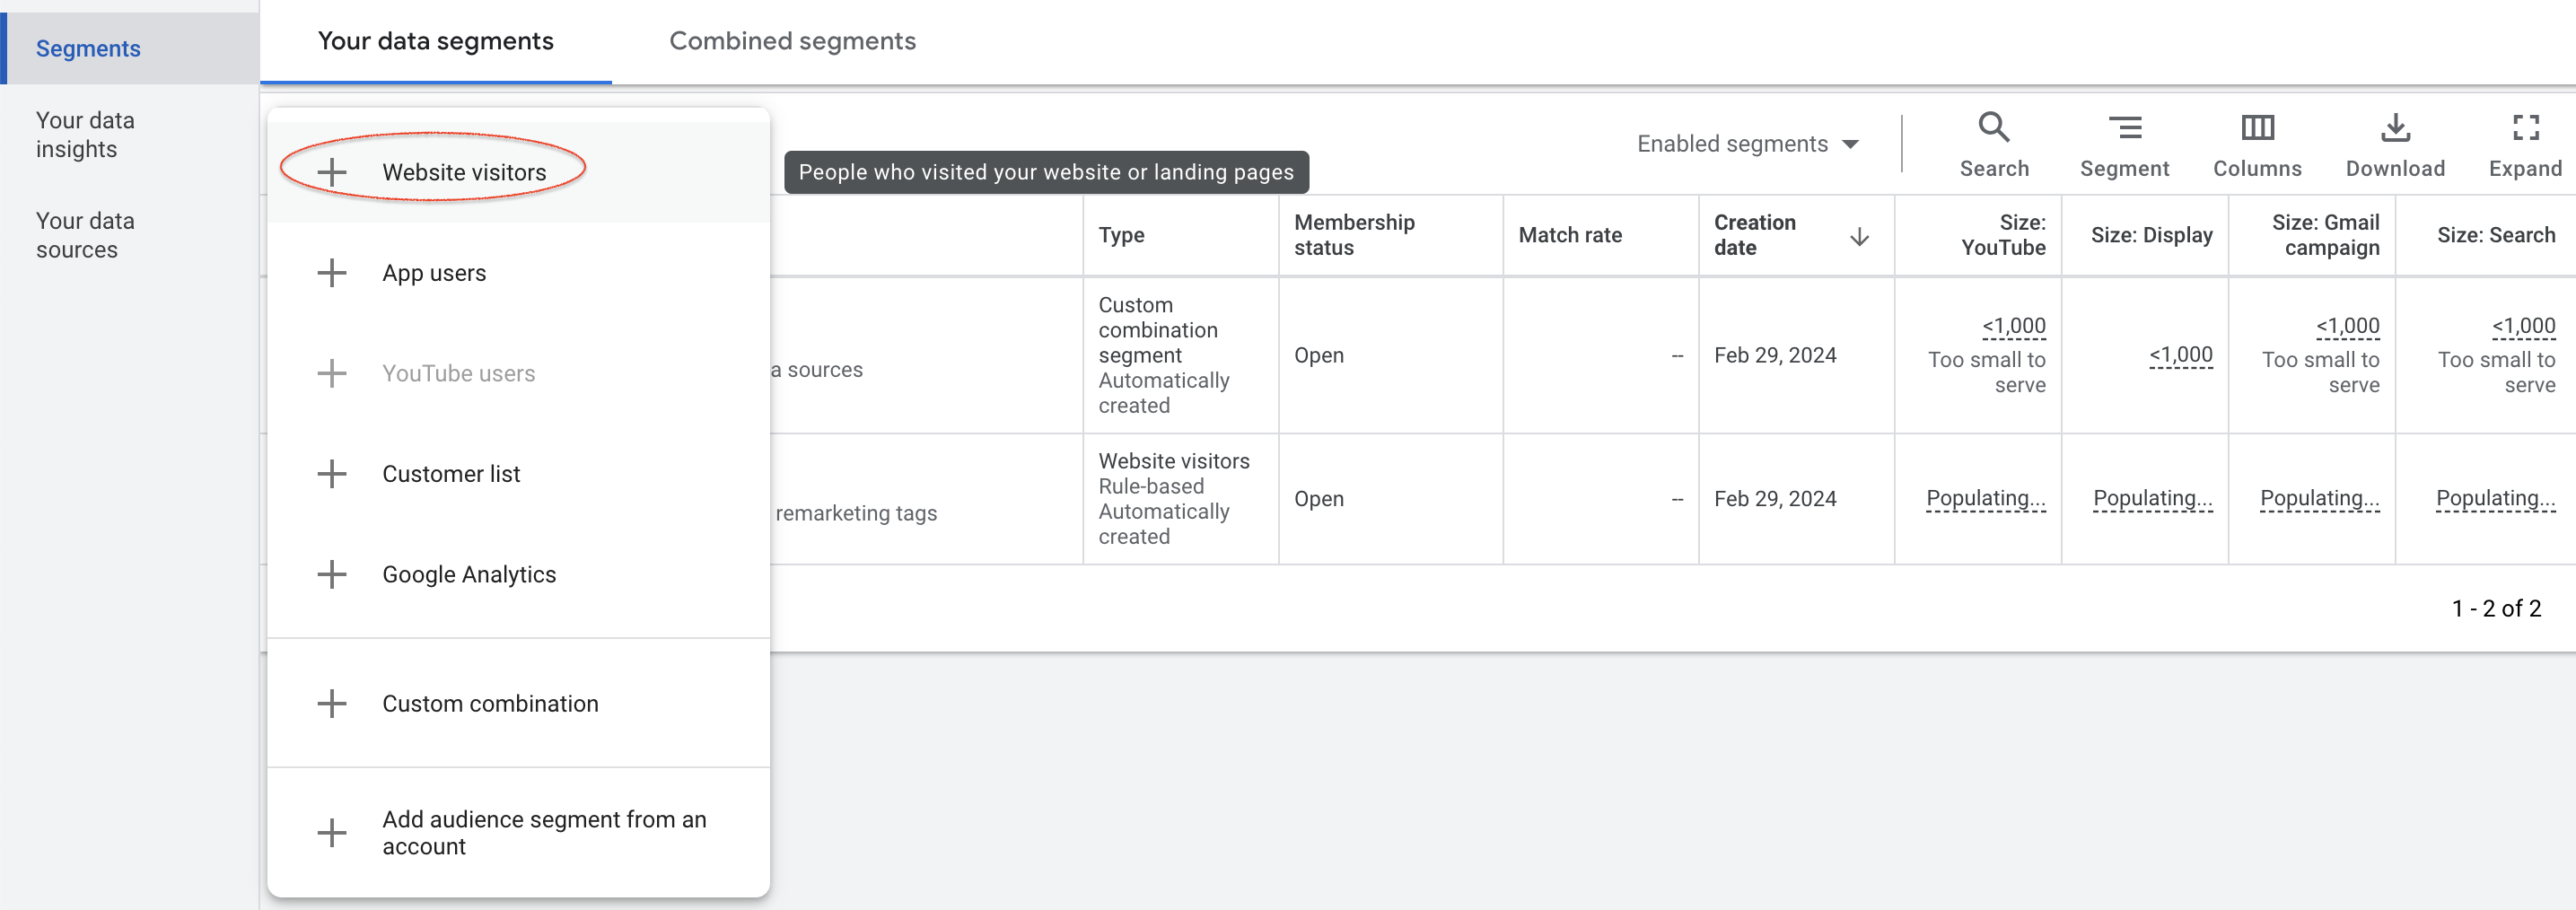
Click the "+" mark in the audience list.
-
Click Website visitors.
-
Select the key name (custom parameter that were set up in the Audience connection, for example "piano_short" in the screenshot below) specified in the remarketing tag in Visit page.
Specify segment ID to target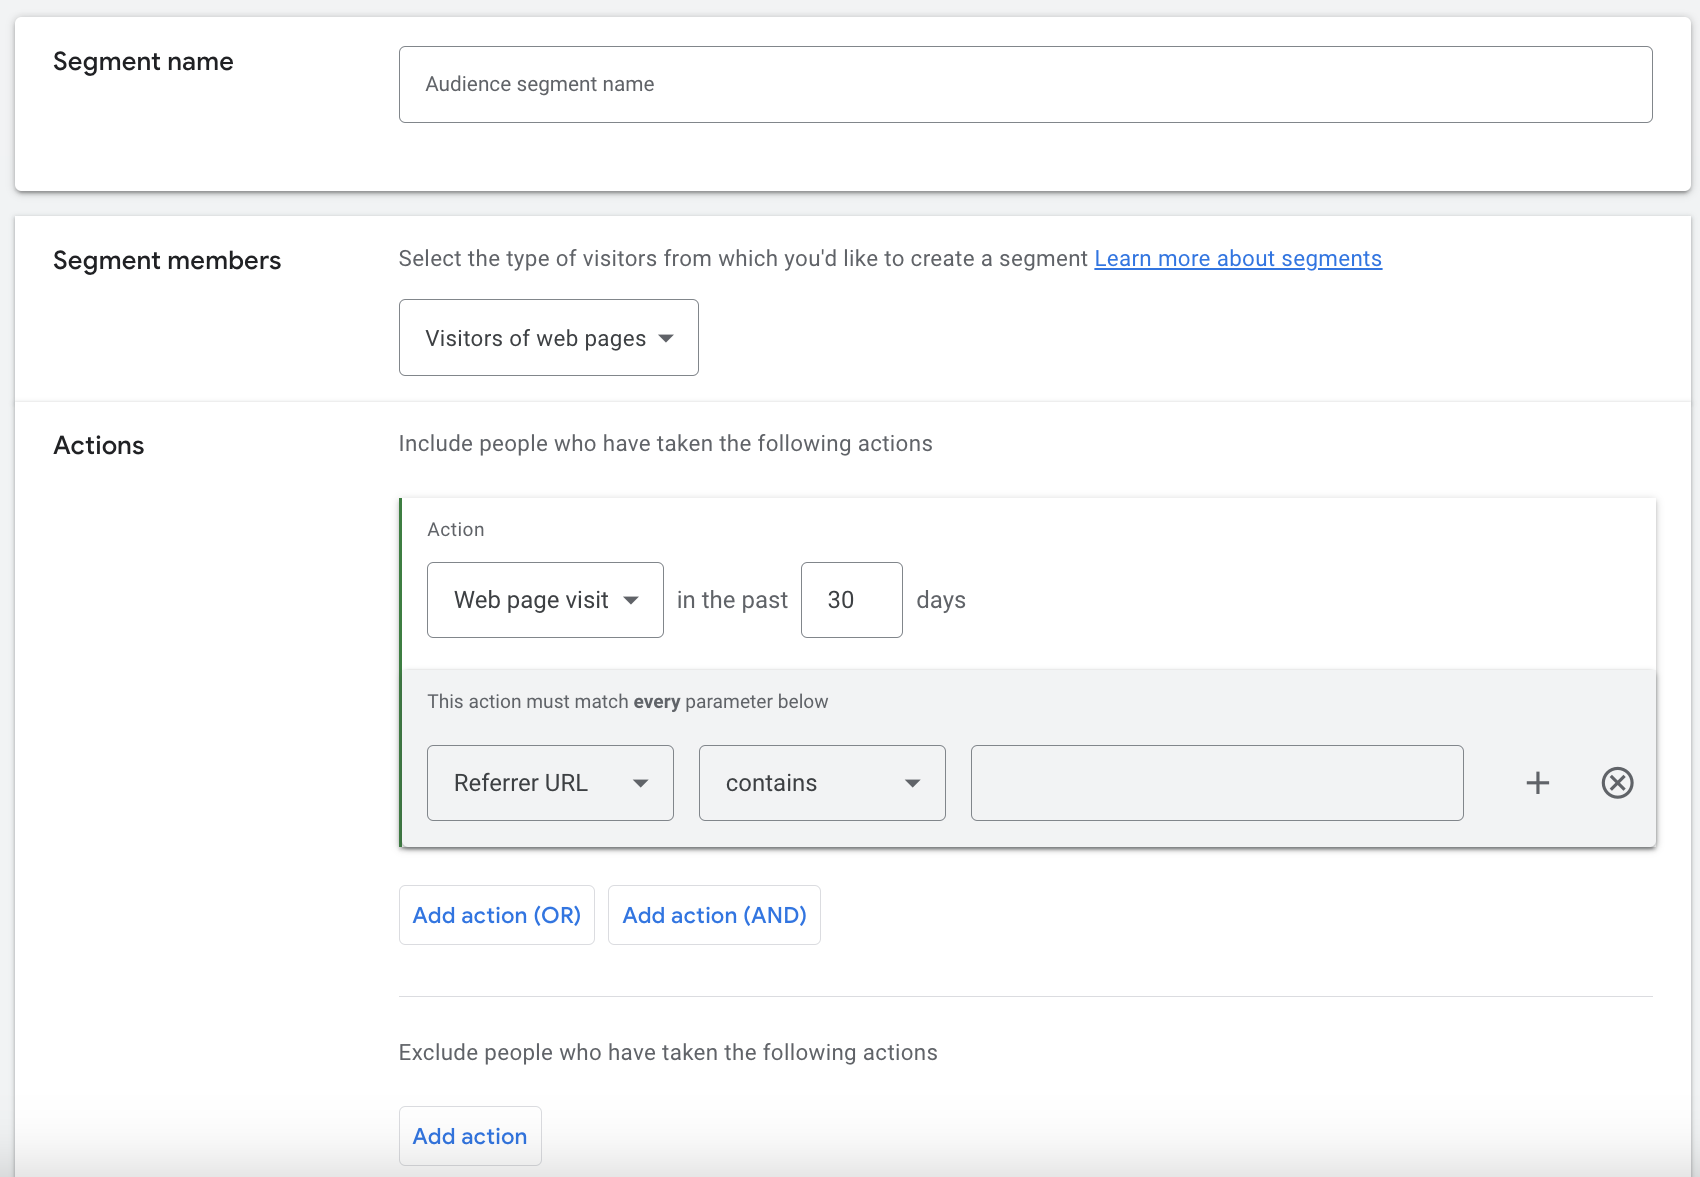
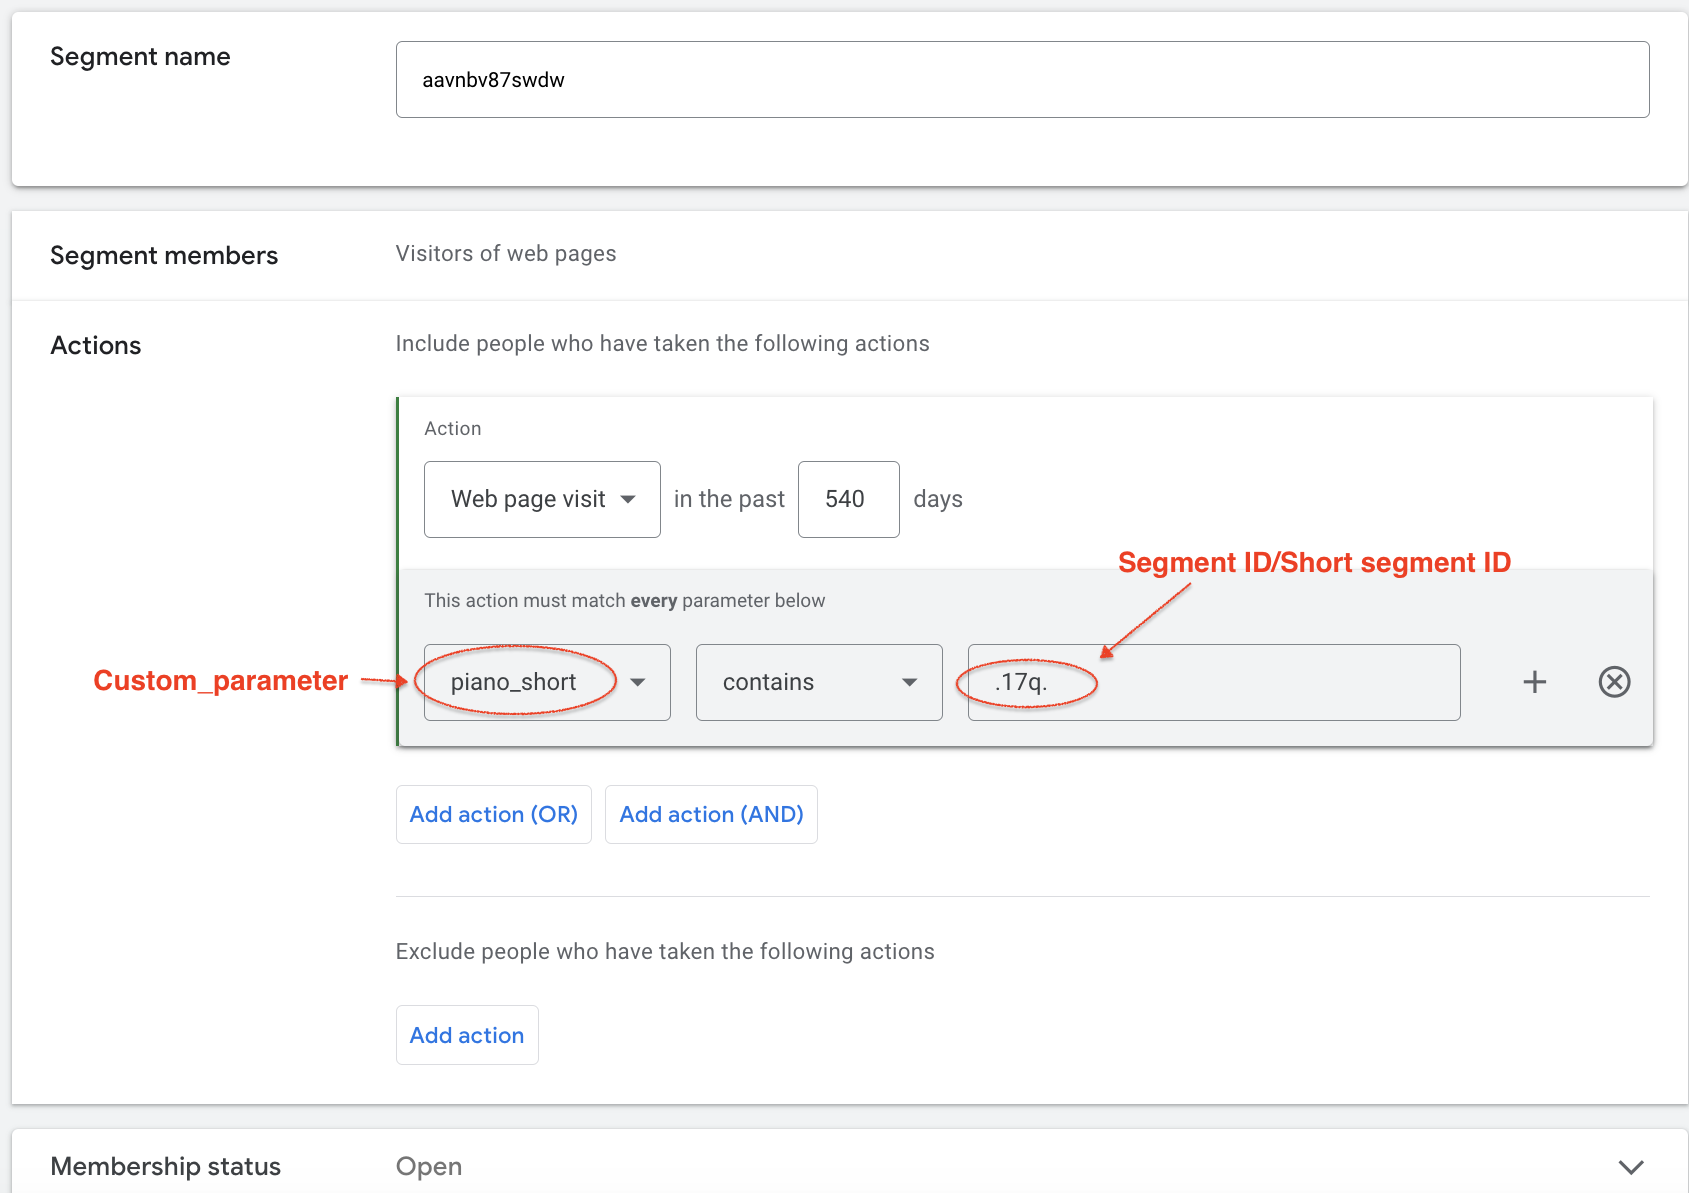
Custom parameters set in the tag will be available for screen selection the day after the page with the tag is accessed.
(Until then, you can only select the URL, the referrer URL, and the items set in the Google ad tag before this date).
7. Enter the audience name, any period, and description, and click the Create segment button.
Due to the specifications of Google Ads, it may take several days to several weeks after creating an audience to reach the predicted value and to actually use the advertisement.
To accurately measure Google Ads for Safari with the ITP (Intelligent Tracking Prevention) function enabled, you might need to contact with Google support.
Please note that a segment ID cannot be used when creating a user list unless the segment status is "valid".
The number of segment IDs that can be sent at a time conforms to Google specifications.
Configuring Piano Audience
-
Prerequisites
Before creating a new Google Ads connection in Audience Connectivity Hub, make sure that you have approved a Piano Google Ads account:
-
Send your Google Ads Manager account ID to Piano (your account manager can be the best option for that).
-
Soon you will receive a Request Access email.
-
Approve the Piano Account ID in your Google Ads account.
-
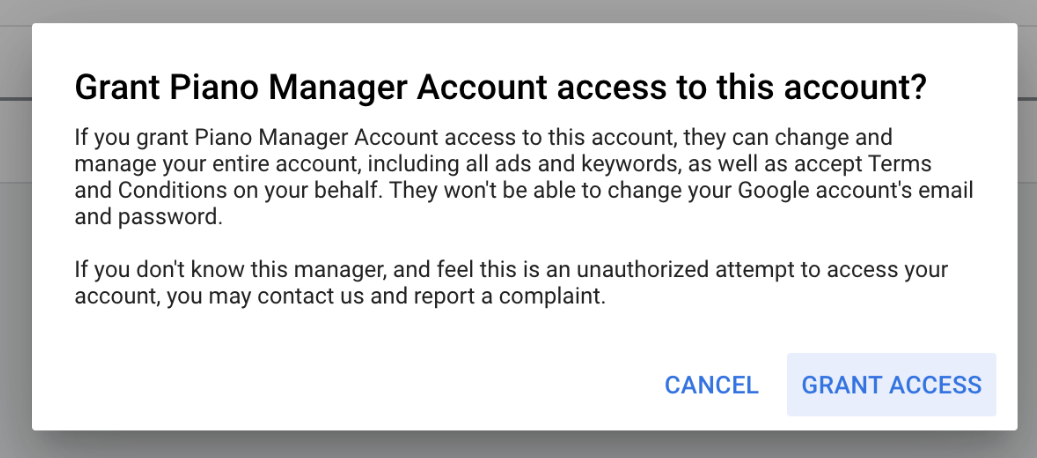
Open the Google Ads account → Notifications OR open the Account Access menu item. Click ACCEPT against the Piano Manager Account.

-
Click GRANT ACCESS.
-
Eventually, you will see the following:

After that a new connection in the Audience Connectivity Hub can be created.
-
Create a configuration
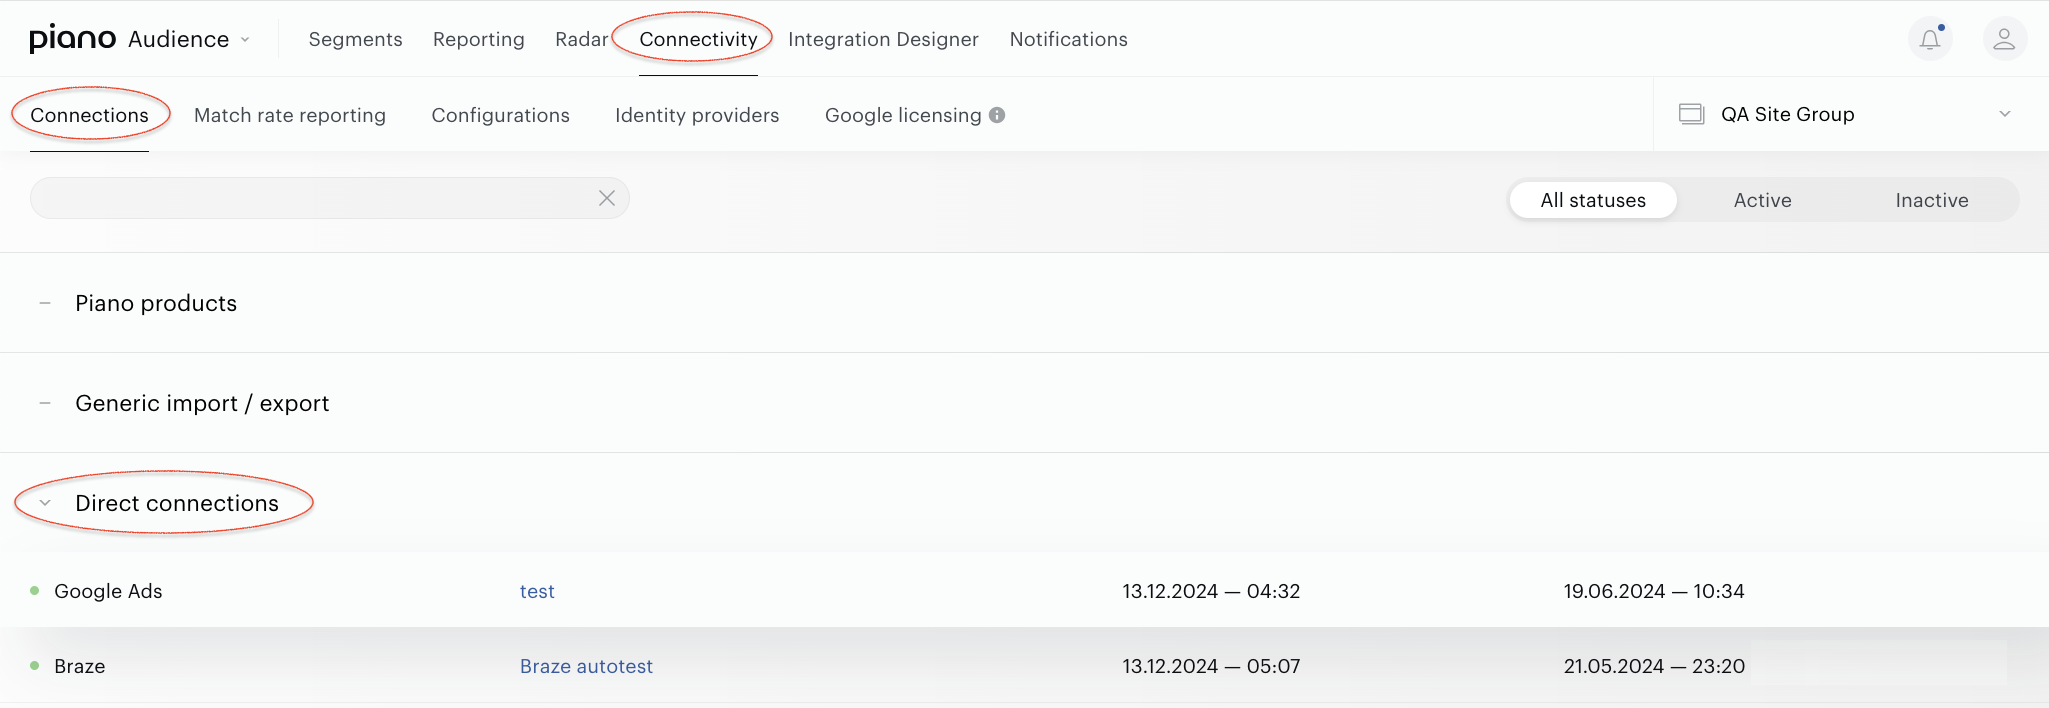
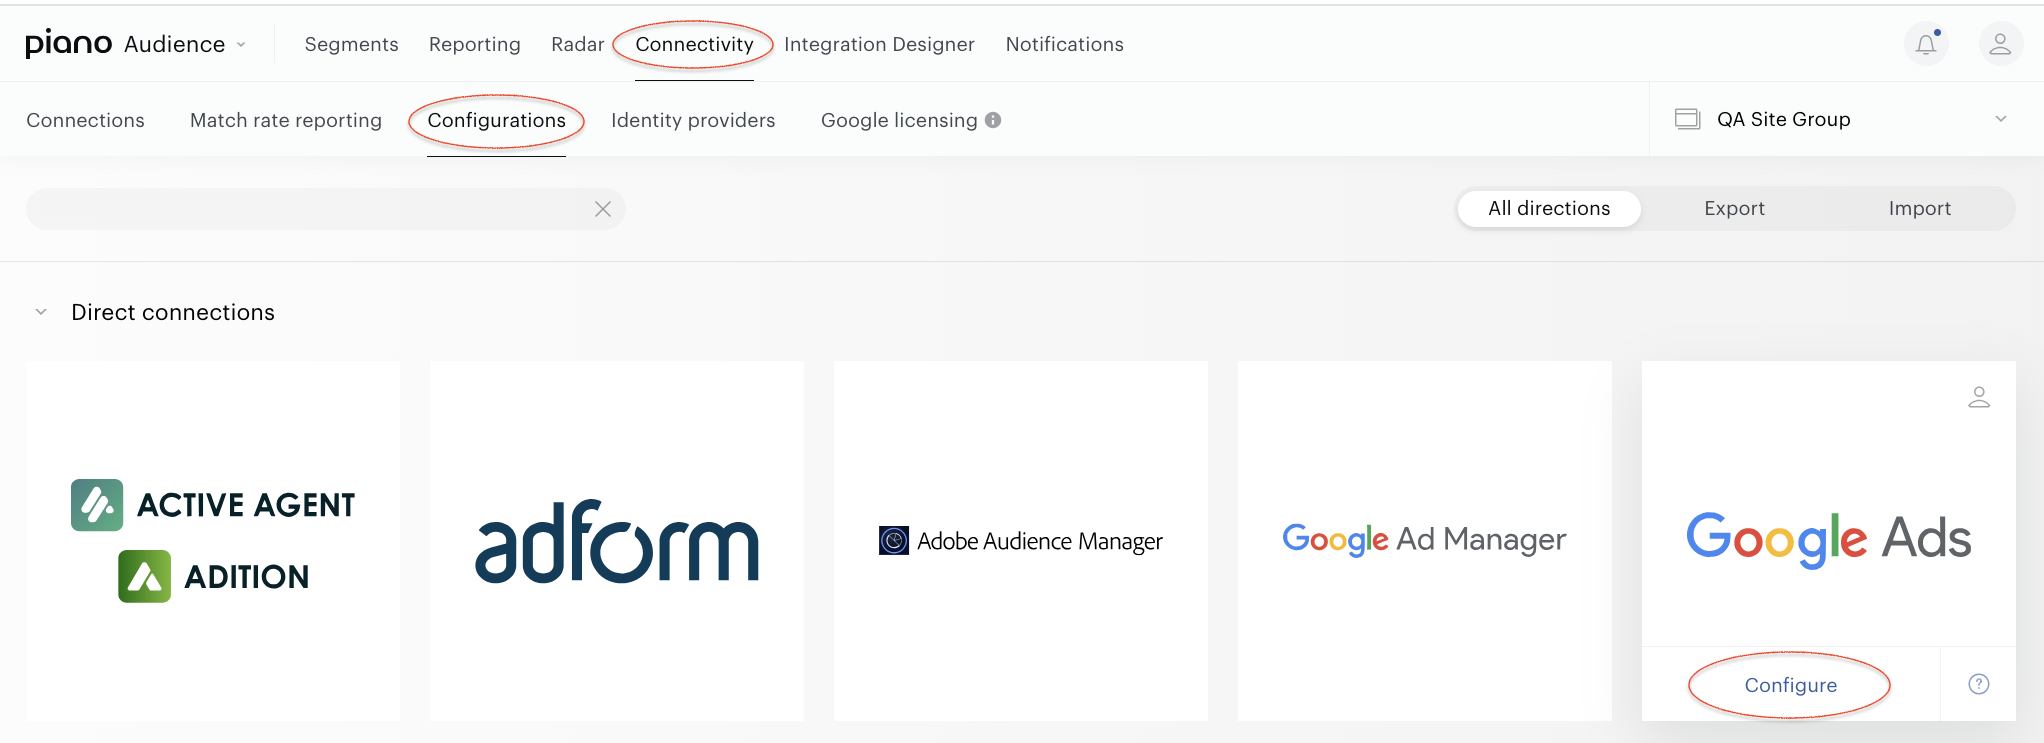
Select a site group. Go to Connectivity → Configurations. Hover the mouse on the Google Ads logo and click Configure to open the New connection menu.
-
Configure the connection
In the New Connection menu, you want to set:
-
Project name: to be shown in Piano Audience only, intended to simplify managing numerous integrations.
-
Client Customer ID: your Google Ads account ID.
Set the parameters and click Test Connection.
A successful test connection activates new configuration sections and the Create button at the top right of the window. Click it before you go on. The button will turn to Save which you can use to save any further changes in your connection. In case of any problems you will see a message. If you don't know how to fix your problem, please contact the Support or Professional Services team.
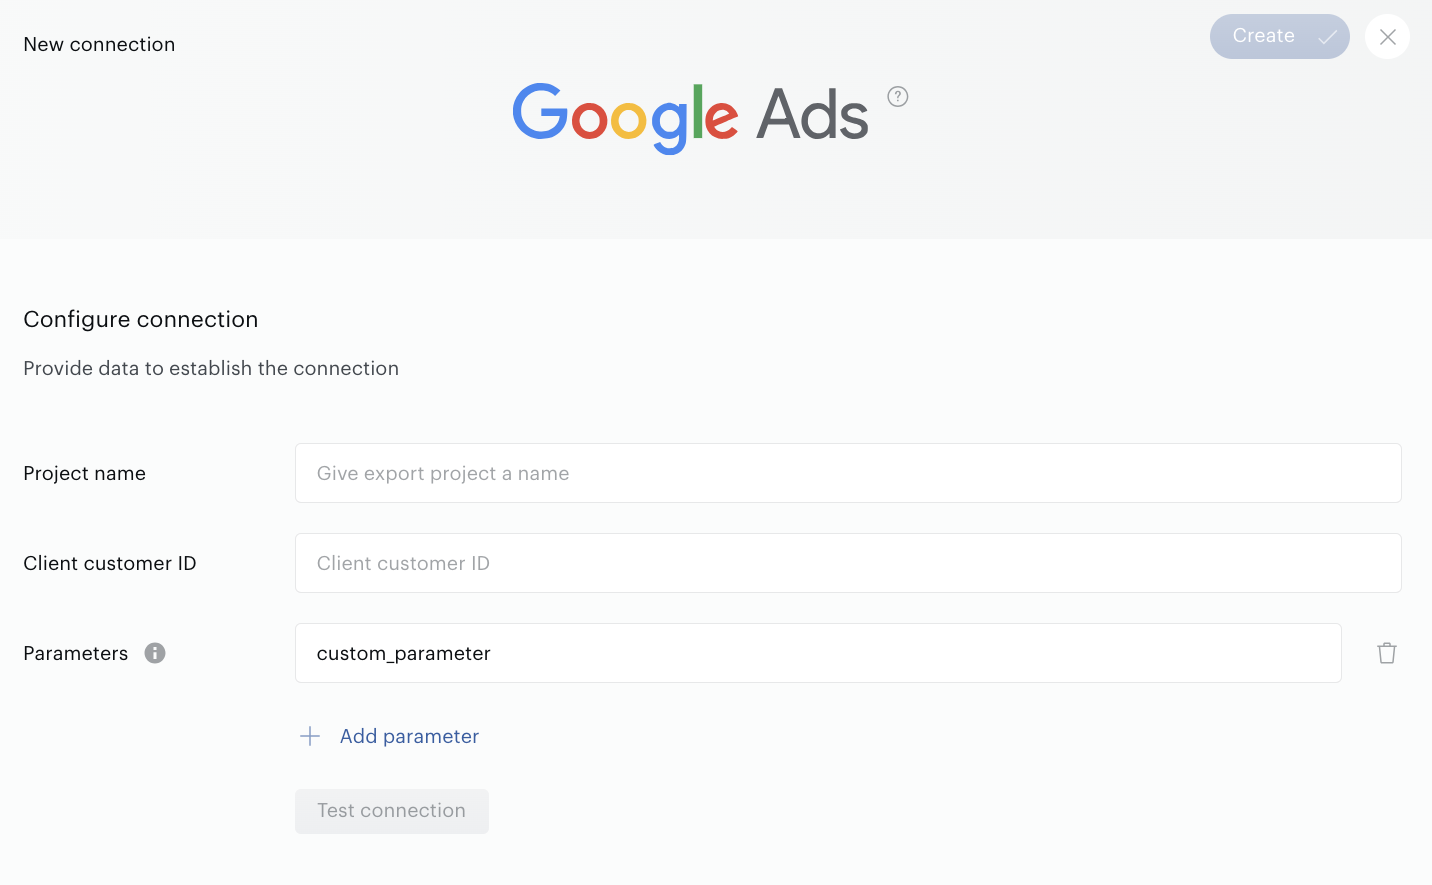
You can create retargeting lists on Google Ads' side using up to 8 custom parameters. When creating custom parameters names, please remember about the following restrictions:
-
The name of a custom parameter can contain only alphanumeric characters.
-
All custom parameter names should differ from each other.
On Google Ads' side, custom parameters in one retargeting list will be joined by the OR operator.
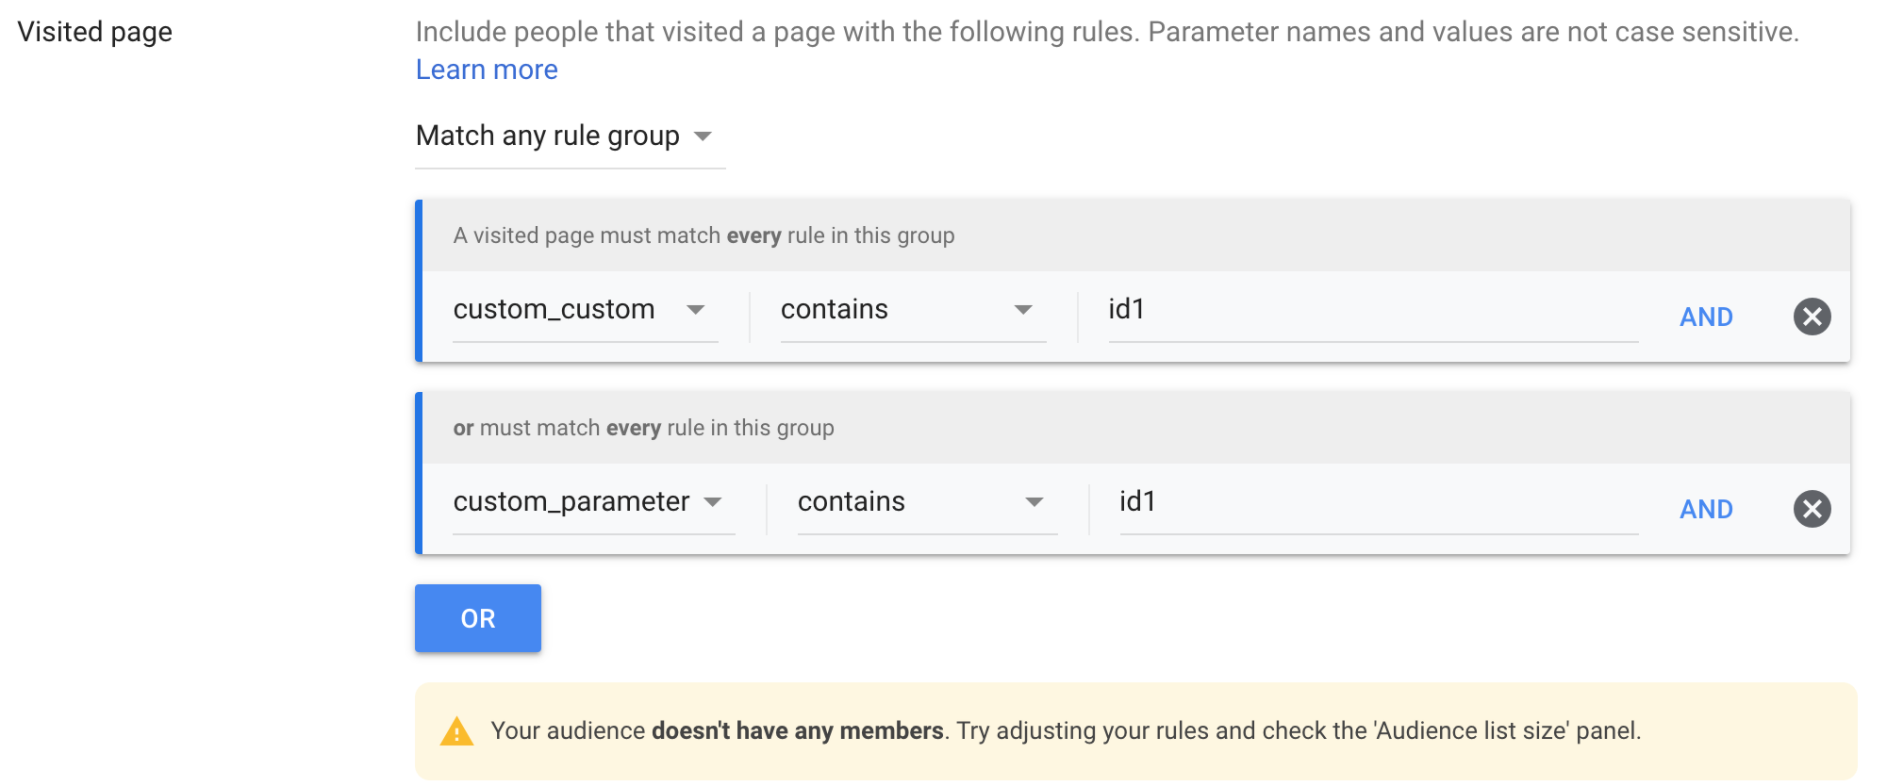
Be aware that according to the Google new Audience Partner API doesn't support the functionality of the "flexible_rule_user_list”. It means that we won't be able to send several custom parameters and create complex retargeting list automatically.
-
Configure segments
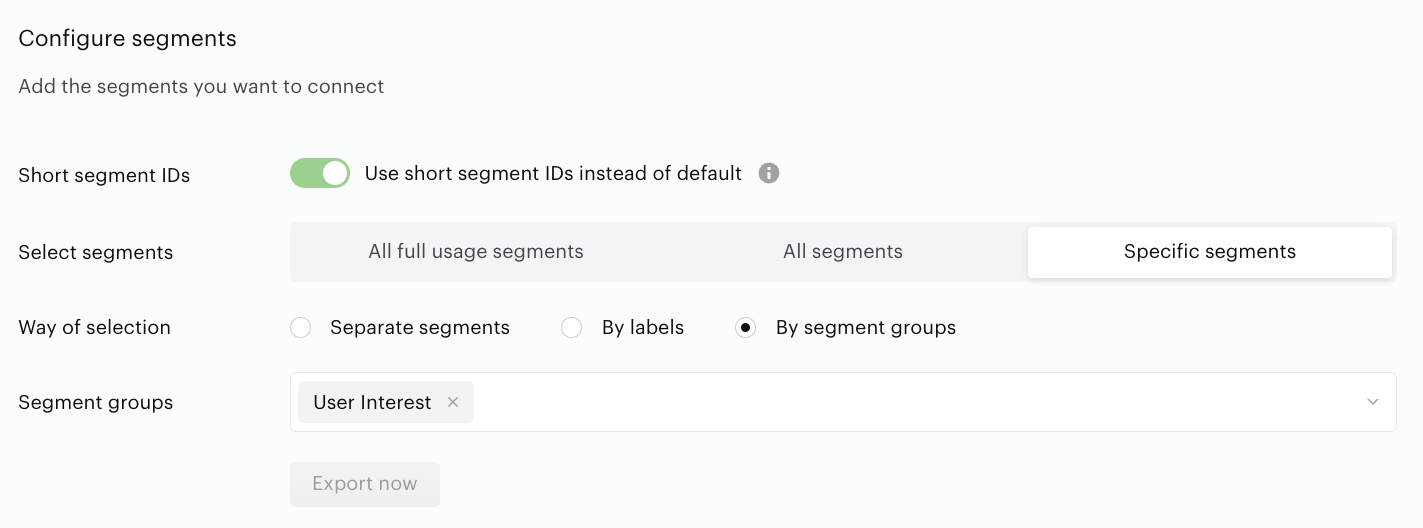
A successful test connection enables the Configure segments form where:
-
Short segment IDs allows client-side integrations to replace Audience' regular segment IDs and thus evade Google Ads' restrictions (length of custom parameter value up to 200 characters). It makes sense, for example, when your marketing purposes demand a lot of segments and the same users belong to a lot of them simultaneously. Event snippet example for the Short segment IDs is here.
-
All full usage segments means that all Full usage (active) segments will be sent to Google Ad Manager; any newly created Full usage (active) segments will be added automatically.
-
All segments includes both types of usage segments: Full and Reporting only segments.
-
Specific segments allows you to select several specific segments. Newly created segments are not added automatically. Specific segments options allow you to choose how exactly Audience should select segments for export:
-
Separate segments allows you to search and select segments one by one manually.
-
By labels allows you to select one or more labels (key-value pairs). Audience will find segments by the selected labels and export them.
-
By segment groups allows you to select one or more segment groups, and Audience will export segments within these specific segment groups. It is more suitable for those clients who prefer to organize their segments specifically
-
Set the parameter.
-
Export segments
You can click Export now in the Configure segments section for almost immediate export of selected segments without waiting for the next scheduled data transfer.
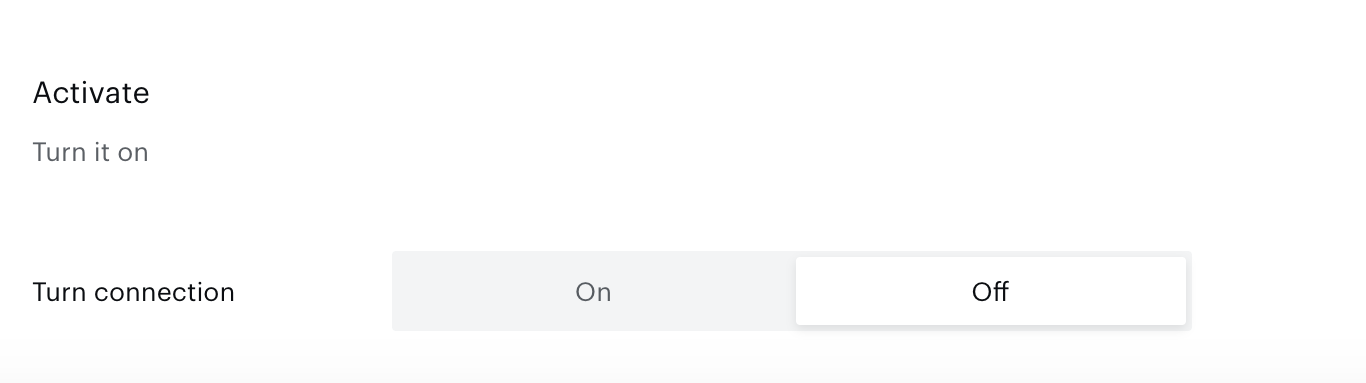
The other option is configuring scheduled data transfer in the Activate section below. There, you can either set up a daily data transfer by turning connection on, or hold the created configuration without activation yet.
When ready, click Create or Save (if editing) in the top right corner of the page.
Monitoring and update
Configured connections can be viewed and edited in the Connections tab. They are also available under the Match rate reporting tab.