
Integrating Piano Audience and Equativ (formerly known as Smart AdServer) provides the full segment-based targeting capabilities of Piano Audience in Equativ.
Integration modes
-
Deprecated Client-side: Segments are created manually in the Smart Ad Server UI, and audience data are exported with the getUserSegmentIds() function of the
cx.jslibrary; -
Server-side: Segments and audience data export to Smart Ad Server is scheduled once a day.
Client-side integration [deprecated]
Creating segments with Smart
See also: the official Smart documentation.
1. Go to Smart→Administration→Groups of keywords.
2. Add a new group (or select if it already exists). Set Name to "Cxense Segments" and Delivery name to "cxsegment"
3. For each Piano Audience segment create a new item in the Smart UI. Set Name to Piano Audience Segment name and "Delivery name" to Piano Audience Segment ID.
Ad tag modification (client side)
See also: exporting ad tags publisher solution, using the ad tag, cX.getUserSegmentIds() documentation.
-
To generate an Ad tag for your page go to Administration→Administration of site and pages.
-
Select the target site and the tag format (sync or async). You can choose a legacy tag if you want.
-
Find the
targettag (or thesas_targetvariable for the legacy tag) in the code of the Ad tag and insert those lines to receive Piano's segments for targeting.
Modified tag for the Asynchronous One Cell (Ajax One Call) format
This is a generic function to install on the page.
<script type="application/javascript" src="//ced.sascdn.com/tag/9991/smart.js" async></script>
<script type="application/javascript">
    var sas = sas || {};
    sas.cmd = sas.cmd || [];
    sas.cmd.push(function() {
        sas.setup({ networkid: 9991, domain: "//www8.smartadserver.com", async: true });
    });
    var cX = cX || {}; cX.callQueue = cX.callQueue || [];
    sas.cmd.push(function() {
        cX.callQueue.push(['invoke', function() {
            var segments = cX.getUserSegmentIds({ persistedQueryId: '<TODO: insert persisted query id here>' });
            sas.call("onecall", {
                siteId: 999992,
                pageId: 999993,
                formatId: '99994',
                target: (segments && segments.length) ? 'cxsegment=' + segments.join(';cxsegment=') : ''
            });
        }]);
    });

    // Async load of cx.js
    (function(d,s,e,t){e=d.createElement(s);e.type='text/java'+s;e.async='async';
    e.src='http'+('https:'===location.protocol?'s://s':'://')+'cdn.cxense.com/cx.js';
    t=d.getElementsByTagName(s)[0];t.parentNode.insertBefore(e,t);})(document,'script');
</script>
Format 980x400 980x400
<div id="sas_99994"></div>
<script type="application/javascript">
    cX.callQueue.push(['invoke', function() {
        sas.cmd.push(function() {
            sas.render("99994");  // Format : 980x400 980x400
        });
    }]);
</script>
Modified tag for the Synchronous (Standard) format
<!-- Load the Piano script synchronously -->
<script type="text/javascript">
    document.write('<scr' + 'ipt type="text/javascript" src="http' +
        (location.protocol === 'https:' ? 's://s' : '://') + 'cdn.cxense.com/cx.js"></scr' + 'ipt>');
</script>
<script type="application/javascript">
    var segments = cX.getUserSegmentIds({ persistedQueryId: '<TODO: insert persisted query id here>' });
    sas.call("std", {
        siteId:     999993, //
        pageId:     999994, // Page :
        formatId:   99995,  // Format :
        target:     (segments && segments.length) ? 'cxsegment=' + segments.join(';cxsegment=') : '' // Targeting
    });
</script>
<noscript>
    <a href="http://www8.smartadserver.com/ac?jump=1&nwid=9991&siteid=999993&pgname=ros&fmtid=999994&visit=m&tmstp=[timestamp]&out=nonrich" target="_blank">
        <img src="http://www8.smartadserver.com/ac?out=nonrich&nwid=9991&siteid=999993&pgname=ros&fmtid=999994&visit=m&tmstp=[timestamp]" border="0" alt="" /></a>
</noscript>
Modified tag for the Asynchronous (Ajax) format
This is a generic function to install on the page.
<!-- Smart header tag -->

<!-- Async load of cx.js -->
<script type='text/javascript'>
    (function(d,s,e,t){e=d.createElement(s);e.type='text/java'+s;e.async='async';
    e.src='http'+('https:'===location.protocol?'s://s':'://')+'cdn.cxense.com/cx.js';
    t=d.getElementsByTagName(s)[0];t.parentNode.insertBefore(e,t);})(document,'script');
</script>
Format 980x400 980x400
<div id="sas_99997"></div>
<script type="application/javascript">
    var cX = cX || {}; cX.callQueue = cX.callQueue || [];
    cX.callQueue.push(['invoke', function() {
        var segments = cX.getUserSegmentIds({ persistedQueryId: '<TODO: insert persisted query id here>' });
        sas.cmd.push(function() {
            sas.call("std", {
                siteId: 999995, //
                pageId: 999996, // Page :
                formatId: 99997, // Format : 980x400 980x400
                target: (segments && segments.length) ? 'cxsegment=' + segments.join(';cxsegment=') : ''    // Targeting
            });
        });
    }]);
</script>
Booking targeted ads and campaigns (client side)
Booking targeted ads and campaigns
See also: keyword targeting.
Go to Campaigns→Insertions→Targeting.
Select the Keyword group Cxense segments.
Server-side integration
See also: Audience connection with Smart Data Hub.
Ad tag modification (server side)
To save Smart's user ID in Piano Audience, add a cookie-sync tag to the page:
Synchronous cookie-sync tag
<script type="text/javascript">
    cX.sync('smart');
</script>
Asynchronous cookie-sync tag
 <script type="text/javascript">
    var cX = cX || {}; cX.callQueue = cX.callQueue || [];
    cX.callQueue.push(['sync', 'smart']);
</script>
Booking targeted ads and campaigns (server side)
-
-
To see all exported Piano Audience segments, go to Home→Administration→Keyword groups and find the group appropriated to Piano Audience.
-
In the list of items, you can see Piano's segments in format <Cxense segment name>#<Cxense segment id> and the Smart targeting key, which looks like dmp728=91289.
-
To target your campaign to a specified segment, go to Campaigns→Insertions→Targeting and open the Keywords/Keyword groups tab.
-
Insert values from #2 in the Range of values section.
-
Configuring Piano Audience
Create a configuration
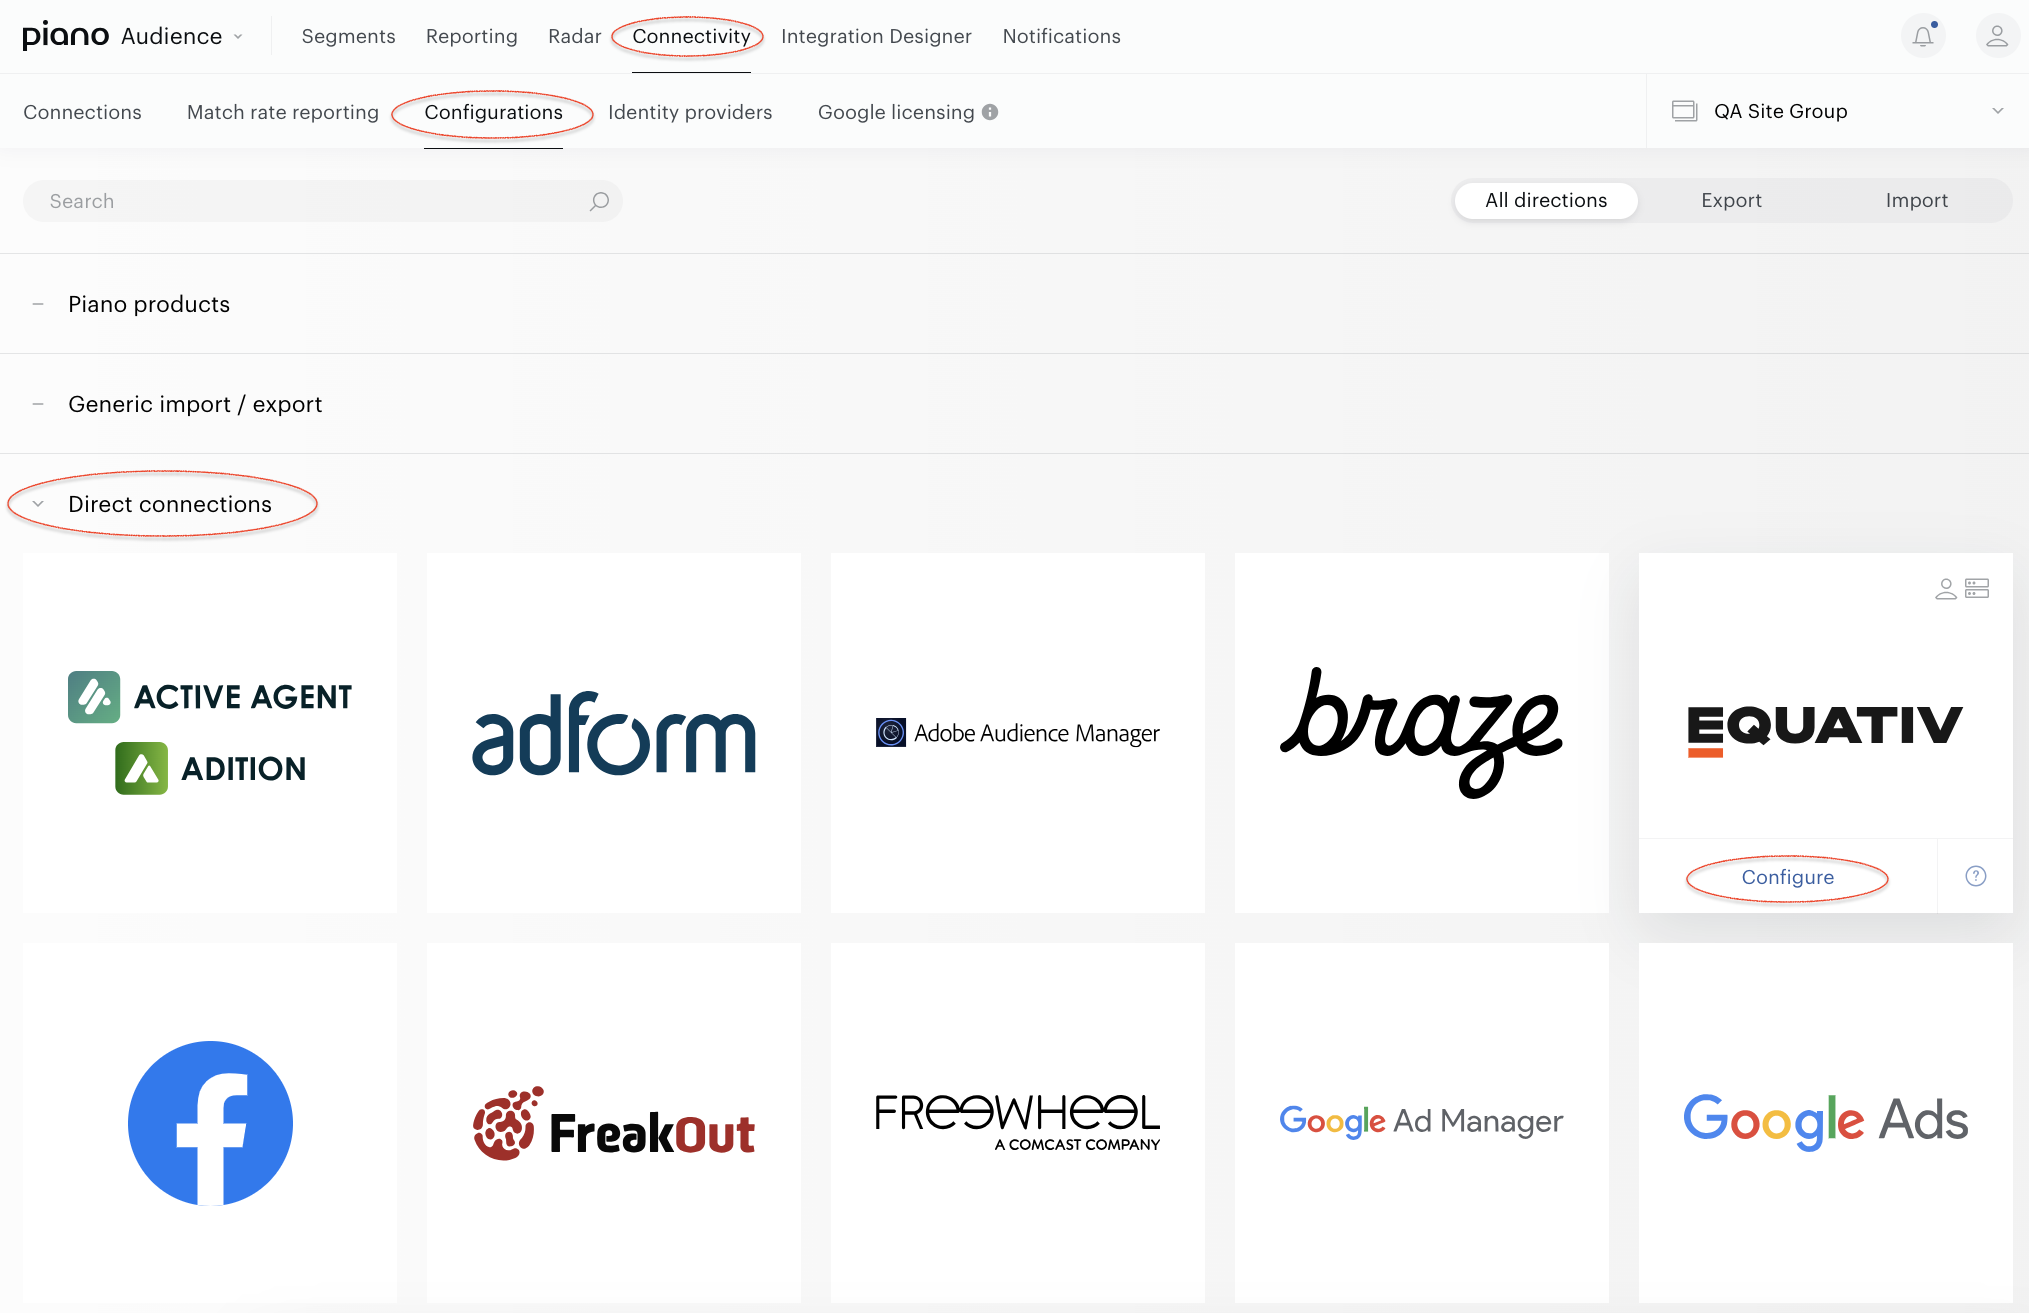
With your site group selected, from the Piano Audience home page, go to the Connectivity tab → the Configurations tab →the Equativicon and click the Configure button.
Configure the connection
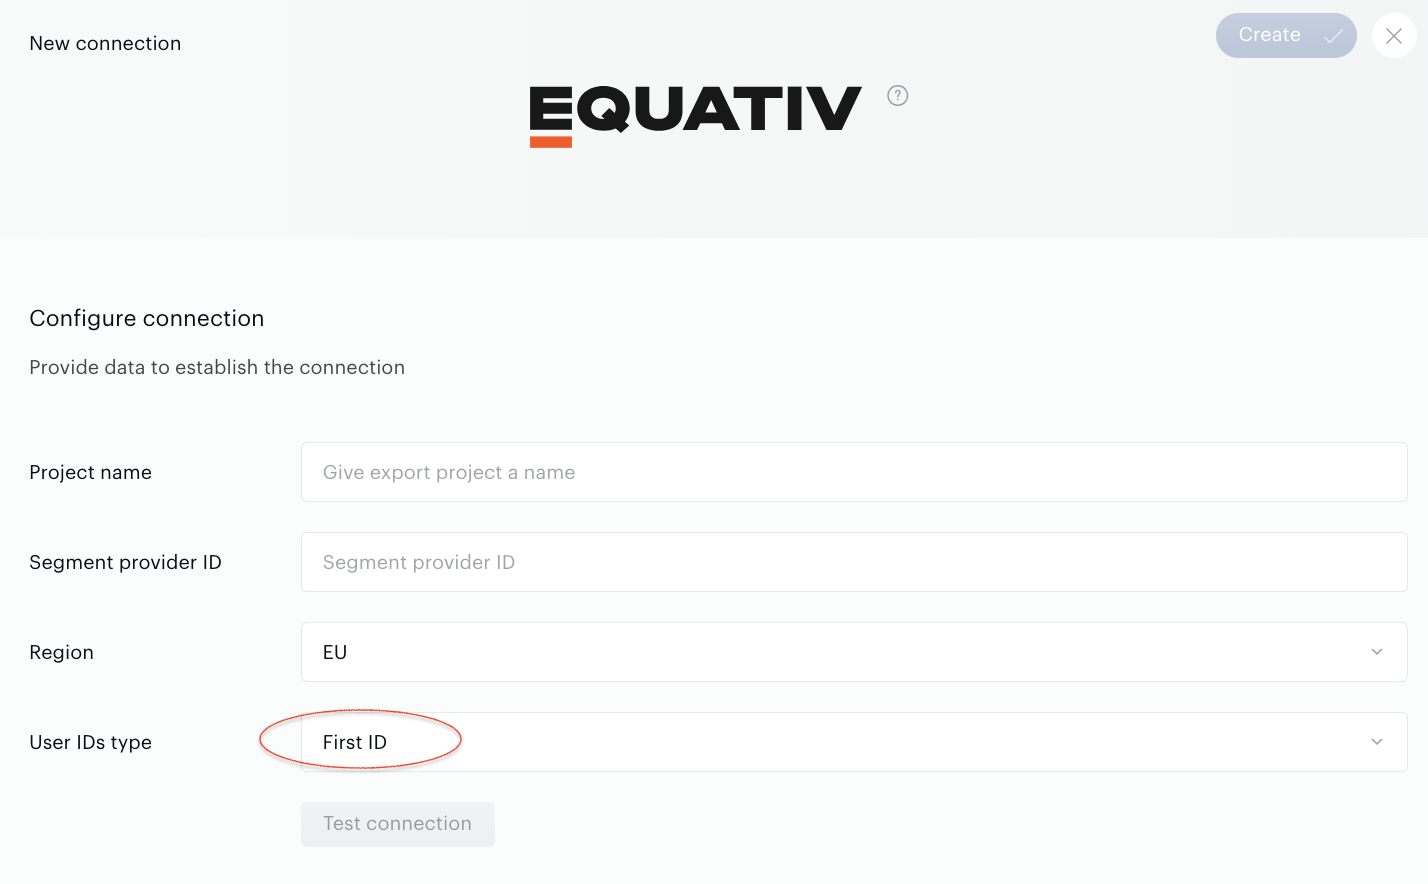
Give the name to your export project just for your convenience - fill in Project name - it will simplify your further work with the list of connections and the Match Rate reporting (e.g. if you have multiple connections with one 3rd party system, such a name can help to distinguish it).
The Segment provider ID attribute is required.
Region is one more obligatory parameter. Equativ provides dedicated endpoints by region (to enable data synchronization) and by environment (production vs. sandbox). This Region parameter is used to correctly select the API provided by the Equativ side.
Then choose User IDs type.
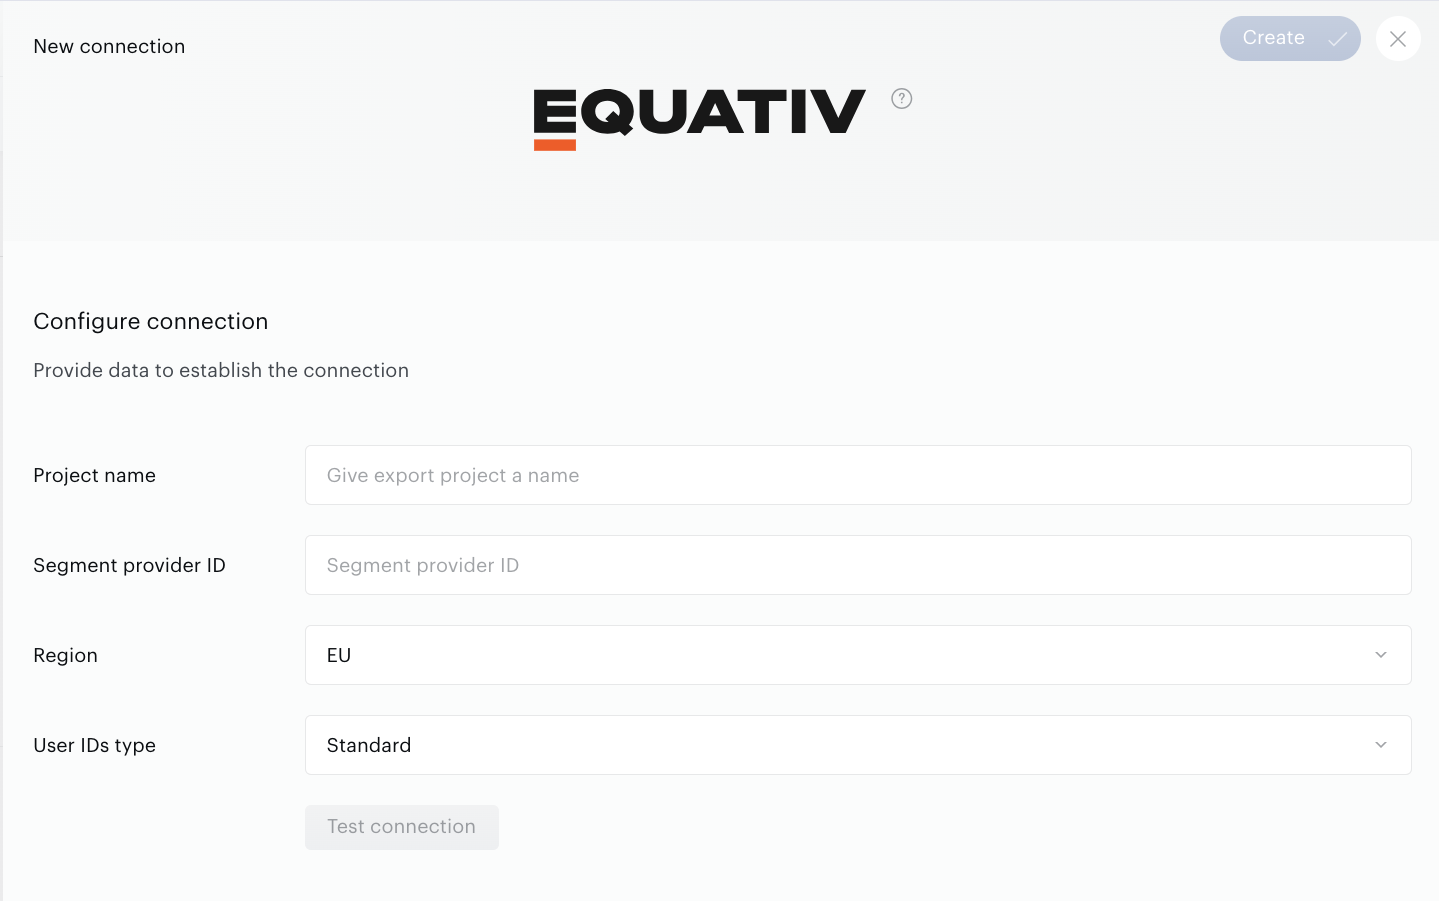
After that, click Test connection. If all settings are specified correctly, the "The connection was tested" message will appear.
The below settings become available only after a passed connection test.
Save all settings by pushing the Create/Save button in the top right corner of the page.
If you don't get the confirmation message or receive an error message like “Auth failed” or “An error occurred”, please check your settings and try again.
If you don't know how to fix the problem, please ask the Support or Professional Services team.
Configure segments
Successful test connection enables the Configure segments form where:
-
All full usage segments means that all Full usage (active) segments will be sent to Google Ad Manager; any newly created Full usage (active) segments will be added automatically.
-
All segments includes both types of usage segments: Full and Reporting only segments.
-
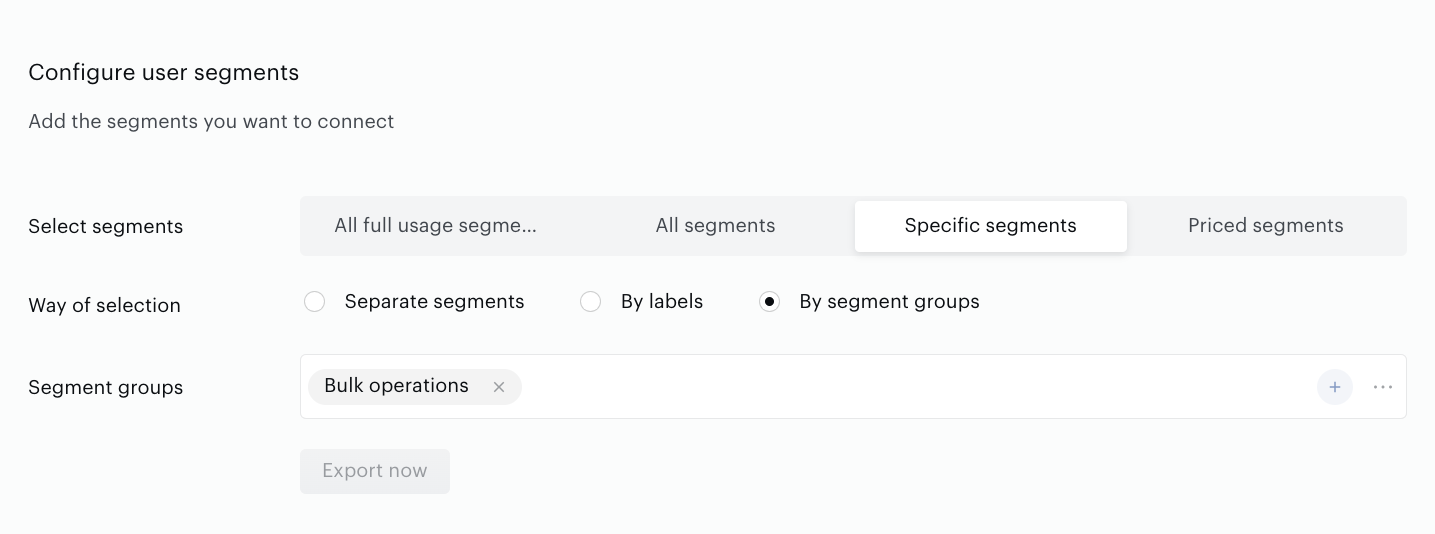
Specific segments allows you to select several specific segments. Newly created segments are not added automatically. Specific segments options allow you to choose how Piano Audience should select segments for export:
-
Separate segments allows you to search and select segments one by one manually.
-
By labels allows you to select one or more labels (key-value pairs). Piano Audience will find segments by the selected labels and export them.
-
By segment groups allows you to select one or more segment groups, and Piano Audience will export segments within these specific segment groups. It is more suitable for those clients who prefer to organize their segments specifically.
-
-
Priced segments allows you to select several specific segments and set prices for them. The price can be either the same for all selected segments or different - individually for each segment. Newly created segments are not added automatically.
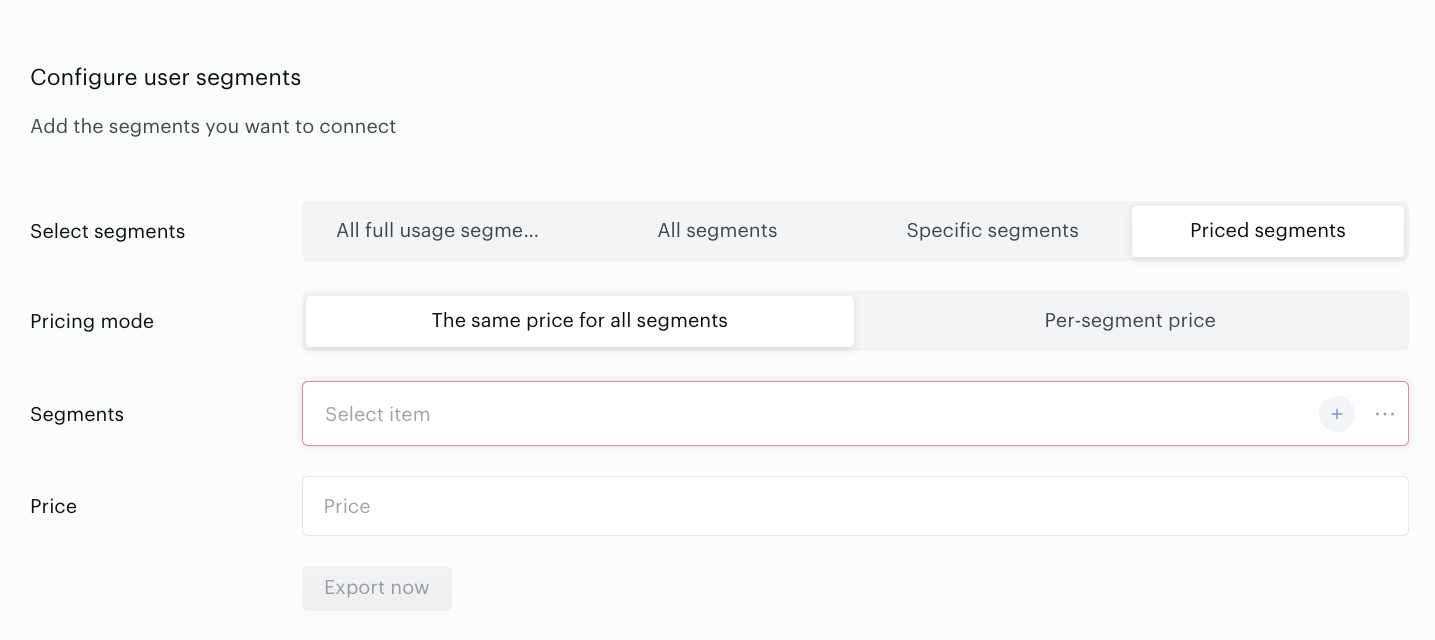
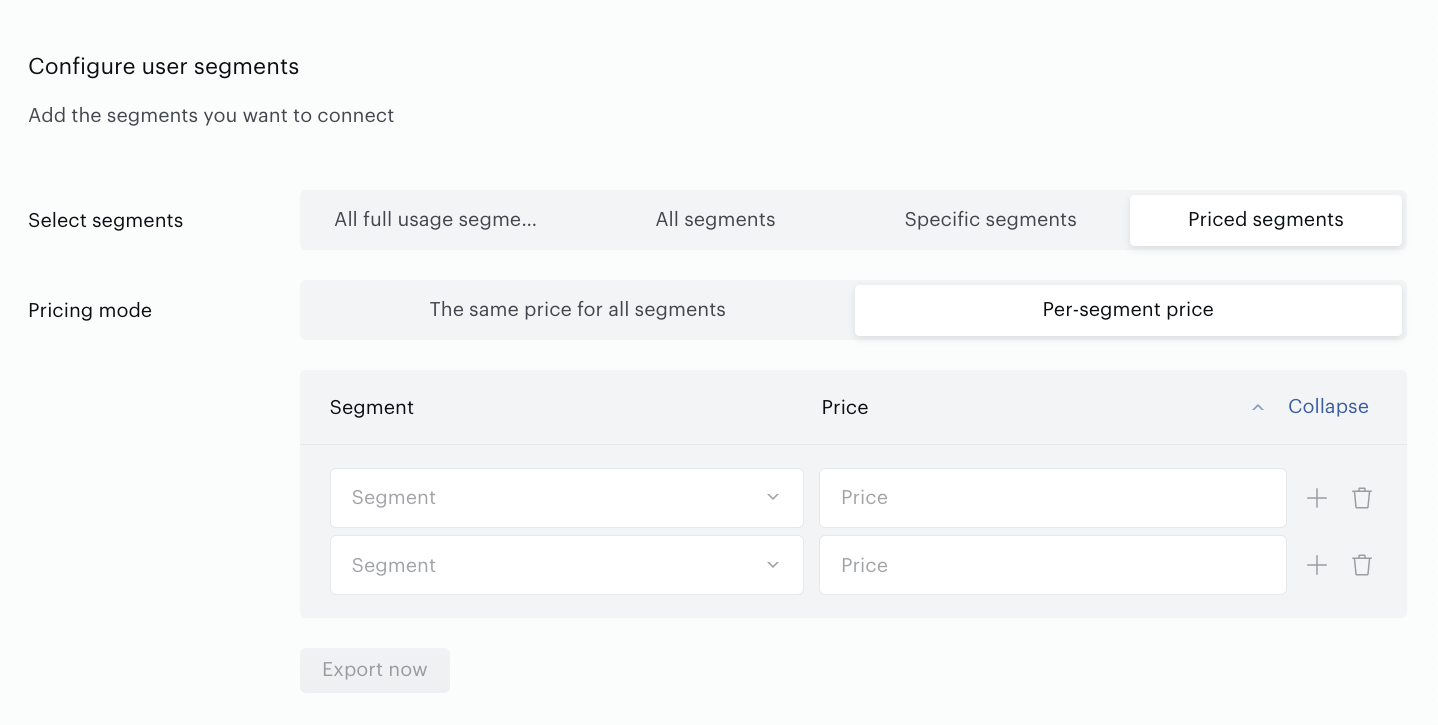
Set the parameter.
Push the Export now button only if data needs to be imported immediately. After successful export you will see the result message “Export completed!” and the files will be in your directory.
Export segments
You can click Export now in the Configure segments section for almost immediate export of selected segments without waiting for the next scheduled data transfer. The other option is configuring scheduled data transfer in the Activate section below. There, you can either set up a daily data transfer by turning connection on or hold the created configuration without activation yet and set the connection to "off".
When ready, click Create or Save (if editing) in the top right corner of the page.
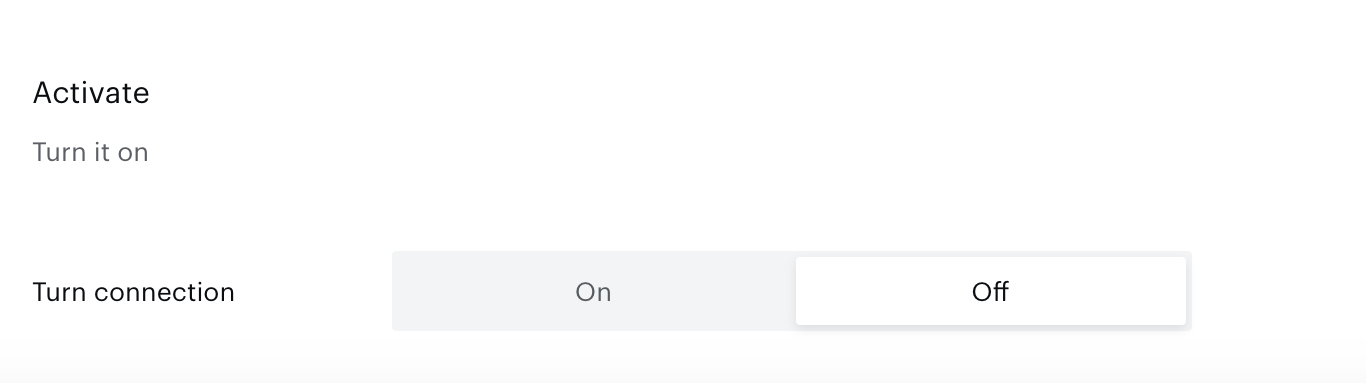
The last step is to activate the connection. If you are still waiting for the confirmation from the Piano team, please keep it inactive because any way you won't get segments on Equativ's side without it.
Now your connection is established! A connection with the server-side option works once a day just like all server-side integrations supported by Piano Audience.
Export First-ID user IDs
Equativ supports server-side integration to bring First-ID UIDs from Piano Audience into Equativ. The First-id solution overview is here.
cx.js
Customer’s websites have to be configured to work with First-ID to obtain First-ID user IDs. Read details in the First-ID documentation.
The cx.js code example below transfer First-ID User IDs from the customer’s websites to the Piano Audience.
cX.callQueue.push(['invoke', function () {
        var firstId = cX.getCookie('firstid');

        if (firstId) {
            cX.sync({
                partner: 'fid',
                userId: firstId
            })
        }
    }]);
Configuring Piano Audience for Equativ
According to the Equativ documentation Equativ is agnostic regarding the id type: Equativ's Id, mobile advertising Id (MAID), publisher first party cookies, hashed e-mail, extended Id etc.; Equativ supports one preferred extended Id provider per audience data provider; please get back to your contact at Equativ and indicate the provider whose extended Ids (alternative Ids) you intend to use.
Read general information about how to configure connection, save changes, activate or deactivate connection above.
The following should be done if you want to export First-ID user IDs to Equativ:
-
When setting up User IDs type parameter, choose First ID option.
Don’t forget to fill in other obligatory fields, make Test connection and save changes.
Monitoring and update
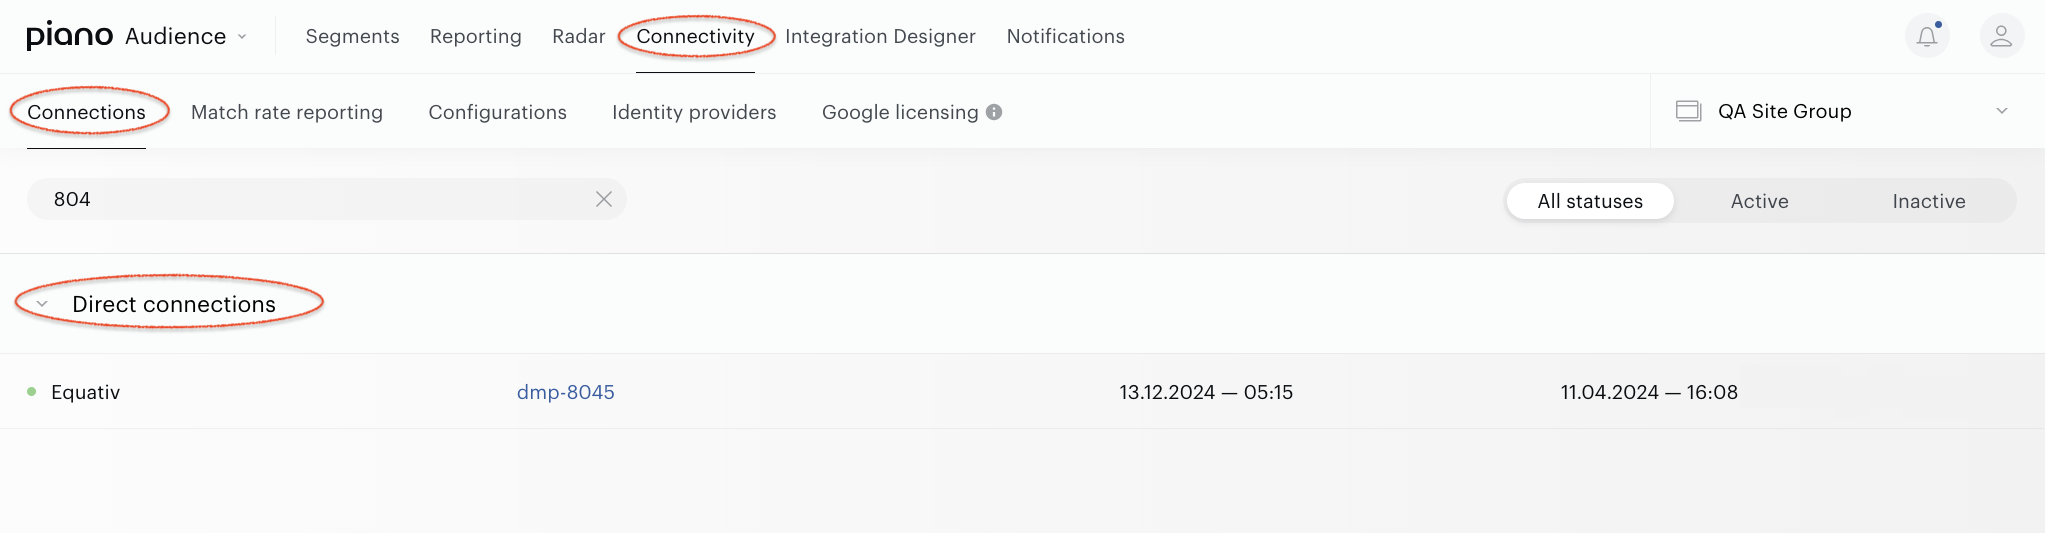
Now you can see your connection on the list of existing connections (Connectivity→Connections) and in the Match Rate report (Connectivity→Match Rate Reporting).
To change settings (project name, segment list, or connection status), please find the needed connection on the list of existing connections:
Please note that the segments are not deleted in Equativ by the integration.
A particular TTL parameter that defines the default time to live of a profile/segment relation is used for all the segments. The default value is 30 days.