For Apple’s App Store Server API integration, Piano supports two environments: Sandbox (testing and development) and Production (live App Store transactions). Xcode local testing is currently not supported.
Initial Configuration
-
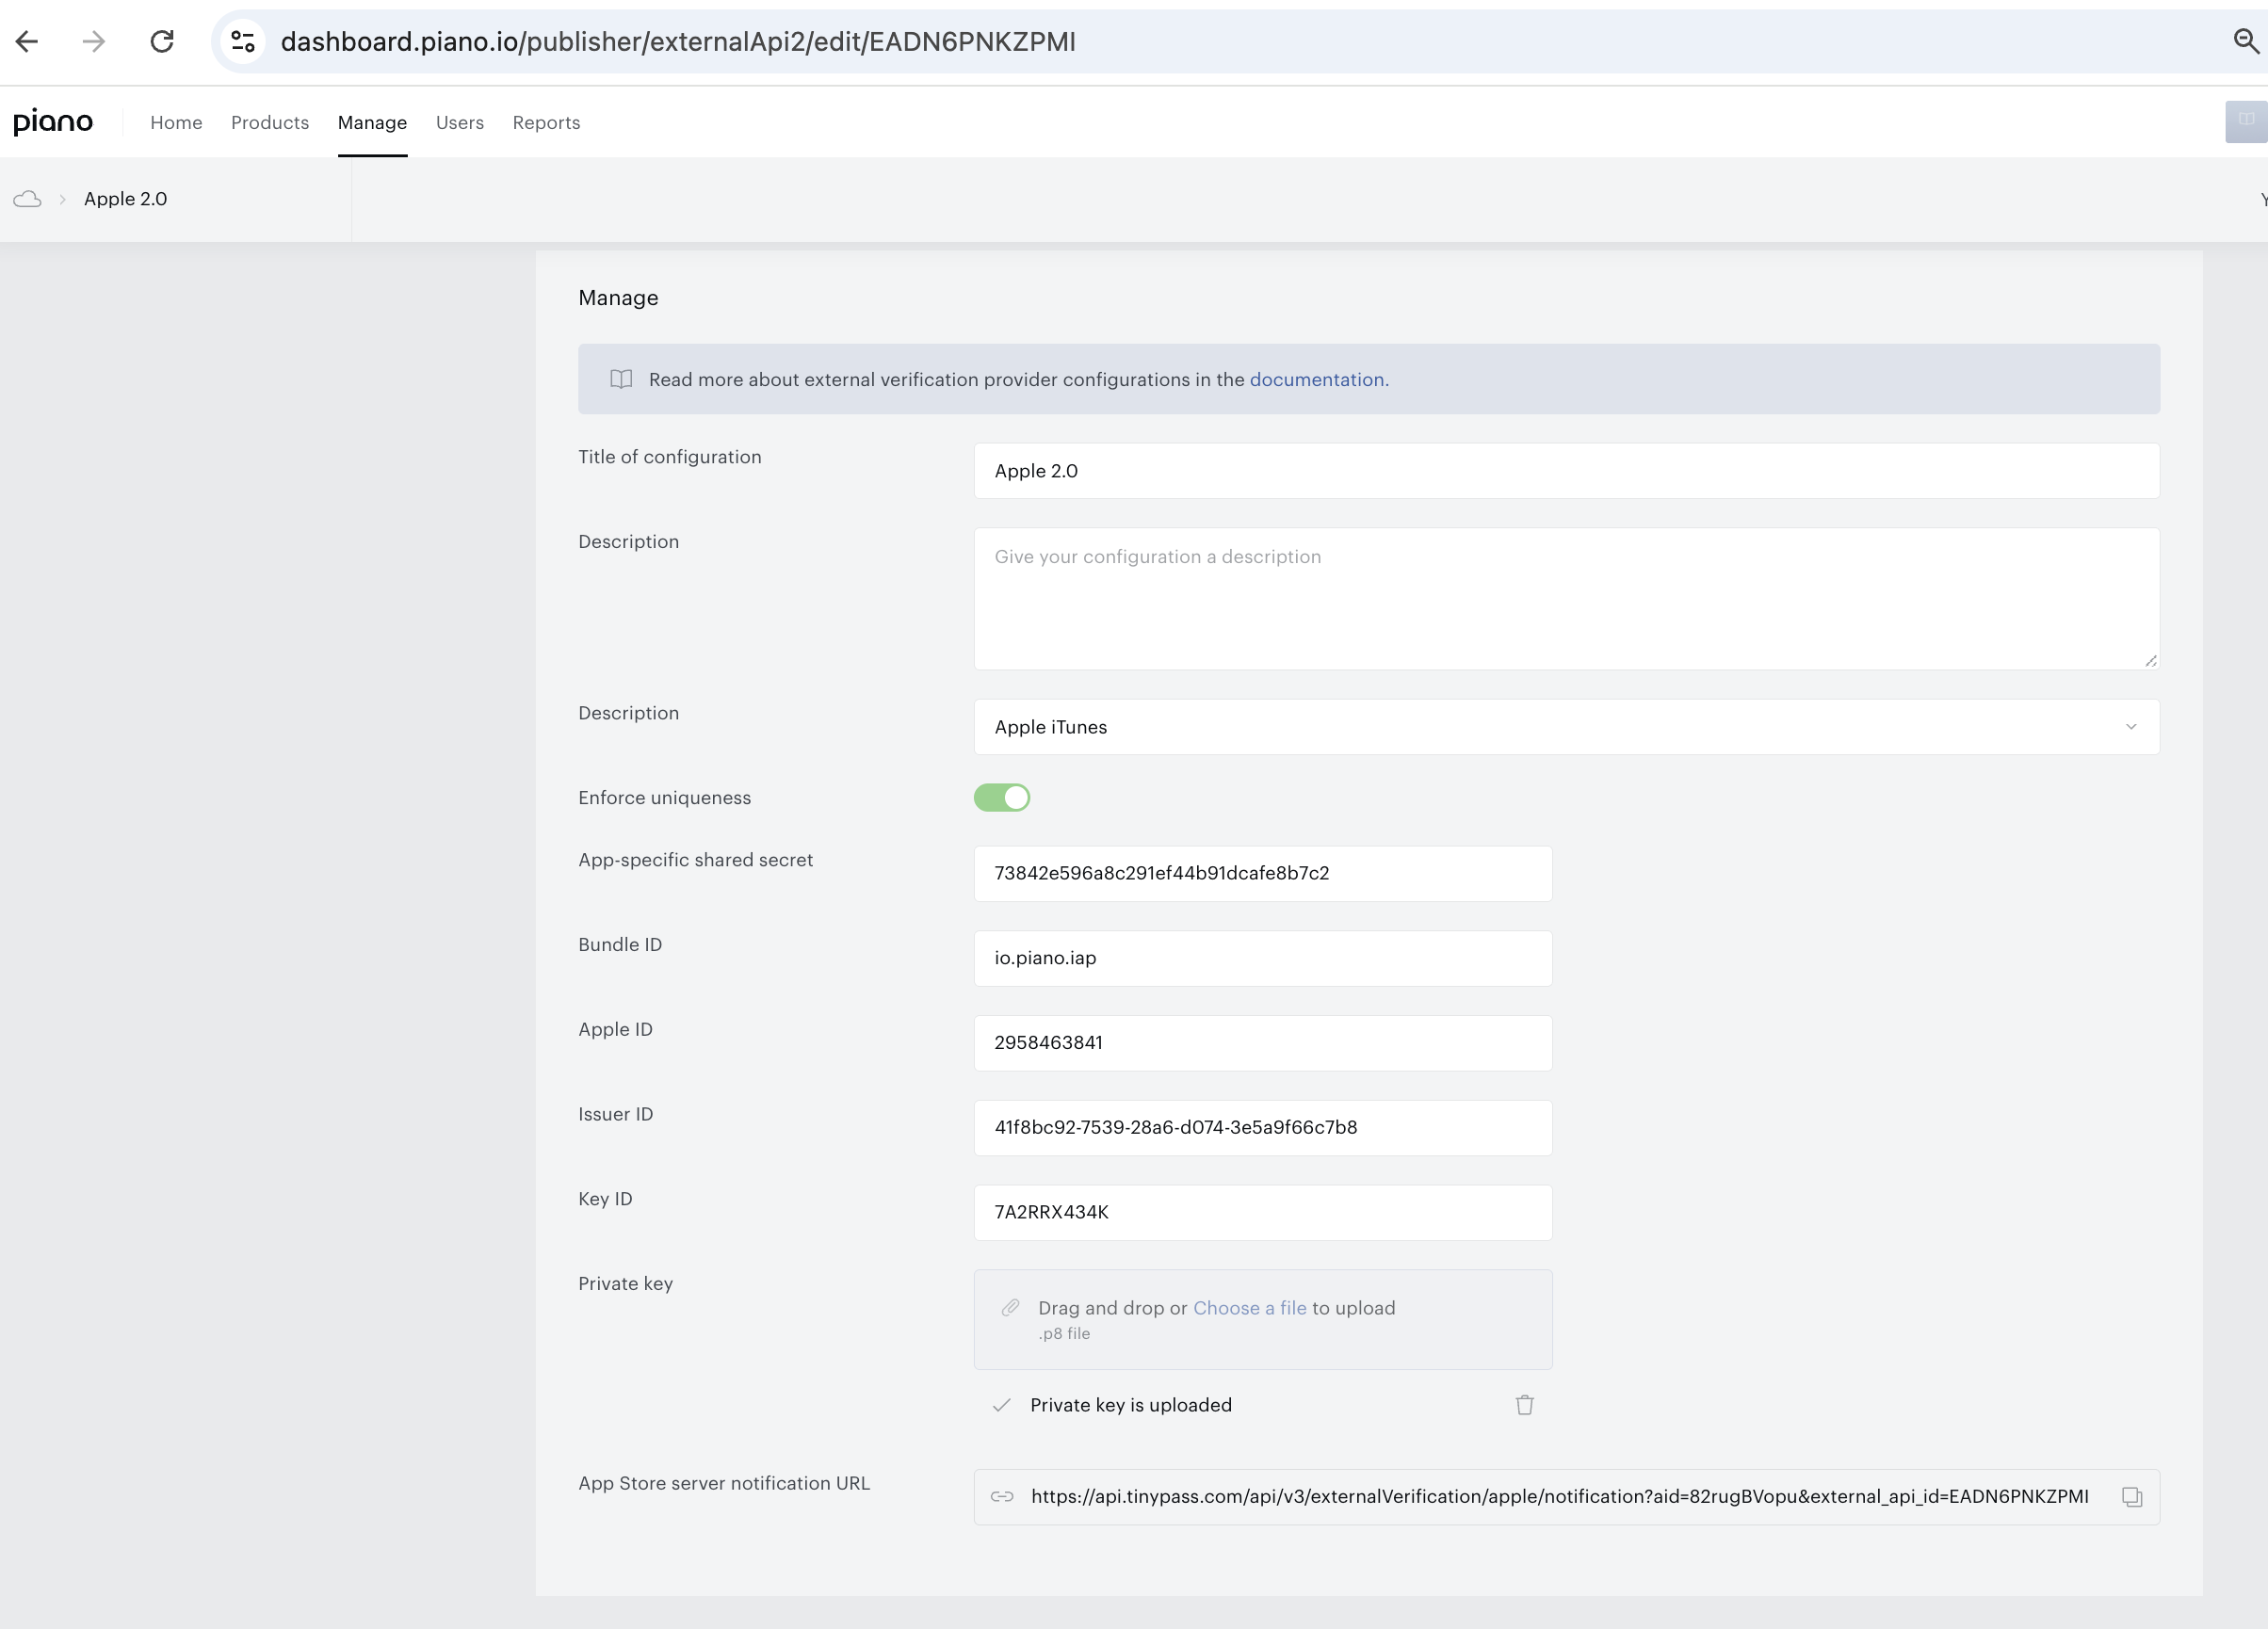
You don't need to create a separate configuration on the Piano side for the new integration if you have an existing Apple configuration. You need to add new configuration parameters to your existing configuration in order for the Piano endpoint to start receiving both types of receipts.
-
Once you add new parameters to the config, you won't be able to remove them from the configuration (even though it is now possible to save configuration without them).
EVT Configuration Guide
To configure the App Store Server API, follow these steps. Ensure you have access to App Store Connect.
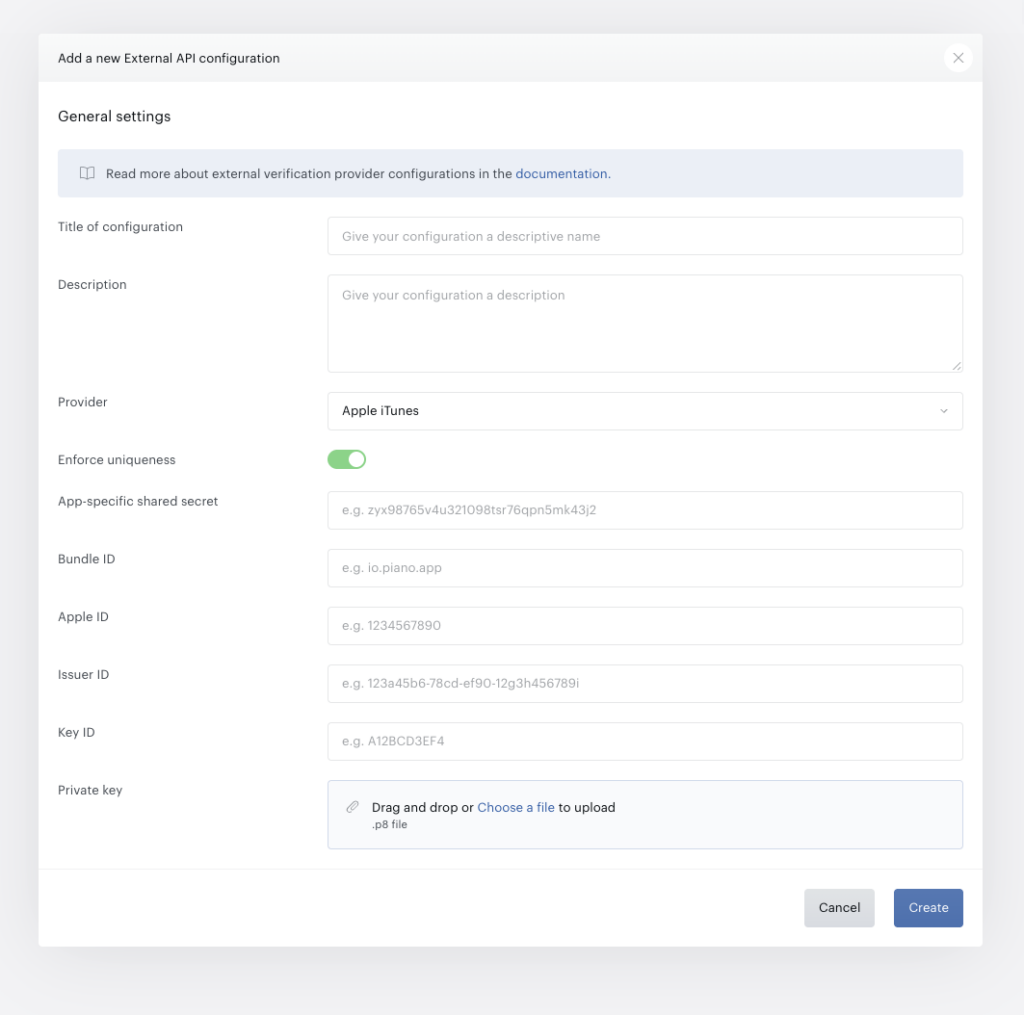
To obtain Password (App-Specific Shared Secret)
-
Log in to App Store Connect.
-
Go to your app's App Information page.
-
Scroll down to App-Specific Shared Secret section and click the Manage button.
To obtain Bundle ID
-
Log in to App Store Connect.
-
Navigate to your app's App Information page.
-
Locate the Bundle ID in the General Information section.
To obtain Apple ID
-
Log in to App Store Connect.
-
Go to your app's App Information page.
-
Find the Apple ID in the General Information section.
To obtain Issuer ID
-
Log in to App Store Connect.
-
Select Users and Access.
-
Open the Integrations tab.
-
Select In-App Purchase.
-
The Issuer ID appears at the top of the page. Click Copy to copy it.
To obtain Key ID and Private Key
-
Generate a Private Key: Follow Apple's guide on creating API keys
-
Download a Private Key: Refer to Apple’s instructions on downloading and storing the private key.
API Description
Create a Subscription with the New App Store API
For detailed terms on external services, refer to: Piano External Service Terms.
Passing JWS Transaction Data
Instead of sending the receiptData field in the JSON payload, you must pass the JWS transaction from Apple.
Apple's documentation on JWS transactions: JWS Representation.
Piano will validate the JWS transaction and convert the term based on the transaction data.
Example Request:
curl --location 'https://sandbox.piano.io/api/v3/publisher/conversion/external/create' \
--header 'Content-Type: application/x-www-form-urlencoded' \
--header 'api_token: xxx' \
--data-urlencode 'aid=xxx' \
--data-urlencode 'uid=xxx' \
--data-urlencode 'term_id=xxx' \
--data-urlencode 'check_validity=true' \
--data-urlencode 'fields={ "transactionData":"eyJhb..." }'
Alternative: Passing Transaction ID
If you do not have a JWS transaction string, you can pass the transactionId, which represents the transaction you want to convert, instead of the transactionData field.
Example Request:
curl --location 'https://sandbox.piano.io/api/v3/publisher/conversion/external/create' \
--header 'Content-Type: application/x-www-form-urlencoded' \
--header 'api_token: xxx' \
--data-urlencode 'aid=xxx' \
--data-urlencode 'uid=xxx' \
--data-urlencode 'term_id=xxx' \
--data-urlencode 'check_validity=true' \
--data-urlencode 'fields={ "transactionId":"2000...." }'
App Store Server Notifications
If you use App Store Server Notifications, then after adding new fields to the Apple config in the publisher dashboard (Manage > External APIs), you need to update the App Store Server Notifications URL in Apple. Copy the App Store Server Notification URL from the Piano Apple config and update here:
-
Log in to App Store Connect.
-
Go to your app’s App Information page.
-
Edit App Store Server Notifications URL (Version 2).
Please note: if you choose to use Version 2 notifications, you cannot revert to Version 1.