
Library
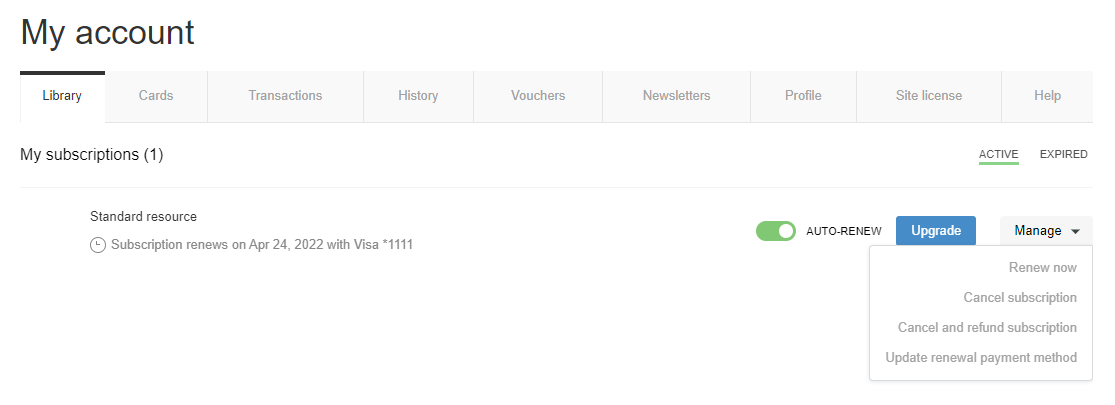
The "Library" tab shows users a list of all of their active and expired payment subscriptions.
Active subscriptions will be listed in the "Active" tab. Next to each of these subscriptions is a toggle that allows users to enable or disable auto-renewal.
If you have any Upgrade options configured, users will see an "Upgrade" button allowing them to change their term. Note that the upgrade button is not available if there are pending term changes or if the initial transaction is still being settled on the payment provider's end.
Users may also click the "Manage" button next to their subscriptions, which will give them the option to cancel the subscription, ask for a full refund, or update the payment method for the renewal billing. For renewable gift subscriptions, the gifter will additionally see a Manage gift recipient option, which allows them to manage the recipient of the gift.
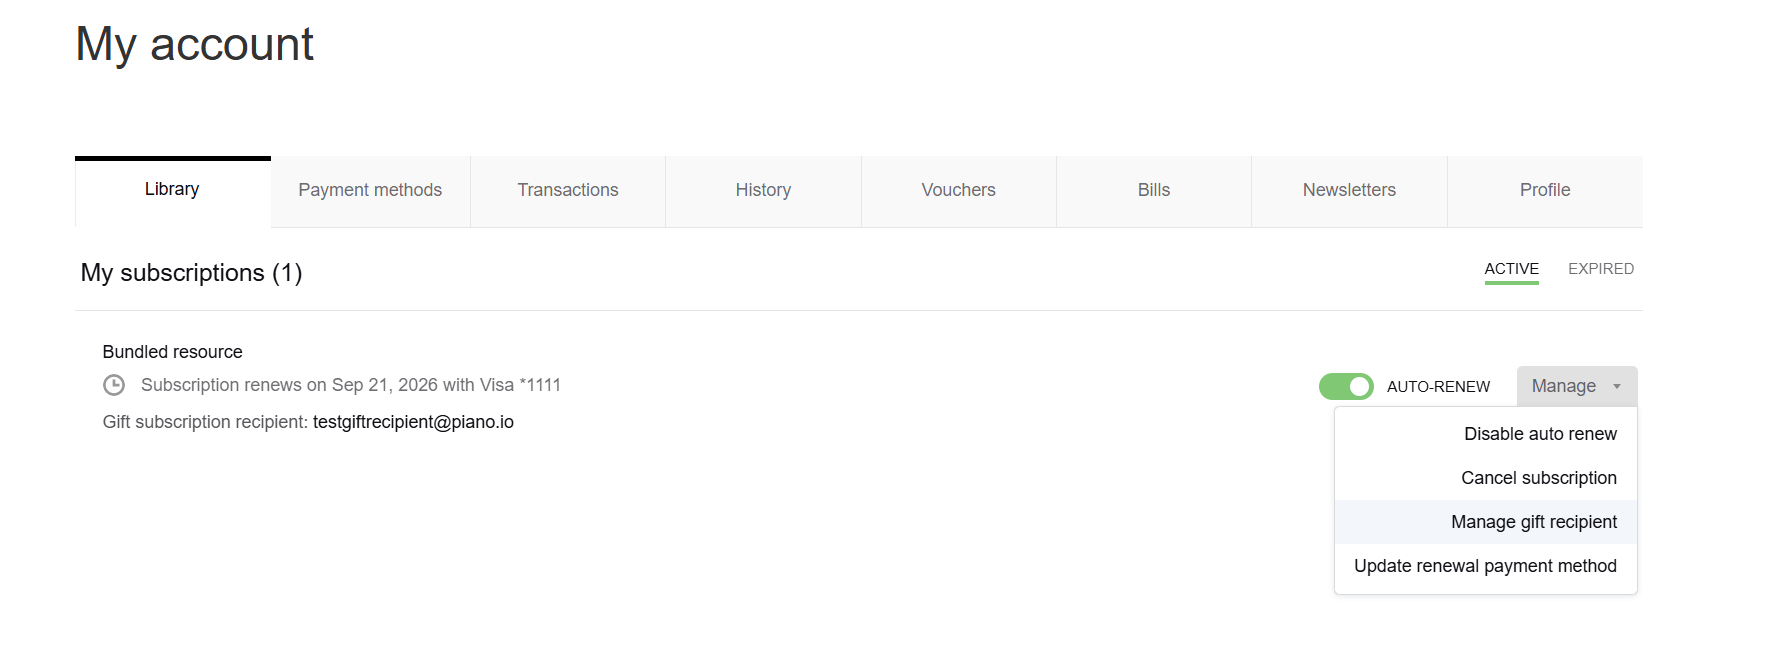
Renewable gift recipients will see a notification banner in the Library tab when a gift subscription is available for them to activate. Clicking on it will allow them to proceed with the redemption of the gift. Giftees who were already registered in Piano at the time of the gift purchase will redeem their access automatically and receive the gift delivery email.
If the term has a manual renewal period configured, an additional option "Renew now" will be available to users, which they can use to renew their subscription before the next billing date.
Users can also view their expired subscriptions using the appropriate tab. This view shows the users' past subscriptions, the date and time of expiration, and the payment method for each subscription.
The timezone for the next billing date displayed in the Library tab depends on the timezone of your application's dashboard instance. For the US dashboard, the timezone is EST, for the AP dashboard it's JST, and for the AU dashboard, it's AEST.
Cards & Payment Methods
The "Cards" or "Payment methods" tab presents a list of all payment methods on file for that user.
The information displayed from this view includes the type of payment method; for example, for a credit card, you will see the last 4 digits of the card number and the expiration date.
This navigation is a general overview; please note that payment-related functionality may vary based on an individual payment provider integration and its country or functional limitations - please always refer to the supported feature list on the given provider page.
Users have the option to remove any inactive payment method on their account by clicking the trash icon next to each listing.
Within this screen, the user can click "Add Card" to include another payment method in this list. The type of available payment methods depends on the payment providers configured for the given application. The user can then apply this card to future transactions without having to reenter the information by selecting the option "Apply this payment method to all active subscriptions".
Please note that on Piano EU instances, this feature is disabled by default due to PSD2, since capturing 3DS authentication in a user-friendly way is not possible. If you want to enable it, contact Piano Support.
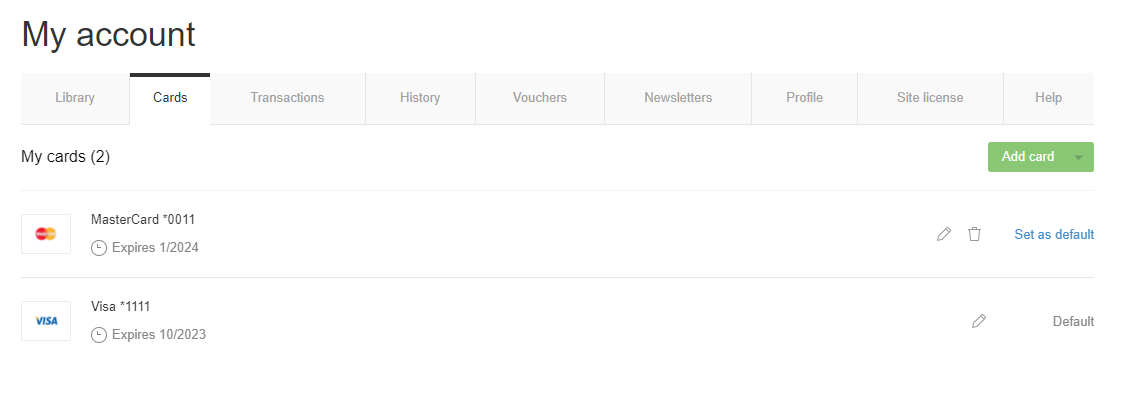
Users can also set any payment method as their default payment method through this tab. Doing so would apply the selected payment method to all ongoing subscriptions that the user has, and all future renewals would be charged to that payment method. To add this as an option in My Account, revert your template to default, or find the appropriate lines of code in the default version and include them in your My Account Wallet template.
If your payment provider supports editing payment methods, a user will be able to do so by clicking the pencil icon.
Please note, it is not possible to add an Apple Pay payment method through the My Account section.
Transactions
This tab shows an overview of all transactions conducted by that user or processed on their behalf. Each transaction is listed separately. The displayed information includes the term and resource name, the amount charged, the transaction status, and the date and time of conversion.
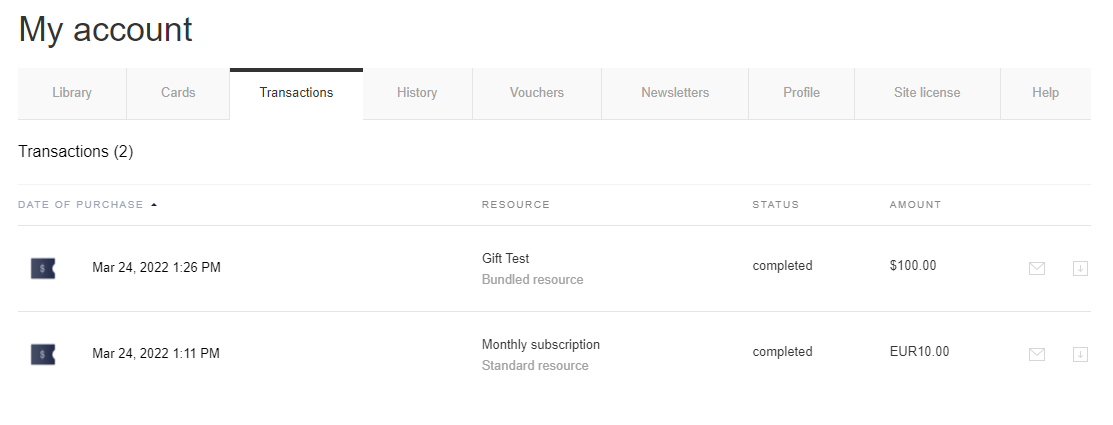
Users can also choose to obtain a receipt of their transactions, either by email or by downloading a .pdf. The icons on the right side of the above screenshot present those options respectively, and are presented via the following lines of code:
<td ng-show="canResendReceipt" class="actions">
    <div ng-show="event.lType === 'purchase' || event.lType === 'sub'">
        <a href="#" ng-click="resendReceipt(event)" class="icon-mail myaccount-action-icon" title="Send Email"></a>
        <a href="#" ng-click="downloadTransactionInfo(event)" class="icon-download myaccount-action-icon" title="Download PDF"></a>
    </div>
</td>
You should include the above as the last <td> in the table row <tr ng-repeat="event in events"></tr>.
History
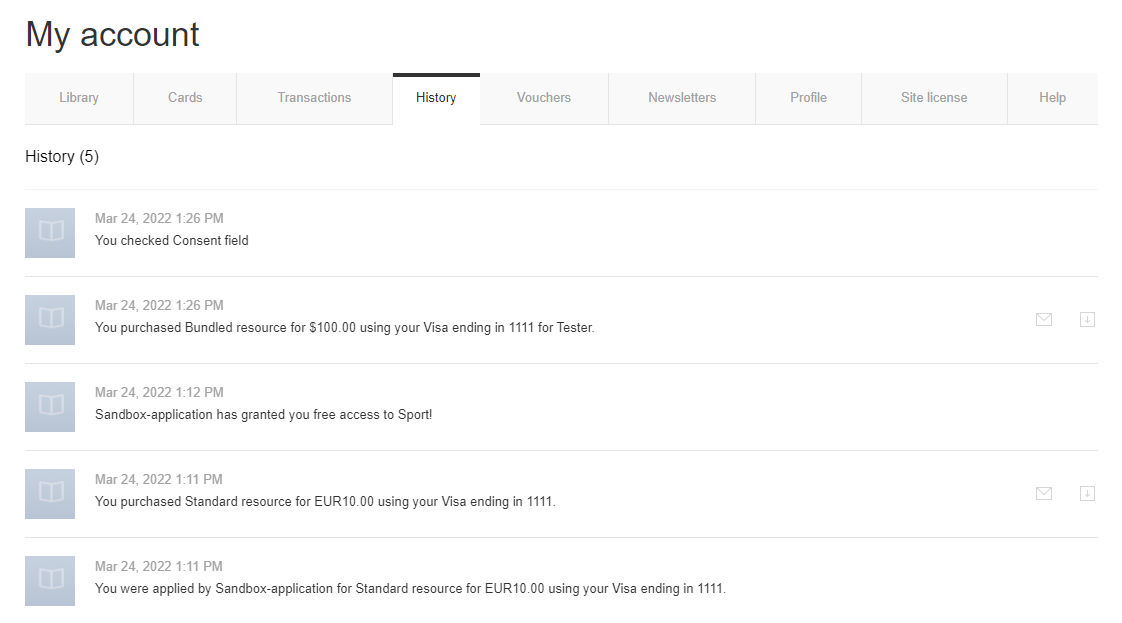
The "History" tab shows you any activity or events that have happened on the user's account. This includes granting access, purchases, consents, and others.
For purchases, similar to the Transactions tab, users are able to do download or email themselves a receipt of the payment.
Vouchers
This tab shows information about gifts given by that user.
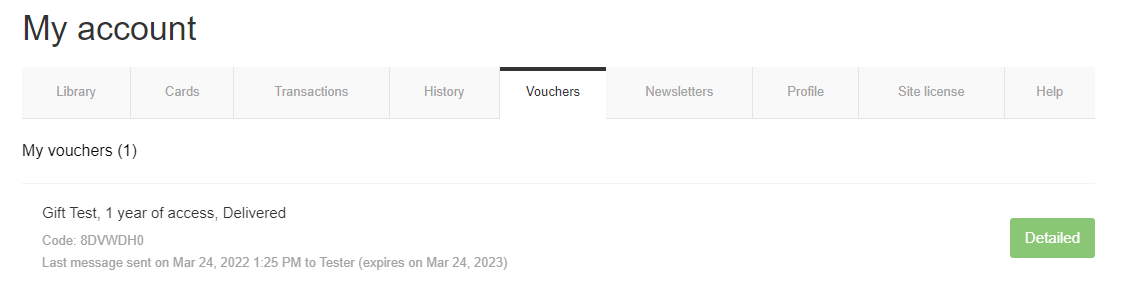
So the view for the gift sender includes information about the gift term, length of access, and delivery status of the last message. The sender of the gift voucher can also see the expiration of the voucher code as well as the code itself.
After clicking on "Detailed", more information about the gift purchased and the redemption status is shown.
The Vouchers tab displays only voucher-based gift subscriptions. Renewable gift subscriptions do not appear here; they are managed in the Library tab instead, where the gifter can manage the gift recipient and the recipient can activate the gift. For more information on renewable gifting, see Renewable Gifting.
Newsletters
If you’re utilizing both our ESP and Identity Management products, your users will have the ability to manage their newsletter subscriptions to ESP campaigns via My Account under the tab Newsletters. Please note that this option is only available for users who are already registered in My Account.
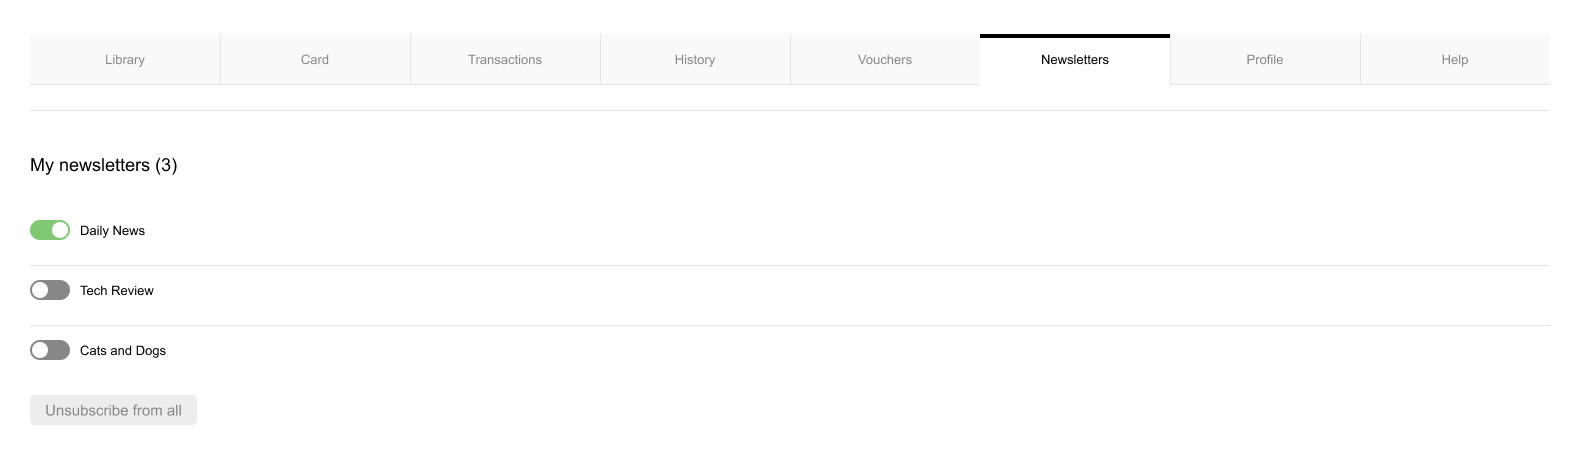
For this tab to be available, you will need to make sure that the below code snippet is added to the My Account Layout template in the relevant section.
<my-account-pianoid-newsletters ng-if="current=='pianoid-newsletters'"></my-account-pianoid-newsletters>
As well as the code below to the My Account Common Components template.
<li data-item="pianoid-newsletters"><a class="" href="#"><t>Newsletters</t></a></li>
The contents of this tab can be configured in the Identity Management Newsletters template and the design in the My Account Style template.
Profile
To add the design update of June 2024 to your existing templates, you can revert them to default or follow this manual.
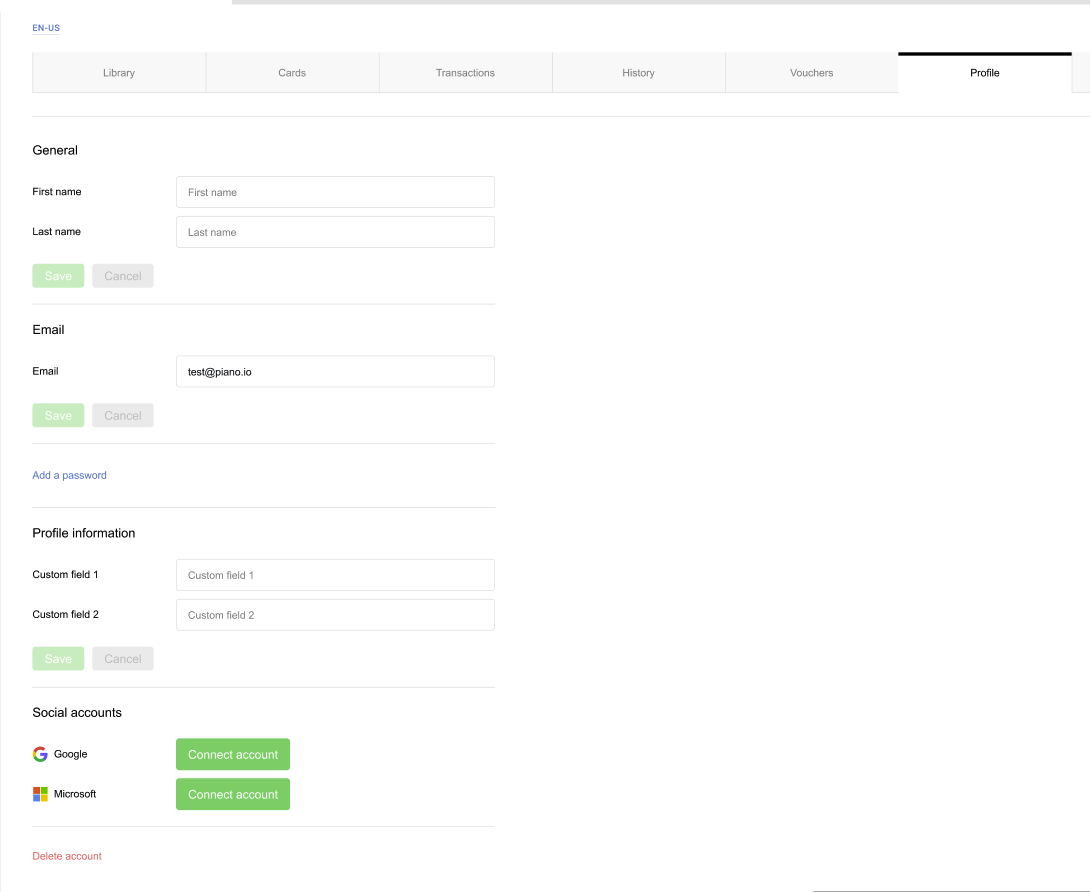
If you use Identity Management as your user provider, the Profile tab is where the user can view their account information.
The widget consists of the following blocks:
-
General (first and last names)
-
Email
-
Password
-
Profile information (custom fields)
-
Social accounts (if enabled)
-
Delete account (if enabled)
If password validation is enabled for your application, a user will need to confirm the newly entered password before being able to save the changes. The following update in the lines of the Identity Management Profile in My Account template would need to be made in order for the validation to work.
From:
<span showIfConfirmPasswordInvalid class="error-message"><t>New and confirmation password do not match</t></span>
To:
<input type="password" fieldProfileRepeatNewPassword id="repeat_password" placeholder="{{ 'Confirm new password' | t }}">
<span showIfConfirmPasswordInvalid class="error-message"><t>New and confirmation password do not match</t></span>
For passwordless users, the Profile tab is a place where a user can set a password.
If you have social login enabled on your application, users will also be able to connect their social networks in this tab by clicking on the "Connect" button next to the respective option.
Once any edits are done to this page, the user can click on the "Save changes" button to apply them.
Site license
This tab is only shown to users who have Licensee representative view permissions for the given contract.
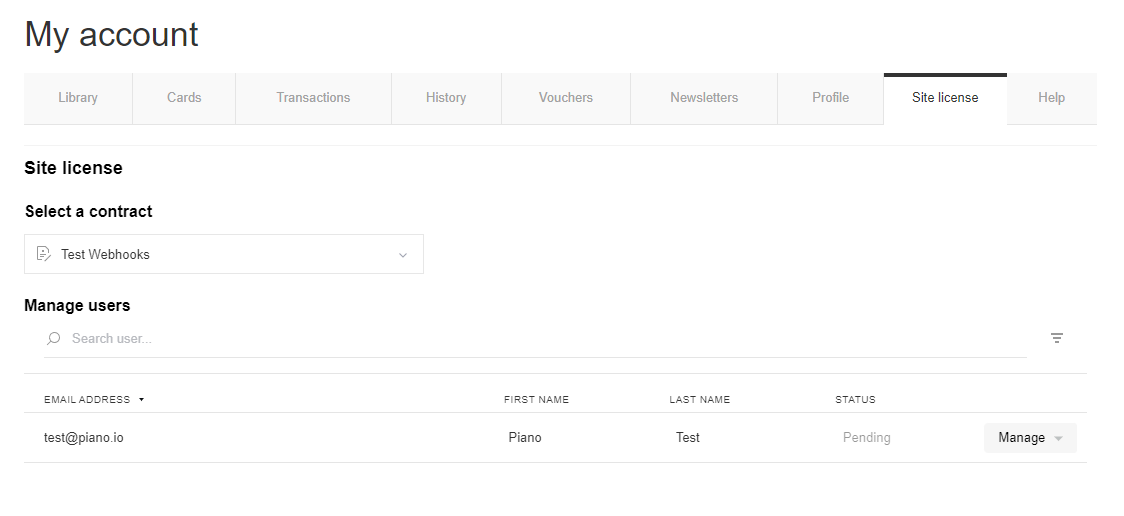
More information about this is available here.
Help
The help tab gives users the ability to interact with your customer service department via the inquiry system. In this tab, users can submit inquiries, monitor existing inquiries, and see a list of every inquiry they have ever opened. For information on implementing the My Account Help Tab, see this guide.
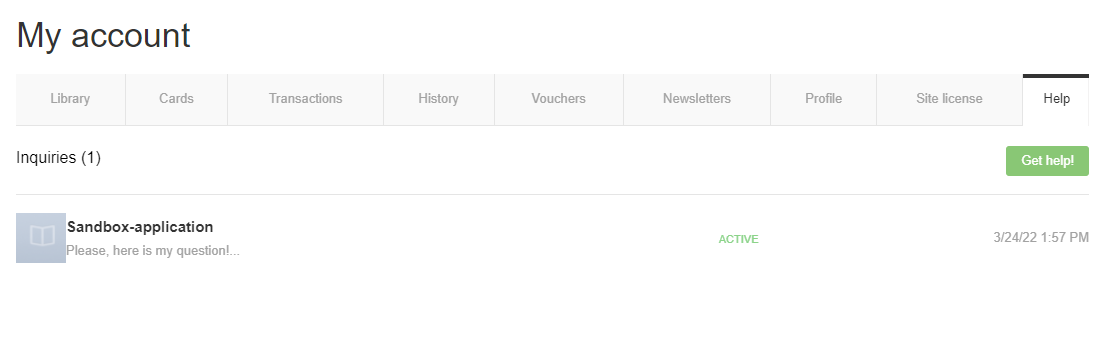
To submit an inquiry, the user can click on "Get help!", then select the resource they have access to and enter their message or question into the respective input field.
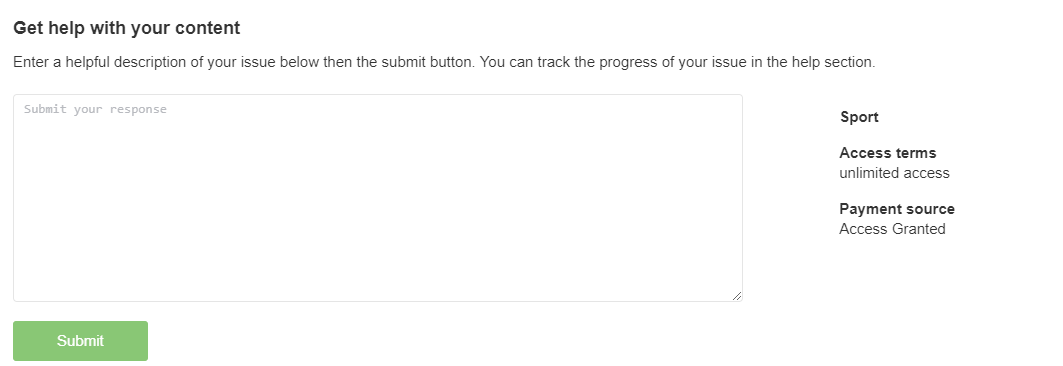
Clicking on "Submit" will send their inquiry to the client and it can be viewed from the Piano dashboard under Users > All Users > Inquiries tab.