
One of the first steps in setting up Piano is to configure your business-specific information and settings. To make changes, click Edit Business in the Piano Dashboard.
⚠️ Important: Please avoid managing multiple applications (AIDs) at the same time across separate tabs within a single browser session. The Piano Dashboard relies on a shared session cookie (SEL_AID) to track which application is currently active, so switching applications in one tab updates the context for every other tab in that session. As a result, actions taken elsewhere — such as publishing integration code or updating business settings — may be applied to a different application than the one shown on screen, with no warning or confirmation.
If you need to work with multiple AIDs simultaneously, we recommend opening each one in a separate browser profile or in an incognito/private window to keep their sessions fully isolated.
Business Name: The name of your business. Be aware that the name you enter here can be exposed to end users in templates, email notifications, and during customer service communications.
Website URL: The URL of your website. As with business name, your website URL can be exposed to end users in templates, email notifications, and during customer service communications.
My account page URL: The URL of your My Account page, which can be included in shared-subscription-related email notifications for end users. Refer to the documentation here for guidance on initializing the My Account component.
Site Licensing Landing Page URL: The landing page URL that users will be directed to in order to redeem access to a Site Licensing contract.
Payment authentication page URL: The URL where you'd like to redirect users in case their renewal has failed due to a 3D-Secure authentication error. Only available for clients using Braintree, Stripe and Cybersource as their payment providers. More information here.
Google Analytics: If you're using Piano's Universal Analytics integration, you'll need to enter your GA tracking ID here. If you're using Google Analytics 4 (GA4), see the GA4 documentation here.
Checkout authentication in separate state: Allows you to control the display of the login and checkout, either separated or in one screen, as well as the custom fields from registration forms. More details are available here.
Time Zone: The timezone that will be used for your application's reports.
Business logo: This image should be 400x400 pixels and will appear as the default image at various points during checkout. The maximum file size of the logo is 2MB.
API IP whitelisting: Set up a list of IP addresses that are allowed to make API calls to the Piano Management + Billing API. More details are available here.
Support email: This is the email address that your customers will receive notifications from and the email address your users can respond to.
Notification email: This is the email address that Piano will send emails regarding activity and changes to your application.
Braintree user statement phone: For clients using Braintree for payment processing, this phone number is included in the transaction detail reports. Every transaction conducted through a credit card has a descriptor the purchaser can use to identify the transaction. When entered, this phone number becomes a part of that descriptor. Entering it here is optional.
Blocked emails for password reset: Users with emails added to this list won't be able to change their password. For example, in case multiple users can access a corporate email address.
Set refund periods: These fields allow you to limit when users with different payment or dynamic subscription durations can cancel and refund their purchases from within the My Account Component.
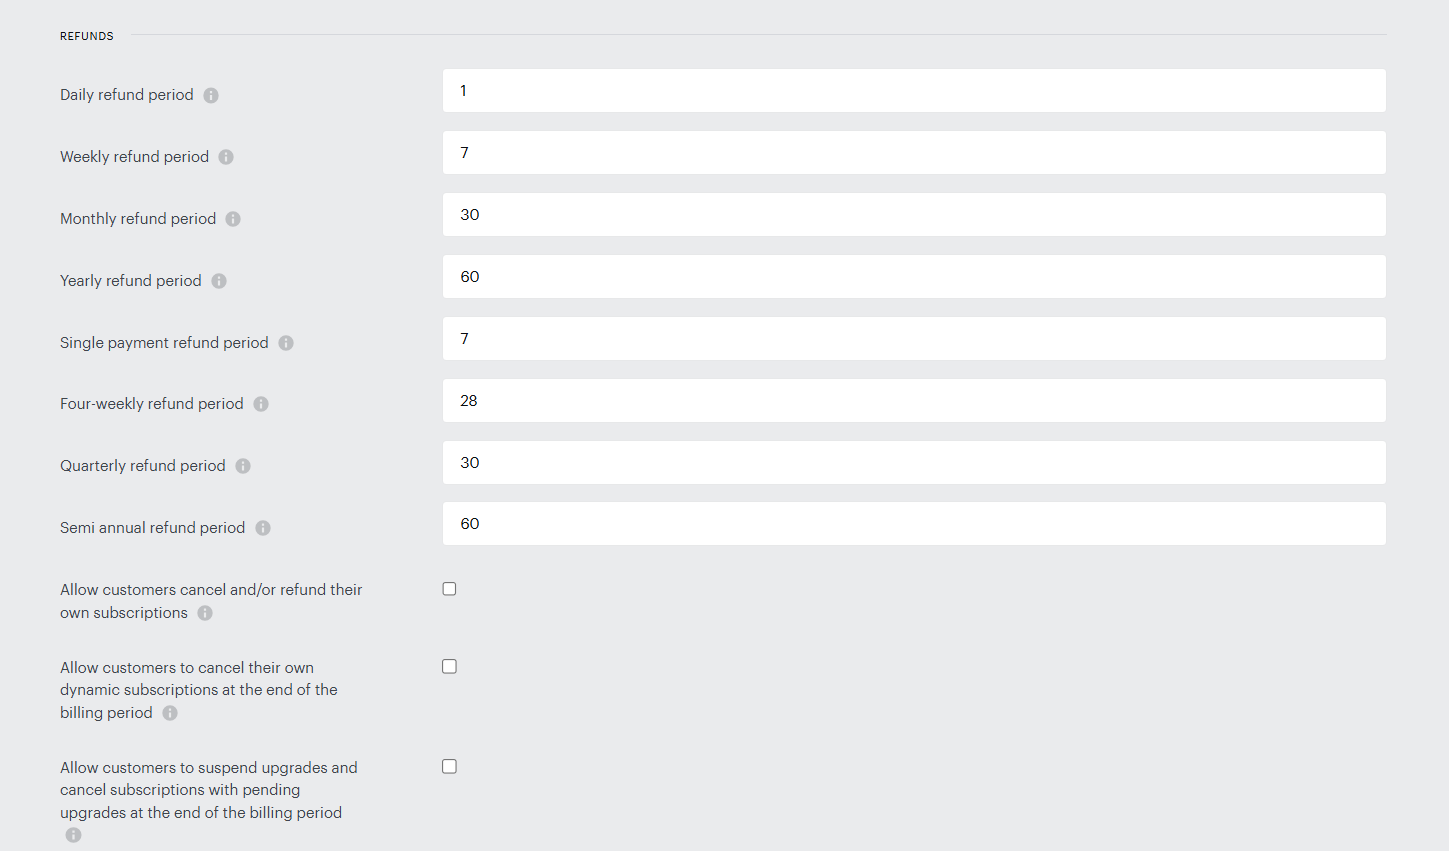
For example, you may want to give users with monthly subscriptions a week to receive a refund while you give users with annual subscriptions longer. Each of these refund periods is set by typing in the number of days. Note that the number of days cannot be greater than the subscription renewal period (i.e. a monthly refund period can't be greater than 30 days). Once you've set these values, users can get a refund directly on your website through My Account. Please note that this option applies to every transaction that is charged for an active subscription — both the initial subscription purchase and any subsequent renewal. You can also manually provide a refund by clicking the Users tab, selecting Subscribers, clicking on the profile of the user you want to provide a refund to, clicking Transaction, and hitting Refund. The refund periods you can specify:
-
Daily refund period
-
Weekly refund period
-
Monthly refund period
-
Yearly refund period
-
Single payment refund period
-
Four-weekly refund period
-
Quarterly refund period
-
Semi-annual refund period
The window is calculated from the payment date, not the start of the access period.
To allow users to refund or cancel their subscriptions (based on the defined refund period) for both payment and dynamic terms via My Account, ensure the Allow customers cancel and/or refund their own subscriptions checkbox is enabled. For dynamic subscriptions, two options are available: cancel with refund and cancel subscription (a deferred, non-immediate cancellation).
For payment subscriptions, users can still disable auto-renewal via My Account regardless of this setting.
Allow customers to cancel their own dynamic subscriptions at the end of the billing period defines if customers can cancel their own dynamic subscriptions at the end of the billing period.
Another checkbox Allow customers to suspend upgrades and cancel subscriptions with pending upgrades at the end of the billing period can be checked if you'd like to give users the option to cancel a pending upgrade via My Account. A pending upgrade can only be canceled if the billing is not immediate and is scheduled for the end of the billing period.
Please note that in this context, "cancel" also refers to the ability for the user to suspend their pending upgrade by disabling auto-renewal on their current subscription. This suspension allows them to revert to the upgrade before the billing period ends, should they choose to re-enable auto-renewal. If they don't, the subscription will expire without the upgrade.
If the setting to allow the cancellation of dynamic or payment subscriptions is also enabled, users can cancel their subscription, which will also cancel the pending upgrade, causing the subscription to expire immediately.
An email notification (if the Pending term change cancellation email is enabled) is only sent when the pending upgrade cancellation is performed through the Piano dashboard or when the subscription is canceled using the "Cancel subscription" option in My Account (if the "Allow customers to cancel and/or refund their own subscriptions" setting is enabled). More details about the pending upgrade settings are available here.
In case this checkbox is NOT checked, users will not be able to disable auto-renewal to suspend the pending upgrade via My Account, nor will they be able to cancel their subscriptions with the pending upgrade.
Fraud prevention settings:
This section allows you to update the following settings:
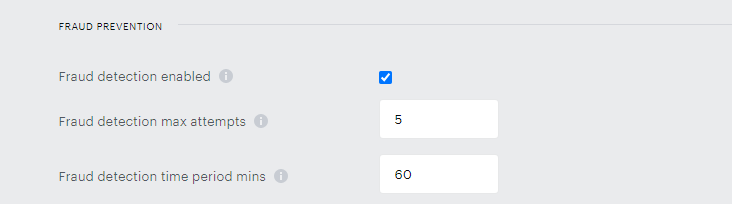
Fraud detection enabled: Enables the Fraud detection feature for your application, which allows granular control over fraud rate limiting settings. Default state: Enabled
Fraud detection max attempts: Define the maximum allowed attempts (1 to 20) to enter card credentials before the fraud limiter restricts purchase requests across all interfaces. Default value: 5
Fraud detection time period mins: Specify the time duration in minutes (1 to 1440) during which attempts to enter card credentials are tallied. If the maximum attempts threshold is reached, subsequent purchase requests will be blocked for the remaining minutes starting from the initial failed attempt. Default value: 60 minutes

Prevent 'Add payment method' from loading for unsubscribed users: This setting helps mitigate fraud risks by restricting unsubscribed users from adding payment methods in My Account. When enabled, it blocks the "Add payment method" dropdown menu from loading for users without an active subscription. It operates independently of the fraud detection settings described above, so it may be enabled even if fraud detection is disabled.
This setting does not affect the checkout process, allowing users who create an account but do not complete the subscription to still make a purchase. However, churned users will not be able to add a new payment method via My Account until they resubscribe. Users in the grace period can continue updating their payment method to restore their subscriptions.
Miscellaneous settings:
This section allows you to update the following settings:
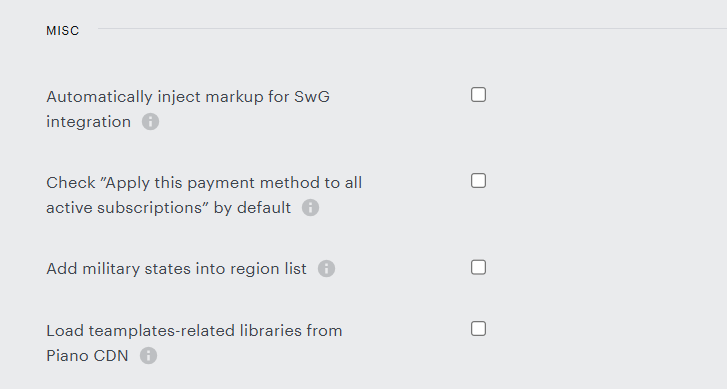
Automatically inject markup for SwG integration: If Subscribe with Google is enabled, the markup is automatically injected.
Check "Apply this payment method to all active subscriptions" by default: Allows the default state of "Apply this payment method to all active subscriptions" checkbox to be enabled when a new card is added by a user, in My Account, Checkout or in the Dashboard.
Add military states into region list: Adds military states into the region list available for tax region selection.
Load templates-related libraries from Piano CDN: Load Angular.js and all templates-related libraries from Piano CDN in case Google CDN is blacklisted on client’s side.
Double Opt-in settings:
Please note, that the additional settings of this section will only be available if the setting Enable double opt-in is checked. Only available if you're using Identity Management as your user provider.

More information about the Verification link expiration time, Confirmation URL and Deferred Double Opt-in is available here.
Enable inquiries for My Account widget: Adds a "Help" tab to the My Account section, where users can create an inquiry.
PSC settings:
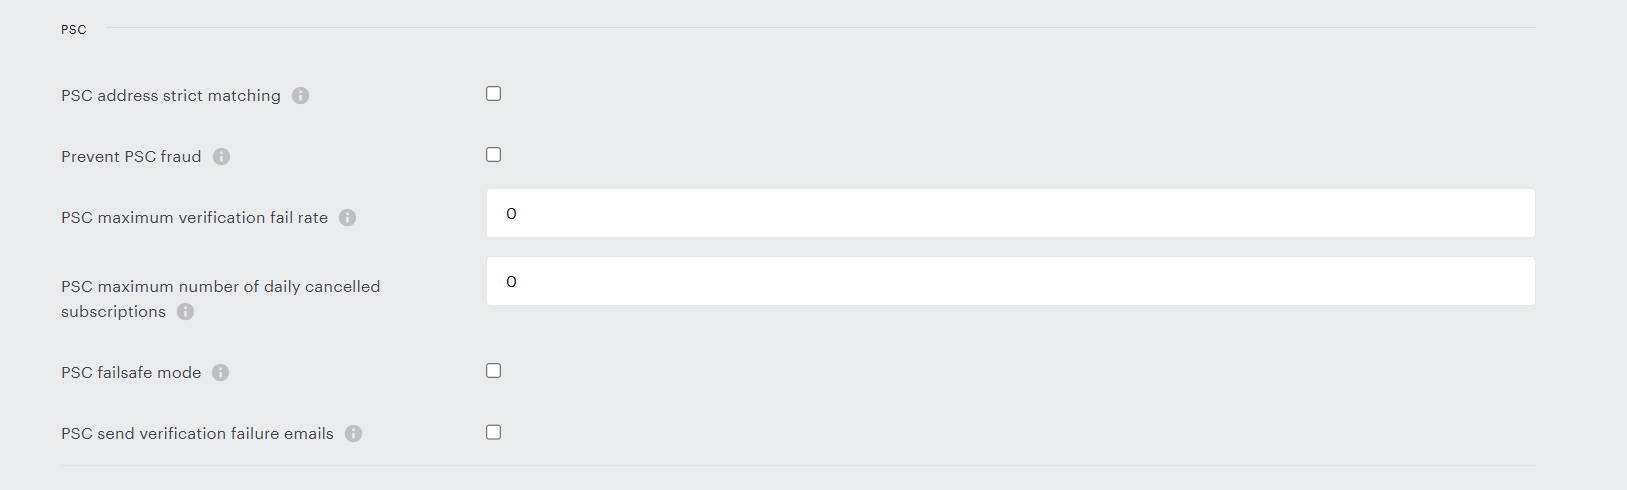
Print Subscription Confirmation (PSC) allows clients to connect digital subscriptions with print subscriptions, making it easier to deliver online content seamlessly to your users. More information about the individual settings can be found here.
For new integrations, we recommend using Custom or Linked terms instead of this legacy PSC process.
Tax Support: You can configure tax settings for your application by navigating to Edit Business → Settings → Tax Support. More details about the individual configuration options can be found on the dedicated page here.