
Overview
Computed Traits allow you to create new, derived user attributes by transforming or combining existing profile data. Instead of relying solely on raw collected data, you can define logic that automatically calculates new values, such as combining a first name and last name into a full name, converting text to uppercase, or applying conditional logic.
Computed Traits in Piano Audience support two modes:
-
Basic Mode: A visual, no-code UI that lets you create computed traits with a few clicks by selecting functions and arguments from dropdowns.
-
Advanced Mode: A code-based editor using JavaScript for maximum flexibility and power. See Computed Traits: Advanced Mode for details.
This article focuses on Basic Mode.
Getting Started
Mandatory Fields
To create a new Computed Trait, you must provide two mandatory fields on the right-hand panel:
|
Field |
Required |
Description |
|---|---|---|
|
Name |
Yes |
A unique identifier for the computed trait (e.g., computed_trait_example). Max 255 characters. |
|
Type |
Yes |
The data type of the resulting trait. See Supported Data Types below. |
You may also optionally fill in:
-
Display Name: A human-readable label for the trait (e.g., "CT Example"). Max 255 characters.
-
Description: A brief explanation of what the computed trait does (e.g., "Combine first & last name into full name attribute"). Max 400 characters.
The following fields are automatically set and cannot be modified:
-
Category: Always set to Computed.
-
Source: Always set to Audience API.
Once the mandatory fields are filled in, you can begin defining your computed trait logic.
Supported Data Types
The following data types are available when creating a Computed Trait:
|
Type |
Description |
Example |
|---|---|---|
|
INT |
Integers. Can safely store integers in the range -(2⁵³ − 1) to 2⁵³ − 1. |
12 |
|
FLOAT |
Double-precision 64-bit IEEE 754 floating point numbers. |
84.15 |
|
BOOLEAN |
Boolean values. |
true, false |
|
DATETIME |
Date-time with millisecond resolution. Must use ISO 8601 format. |
2021-01-26T16:31:48.722Z |
|
STRING |
Default strings (arbitrary), optimized for wildcard searches. |
"string" |
|
KW |
Keywords, strings up to 255 characters, optimized for exact match searches. |
"string" |
|
TEXT |
Arbitrary strings automatically tokenized upon indexing, suitable for long texts. |
"arbitrary strings which are automatically tokenized" |
The OBJECT and MIXED data types are not supported for Computed Traits.
When Are Computed Traits Evaluated?
Computed Traits are evaluated in real time as soon as an update to any of the affected source attributes is recognized. For example, when an API call updates a user's first name or last name, any computed trait that references those fields (such as a "full name" concatenation) is automatically recalculated.
There is no manual trigger or scheduled batch process required. As long as the source attributes are being updated through supported channels (such as the Audience API), your computed traits will stay current.
Logic Categories
When creating a Computed Trait, in both Basic and Advanced modes, you will see three logic category tabs on the left-hand side of the editor: Processing, Init, and Merge. Each category determines when and how the computed trait logic is executed.
Processing
Processing logic runs automatically whenever an existing user profile is updated. It recalculates the computed trait based on changes to profile attributes such as purchase history, subscription status, or any other updated field. This is the most commonly used category and ensures your computed traits stay current as user data evolves.
Init
Init logic executes only when a new user profile is created. It sets the initial value of the computed trait using whatever attributes are available at the time of profile creation. Use this category when you need to establish a baseline value for new users.
Merge
Merge logic triggers when two user profiles are combined into a single profile. This is common in identity resolution scenarios. The merge logic aggregates or recalculates the computed trait to accurately reflect the consolidated data from both profiles.
You can define logic independently for each category. For example, you might use concat in Processing to keep a full name up to date, while defining different merge behavior to resolve conflicts when two profiles are combined.
Creating a Computed Trait in Basic Mode
Step 1: Select a Function
After entering the required Name and Type, navigate to the Processing tab (or Init/Merge, depending on your use case). In the left-hand panel, you will see a Function call dropdown labeled "Select operator." Click on it to reveal the available functions.
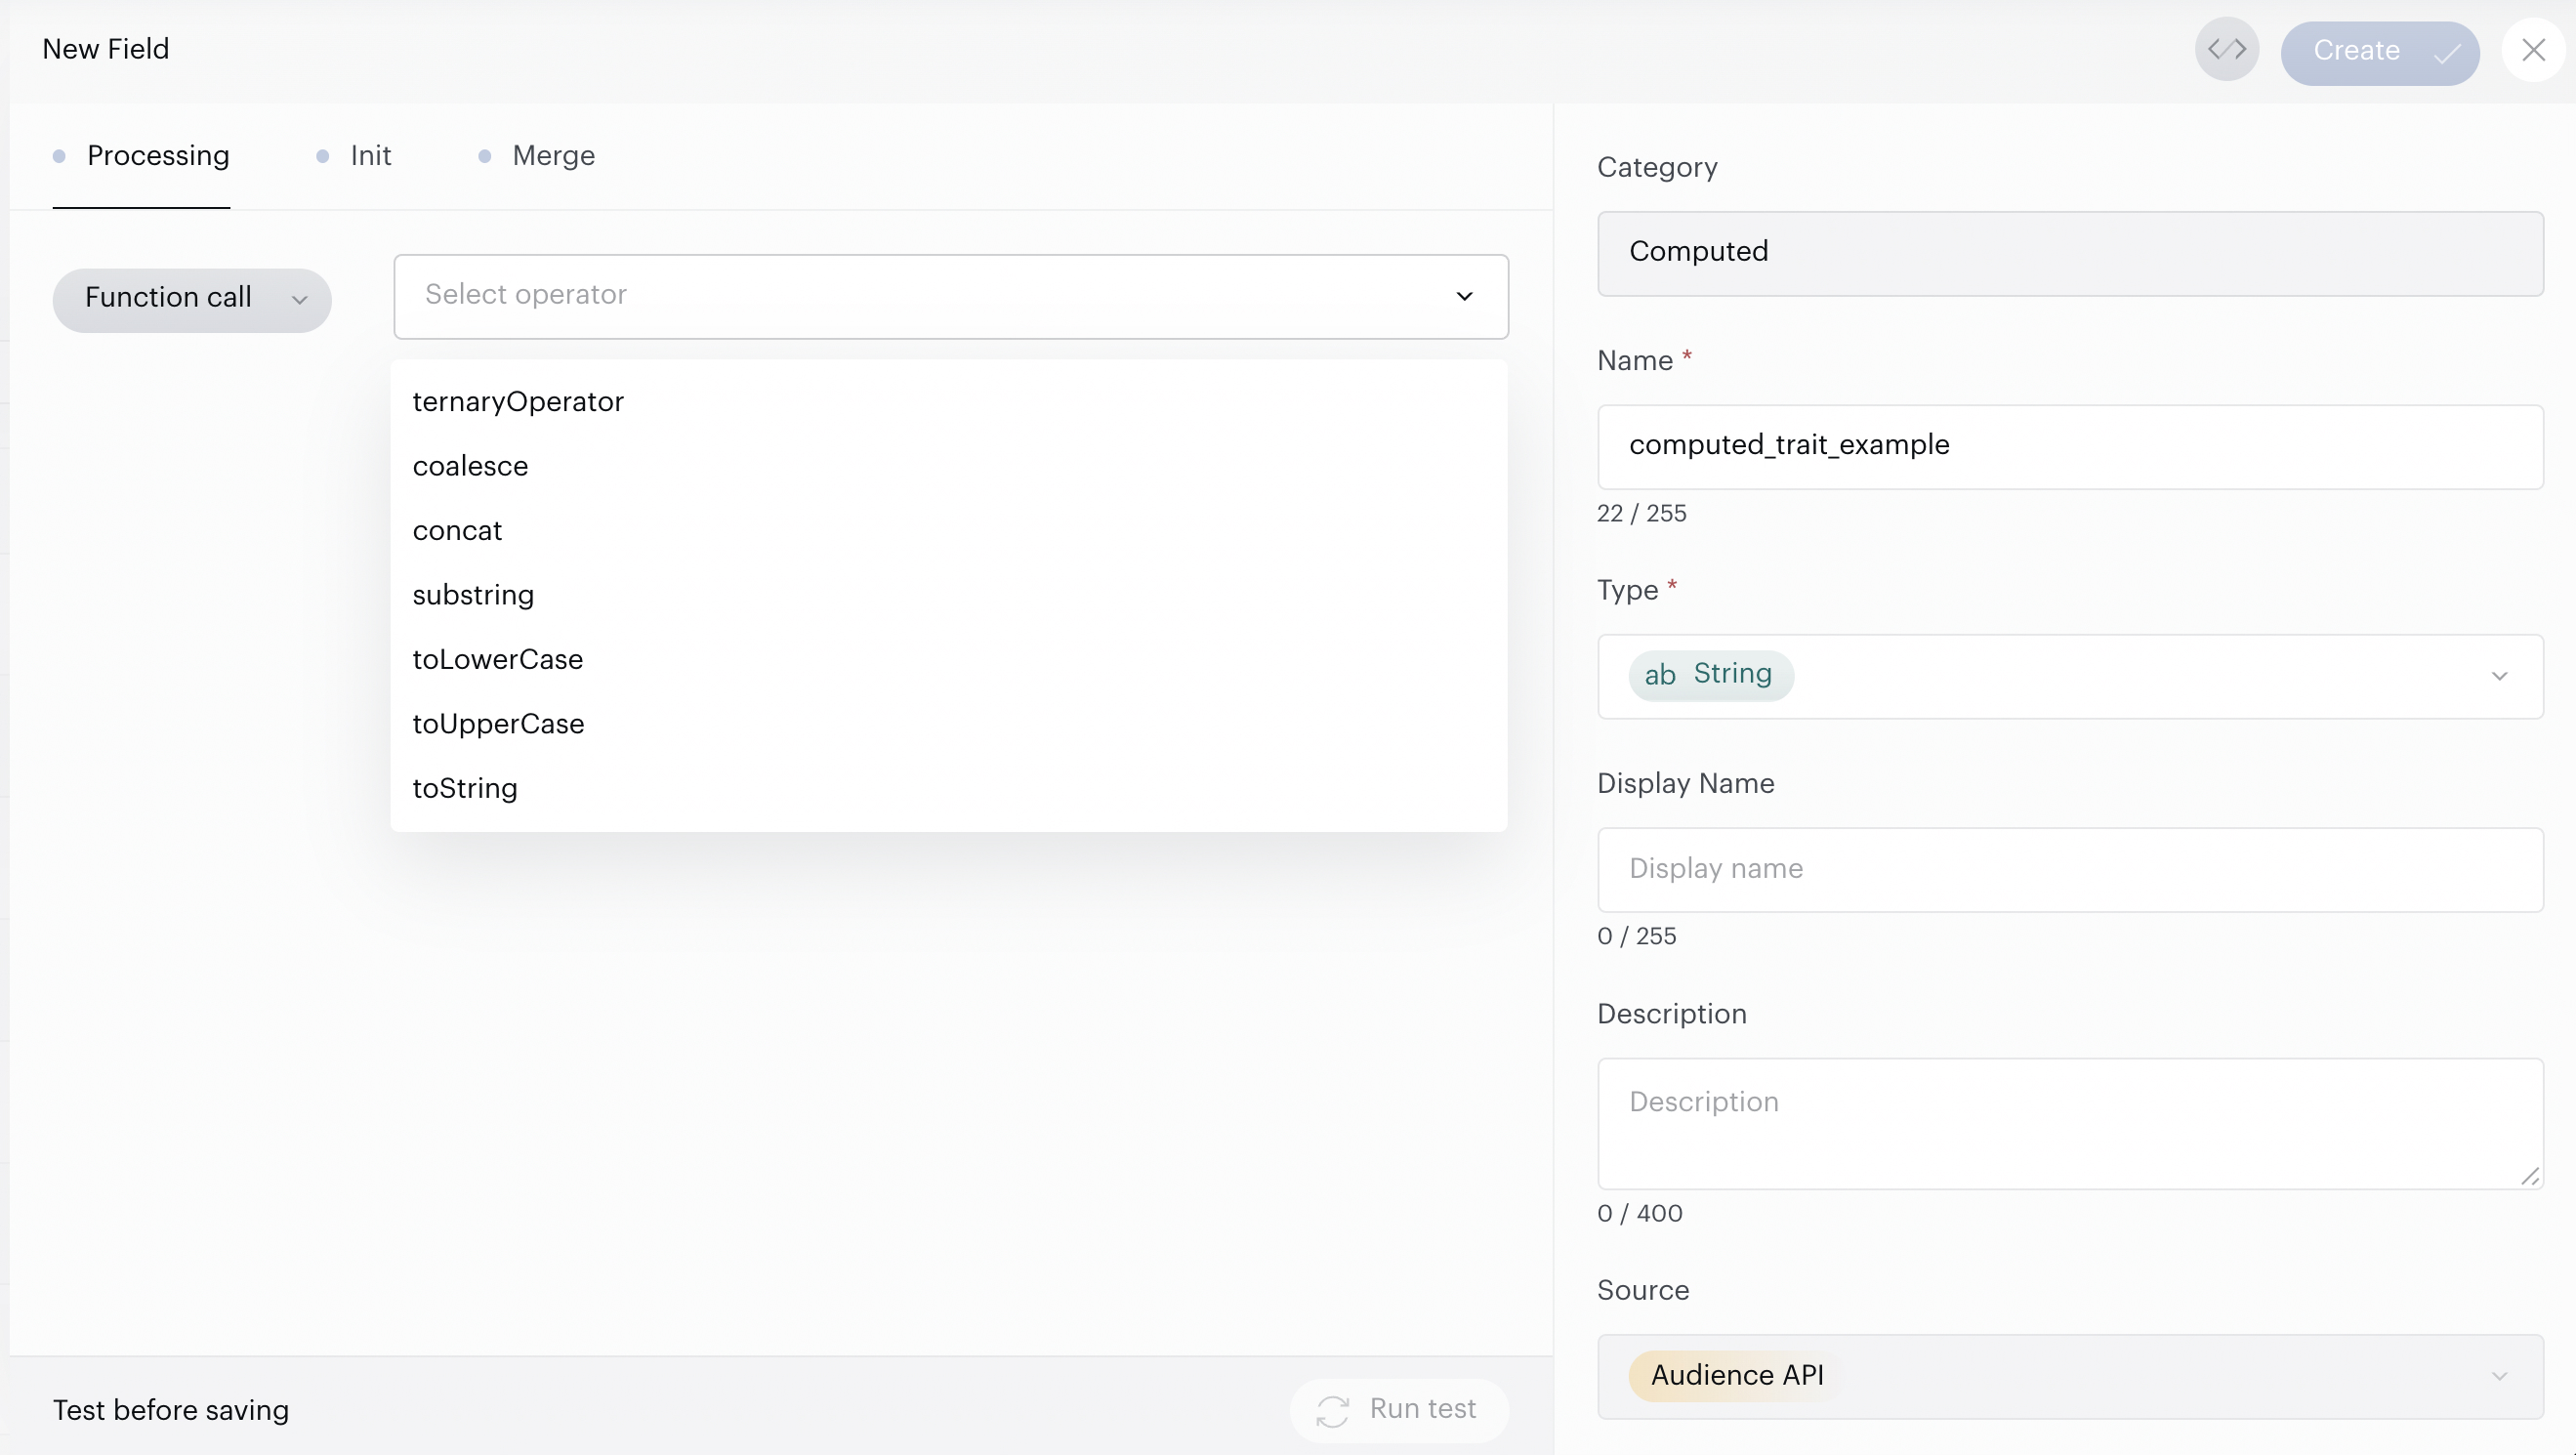
The functions available in the operator dropdown depend on the Type selected for your computed trait. The UI will always display only the functions applicable to your chosen data type.
Below is a reference of all available functions, organized by data type:
Boolean Functions
|
Function |
Description |
|---|---|
|
isEqual |
Compares two values (number, string, date, or boolean). Returns true if they are exactly the same. |
|
isNotEqual |
Compares two values. Returns true if they are different. |
|
isLess |
Compares two values (number or date). Returns true if left < right. For dates: earlier than. |
|
isLessOrEqual |
Compares two values (number or date). Returns true if left ≤ right. |
|
isGreater |
Compares two values (number or date). Returns true if left > right. For dates: later than. |
|
isGreaterOrEqual |
Compares two values (number or date). Returns true if left ≥ right. |
|
not |
Inverts a boolean value (true → false, false → true). |
|
and |
Combines multiple conditions. Returns true only if all are true. |
|
or |
Combines multiple conditions. Returns true if at least one is true. |
|
ternaryOperator |
Conditional output: condition ? valueIfTrue : valueIfFalse. Use to return any data type based on a condition. |
Integer / Float Functions
|
Function |
Description |
|---|---|
|
+ (add) |
Adds two or more numbers. Great for summing revenue fields, calculating totals, or building LTV traits. |
|
- (subtract) |
Subtracts the right value from the left. Useful for discounts, churn calculation, etc. |
|
* (multiply) |
Multiplies numbers (e.g., quantity × price, or conversionRate × 100). |
|
/ (divide) |
Divides left by right. Returns a float result (e.g., totalRevenue / orders → AOV). Division by zero returns null. |
String / Text / Keyword Functions
|
Function |
Description |
|---|---|
|
concat |
Joins two or more strings (e.g., firstName + " " + lastName → "John Doe"). |
|
substring |
Extracts part of a string using start index and optional length/end index. |
|
includes |
Checks if a string contains a substring. Returns true or false. |
|
toLowerCase |
Converts the string to lowercase. |
|
toUpperCase |
Converts the string to uppercase. |
|
toString |
Converts any value to its string representation. |
Date / Time Functions
|
Function |
Description |
|---|---|
|
getISODate |
Converts a date/time value to ISO 8601 format (e.g., "2025-11-20T00:00:00Z") for standardization. |
Select the function that matches your desired transformation.
Step 2: Configure Arguments
Once a function is selected, you will configure the arguments (inputs) for that function. Each argument can be set to one of the following types via its own dropdown:
-
Field value: References an existing attribute from the user profile (e.g., Profile:firstName:FACT:STRING).
-
Constant value: A static, hard-coded value you define (e.g., a space character " "), with a selectable data type such as STRING.
-
Function call: Selects another function as the argument, enabling nested transformations. This is useful when you need to chain multiple operations, for example, converting a concatenated string to lowercase in a single computed trait.
You can add additional arguments by clicking the + Add argument link below the existing arguments.
Example: Creating a "Full Name" Computed Trait
Let's walk through a practical example where we combine a user's first name and last name into a new attribute called full name.
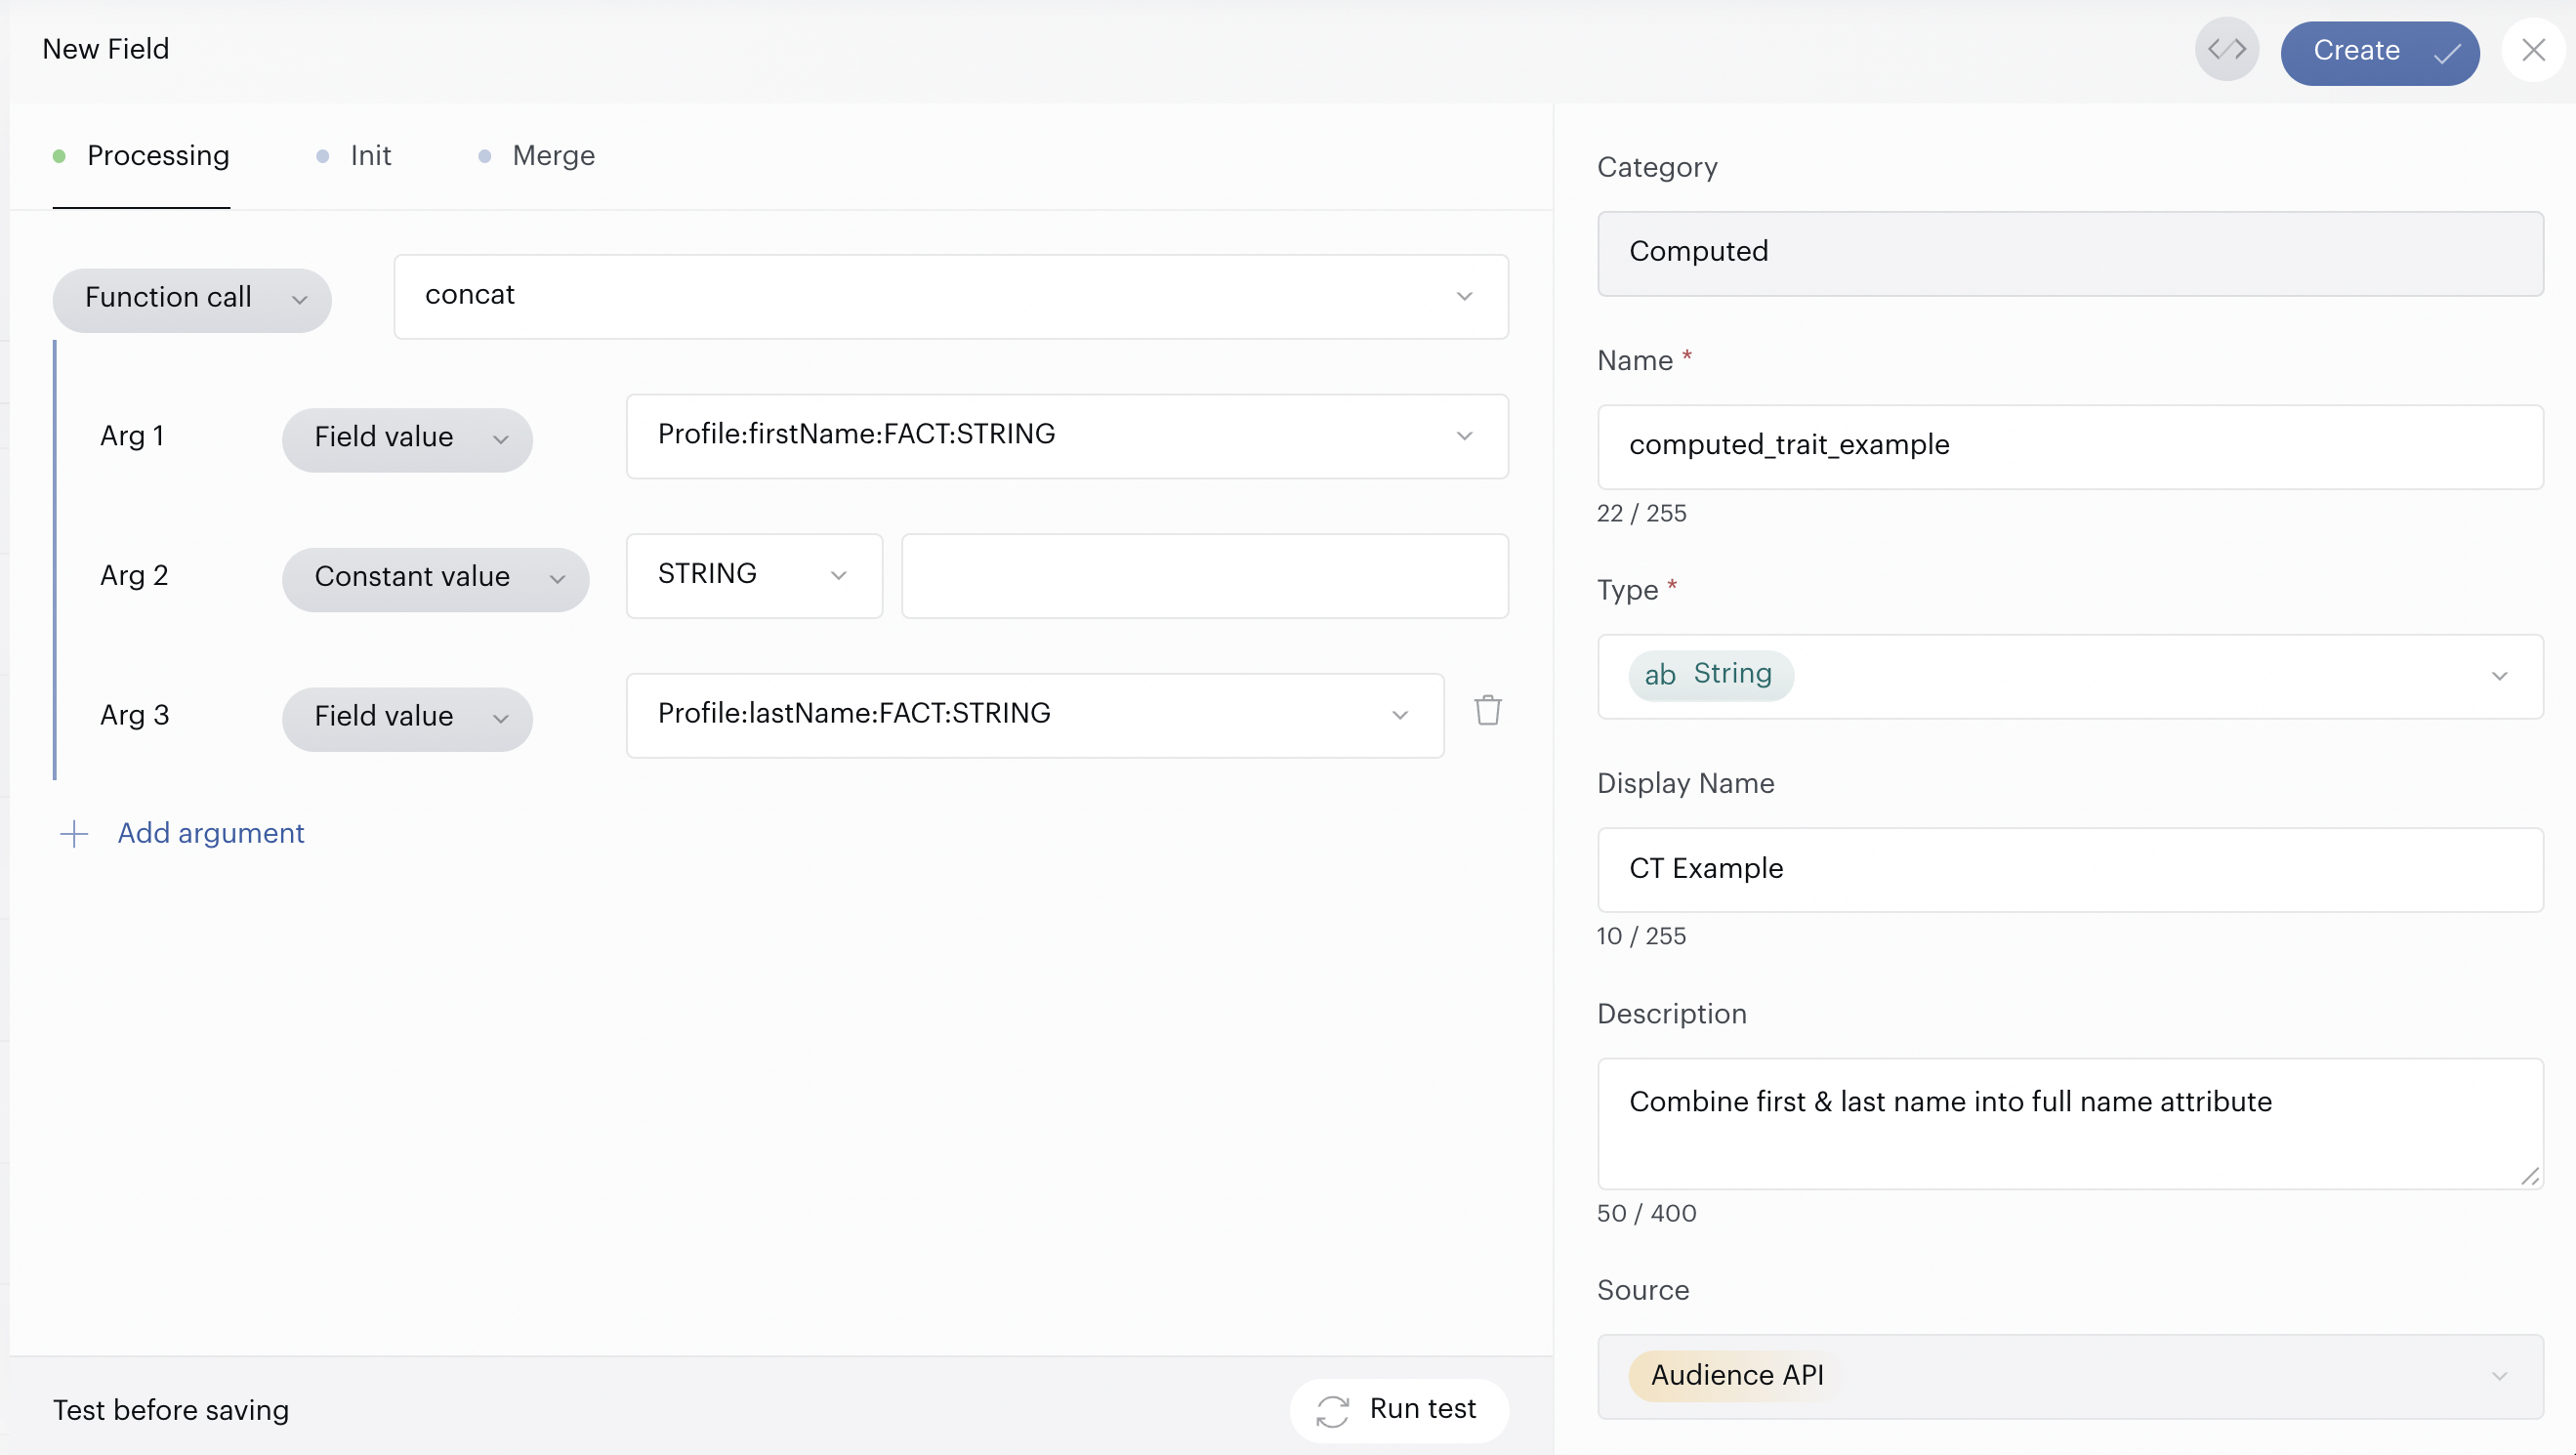
Configuration:
-
Name: computed_trait_example
-
Type: String
-
Function: concat
Arguments:
|
Argument |
Type |
Value |
|---|---|---|
|
Arg 1 |
Field value |
Profile:firstName:FACT:STRING |
|
Arg 2 |
Constant value |
" " (a space character, type: STRING) |
|
Arg 3 |
Field value |
Profile:lastName:FACT:STRING |
Step-by-step:
-
In the Processing tab, select concat from the function dropdown.
-
Arg 1 is automatically added. Set the type selector to Field value and select the Profile:firstName:FACT:STRING attribute from the dropdown.
-
Arg 2 appears next. Switch the type selector to Constant value, set the data type to STRING, and enter a single space ( ) in the input field. This ensures a space separates the first and last name.
-
Click + Add argument to add Arg 3. Set the type selector to Field value and select the Profile:lastName:FACT:STRING attribute.
Your computed trait will now produce a combined full name such as "John Johnson" for any matching profile.
Testing with Dry Run
Before saving your Computed Trait, it is strongly recommended to validate your logic using the built-in Dry Run capability. This testing feature is available in both Basic and Advanced modes.
Running a Test
At the bottom of the Computed Trait editor, you will see a "Test before saving" section with a Run test button. Click Run test to execute your computed trait logic against sample data.

After the test completes, you will see:
-
Evaluation status: Displays SUCCESSFUL (highlighted in green) if the logic executed without errors.
-
Last Run timestamp: Shows when the test was last executed (e.g., "Last Run: March 11, 2026 at 08:42 AM").
Viewing Detailed Results
Click Show result to expand the result panel and view the actual output of the computed trait. The system runs your logic against randomly selected test profiles from your customer account, displaying the resulting value.
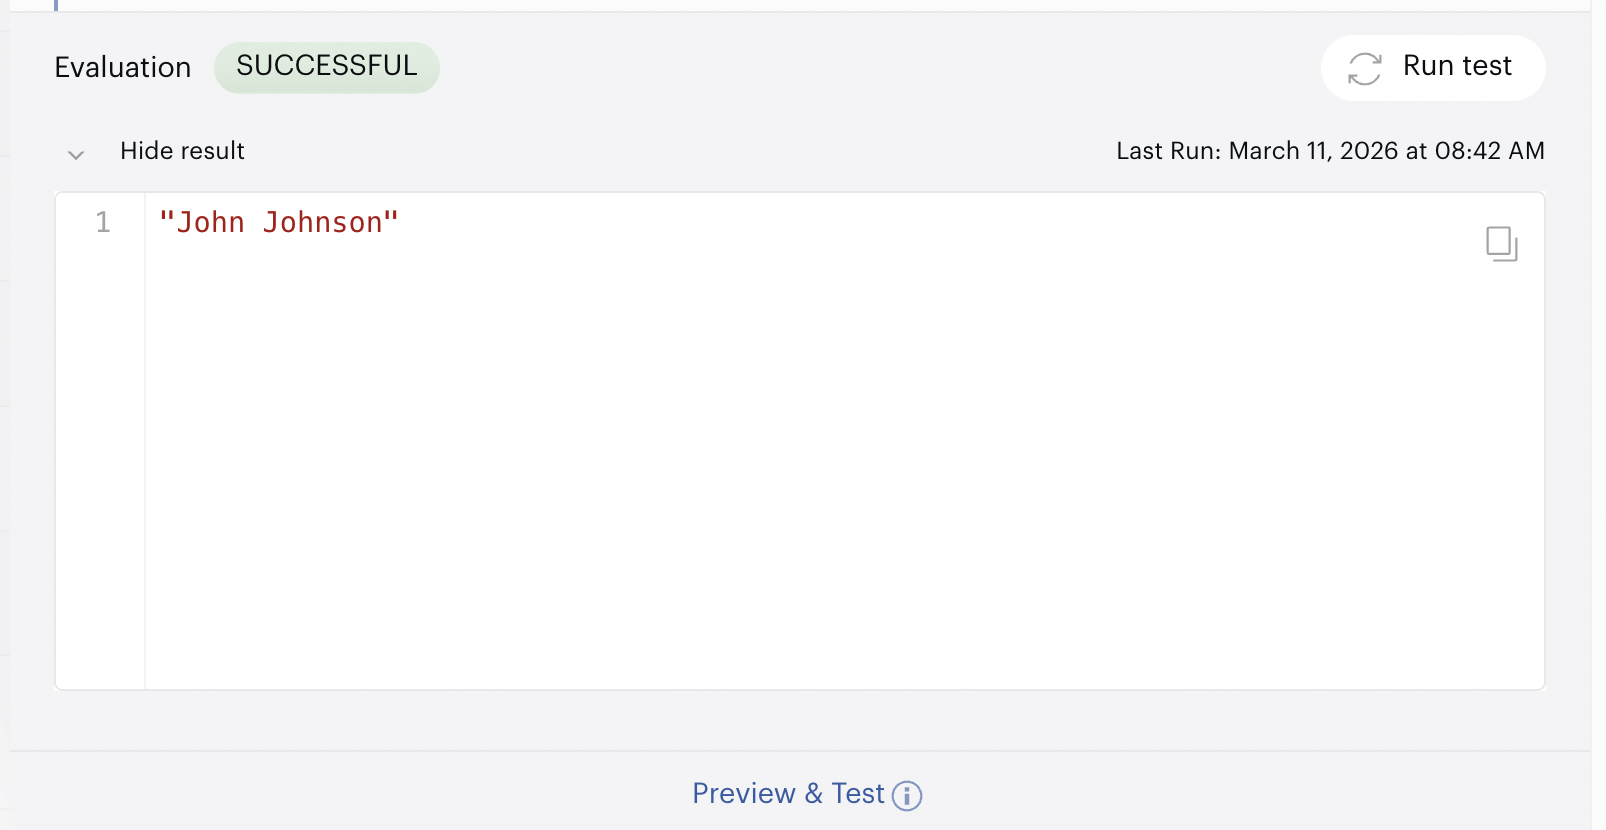
For example, after running the concat full name trait, you might see:
"John Johnson"
This confirms that the first name, space, and last name were successfully concatenated.
Click Hide result to collapse the result panel.
Preview & Test
For more comprehensive testing options, click the Preview & Test link located below the dry run results. This opens an extended testing interface where you can explore additional profiles and scenarios.
Saving Your Computed Trait
Once you have validated your logic via the dry run, click the Create button in the top-right corner of the editor to save your Computed Trait. The new trait will then be applied to user profiles according to the logic categories (Processing, Init, Merge) you have configured.
Quick Reference
|
Step |
Action |
|---|---|
|
1 |
Enter the mandatory Name and Type fields |
|
2 |
Select a logic category tab (Processing, Init, or Merge) |
|
3 |
Choose a function from the dropdown |
|
4 |
Configure arguments using field values, constant values, or nested function calls |
|
5 |
Click Run test to validate with the dry run |
|
6 |
Review results via Show result |
|
7 |
Click Create to save |