
Computed Traits: Preview & Test
Before saving a computed trait, you can validate its logic and preview results using the Preview & Test feature. This allows you to run your computed trait against test data in a safe, draft environment, ensuring it behaves as expected before it goes live.
The Preview & Test feature is available for computed traits created in both Basic Mode and Advanced Mode.
Accessing Preview & Test

-
Open a computed trait in the editor (either create a new one or edit an existing one).
-
At the bottom of the editor panel, click the Preview & Test button.
This opens a dedicated testing interface where you can validate logic and preview results before publishing.
To return to the computed trait editor, click Return to computed traits creation in the top-left corner.
Selecting Test Data
When you enter the Preview & Test interface, you first choose how test data should be prepared. Two options are available:

Sample Profiles
Realistic sample profiles generated from your data.
This is the default mode. The system automatically generates test data based on your current configuration, giving you realistic profiles to evaluate your computed trait against. Sample profiles are read-only: you cannot edit the generated data. If you want to test with your own data, switch to Custom Profile.
Custom Profile
Enter a custom profile to test.
In this mode, you can manually define test data to simulate specific scenarios. This is useful when you want to test edge cases or particular profile states that may not appear in the auto-generated samples.
Test Input Tabs
Below the data selection area, you will find input tabs on the left and an Evaluation Result panel on the right. The Evaluation Result output is read-only.
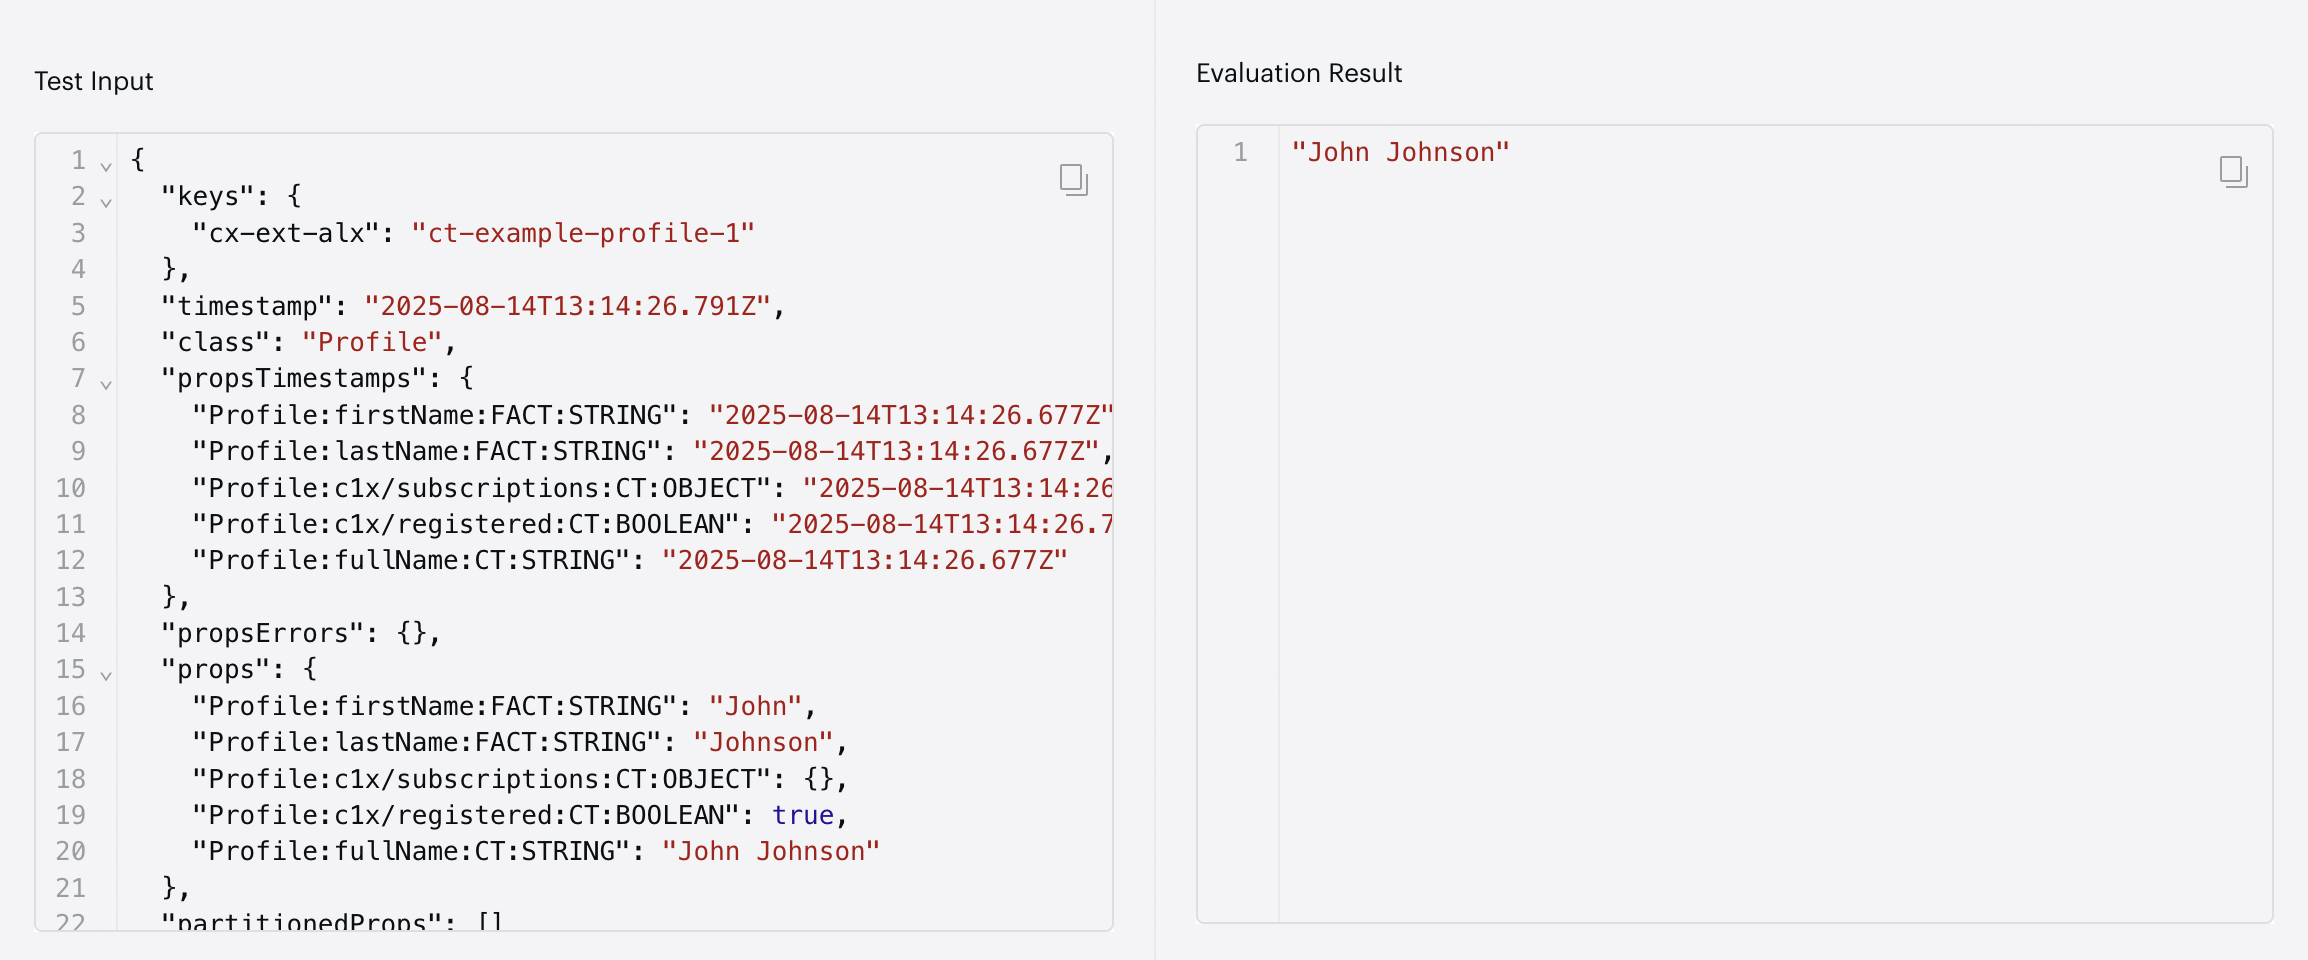
Test Input
The Test Input tab is available in both Basic Mode and Advanced Mode. It simulates a pre-existing target document (for example, a Profile) with existing computed trait values and timestamps. Use this to test how your computed trait behaves when the document already has prior state.
This is particularly useful for testing scenarios such as:
-
Incremental calculations that build on previous values
-
Conditional logic that depends on existing computed trait results
-
Merge operations where two profiles with existing state are combined
A typical test input payload includes:
|
Field |
Description |
|---|---|
|
|
The ISO 8601 timestamp of the target document |
|
|
Identifiers for the target document |
|
|
Existing properties and computed trait values on the document |
|
|
Timestamps indicating when each property was last updated |
|
|
The document class (e.g., Profile) |
Example test input payload:
{
"timestamp": "2022-06-23T09:37:49.746Z",
"keys": {
"id": 100
},
"props": {
"Profile:clicks_count:CT:INT": 1
},
"propsTimestamps": {
"Profile:clicks_count:CT:INT": "2022-06-23T09:37:49.746Z"
},
"propsErrors": {},
"class": "Profile"
}
Event (Advanced Mode Only)
The Event tab is available only when your computed trait is configured in Advanced Mode. It simulates the incoming event that triggers a computed trait recomputation. Here you define the event class, tags, keys, and properties to test how your computed trait responds to new data.
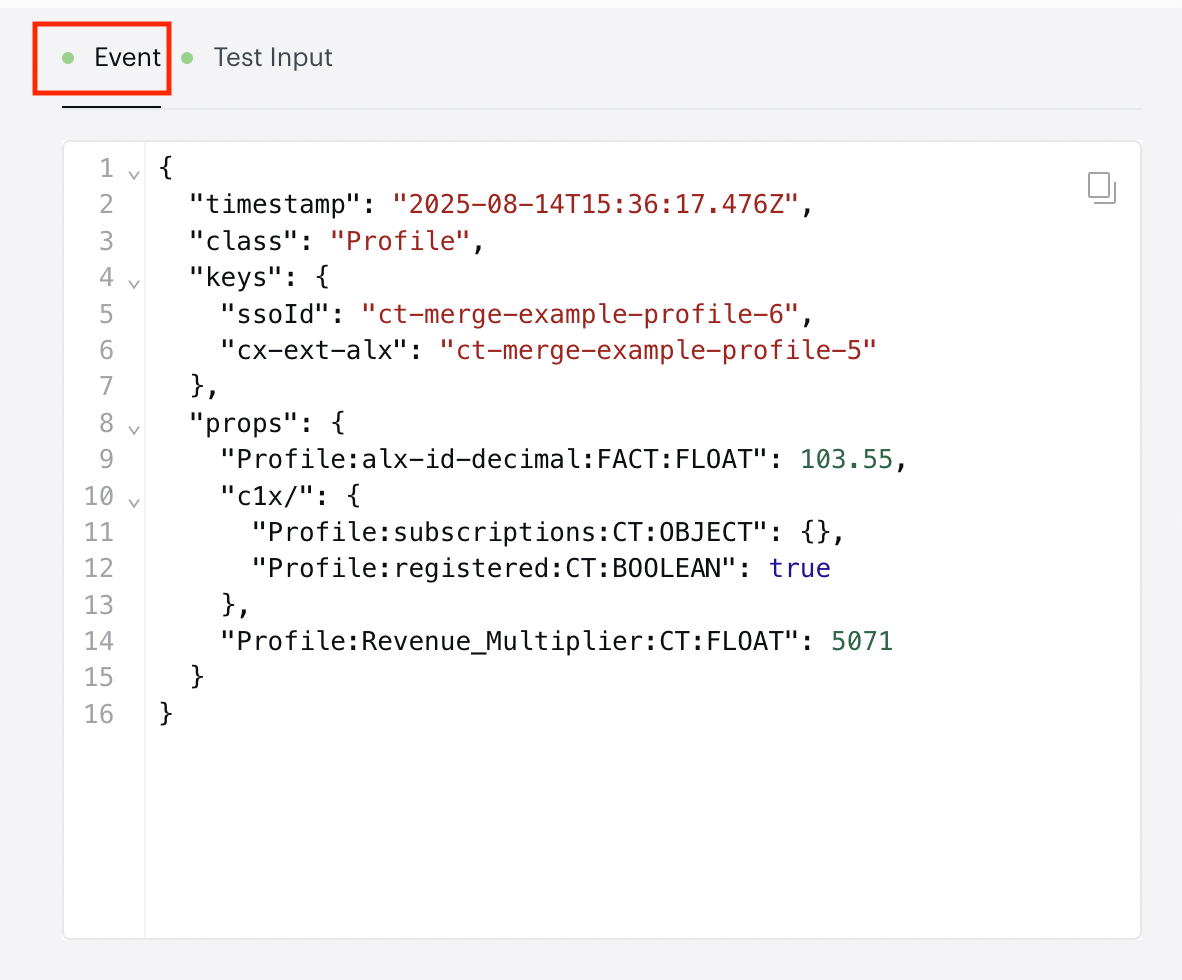
The event payload is displayed as a JSON object. In Sample Profiles mode, this is pre-populated and read-only. In Custom Profile mode, you can edit the JSON directly.
A typical event payload includes:
|
Field |
Description |
|---|---|
|
|
The ISO 8601 timestamp of the event |
|
|
The document class (e.g., Profile, Visit) |
|
|
Identifiers for the document (e.g., ssoId, cx-ext-alx) |
|
|
Properties of the profile, including source attributes and existing computed trait values |
Example event payload:
{
"timestamp": "2025-08-14T15:36:17.476Z",
"class": "Profile",
"keys": {
"ssoId": "ct-merge-example-profile-6",
"cx-ext-alx": "ct-merge-example-profile-5"
},
"props": {
"Profile:alx-id-decimal:FACT:FLOAT": 103.55,
"clv": {
"Profile:subscriptions:CT:OBJECT": {},
"Profile:registered:CT:BOOLEAN": true
},
"Profile:Revenue_Multiplier:CT:FLOAT": 5071
}
}
Running a Test
Once your test data is configured:
-
Click the Run test button in the top-right corner of the testing interface.
-
The system evaluates your computed trait logic against the provided test data.
-
The evaluation status is displayed at the top of the page:
-
Evaluation: Successful (shown in green): Your logic executed without errors and produced a result.
-
Evaluation: Error (shown in red): Something went wrong. Review the error message for details.
-
-
The Last Run timestamp is displayed, showing when the test was last executed (for example, Last Run: April 1, 2026 at 12:06 PM).
Reviewing the Evaluation Result
After running a test, the Evaluation Result panel on the right side of the interface displays the computed output value. This output is read-only.
For example, if your computed trait determines whether a user qualifies as a "whale" based on predicted revenue, the evaluation result might display:
false
This output represents exactly what the computed trait would produce if it were live with the given test data.
Use multiple test runs with different input data to cover a variety of scenarios, including edge cases, before saving your computed trait. This helps ensure consistent behaviour in production.
Handling Errors
If your test results in an error, the interface will display Evaluation: Error along with the message: Can't evaluate trait: Resolve the errors to proceed.
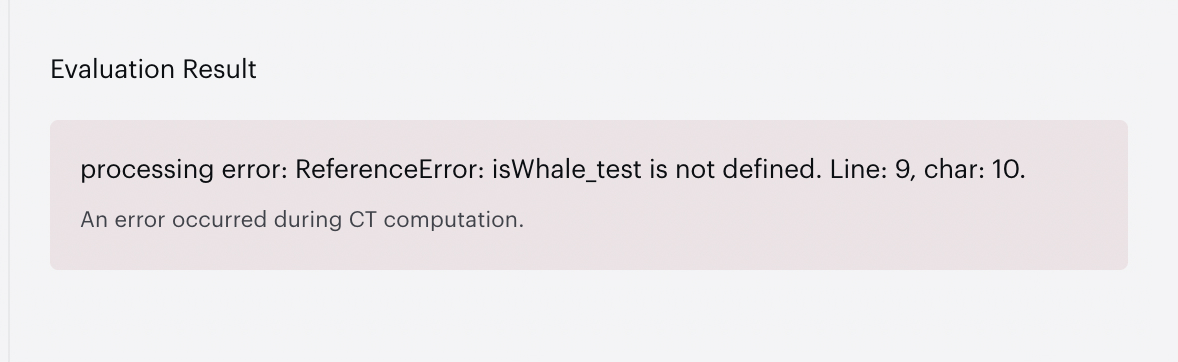
Common causes of errors include:
-
Referencing a property that does not exist in the test data
-
Syntax errors in JavaScript code (Advanced Mode)
-
Returning an incorrectly formatted result object (Advanced Mode requires a returned object with a
valueproperty)
Review your computed trait logic and test data, then click Run test again after making corrections.
Best Practices
-
Test before saving: Always use Preview & Test to validate your logic before publishing a computed trait to production.
-
Try both Sample Profiles and Custom Profile: Sample profiles give you realistic data, while custom profiles let you target specific edge cases.
-
Test all logic paths: If your computed trait has conditional logic, create test inputs that exercise each branch.
-
Check with pre-existing state: Use the Test Input tab to verify that your computed trait handles profiles that already have existing values correctly, especially for incremental or cumulative calculations.
-
Iterate quickly: The Preview & Test environment does not affect production data, so you can run as many tests as needed.
Summary
|
Feature |
Description |
|---|---|
|
Preview & Test button |
Opens the testing interface from the computed trait editor |
|
Sample Profiles |
Auto-generated, realistic read-only profiles from your data |
|
Custom Profile |
Manually defined test data for specific scenarios |
|
Test Input tab |
Simulates a pre-existing target document with prior state |
|
Event tab |
Simulates the incoming event that triggers CT recomputation (Advanced Mode only) |
|
Evaluation Result |
Displays the computed output value (read-only) |
|
Run test |
Executes the test and shows Successful or Error status |
Next Steps
-
Learn how to create computed traits with a no-code interface: Computed Traits: Basic Mode
-
Learn how to create computed traits using JavaScript: Computed Traits: Advanced Mode