If a client wants to show a special text only for churned users in their Checkout template, here are the steps they should take:
Step 1: Create a new experience in Composer.
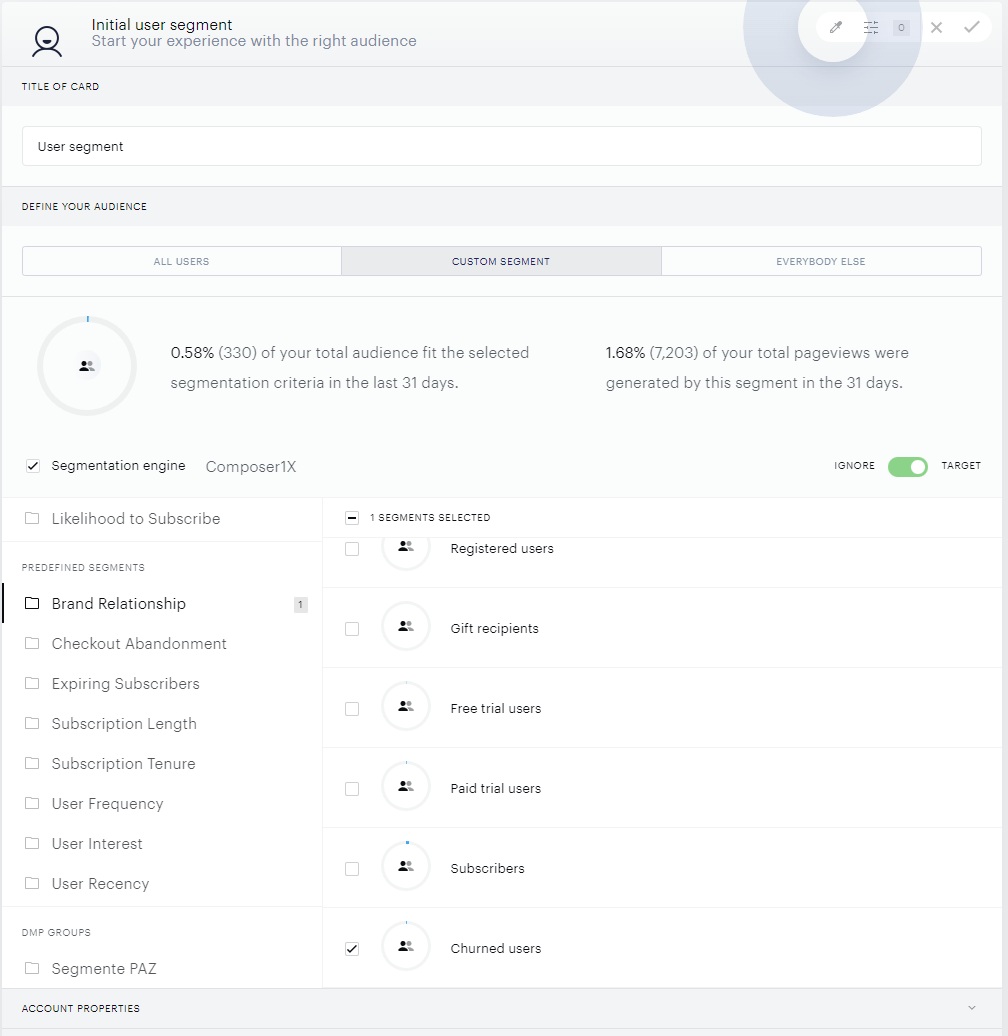
The client should create a new experience in Composer that will target churned users from the Brand Relationship segment. Under the following link, you can find more detailed information about the Composer 1x segments.
Step 2: Add a Run JS card to the experience.
In the new experience, the client should add a Run JS card. This card will contain a JavaScript code that will listen for a postMessage and send a new postMessage to the checkout iframe.
Step 3: Write the JavaScript code for the Run JS card.
The JavaScript code for the Run JS card should listen for a postMessage from the checkout iframe. When it receives the message, it should send a new postMessage to the checkout iframe with the text that the client wants to display for churned users. Here's an example code used for Sandbox:
const iframe = document.querySelector("iframe[allow=payment]");

window.addEventListener("message", (event) => {
  if(event.origin == 'https://sandbox.tinypass.com') {

    if (event.data == "churned_user")
      iframe.contentWindow.postMessage("data to template", "https://sandbox.tinypass.com");

  }
});
If you're using this code on Production, just change the origin URL accordingly.
Step 4: Add JavaScript code to the Checkout template.
In the Checkout template, the client should add a JavaScript code that sends a postMessage to the parent and listens for postMessages from the parent. When it receives a message, it should display the <div> from the template containing the text that the client wants to show for churned users. Here's an example code:
<div custom-script>
  window.parent.postMessage("churned_user", "https://publisher-website.com");

  window.addEventListener("message", (event) => {
    if(event.origin == "https://publisher-website.com") {
      // your code
      // e.g. document.getElementById("placeholder").innerText = text;
    }
  });
</div>
Note, you'll need to update the URLs in this code with your website as well as the <div> name (in the example shown as "placeholder") as needed.
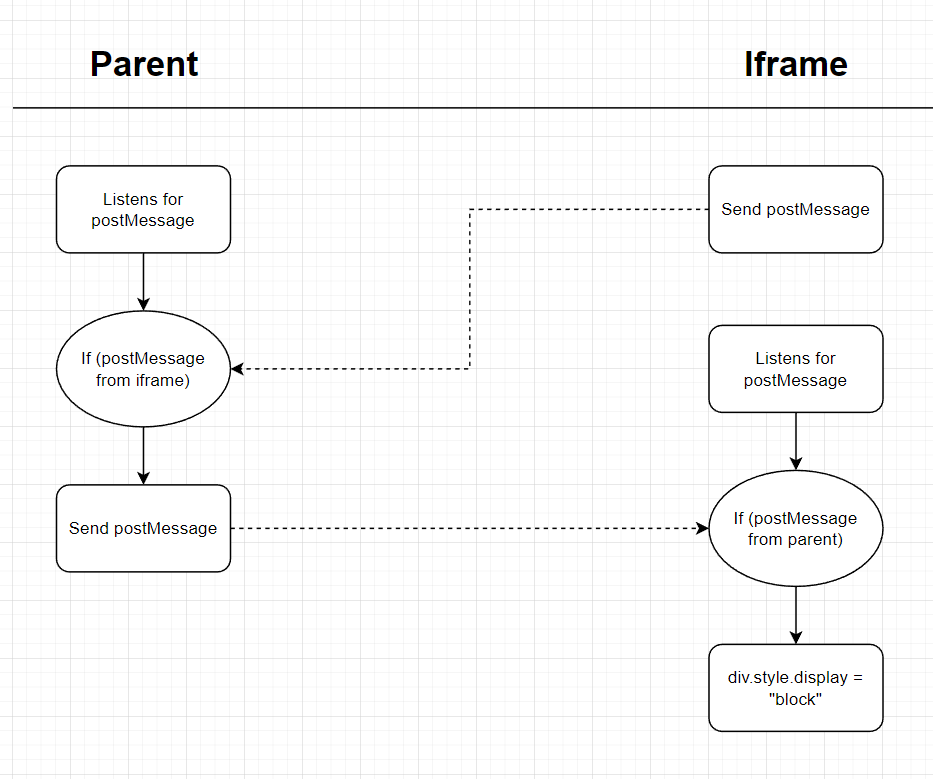
Below is a schema of the whole flow: