
Re-targeting is another method by which you are able to target your audience. This page describes how to implement re-targeting campaigns where a client wants to show advertisements to visitors or customers of client web sites, possibly dependent on certain actions.
Examples of scenarios that would be useful for re-targeting campaigns:
-
Any visitor that has visited any page the customer site.
-
Only visitors that have visited a subsection or a specific page.
-
Visitors that have created a subscription.
-
Visitors that have put something into their shopping cart.
-
Visitors that have made a purchase (to re-target them with offerings to get another sale).
Individual users must be tagged with information about what actions they have performed, or where in they are in this sales they cycle are. For scenario 1 and 2, this is achieved by including a specific tag on either all pages or the specific pages where re-targeting is wanted. For scenario 3-5, this is achieved by setting the tag when a specific action occurs on the customer site.
Adding Re-targeting to a Campaign/Ad
Re-targeting placeholder
Once a CPC product has been configured to allow re-targeting criteria to be specified you will see something similar to the image below when navigating to a Campaign or Ad that is associated with the product. Clicking on the link to "add some Retargeting now" will display one of two possible editor configurations depending on how the product is set up. For either configuration setup the process, apart from selection of taxonomy entries is the same. You pick some options, choose whether those options should be combined into a single tag or combined together into a tag. A tag has a valid bid amount, which is similar to the bid placed against a keyword. For combined tags this means that you are bidding on the user who has qualified for each of the options specified. Basically the more options in the combined tag the more specific the targeting is.
-
Product defined taxonomy
-
User defined taxonomy

Product defined taxonomy
When a product has been set up with product taxonomy targeting you will see the following to allow selection of taxonomy entries.
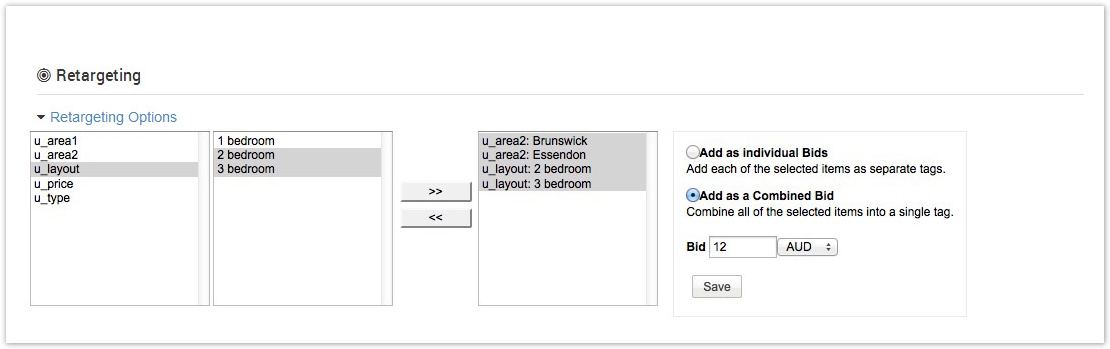
The process is to click items in the first selector to then display the values available within. The process is as follows
-
Pick items from selector 1. This will display the available options in selector 2
-
Pick items from selector 2.
-
Click the ">>" button to save the selections into selector 3. You can then go back to step 1 to select more items if you wish.
-
Select items in selector 3.
-
Choose to create individual or combined tags.
-
"Add as a Combined Bid" will create single tag for each of the selected items in selector 3. This would mean that the user viewing the ad needs to have all of the entries before matching against this bid. The more items in the tag the more targeted the match.
-
"Add as individual bids" will create a tag for each selected item in selector 3. This is handy if you are wanting to generate a lot of tags with the same bid value.
-
-
Save the tag. From here you can return to step 1, 2, 4 or 5 to generate additional tags.
The image below shows a number of selections that have been made. You can see that two values (Brunswick, Essendon) from u_area2 have been selected as well as two values (2 bedroom, 3 bedroom) from u_layout. The option to select a combined bid of 12AUD has also been entered.
User defined taxonomy
When a product has been set up with user taxonomy targeting you will see the following to allow selection of taxonomy entries.
-
Add new taxonomy items.
-
Select items from the selector.
-
Choose to create individual or combined tags:
-
"Add as a Combined Bid" will create single tag for each of the selected items in selector 3. This would mean that the user viewing the ad needs to have all of the entries before matching against this bid. The more items in the tag the more targeted the match.
-
"Add as individual bids" will create a tag for each selected item in selector 3. This is handy if you are wanting to generate a lot of tags with the same bid value.
-
The image below showsthe selection of 3 items in the user taxonomy. If save was clicked at this point a single tag would be created that would have the entries "checkout_page", "survey_page" and "test_tag" with a bid value of 1AUD.
Adding new taxonomy entries
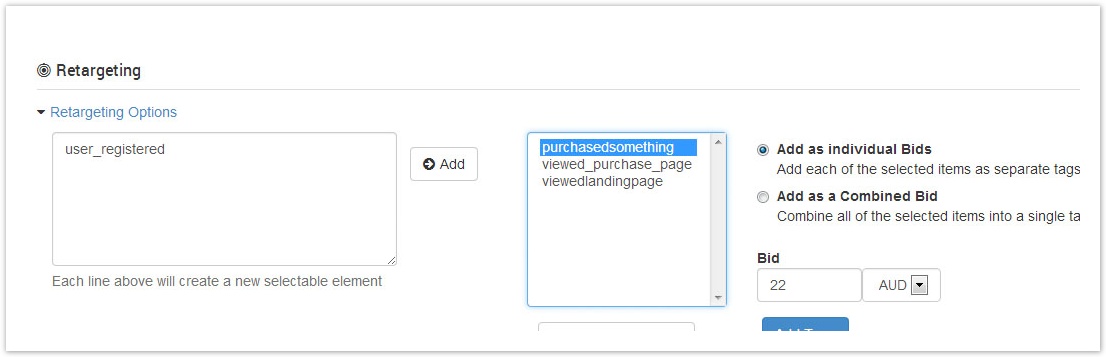
Adding new entries is performed by typing words/phrases into the text area in the left and clicking "Add". The entries are then cleansed (spaces replaced with "_" and converting all items to lowercase before being added to the user taxonomy. Any items added will be available for ALL re-targeting specifications regardless of the campaign/product association. The idea is that the advertiser will want to set up a number of common items that they wish to target users against. These have no direct relationship to a product.
Setting up actions
The advertiser must set up actions in the places that they wish to trigger as a user having visited one of their taxonomy entries before. They are able to download a file by clicking on the "Download JavaScript" button under the taxonomy entry text field. This file contains the sections of JavaScript that MUST be included in the call to cx::analytics as documented in our re-targeting template page. The below example shows the result of clicking the download link for the user taxonomy shown in the screenshot above. The download button was clicked after defining 2 tags against the re-targeting functionality for "another_user_tag" and "checkout_page".
UserRetargetingTaxonomy_Campaign_00000000000047bd.html
Saved Re-targeting taxonomy
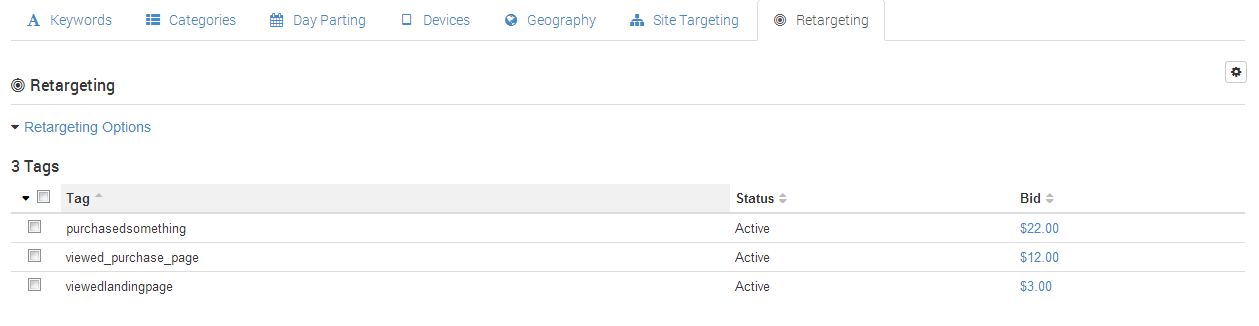
After tags have been created you will see a table like that shown in the image below. This image shows that 4 tags have been created. Two of the tags (with $3.50 and $3.00 bid values) have combined taxonomy entries and the other two are single taxonomy entry tags. From here you are able to perform the following functions:
-
Bulk operations: see below
-
Altering the bid amount for a single tag. You do this by clicking on the link for the bid value in the far-right column.
-
Various sort options
Bulk Operations
Bulk operations can be performed in the same way as that documented in the keyword functionality. Available bulk operations are:
-
Delete: this removes the tag.
-
Activate: this activates an inactive tag. Performing this operation on an already active tag has no effect
-
Deactivate: this stops the selected tags from being able to match. This can be useful to temporarily prevent matches on this tag without the need to delete it.
-
Update bid: this lets the user perform a number of alterations to bid values. The same functionality for setting bids is documented against "Managing Keyword Bids in Bulk". Please refer to that documentation for specific examples of the inner workings of this bulk operation.