
Stripe Billing Integration Series: Part 2 of 3 · Stripe Payments clients
This is the Stripe Payments version of the setup guide (for clients processing payments natively through Stripe). If you use a non-Stripe processor, follow the BYOP version instead. See the Client Guide Series index.
Getting Started
This section covers what your Piano representative enables for you, how to create or connect your Stripe account, and the Stripe Dashboard settings you apply before the Switch.
Enabling Stripe Billing
Stripe Billing must first be enabled on your application by your Piano representative. Clients are enabled progressively based on their use of Piano features. If you have any questions, please contact your Piano representative.
This article provides a general overview of the Stripe Billing setup for Stripe Payments clients. For a complete breakdown of all configuration steps, supported features, and detailed implementation instructions, see the Stripe Billing Integration technical reference.
Step 1: Determine your setup
Existing Stripe Payments clients
If you are already using Stripe for Payments:
-
Your existing Stripe account is automatically connected to Piano's Stripe Billing Connect account.
-
No additional setup is required in Piano beyond adding your Stripe API keys (if not already configured).
-
Simply log in to your Stripe Dashboard and complete the configuration steps outlined below.
New Stripe clients
If you are enabling Stripe for the first time, you will need to create a Stripe account for Billing purposes. Contact your Piano representative to enable Stripe Billing for your application.
Step 2: Create or connect your Stripe account
Option A: Create a new Stripe account
-
In the Piano Dashboard, navigate to Edit Business → Billing Provider.
-
Click Add, then Connect.
-
Complete the Stripe onboarding flow.
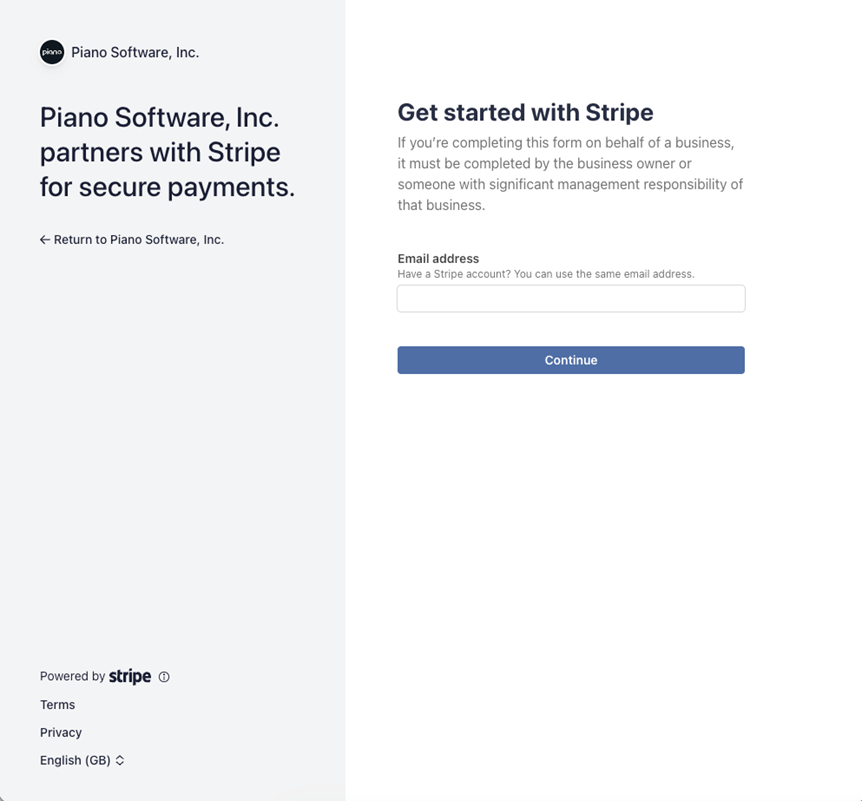
Follow the instructions provided by Stripe to create your account.
Option B: Connect an existing Stripe account
If you already have a Stripe account:
-
In the Piano Dashboard, navigate to Edit Business → Billing Provider.
-
Click Add, then Connect to authenticate your account via Stripe onboarding.
Clients already using Stripe Payments have their accounts connected automatically and are already presented in the Billing configuration.
Ensure your Stripe API keys are configured in the Payment Provider settings. Piano uses the account ID from your Stripe payment provider configuration to ensure that your existing customers and payment methods are carried over to Billing.
Step 3: Verify configuration
Your Stripe Billing setup is complete when:
-
A Connected Account ID is present.
-
API credentials are added and valid.
Once both are configured, you can proceed to configure the settings in your Stripe dashboard as detailed below.
Required Stripe Dashboard Configuration
The Piano-Stripe integration requires a few simple configuration changes in the Stripe Dashboard so that subscriptions can be fully synchronized between the two systems. The settings below apply to Stripe Payments clients.
|
Setting |
Stripe Default |
Piano Guidance |
Key Risk if Misconfigured |
|---|---|---|---|
|
Revenue recovery |
Smart Retries: 8 retries over 2 weeks & Enable local payment methods retries as required. |
Recommended |
If using a third-party retry tool, contact your Piano representative to validate compatibility |
|
Invoice finalization period |
1 hour |
Recommended |
Do not change: affects renewal window and Piano sync logic |
|
Upcoming invoice events |
Stripe's dashboard default on a new account is 7 days before renewal. On an existing account the setting may be off entirely, so check it. |
3 days before renewal recommended |
Required for Piano-Stripe pre-renewal sync; not setting it risks out-of-sync state |
|
Invoice level rounding |
Round at invoice level |
Recommended |
Do not change to item-level: small discrepancies may cause sync failures |
|
Automatic invoice emails |
Send finalized invoices enabled |
Optional for Stripe Payments |
You may leave enabled; ensure Stripe email rules and Piano Email Manager do not send duplicate emails |
|
Invoice status (Manage Failed Payment) |
Past-due |
Set to Uncollectible |
Leaving the default can interfere with Piano-managed cancellation |
|
Subscription status (Manage Failed Payment) |
Cancel / Past-due |
Set to Unpaid |
Subscription remains active in Stripe, so Piano controls cancellation |
Do not make any direct changes to any Piano-created entities in the Stripe Dashboard; manual changes will cause out-of-sync events and subscription operations will be limited.
Below, you'll find the same configuration steps outlined in a step-by-step format. These are the same canonical instructions used across the Stripe Billing documentation, so they'll stay in sync as settings change.
Billing Settings
Revenue Recovery Settings
In the Stripe Dashboard, go to Billing → Revenue recovery → Retries → Cards. Direct link: dashboard.stripe.com/revenue_recovery/retries.
Recommended configuration:
-
Retry period: 2 weeks (to avoid overlapping periods on monthly subscriptions). Stripe lets you choose 1 week, 2 weeks, 3 weeks, 1 month, or 2 months, and set the number of attempts. Stripe's own recommended setting is 8 attempts within 2 weeks.
-
Subscription status: "Mark the subscription as unpaid"
-
Invoice status: "Mark the invoice as uncollectible"
This setting configures the same retry rules regardless of term length. To use different rules for monthly vs. annual subscriptions, use Automations to configure separate policies.
In the same section, navigate to Local Payment methods and click Manage to enable retries accordingly (e.g. if you use SEPA or other direct debit payment methods).
Invoice Settings
Invoice Finalization Rules
In the Stripe Dashboard, navigate to Settings → Billing → Invoices → Invoice finalization grace period and locate the Edit button next to the default rule. Direct link: dashboard.stripe.com/settings/billing/invoice.
Required setting:
-
Set the finalization grace period to 1 hour (default)
-
Do not add additional rules
This setting determines the time between invoice creation and when it's finalized and sent to subscribers. Piano uses this window to validate the invoice before payment is collected.
Upcoming Invoice Events
In the Stripe Dashboard, navigate to Settings → Billing → Subscriptions and emails → Prevent failed payments → Upcoming renewal events.
Required setting:
Configure events for upcoming renewals to ensure proper validation between Piano and Stripe. This is an important integration point between the systems. Change the "Upcoming renewal events" setting to be triggered 3 days before a subscription renews.
Stripe's dashboard default on a new account is 7 days, which is compatible. It does, however, widen the period within which changes may still happen before the renewal invoice is finalized. On an existing Stripe account, check that the setting is configured at all: if it is off, the pre-renewal sync does not run and subscriptions can go out of sync.
Invoice Level Rounding
In the Stripe Dashboard, navigate to Settings → Billing → Invoices → Manual tax amount rounding.
Required setting:
If you use Piano Tax support, choose "Round manually entered taxes at invoice level". This ensures that the invoice level rounding rules are enabled in your Stripe account invoice settings to prevent discrepancies.
This setting applies only to invoices with manual tax rates, which is what Piano creates. Invoices calculated with automatic Stripe Tax always sum tax amounts first and then round, which is one more reason Stripe Tax must not be enabled while Piano manages tax.
Manage Failed Payments setting
Under Settings → Billing → Subscriptions and emails, navigate to Manage failed payments and update the Subscription status to Unpaid and the Invoice Status to Uncollectible.
This section applies to both Stripe Payments and BYOP clients.
Automatic invoice emails: As a Stripe Payments client, you may leave "Send finalized invoices and credit notes to customers" enabled if desired. If you do, make sure Stripe email rules and Piano Email Manager do not conflict or send duplicate emails.
Switch Timeline
Your Piano team will coordinate your transition to Stripe Billing through a phased rollout process:
1. Pre-switch
Configuration review and Stripe account setup.
Subscription Billing intervals: Stripe currently supports billing intervals of up to 3 years. Subscriptions with longer billing intervals cannot be switched to or purchased with Stripe Billing. For more details, see Billing periods and the 3-year guideline.
2. New purchases move to Stripe Billing immediately
From the moment your application is activated on Stripe Billing, all new subscription purchases are processed through Stripe immediately. No action is required on your part. New subscribers are automatically placed on Stripe Billing from day one.
3. Switch for Existing Subscriptions
Switching your existing subscriptions is a brief, coordinated process. During the Switch, Piano creates all required subscription entities in Stripe Billing and sets each subscription to renew through Stripe from its next renewal date. From this point forward, Stripe becomes the owner of subscription billing and renewals.
There is no subscriber-visible change during this process and no interruption to access.
A small number of subscriptions may not transition automatically at renewal. This typically applies to subscriptions that are in a failed payment or suspended state at the time of renewal, or that require individual review. These subscriptions remain on Piano billing temporarily and are handled by Piano's account team. They transition at the next successful renewal or payment method update.
Any subscription that does not transition automatically will resolve at the next billing event: either the next renewal attempt or when the subscriber updates their payment method. No manual intervention is required by the publisher. If you have questions about a specific subscription, contact the Piano support team.
4. Post-switch and Go-Live
Validation and monitoring period. All subscription purchases and renewals flow through the integrated Stripe Billing system. Your Piano Account Manager will provide specific dates and migration steps for your account.
Appendix: Revenue Recovery Automations and Edge Cases
The recommended Revenue Recovery configuration (retry period, subscription status, invoice status) is covered above under Billing Settings → Revenue Recovery Settings. The items below cover edge cases only.
Overlapping Period Warning
If you set 2 months for the retries policy, overlapping periods may occur and affect the processing behavior of the subscription renewal and access. The notifications sent to the subscriber may also be confusing.
Automations
If you wish to configure different retry strategies for Monthly vs. Annual subscription types, navigate to Automations in the Stripe Dashboard.
-
Set name and trigger
-
In the conditions, choose "Subscription interval is" and set it to Yearly (or Monthly)
-
Select or create the desired retry policy for the subscription type
-
Set the Subscription status and Invoice status as described above
-
Add actions to "Mark subscription unpaid" and "Mark invoice uncollectible"
-
Click Publish
Appendix: Stripe Account Configuration
This appendix explains how your Stripe accounts map to your Piano applications, and what you can and cannot change once Stripe Billing is live.
Account Hierarchy Scenarios
There may be multiple account hierarchy use cases; such as 1 to 1, 1:2 and many to 1 scenario between Piano and Stripe applications and account structures. It is important to understand the effect of multiple account configurations.
Known limitations:
A Stripe Customer and its saved payment methods belong to a single connected account. Stripe can clone a payment method onto another connected account, but the result is a separate Customer, and activity on one is not reflected on the other.
This is why all Stripe payment provider integrations in a single Piano application, for example Stripe Elements and Stripe Apple Pay, must point at the same Stripe account ID. If they do not, subscribers will lose access to saved payment methods when you switch to Stripe Billing.
Scenario 1: 1 to 1 (Supported and recommended)
Most common implementation scenario, fully supported and recommended.
Scenario 2: Many Piano apps to 1 Stripe account (Supported)
Using a single Stripe account for payment processing across multiple Piano applications is supported.
Scenario 3: 1 Piano app to 2 Stripe accounts (Unsupported DO NOT USE!)
Using multiple Stripe payment integrations connected under the same application in Piano with two different Stripe accounts for processing payments is not supported and should never be used.
If your application is already in this configuration, contact your Piano representative before enabling Stripe Billing. The application cannot be switched until the integrations are consolidated onto a single Stripe account.
Important Notes
-
Once your Stripe account is connected to Piano and used for billing, you cannot change it. To switch to a different account, a migration on both Piano and Stripe side will be required.
-
The same connected account used across different Piano applications doesn't guarantee that billing configurations will be created for each application.
-
To disconnect already connected accounts from Piano, clients need to inform their Piano and Stripe Account representatives.
Continue the Stripe Billing Integration Series
Previous: Part 1: Stripe Billing Integration Overview
Next: Part 3, Manage Subscriptions (Stripe Payments version). See the Client Guide Series index.